Deploying Workflow Automation
This guide explains how to deploy a workflow to multiple devices at scale. Once a workflow is created and tested in the Workflow Editor, you can roll it out across many machines using Microsoft Intune, PowerShell Remoting, or PsExec.
Deployment always involves two things on each target device:
- The exported workflow file — a
.jsonworkflow exported from the Workflow Editor (see Export a Workflow). - The automation command — the Accesskey command that registers the workflow to run on the security key presence (card tap) trigger (see Configuring Accesskey).
Prerequisite: Workflow Automation (which includes the Workflow Runner) and IDmelon Accesskey (version 3.12.1 or later) must be installed on every target device. With Intune you can deploy these apps the same way you deploy any other application; see Automatic Software Deployment for guidance on packaging and assigning apps.
Note: The scripts in this guide are examples and will need to be adjusted to your environment. Update them based on:
- The file name and path of the exported workflow (
documentation_sample.jsonis only a placeholder).- Whether the workflow
.jsonfile already exists on the device and you only want to update its contents, versus copying it for the first time.- Whether you want to change the file name or path referenced in the Accesskey automation command (
--workflow-path), in which case re-register the command so it points to the new location.- The source location you copy the workflow from.
Deploying in a Kiosk Environment
In a kiosk environment, deployment is the most important part of the rollout, because the Workflow Editor itself cannot run in kiosk mode (Windows allows only one application at a time in kiosk mode; see Workflow Automation in Kiosk Environment).
The recommended approach is:
- Train the workflow on a normal user. Build and test the workflow in a standard Windows account on a representative device, then export it as a
.jsonfile. - Use Intune to set the automation command on every kiosk device. Distribute the exported workflow file and register the automation command across all kiosk machines with an Intune platform script.
Step 1: Train and export the workflow on a normal user
- On a standard Windows account (not a kiosk account), open the
Workflow Editorand create your workflow. - Make sure each UI element selector is configured so it is not dependent on your local system, so the workflow runs reliably on other devices (see UI element selector).
- Test the workflow end to end with the Run button.
- Export the workflow as a
.jsonfile (see Export a Workflow).
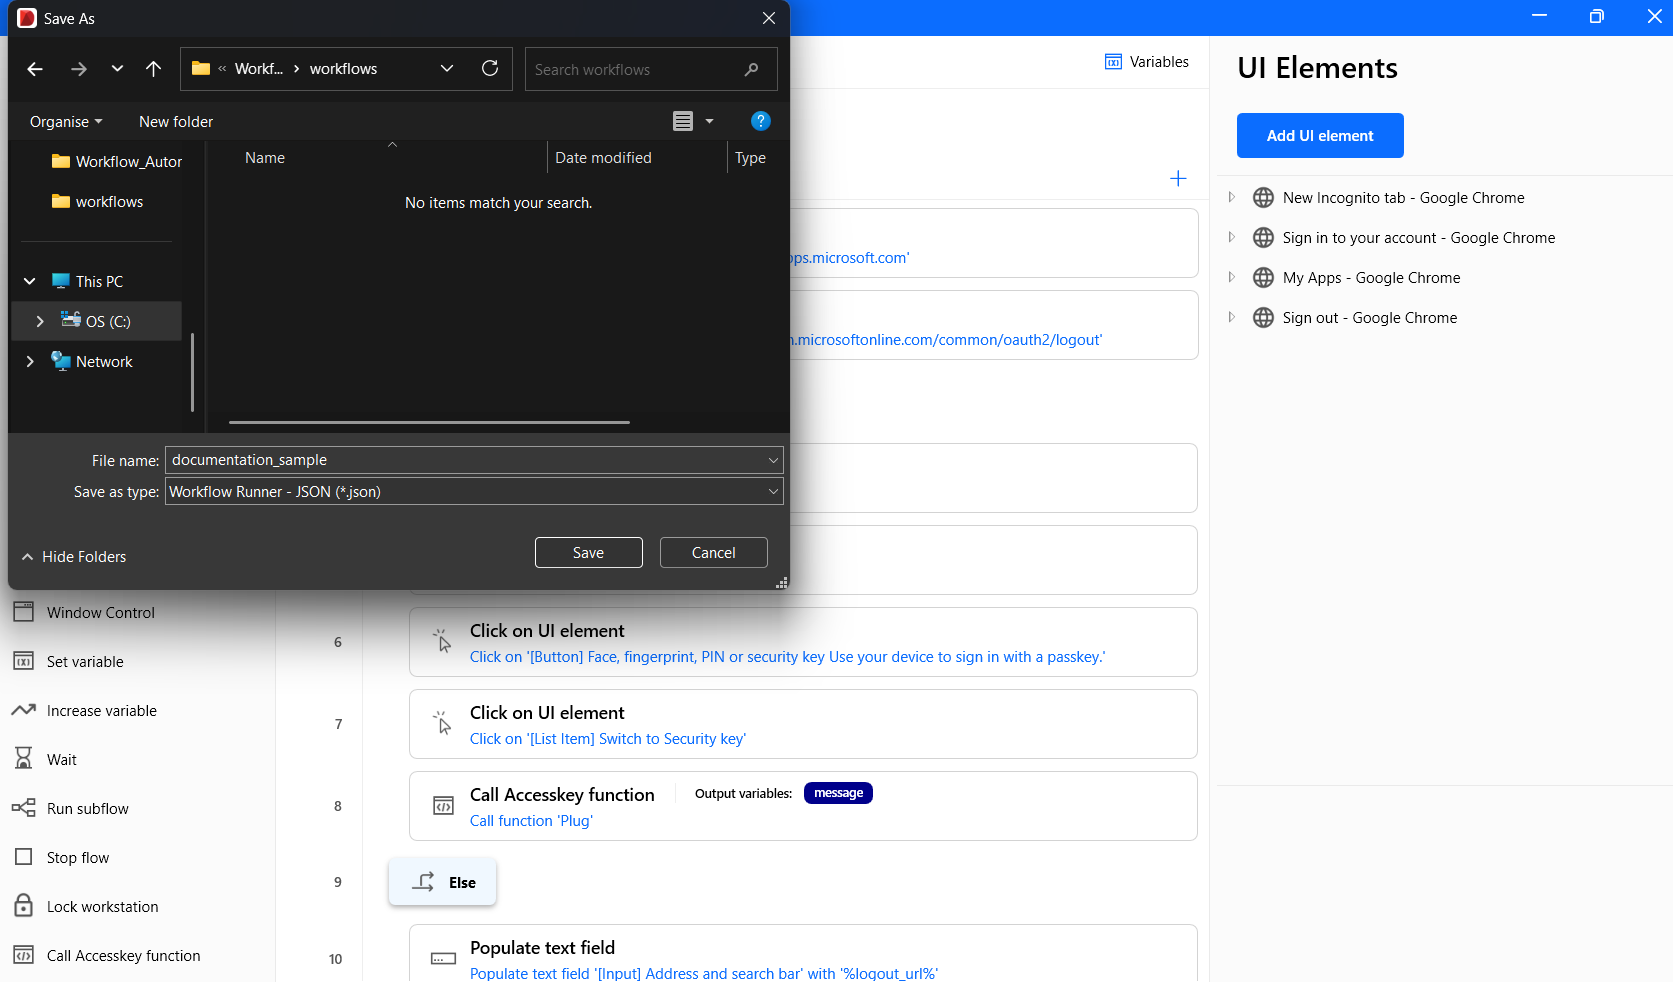
Figure: Exporting a workflow.
Step 2: Distribute the workflow and register the automation command via Intune
You will use a PowerShell platform script in Intune to copy the workflow file to a known location on each device and then register the automation command.
Place the exported workflow file where the script can reach it on the device (for example, package it alongside the script or copy it from a network share). In the example below, the workflow is expected at
C:\ProgramData\IDmelon\Workflow Automation\Workflows\documentation_sample.json.Create the deployment script and save it as a
.ps1file:# Destination folder on each kiosk device $workflowDir = "C:\ProgramData\IDmelon\Workflow Automation\Workflows" $workflowPath = Join-Path $workflowDir "documentation_sample.json" # Ensure the workflow file is present (copy it from the packaged location or a share) if (-not (Test-Path $workflowDir)) { New-Item -Path $workflowDir -ItemType Directory -Force | Out-Null } # Example: copy the workflow shipped next to this script Copy-Item -Path "$PSScriptRoot\documentation_sample.json" -Destination $workflowPath -Force # Register the automation command so the workflow runs on the card-tap trigger accesskeycli workflow-automation -s -t automation-app --action execute --workflow-path "$workflowPath"Create a PowerShell script policy in Intune:
- Navigate: Devices > Windows > Scripts and remediations > Platform Scripts.
- Select Add.
- Basics: Name the script (e.g., “Deploy Workflow Automation”).
- Select Next.
- Upload script: Select your
.ps1file. - Run this script using the logged-on credentials: No (run as System).
- Enforce script signature check: No.
- Run script in 64-bit PowerShell: Yes (recommended on Windows 11).
- Assignments: Assign to the kiosk device groups.
- Review + add: Confirm and create the script deployment.
Note: Run the script as System so the automation command is registered on the device regardless of which kiosk user logs on.
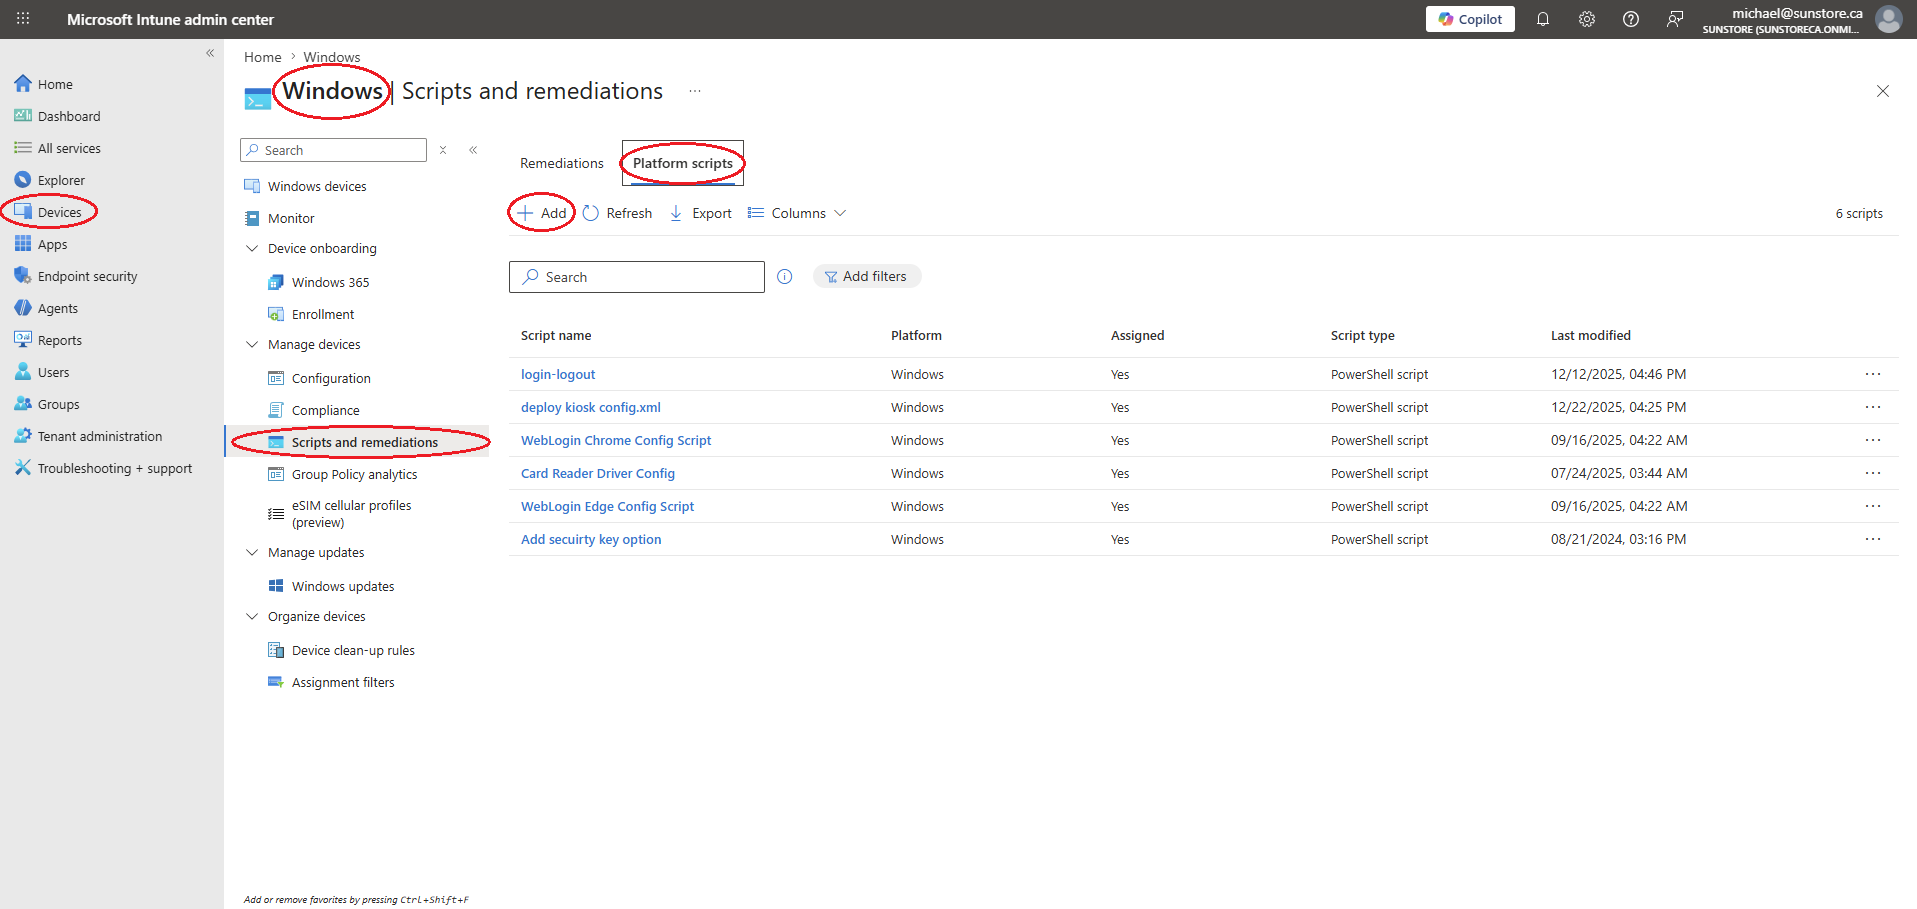
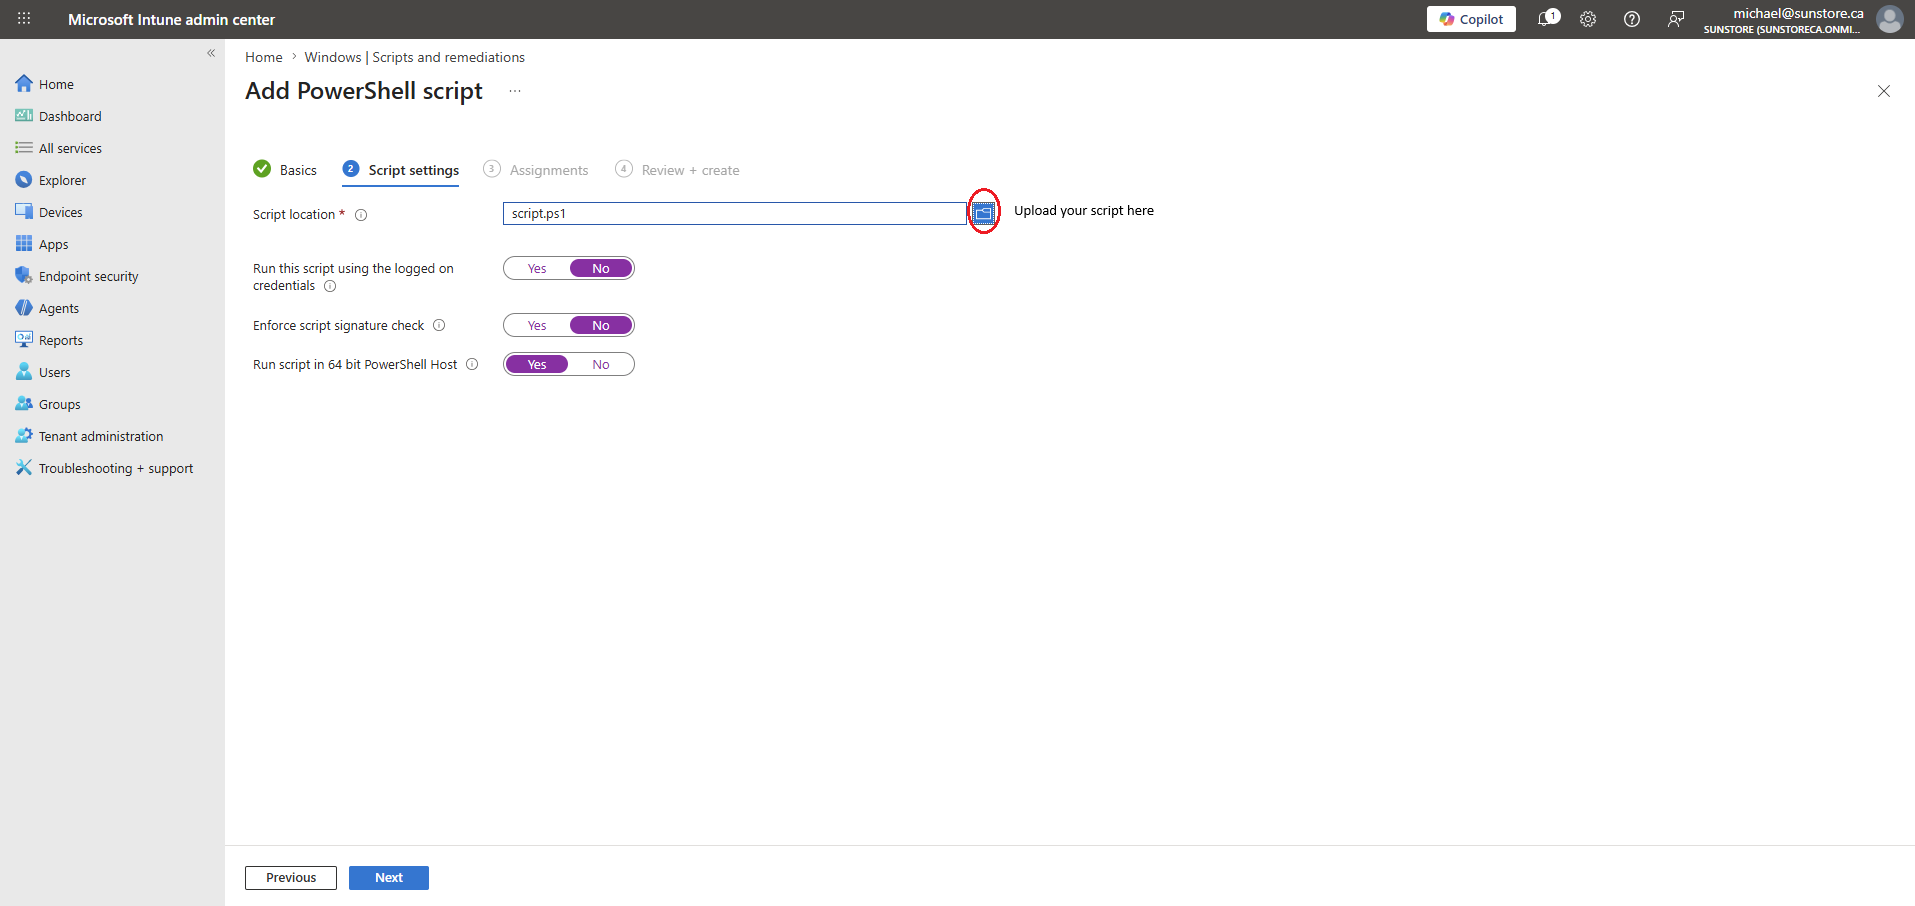
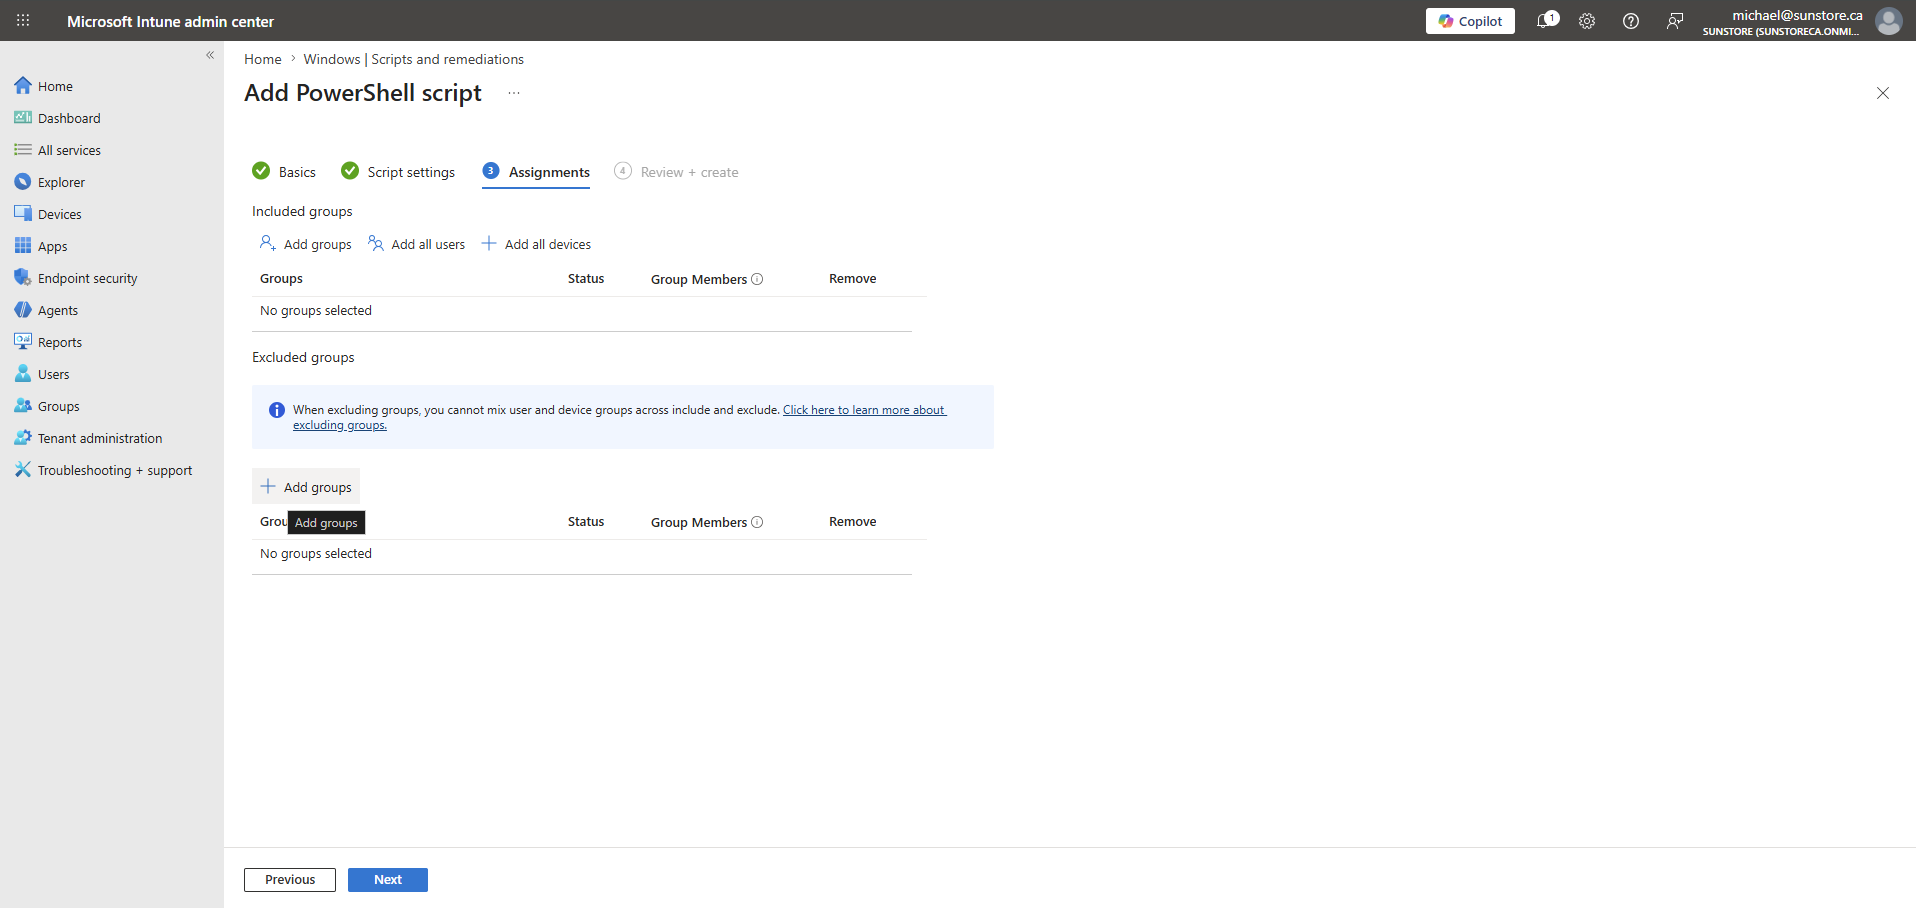
Figure: Powershell script policy in intune.
To remove the automation later, deploy a script that disables it:
accesskeycli workflow-automation -t automation-app -r
Tip: You can also run the workflow through the Workflow Runner CLI from an Accesskey script instead of registering the automation app directly. See Using the Workflow Runner CLI in the Accesskey script.
Deploying with PowerShell Remoting
PowerShell Remoting lets you push the workflow and register the automation command on remote devices over WinRM. This is useful for ad-hoc rollouts or for environments without an MDM.
The Workflow Automation app itself can be installed either from Intune (see the prerequisite above) or over the same remoting session by copying the installer and running it silently, as shown in the optional step below.
Prerequisite: PowerShell Remoting must be enabled on the target devices (
Enable-PSRemoting -Force), and you need administrative credentials and network connectivity to the targets.
Connect to the target device.
When the target is reached by IP address or is not domain-joined, add it to
TrustedHostsand authenticate explicitly:$ComputerName = "192.168.1.80" # Required for IP / workgroup (non-domain) targets Set-Item WSMan:\localhost\Client\TrustedHosts -Value $ComputerName $Session = New-PSSession -ComputerName $ComputerName -Credential (Get-Credential) -Authentication NegotiateFor domain-joined devices reachable by host name,
New-PSSession -ComputerName $ComputerNameis usually enough (Kerberos handles authentication), and theTrustedHostsstep is not needed.(Optional) Install the Workflow Automation app over the session.
Skip this step if the app is already deployed through Intune.
$SetupSource = "C:\Users\you\Downloads\Workflow Automation\Setup.exe"
$SetupDest   = "C:\Temp\Setup.exe"

Invoke-Command -Session $Session -ScriptBlock { New-Item -Path "C:\Temp" -ItemType Directory -Force | Out-Null }
Copy-Item -Path $SetupSource -Destination $SetupDest -ToSession $Session

# Install silently and wait for it to finish
Invoke-Command -Session $Session -ScriptBlock { Start-Process $using:SetupDest -ArgumentList "/S" -Wait }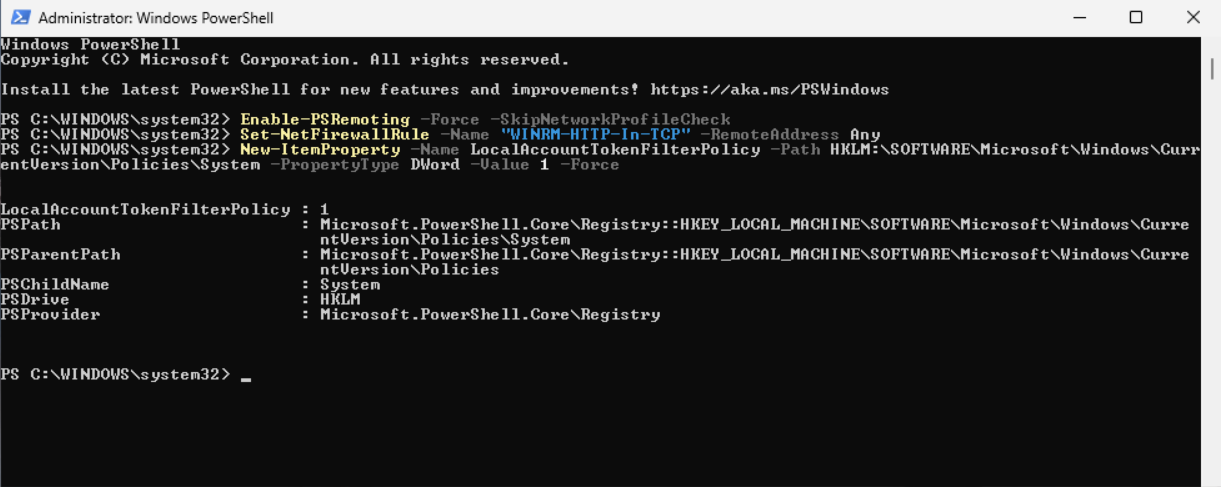
Figure: Installing workflow automation using powershell remoting - client side.
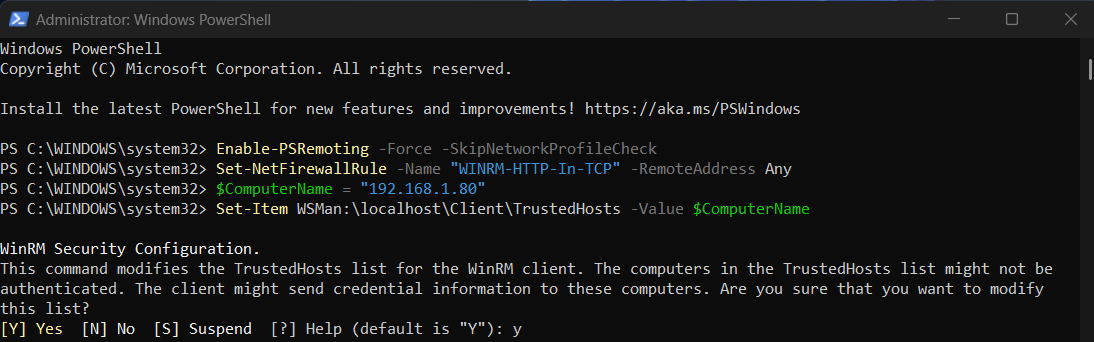


Figure: Installing workflow automation using powershell remoting - server side.
Copy the workflow file and register the automation command:
$WorkflowSource = "C:\ProgramData\IDmelon\Workflow Automation\Workflows\documentation_sample.json"
$WorkflowDest   = "C:\ProgramData\IDmelon\Workflow Automation\Workflows\documentation_sample.json"

# Ensure the destination folder exists on the remote device, then copy the workflow file
Invoke-Command -Session $Session -ScriptBlock { New-Item -Path "C:\ProgramData\IDmelon\Workflow Automation\Workflows" -ItemType Directory -Force | Out-Null }
Copy-Item -Path $WorkflowSource -Destination $WorkflowDest -ToSession $Session

Invoke-Command -Session $Session -ScriptBlock {
    accesskeycli workflow-automation -s -t automation-app --action execute --workflow-path $using:WorkflowDest
}

Remove-PSSession $Session
Note: Inside
Invoke-Command -ScriptBlock { ... }, local variables are not available on the remote device. Use the$using:prefix (for example,$using:WorkflowDest) to pass a local value into the remote session.

Figure: Registering automation command - server side.
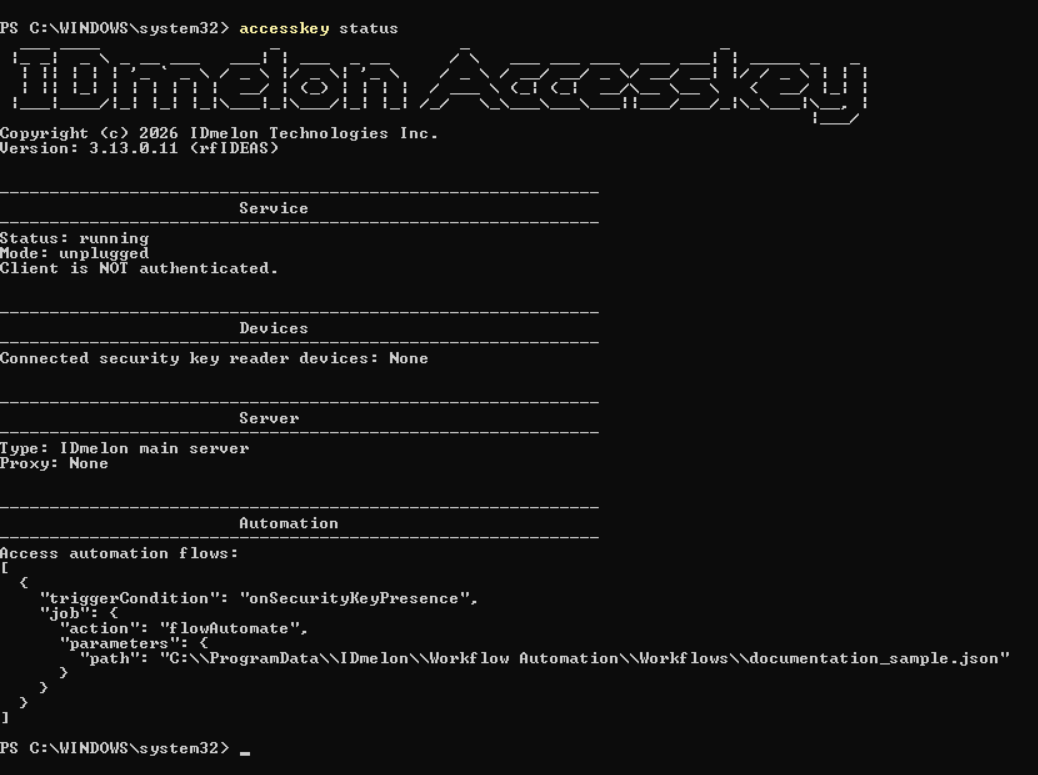
Figure: Registering automation command - result on client side.
Verifying the Deployment
After deployment, confirm that the automation runs on each device:
- Tap a registered badge on the reader on a target device.
- The Workflow Runner should execute the deployed workflow automatically (see Test Workflow).
Note: If the workflow does not run, verify that Workflow Automation and Accesskey are installed, that the workflow file exists at the path used in the automation command, and that the UI element selectors are not dependent on the machine where the workflow was trained.
For troubleshooting, check the Workflow Automation log files on the target device:
C:\ProgramData\IDmelon\Workflow Automation\Logs