Provision FIDO2 Passkeys for Okta
Administrators can assign Okta passkeys to users via the IDmelon Admin Panel by integrating their Okta environment. Once configured, users can use their security keys to authenticate to Okta-supported applications and services.
Prerequisites
Before configuring Okta passkey provisioning, ensure you have:
- Okta API Integration: Complete the Okta API Integration setup first.
- Okta Admin Console Access: Ensure you have access to the Okta Admin Console with administrative privileges.
- User Synchronization: Okta users must be available and synchronized in the IDmelon Admin Panel (via group or directory import).
- User Groups: You must have an Okta group containing users to which the WebAuthn policy will be applied.
Overview
This guide walks you through configuring Okta FIDO2 authenticator settings and policies to enable passkey authentication for your users. The process involves setting up authenticator options, enrollment policies, and authentication policies in Okta.
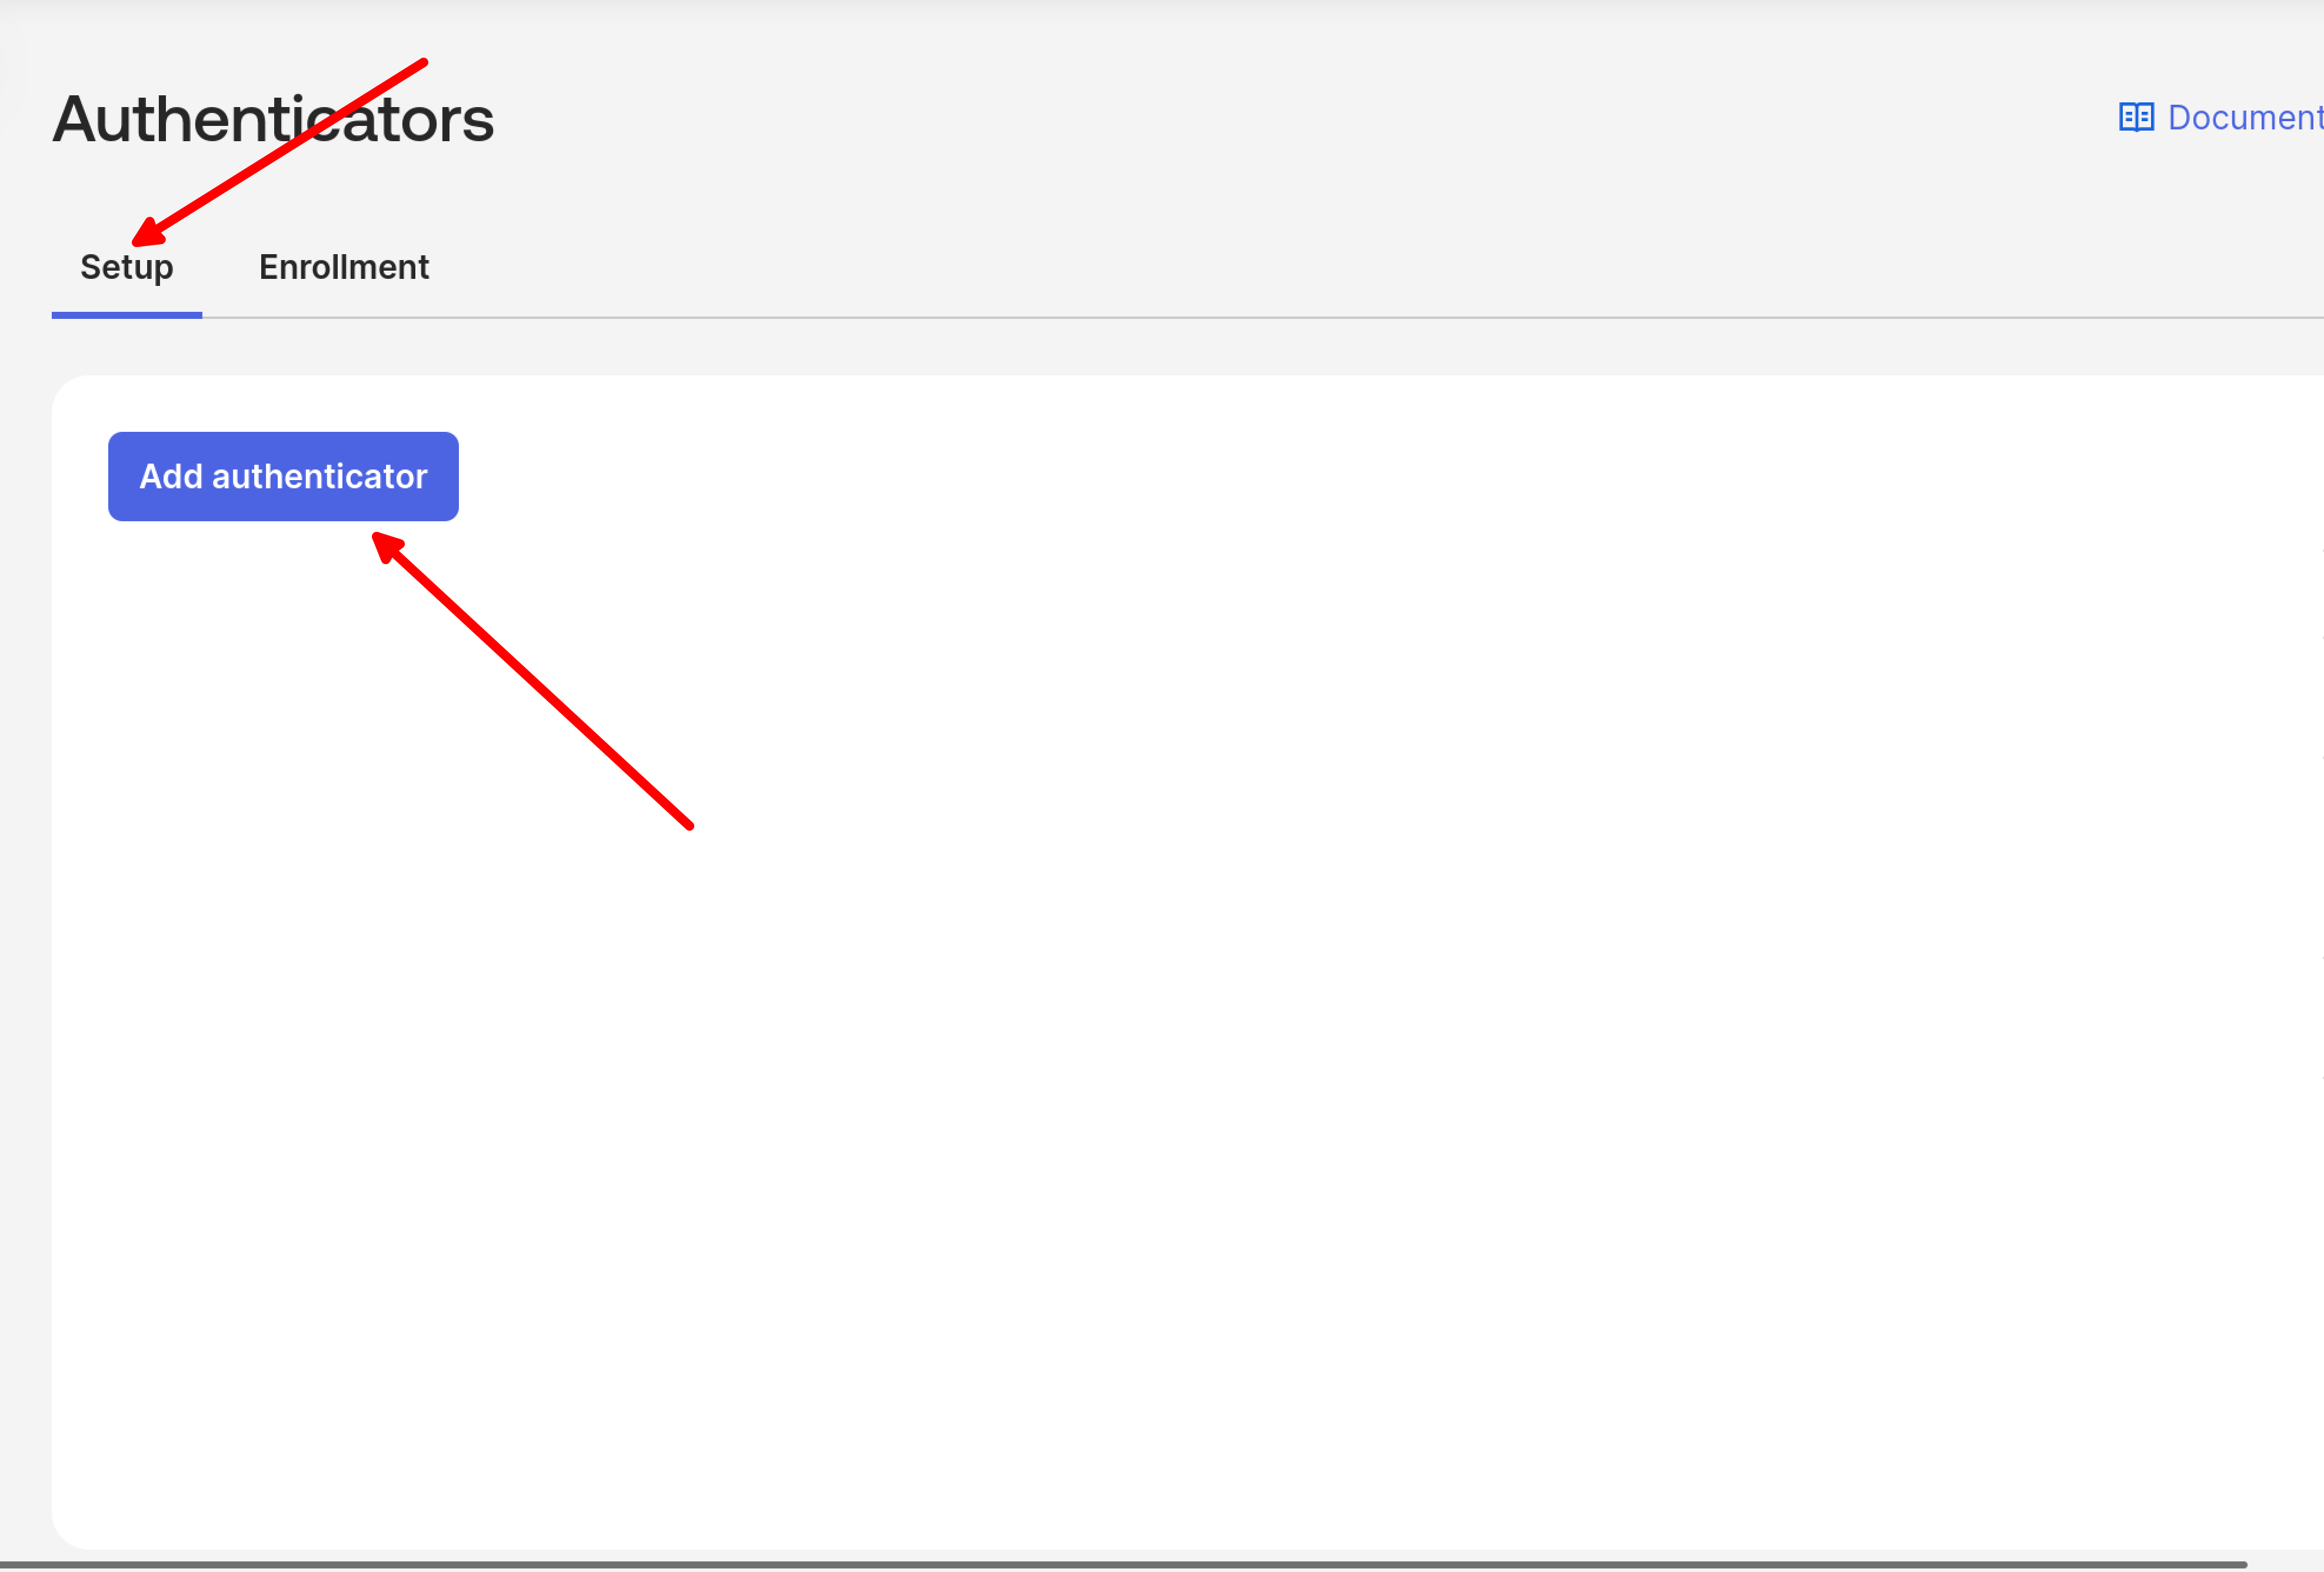
Setting up Okta FIDO2 Authenticator Options
Navigate to Security > Authenticators in your Okta Admin Console, then select Setup options and click Add authenticator.
Select the FIDO2 (WebAuthn) authenticator from the list.
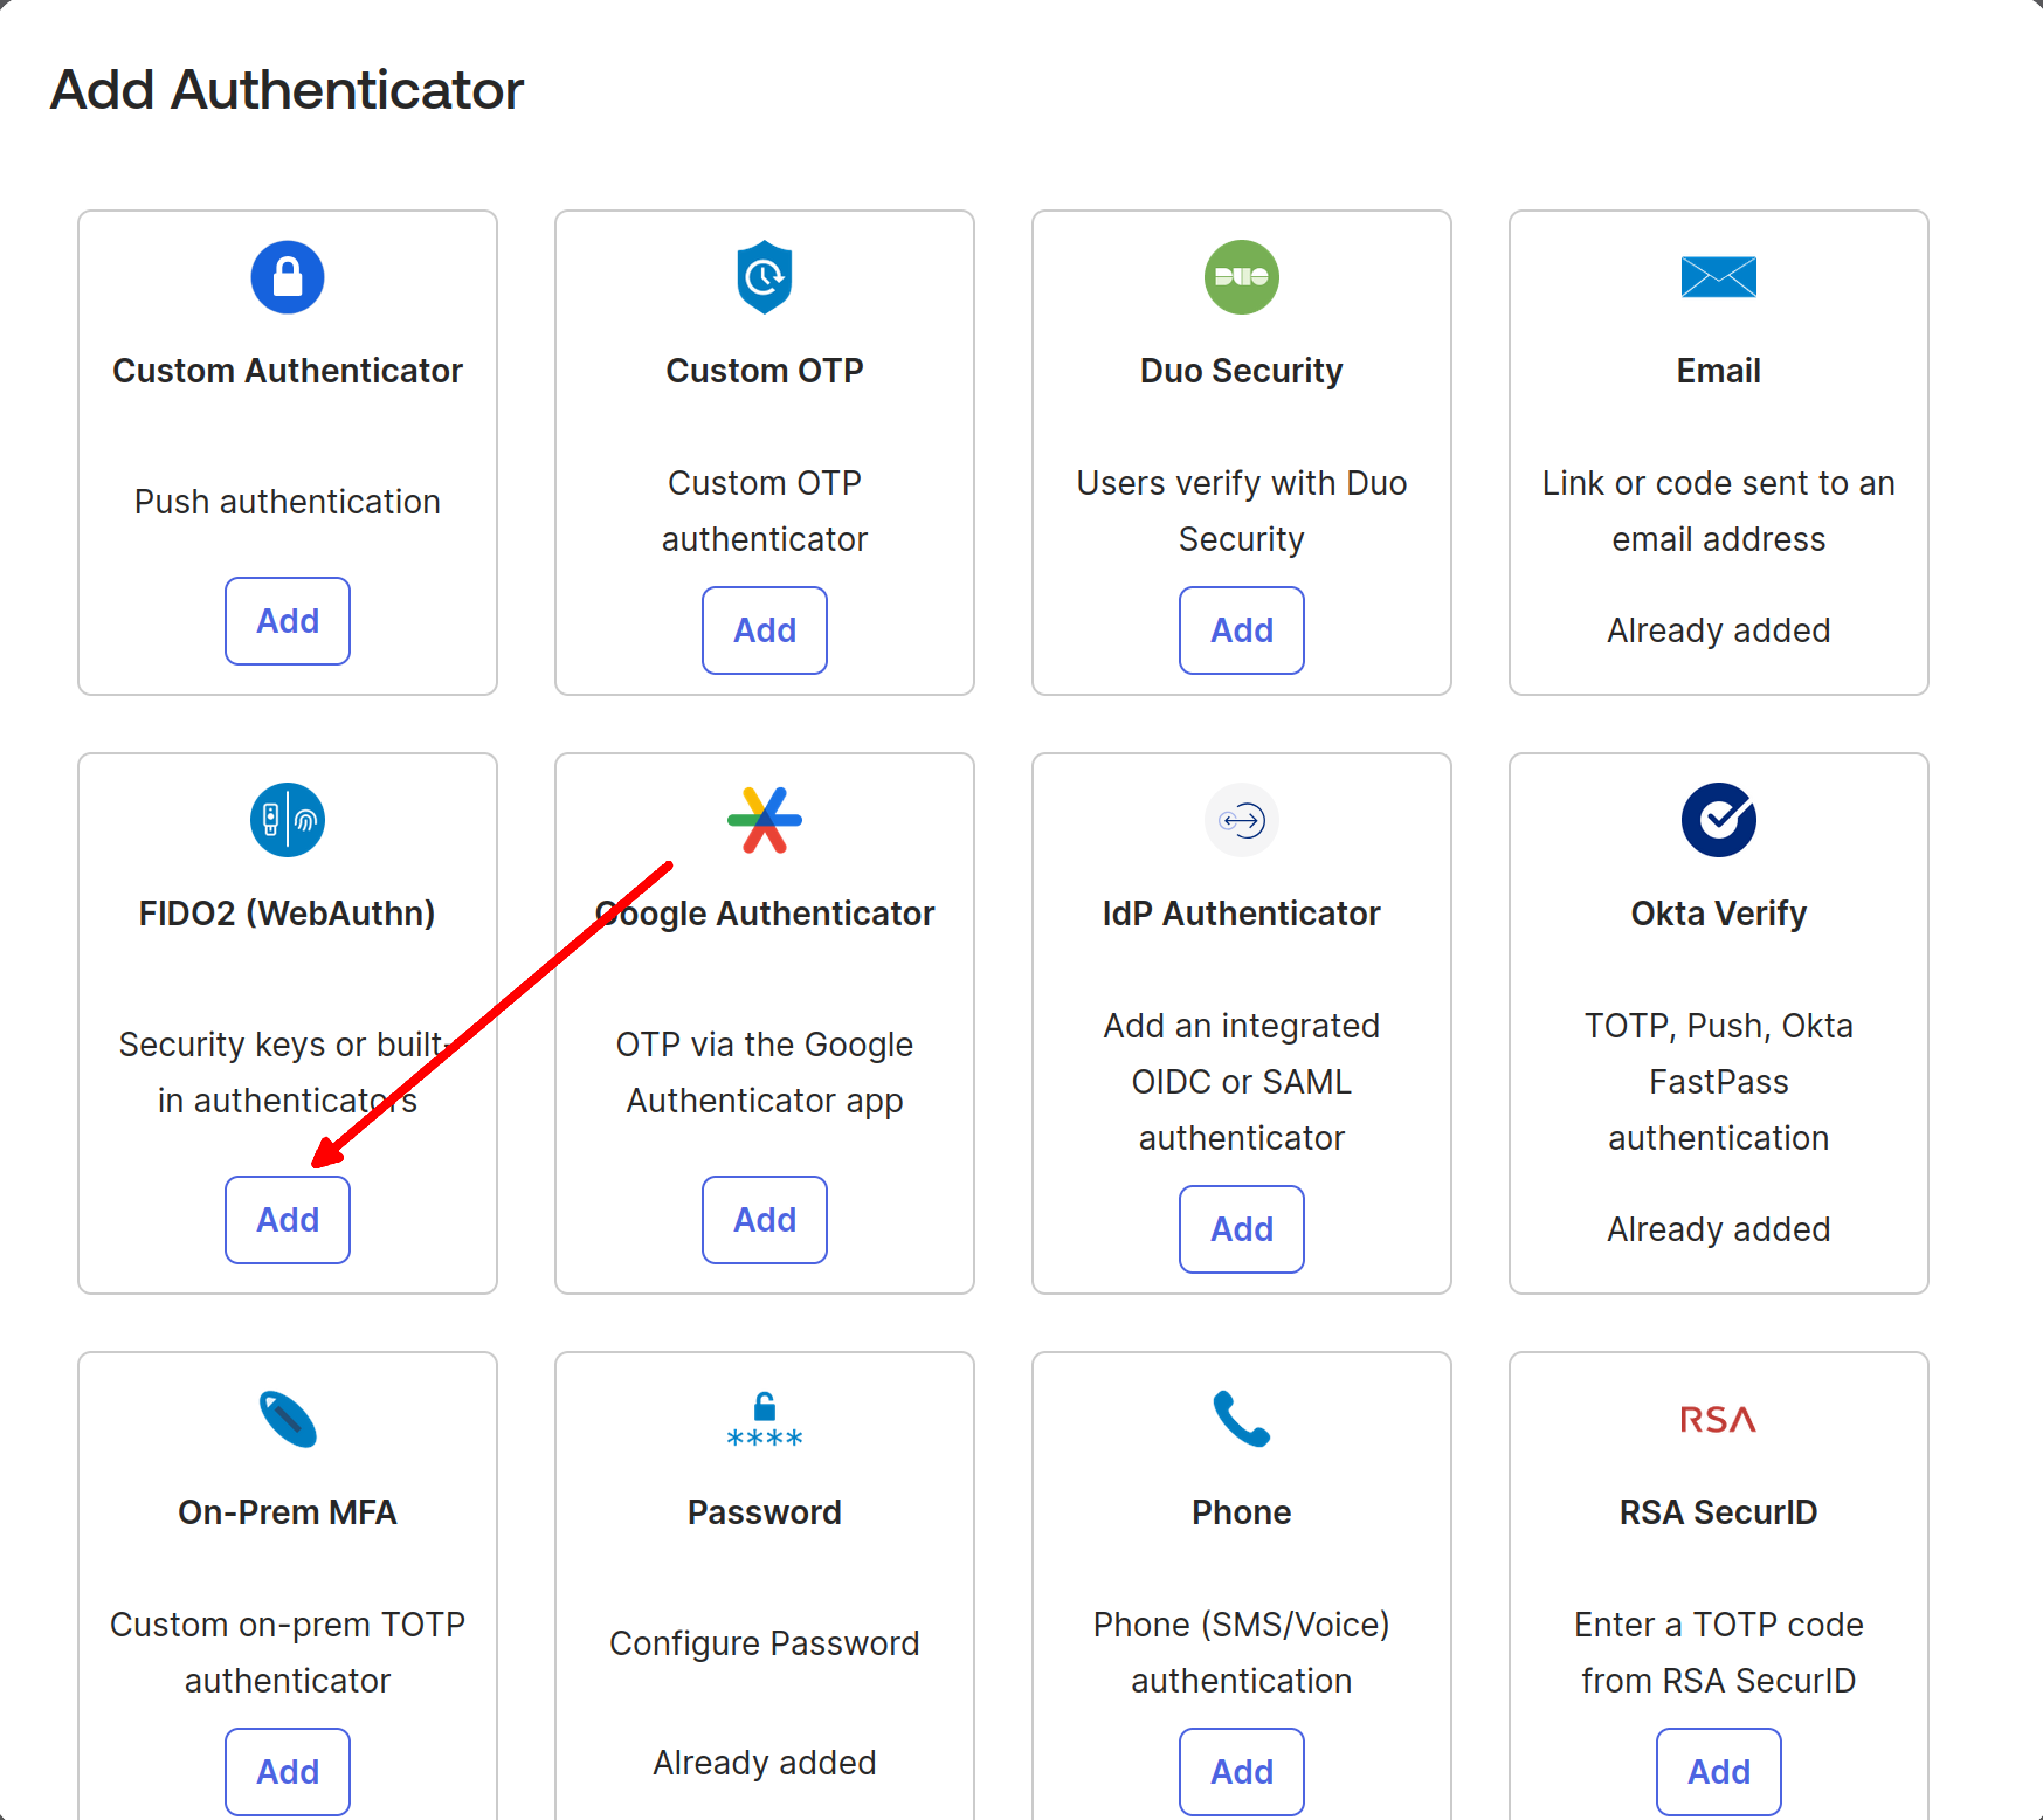
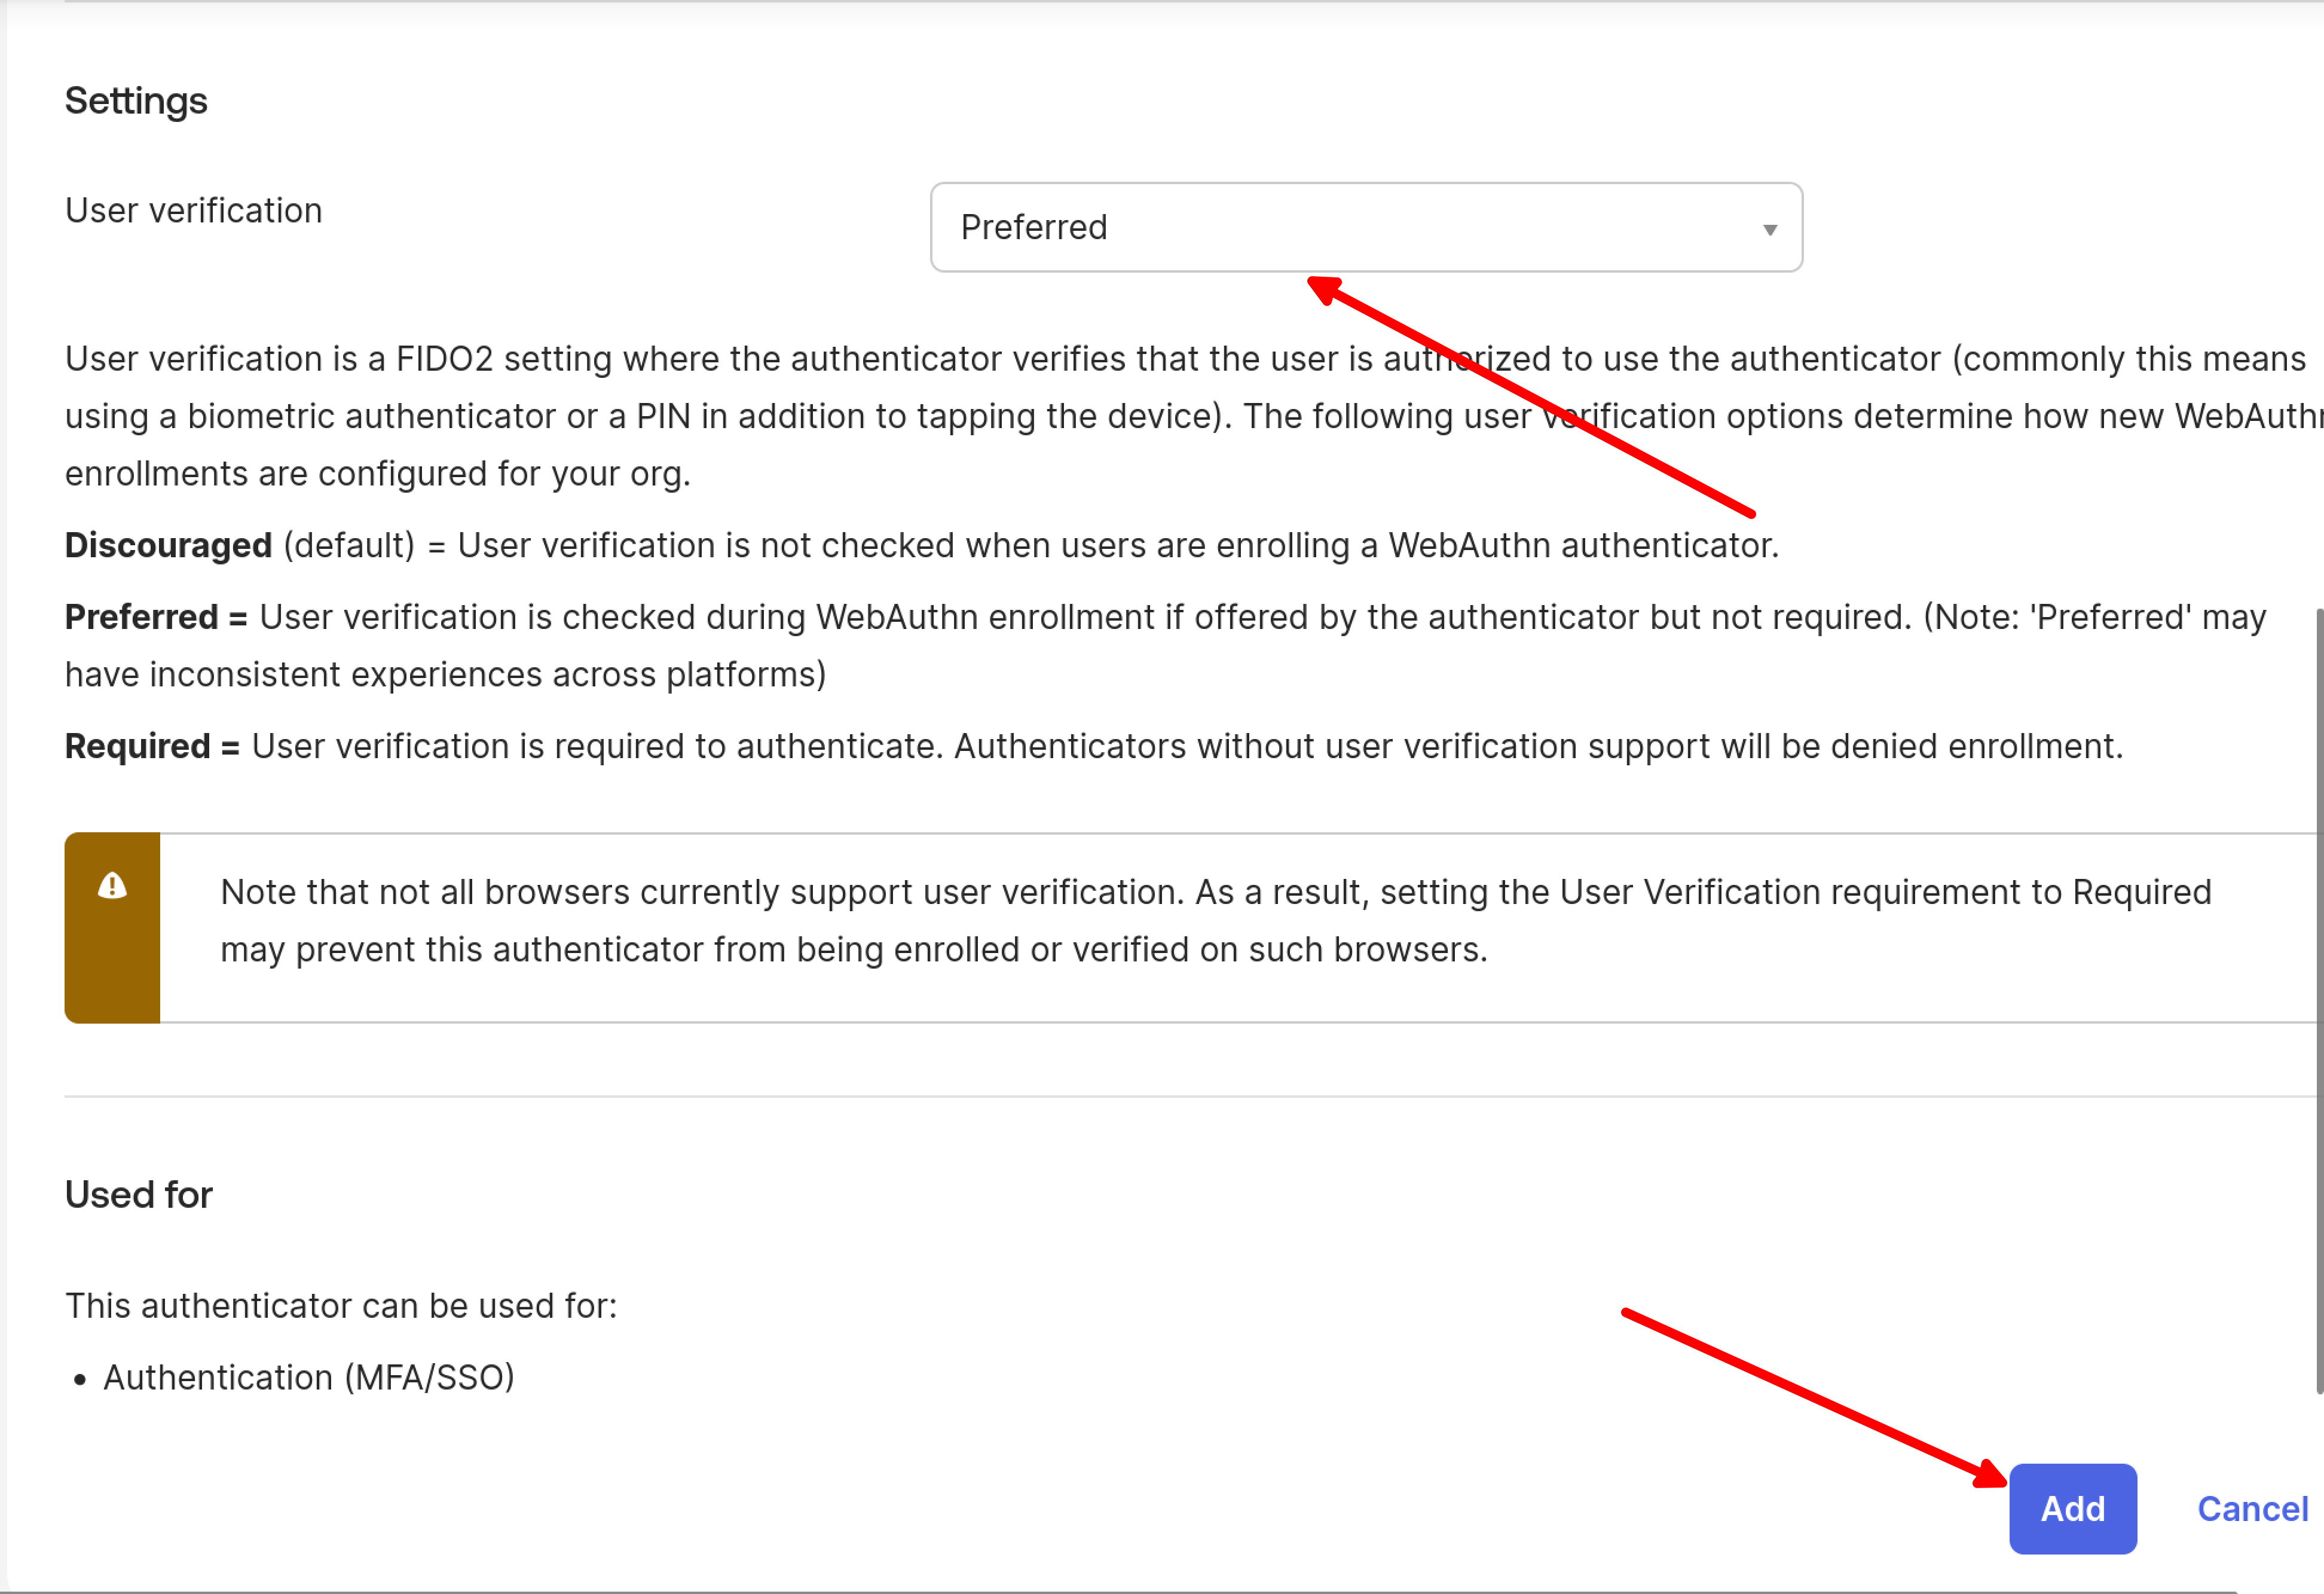
Configure the authenticator settings:
- Select Preferred option for the authenticator
- Click Add to complete the setup
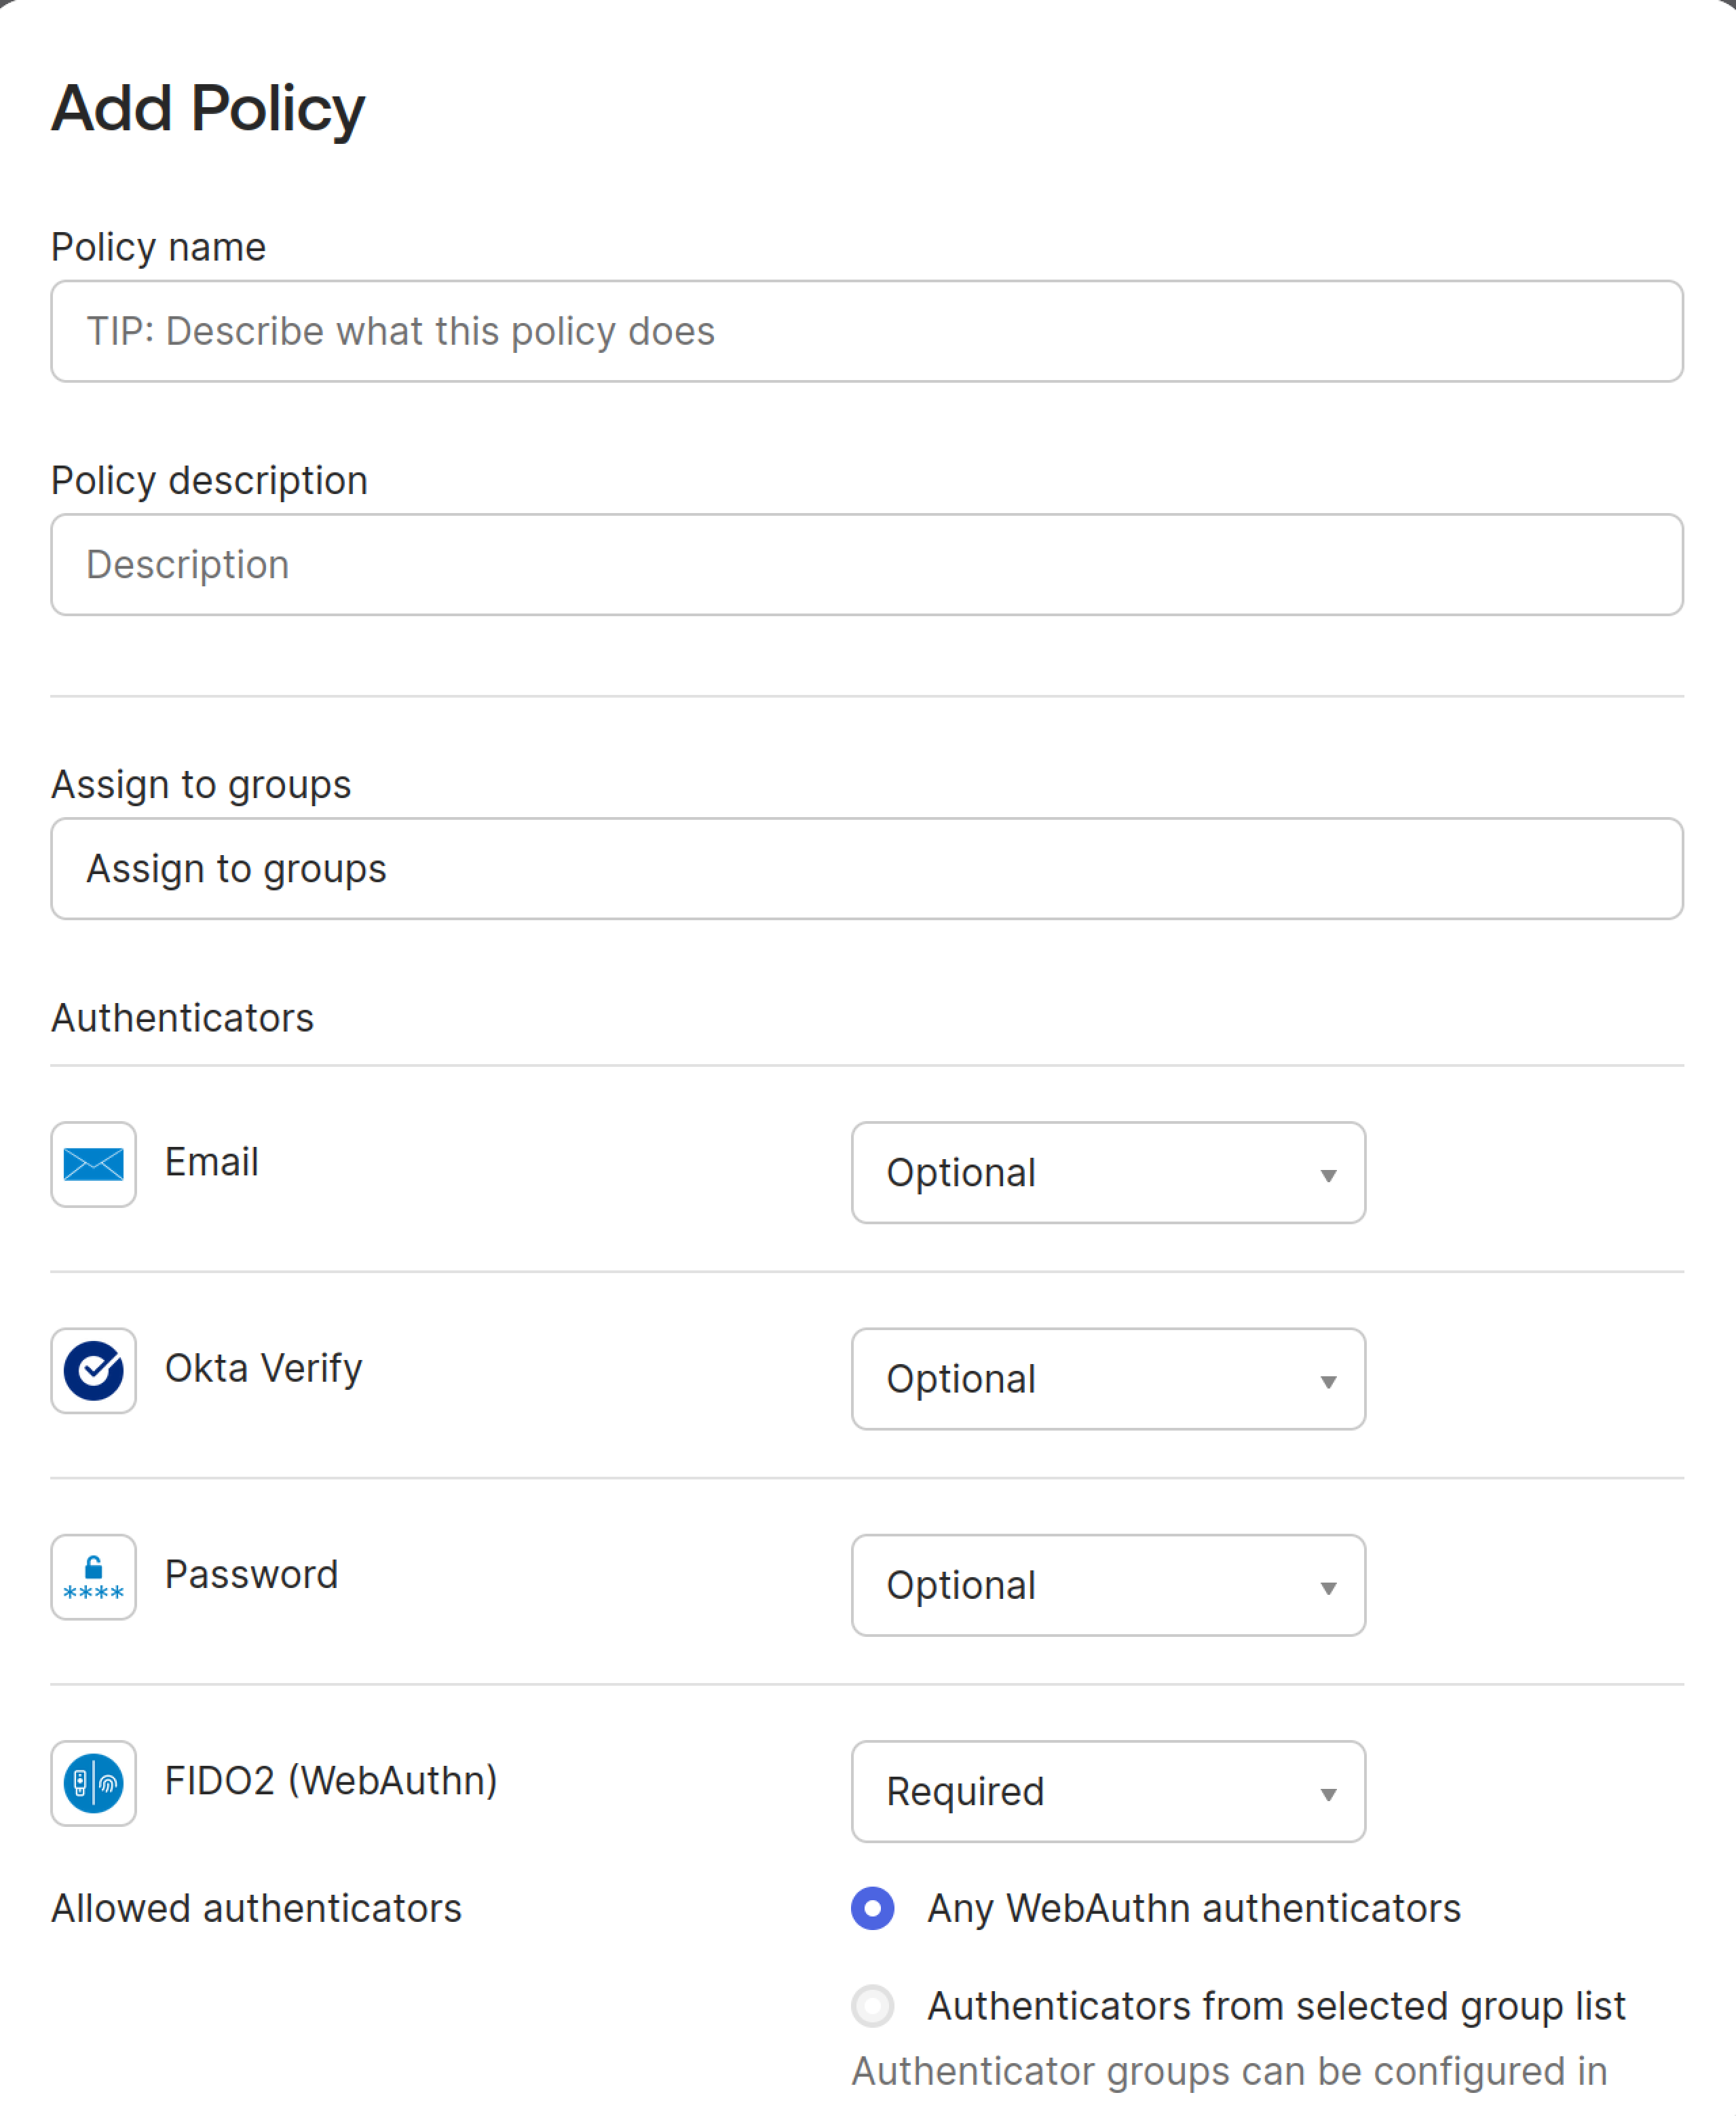
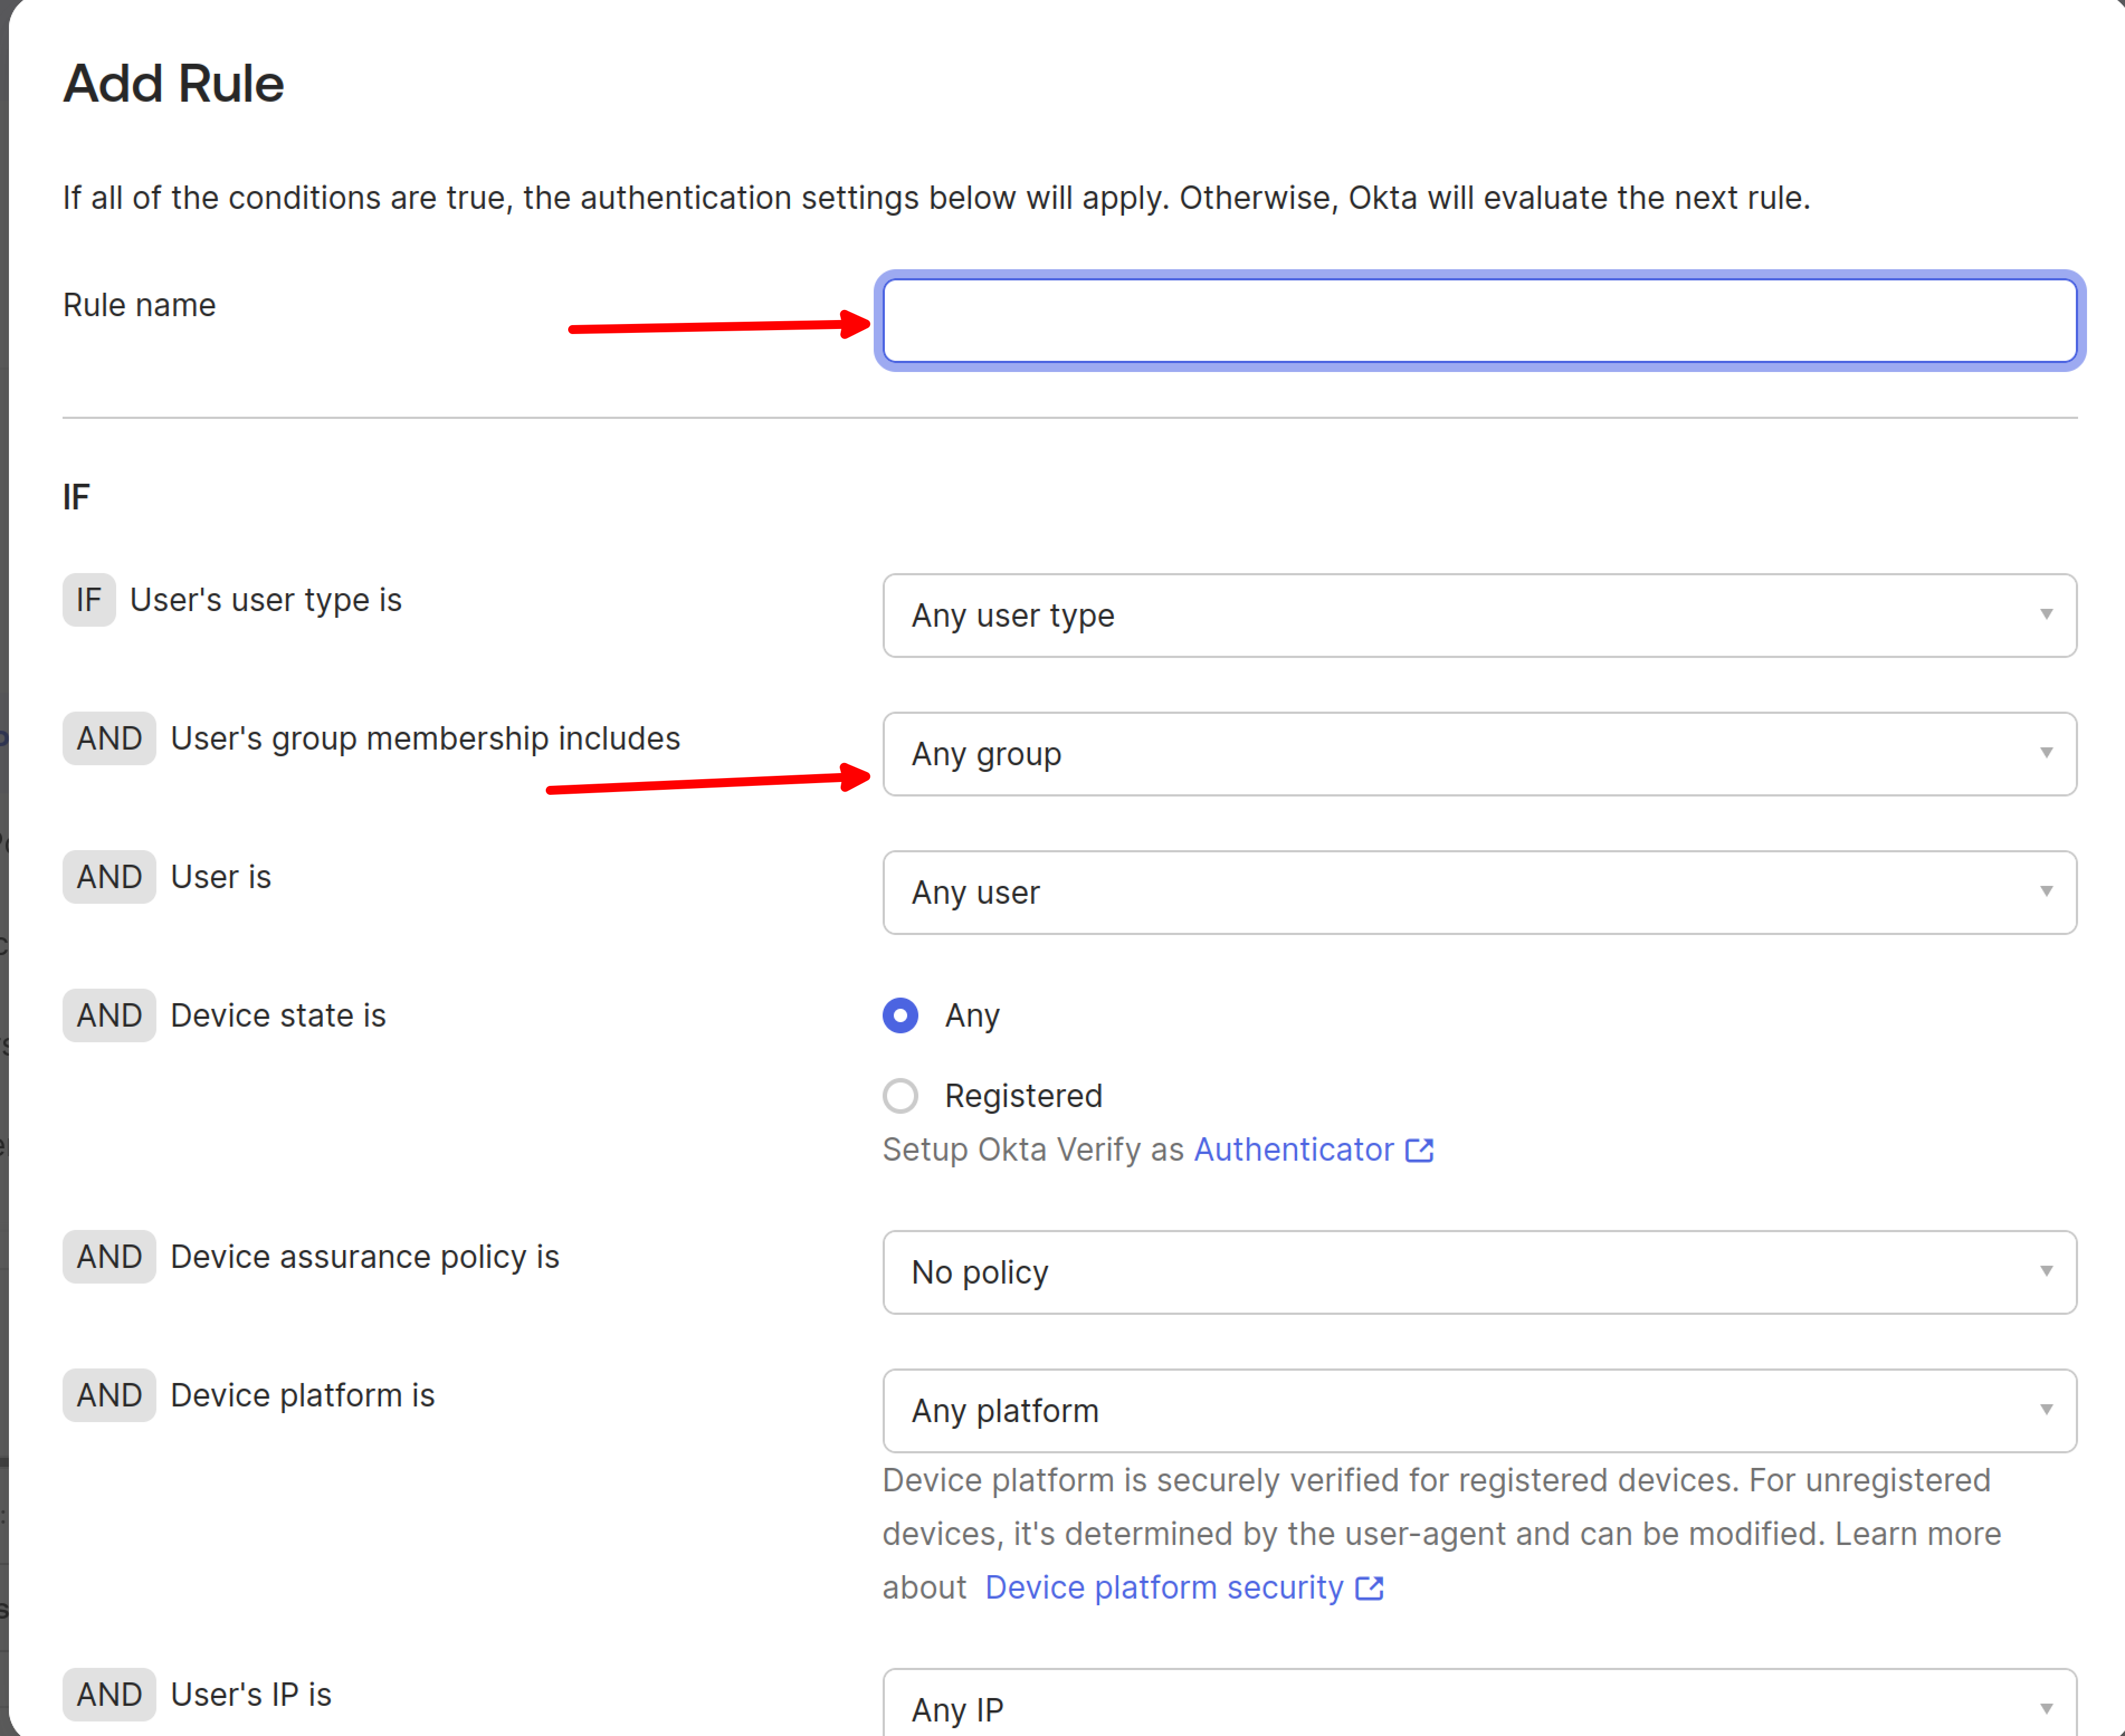
Adding Okta Enrollment Policy
Navigate back to Security > Authenticators and select Enrollment options.
Click Add a policy.
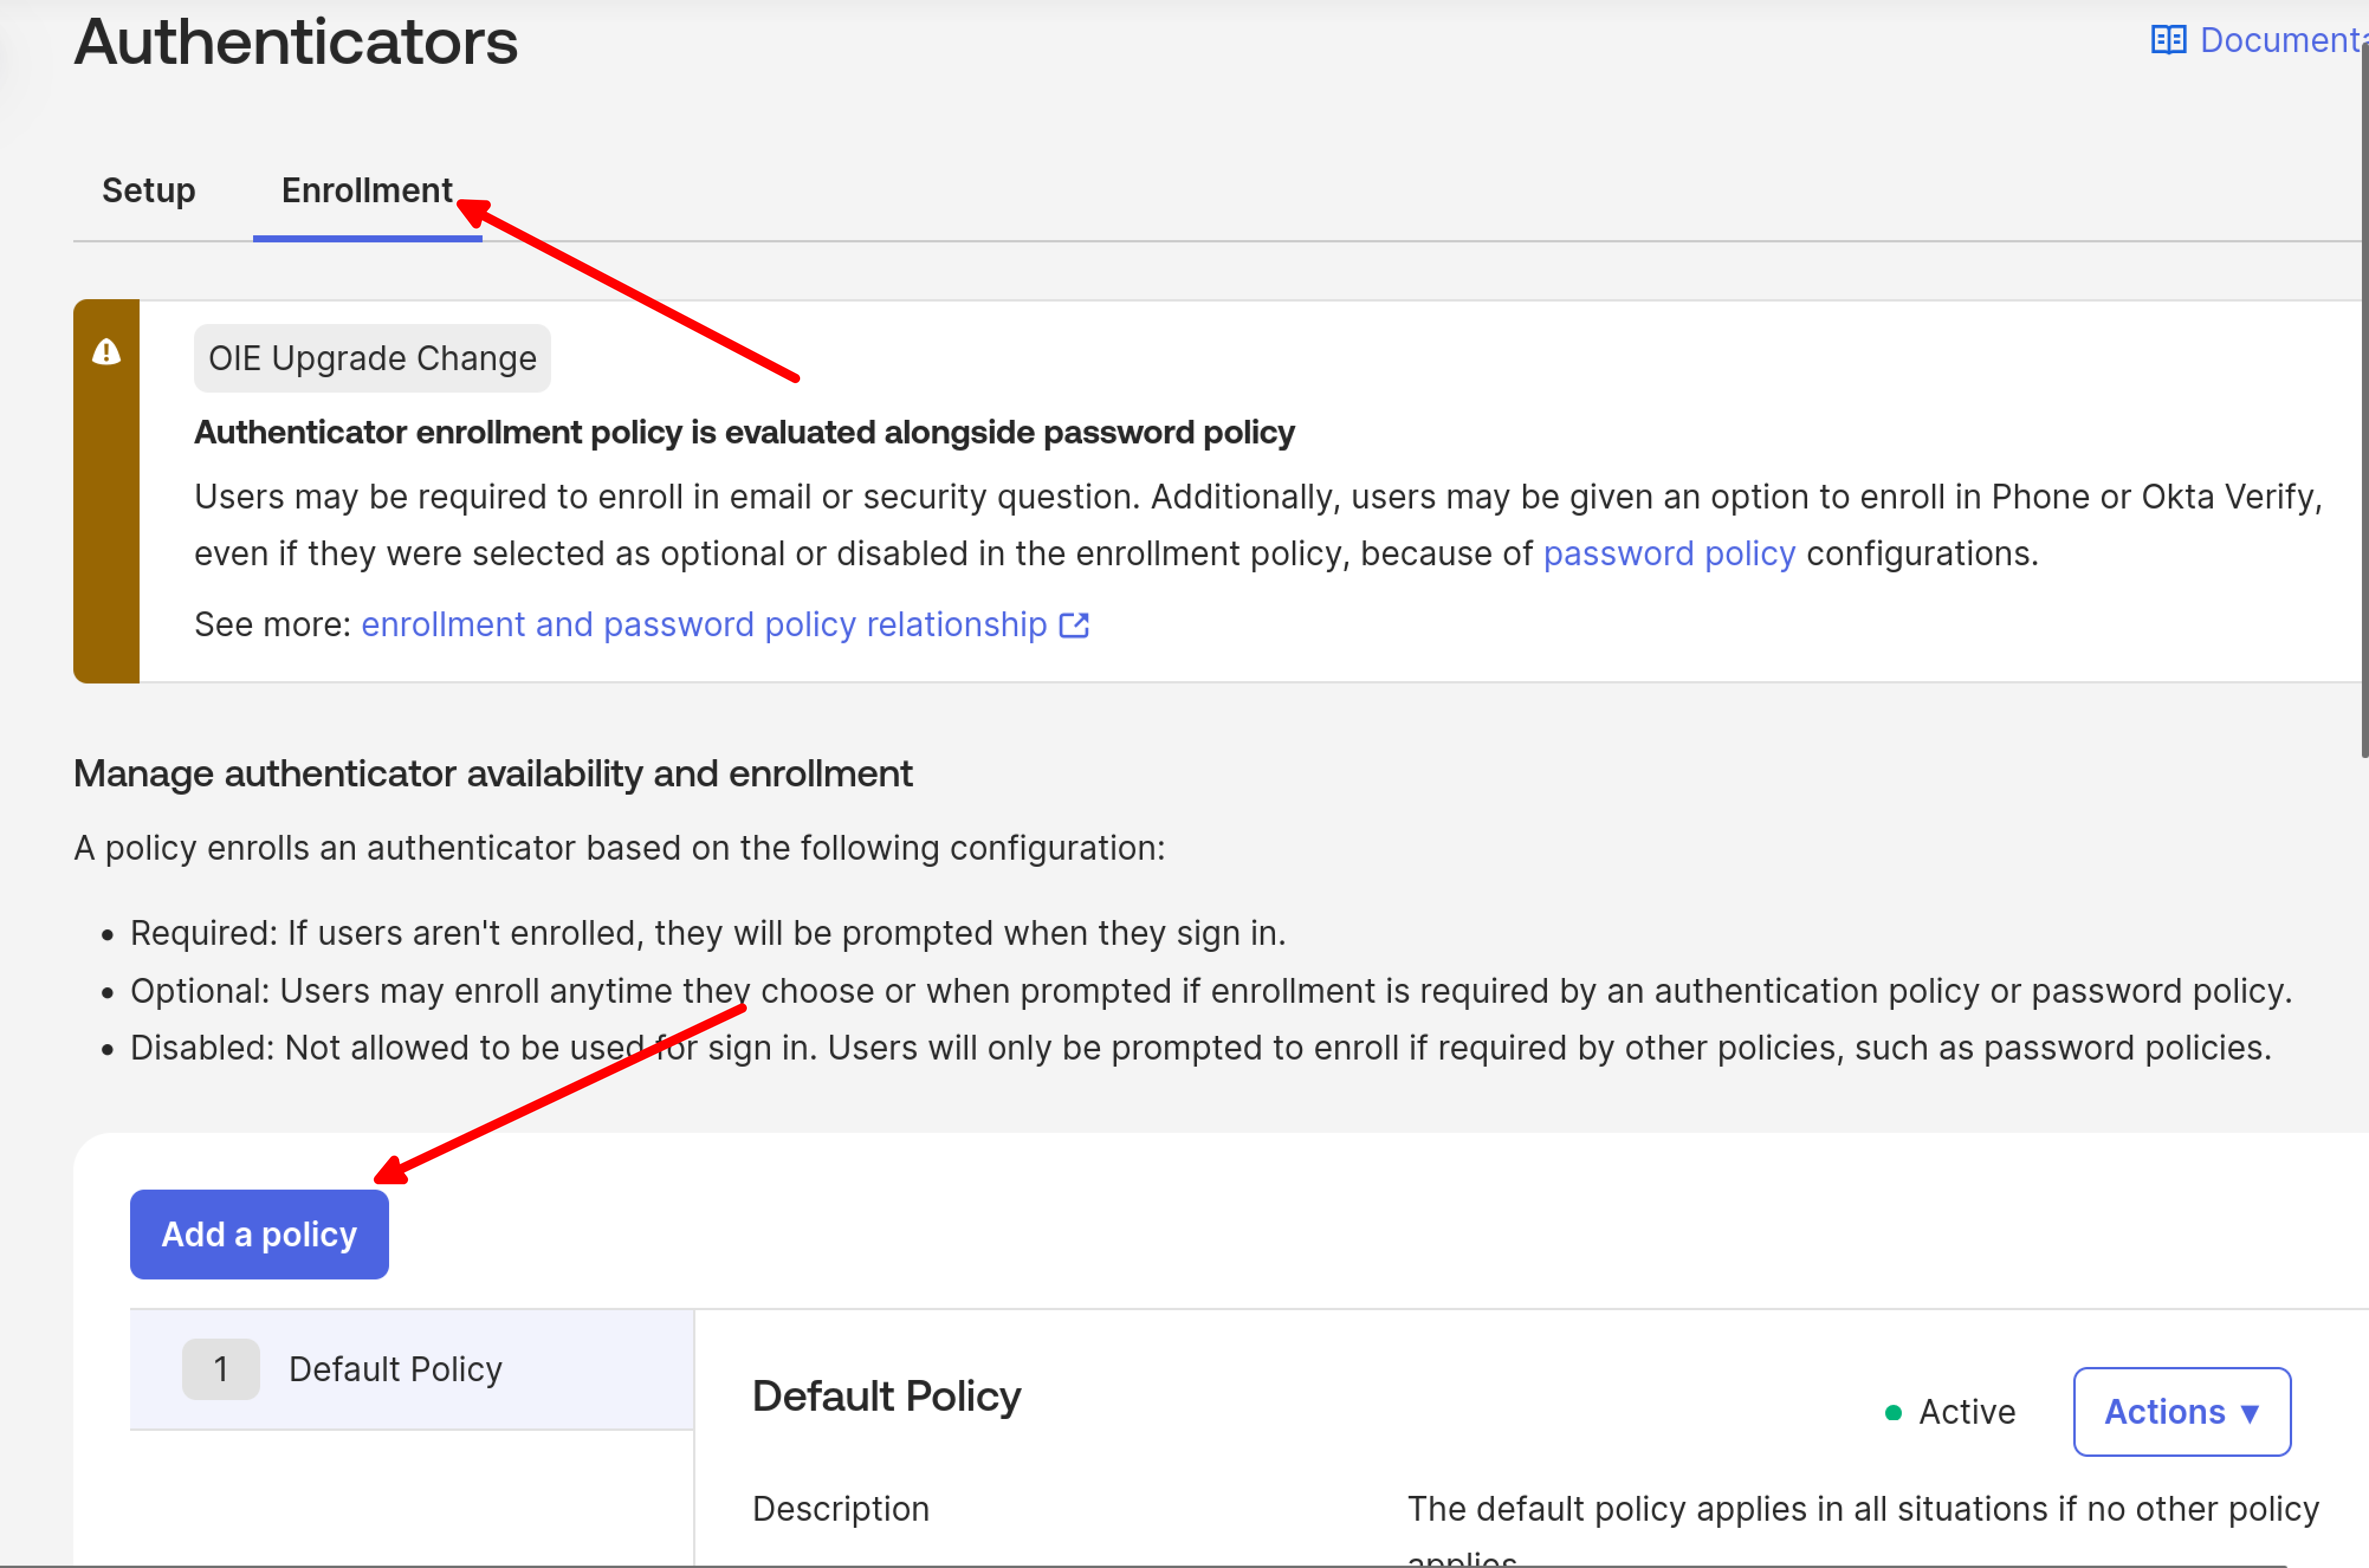
Fill in the required fields as shown in the image:
- Policy name: Enter a descriptive name (e.g., “FIDO2 Enrollment Policy”)
- Assign to groups: Select the groups that should use FIDO2 (WebAuthn) authenticator
- Authenticators: Select authenticator options as appropriate
- Allowed authenticators: Choose “Any WebAuthn authenticator”
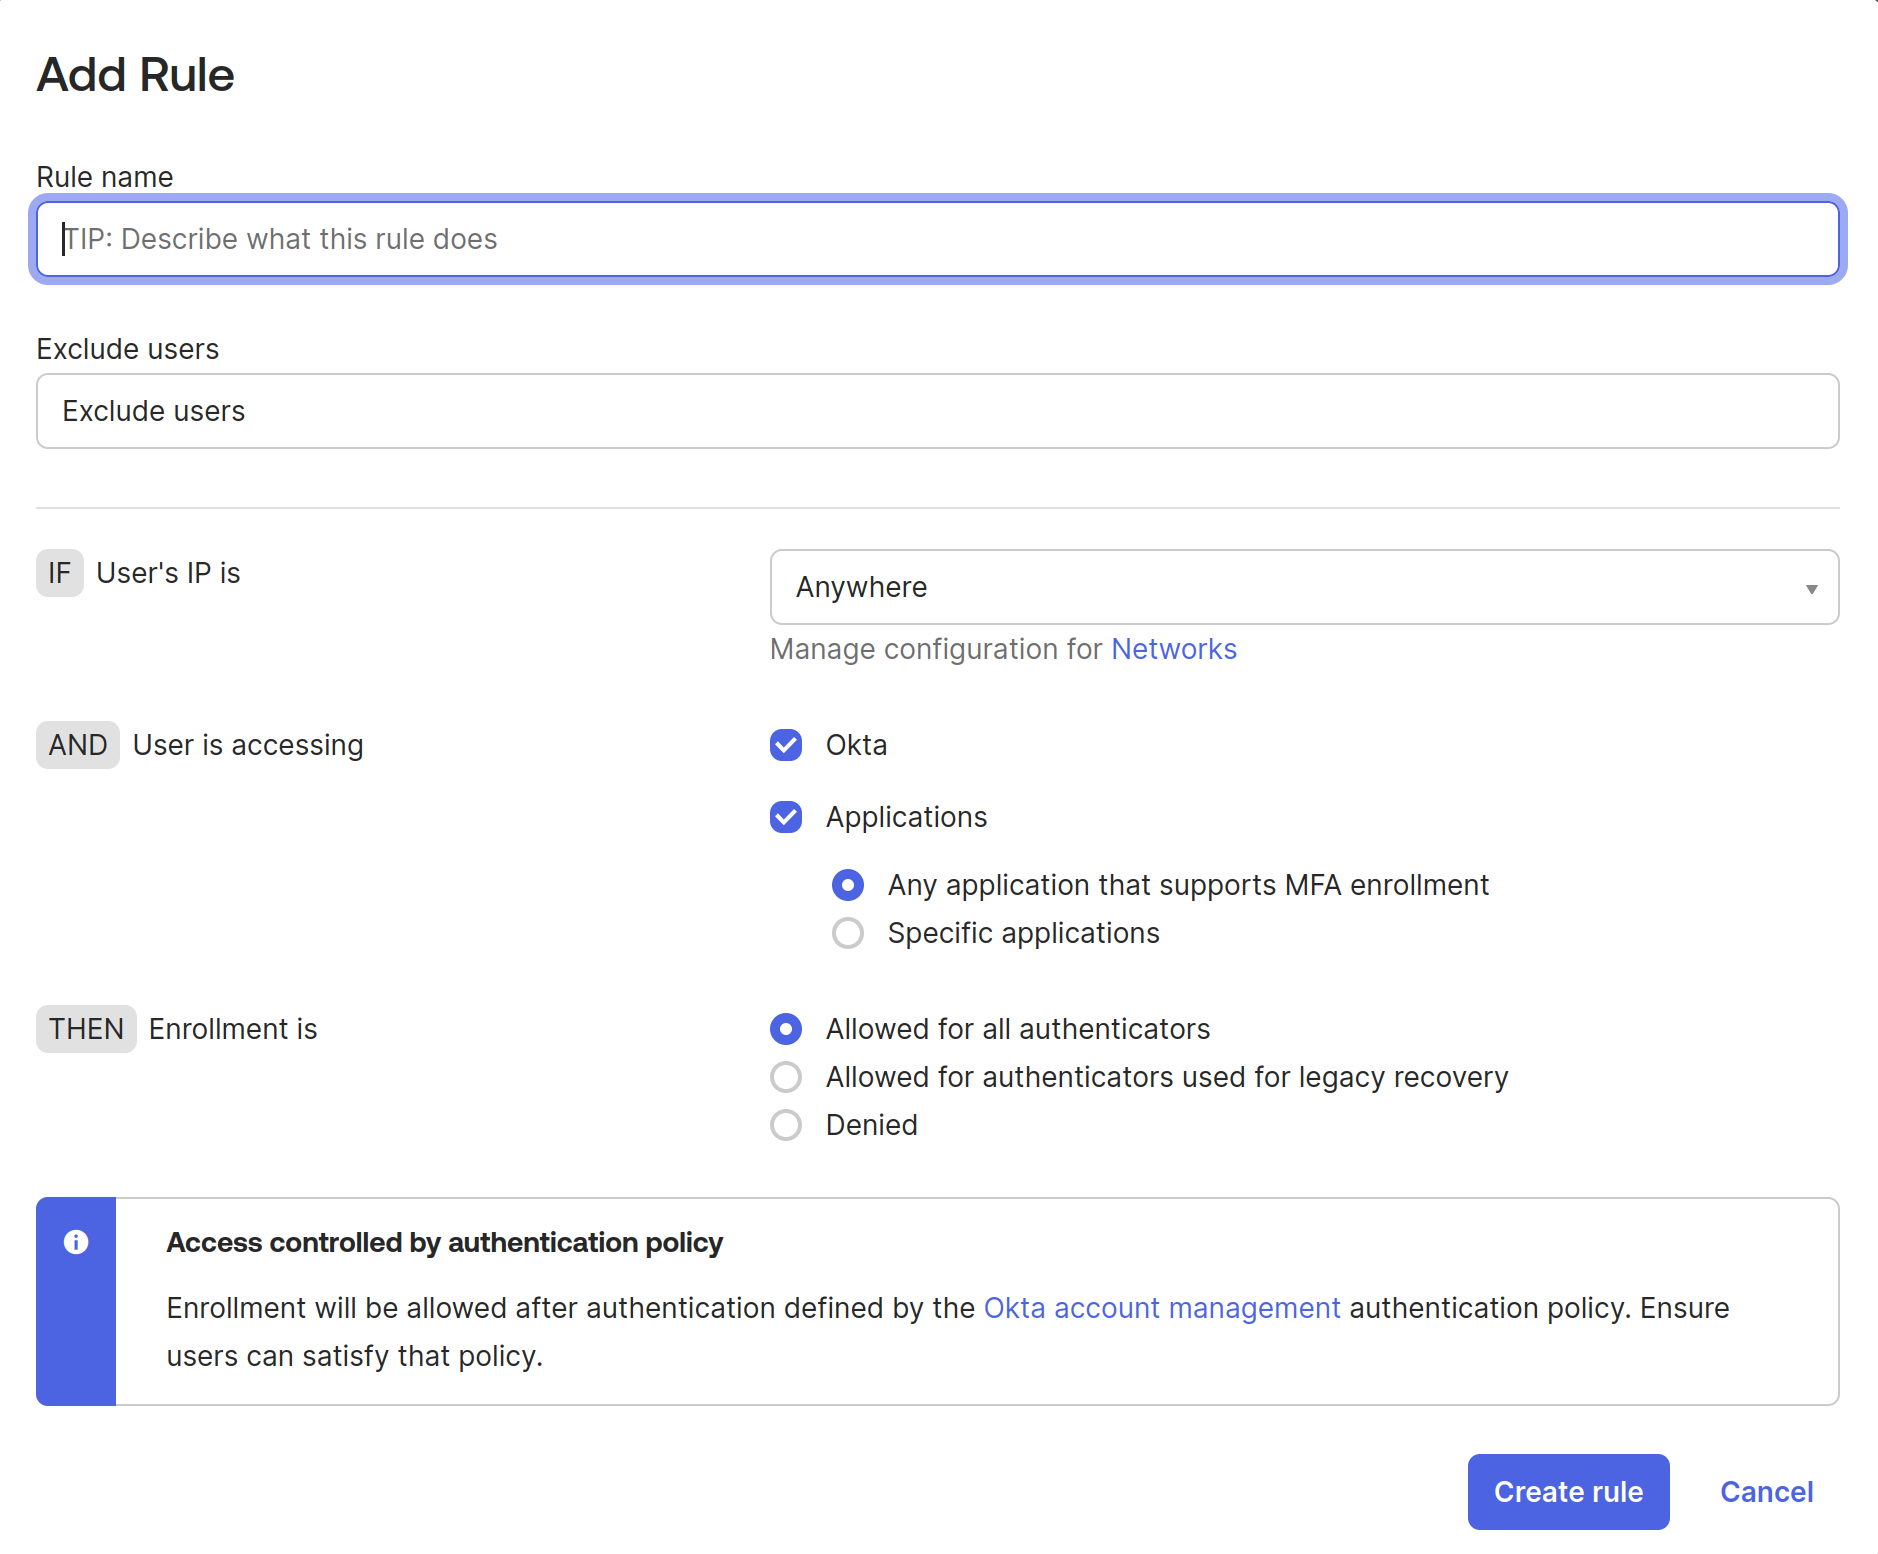
In the newly opened Add Rule window, provide a rule name and click Create Rule.
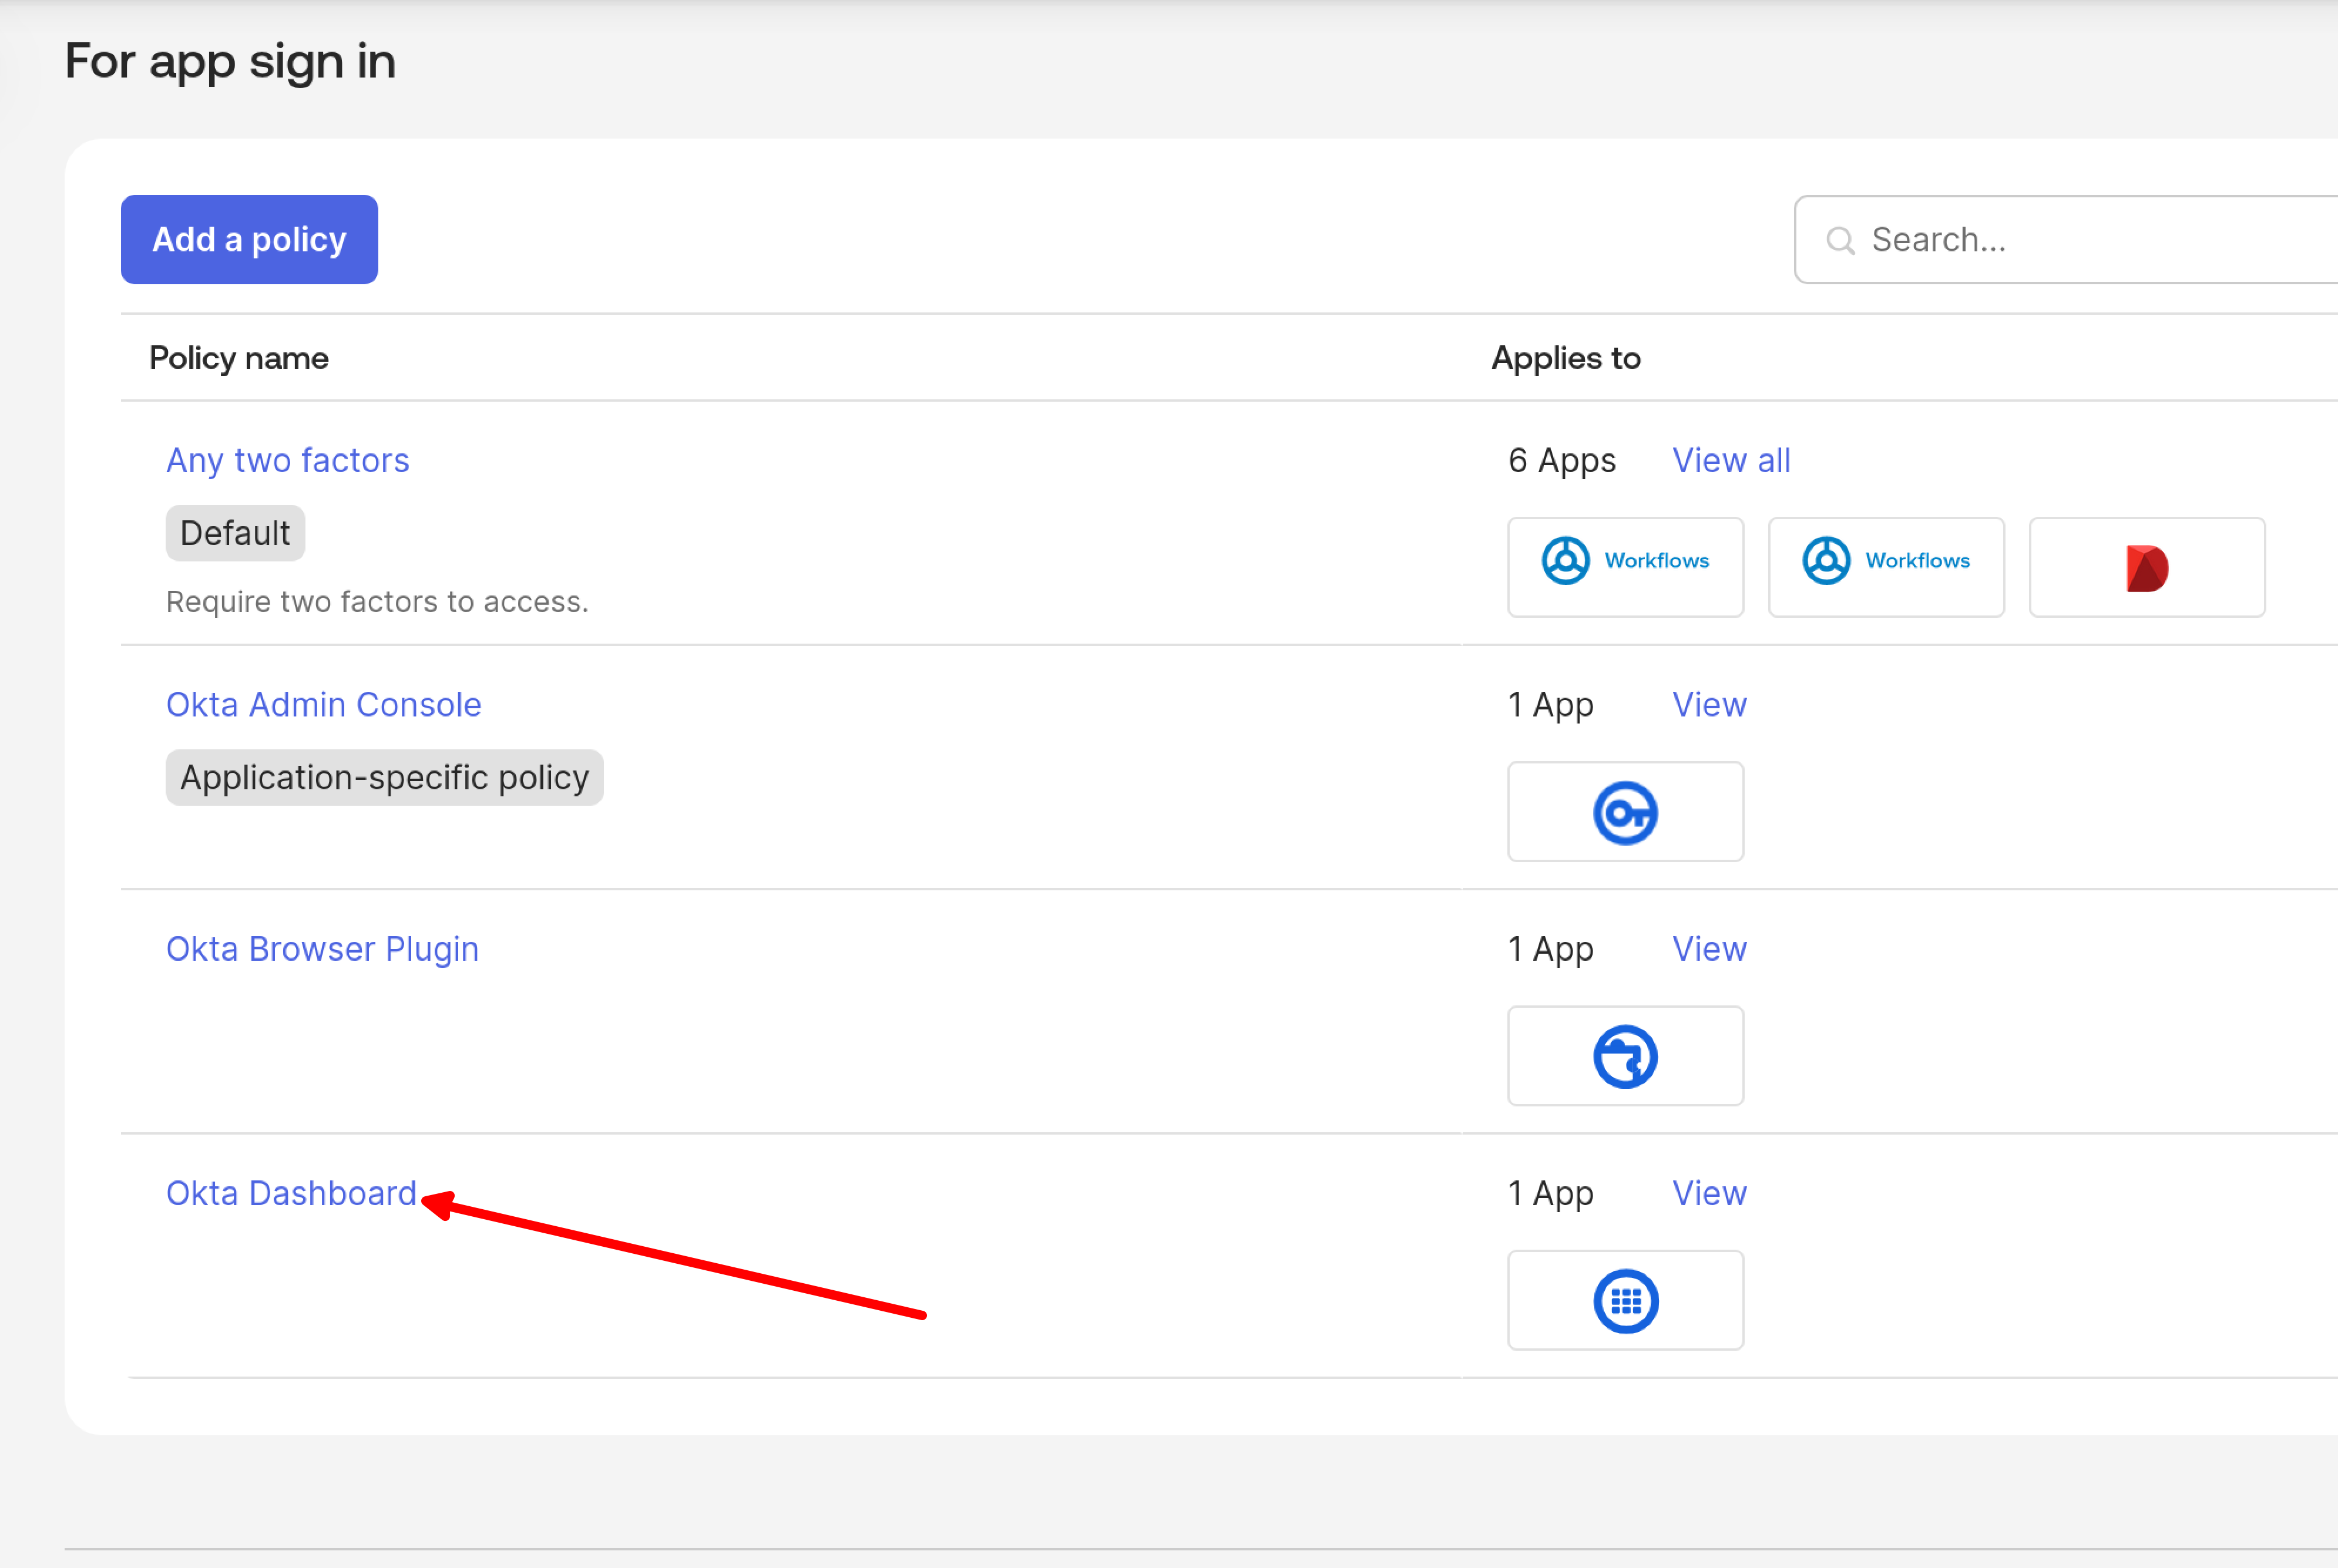
Setting up Okta Authentication Policy
Navigate to Security > Authentication Policies and select Okta Dashboard (or any application you want to protect).
In the Rule section, click Add Rule.
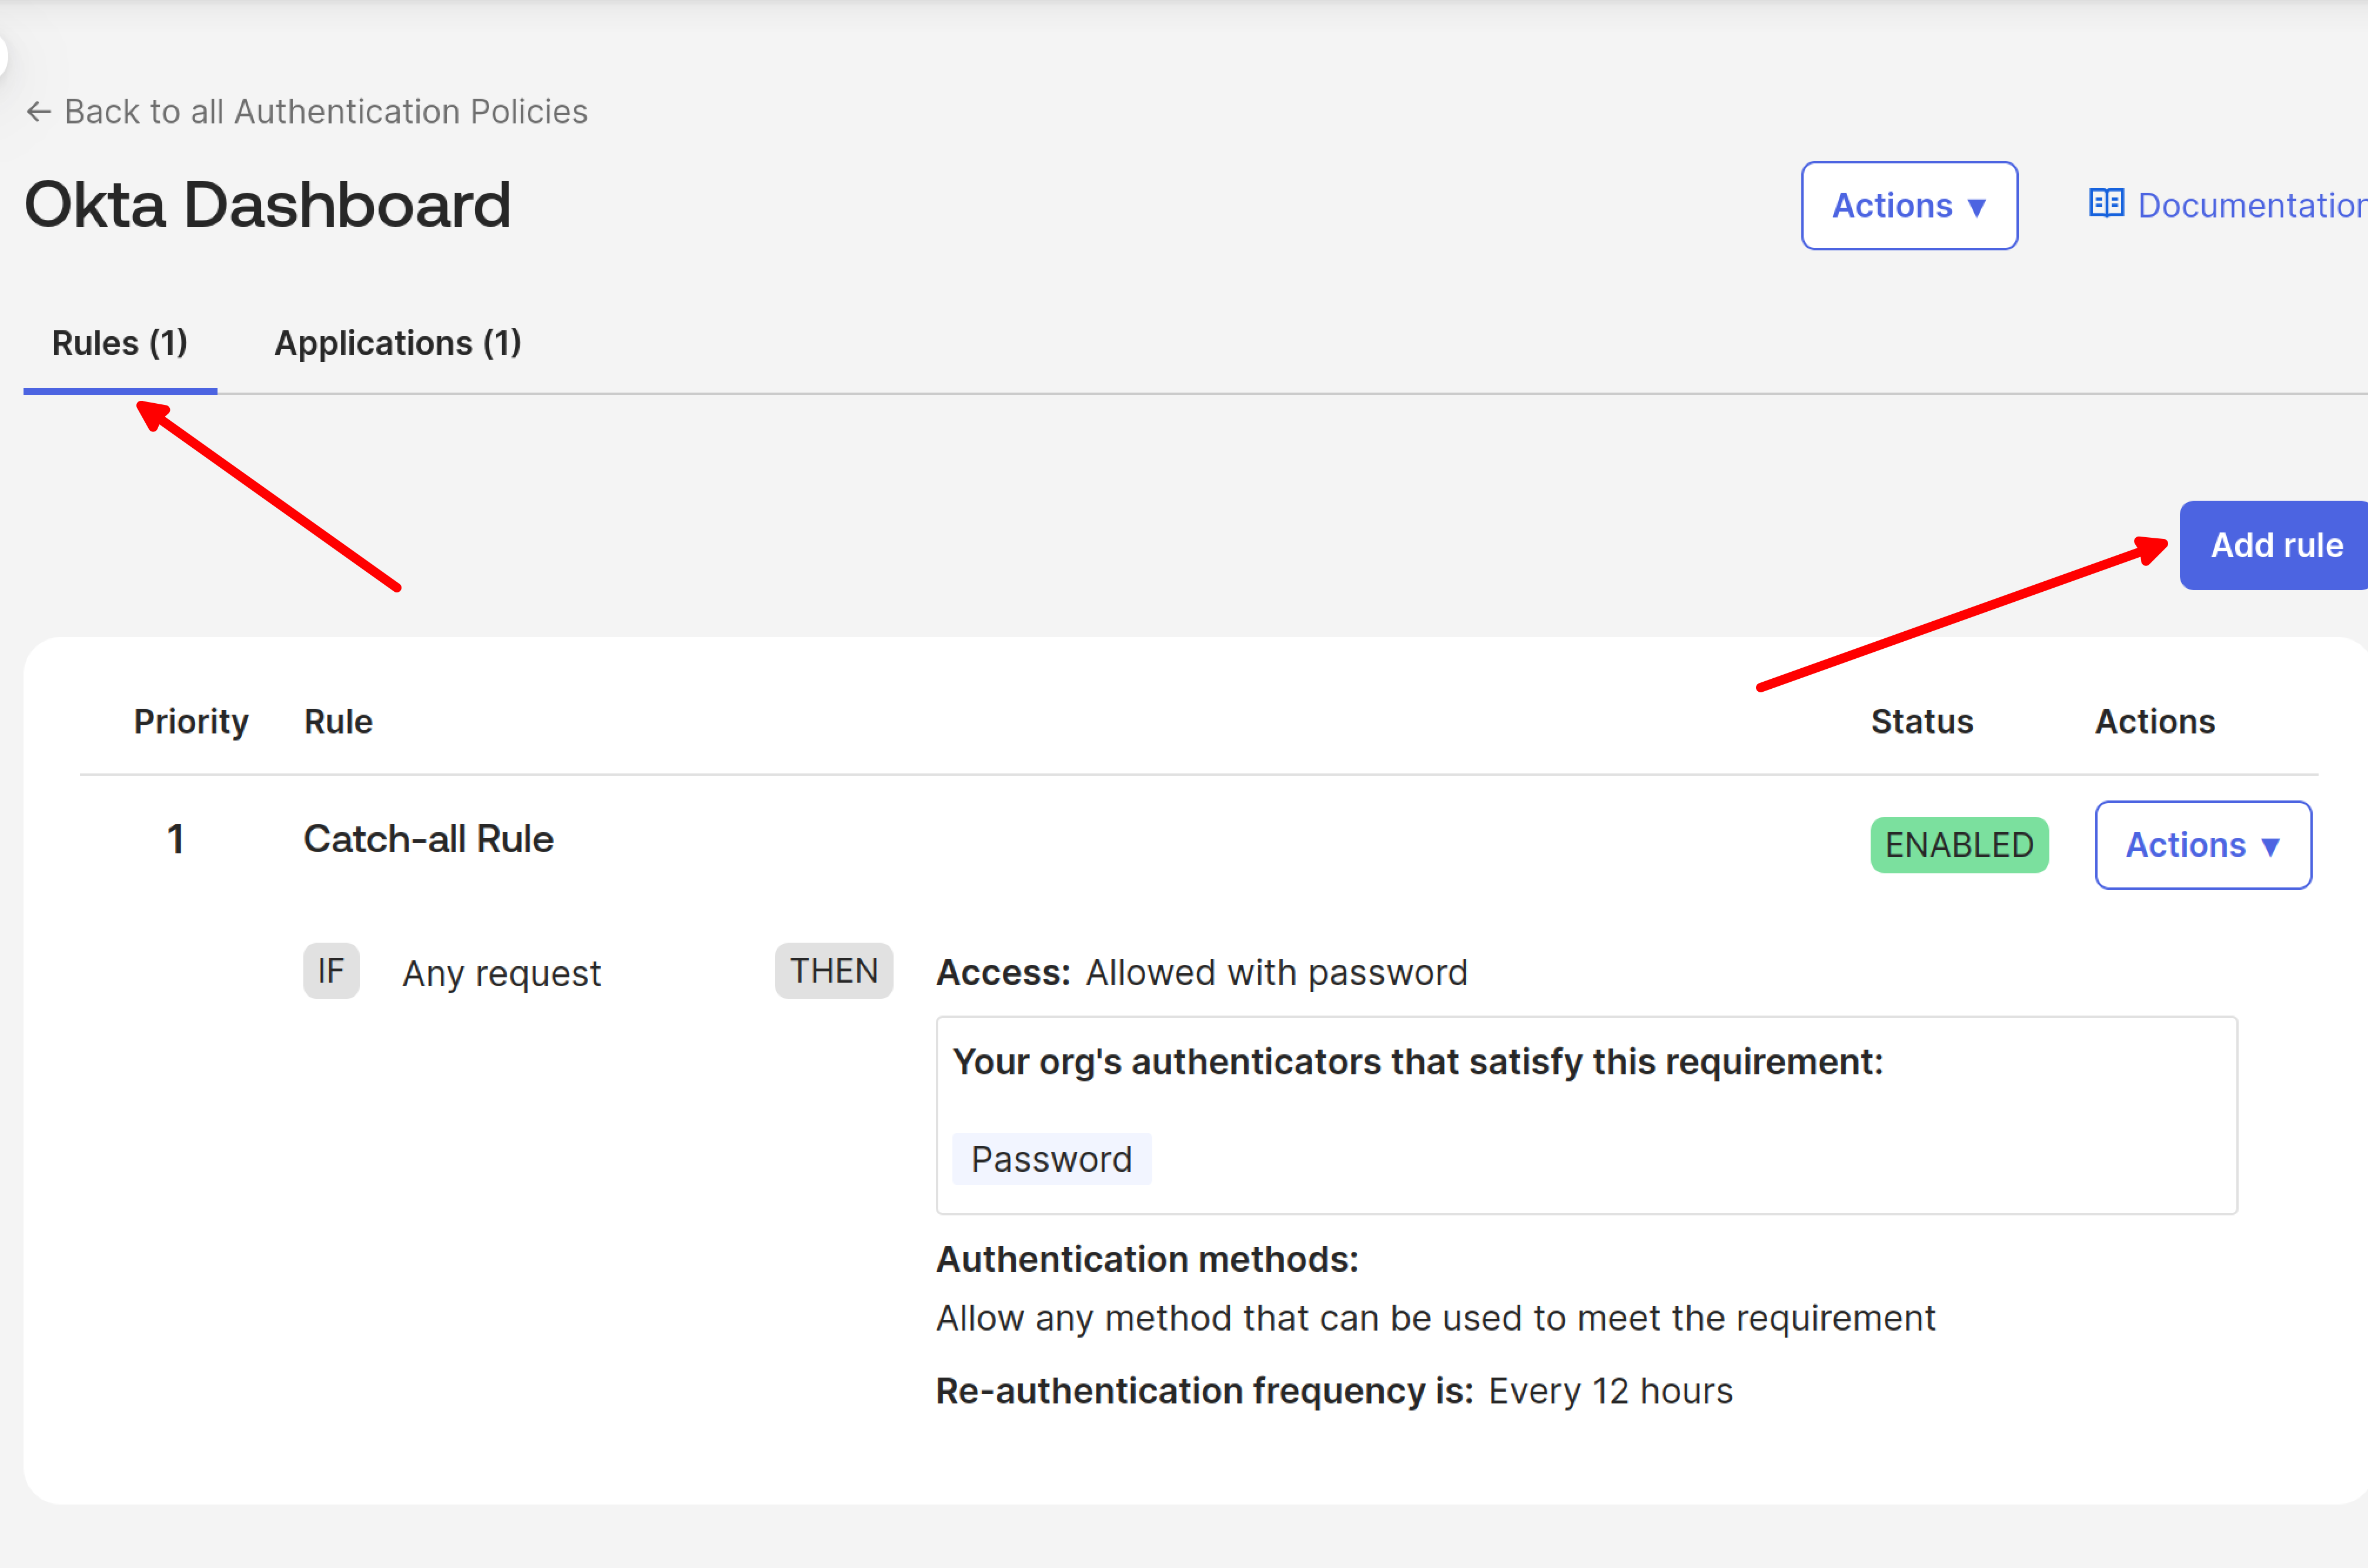
Configure the authentication rule with the following settings:
- Rule name: Provide a descriptive name
- Assign to groups: Select the same groups that have the authenticator policy enabled
- Possession factor: Select this option
- Phishing resistant: Select this option
- FIDO2 (WebAuthn) authenticator: Select this authenticator
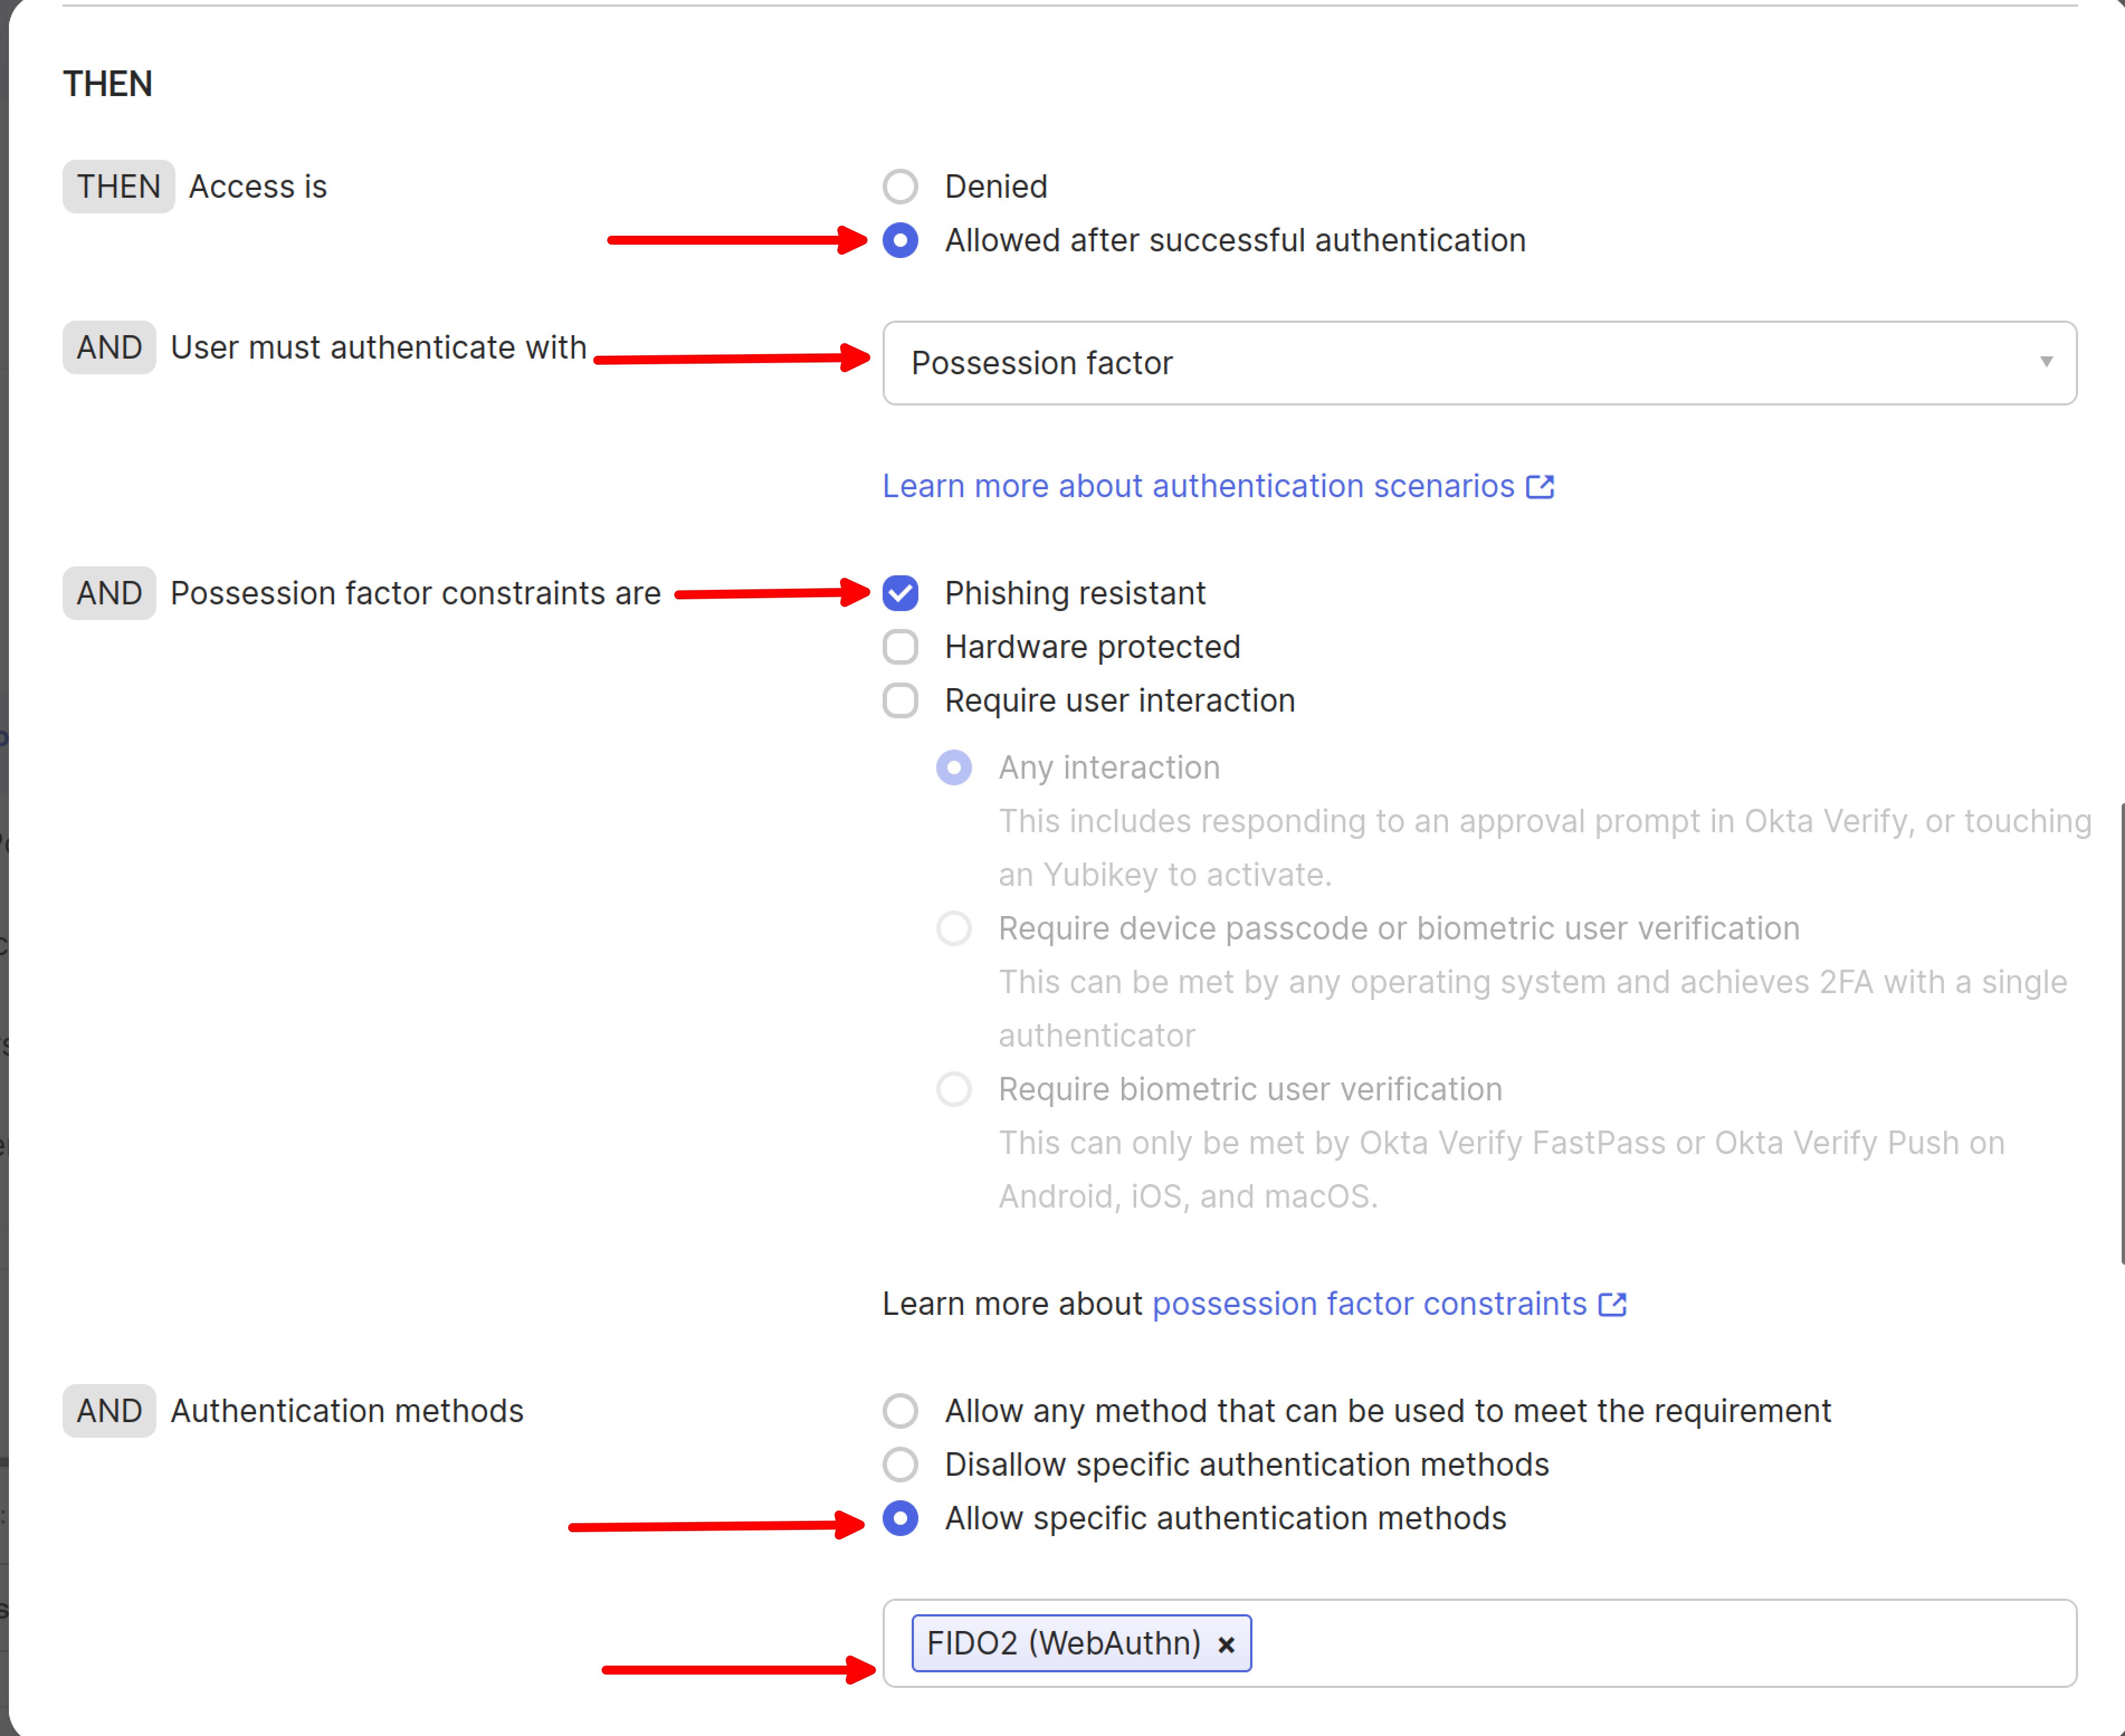
Important: Users in the specified groups can only access the specified application when all authentication policies are met.
Assigning Okta Passkeys
Individual Passkey Assignment
Administrators can assign Okta passkeys individually through the user profile in the Admin Panel:
- Log in to the IDmelon Admin Panel.
- Navigate to Users → All Users.
- Select the user you wish to assign a passkey to.
- Go to the Passkeys tab.
- Click Add Passkey and choose Okta.
- Click Create in the popup window.
The passkey will be assigned to the user and will become active once the security key is initialized by the user.
Automatic Passkey Assignment via Workflows
Administrators can automate the assignment of Okta passkeys using the workflow feature:
- Navigate to Workflows → Okta Passkey Provisioning.
- Enter a name for the workflow (e.g., “Auto Okta Provisioning”) and click Next.
- On the configuration page:
- The Okta Origin field will be automatically populated if the Okta integration has already been set up.
- Set the trigger condition:
- New User Imported: Assigns the passkey when a user is added to the panel
- New Security Key Activated (Recommended): Assigns the passkey once the user activates their security key
- Continue to the next step to review and submit the workflow.
Once activated, the workflow will automatically assign Okta passkeys to applicable users based on the chosen trigger, requiring no further manual action.