SCIM Synchronization with Okta
This document describes how to configure SCIM synchronization between Okta and IDmelon for automated user provisioning.
Setup IDmelon For Provisioning
Log in to the IDmelon panel, go to App Integrations > SCIM, and click Okta.
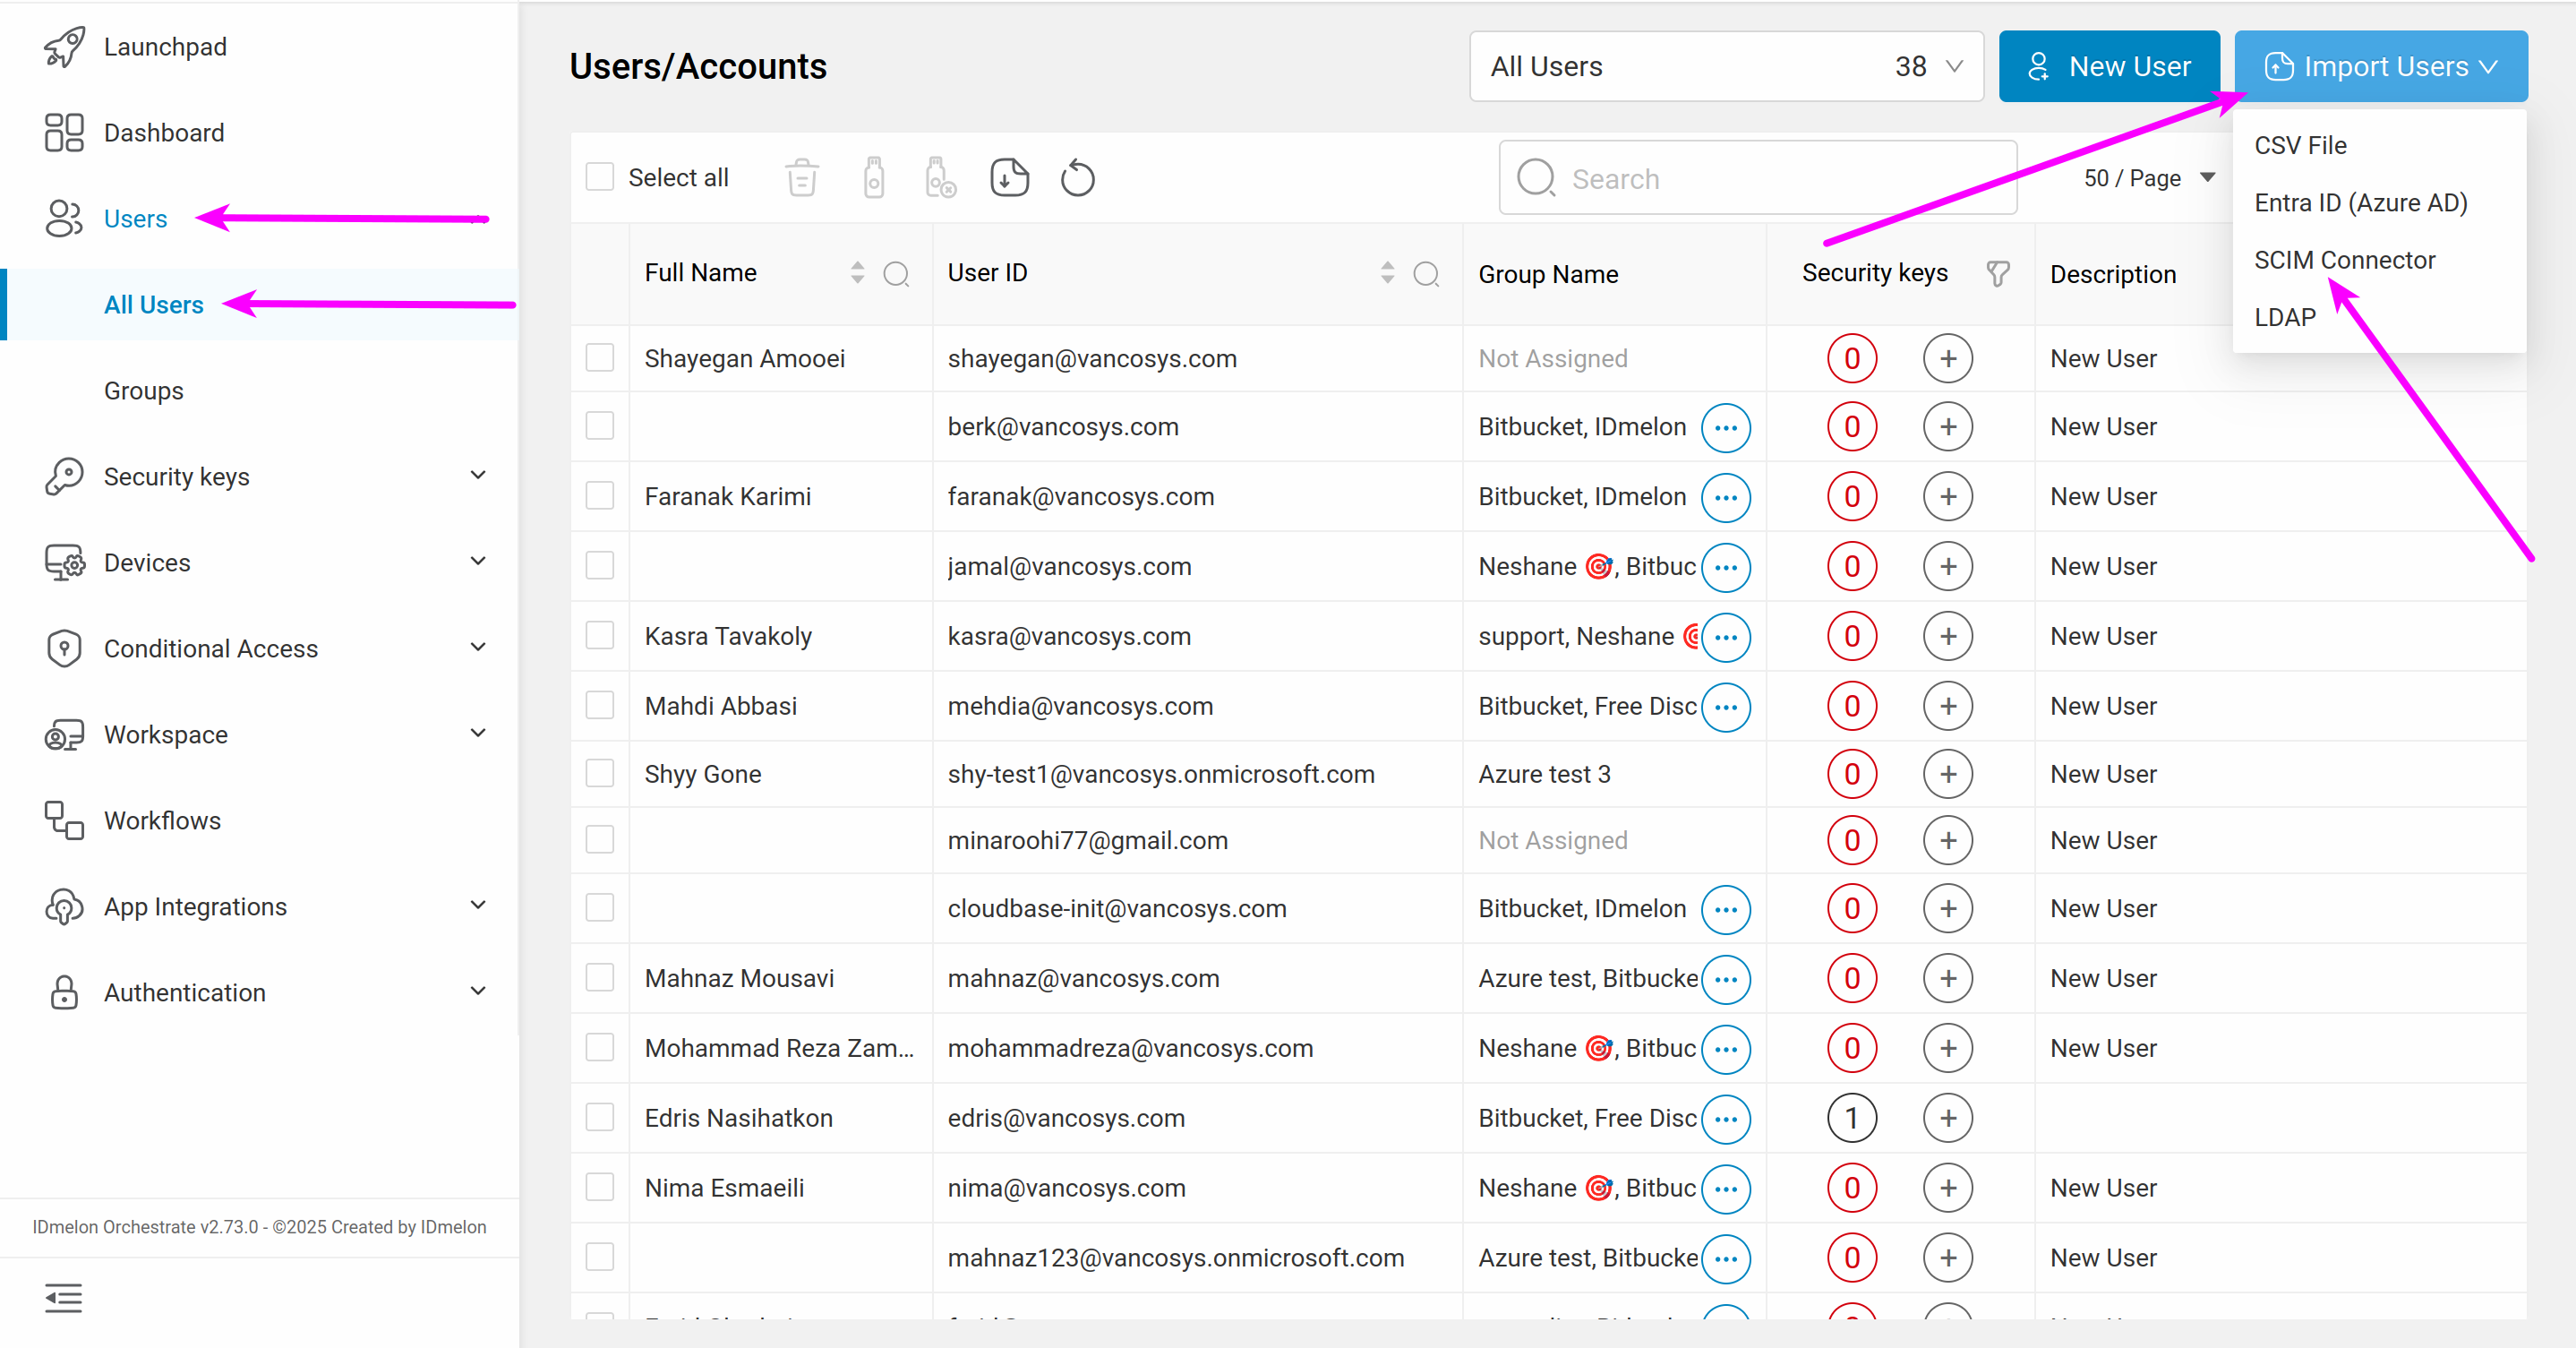
Enable the connection by clicking the switch button.

You can see the SCIM URL and SCIM Token to use in the Okta panel.
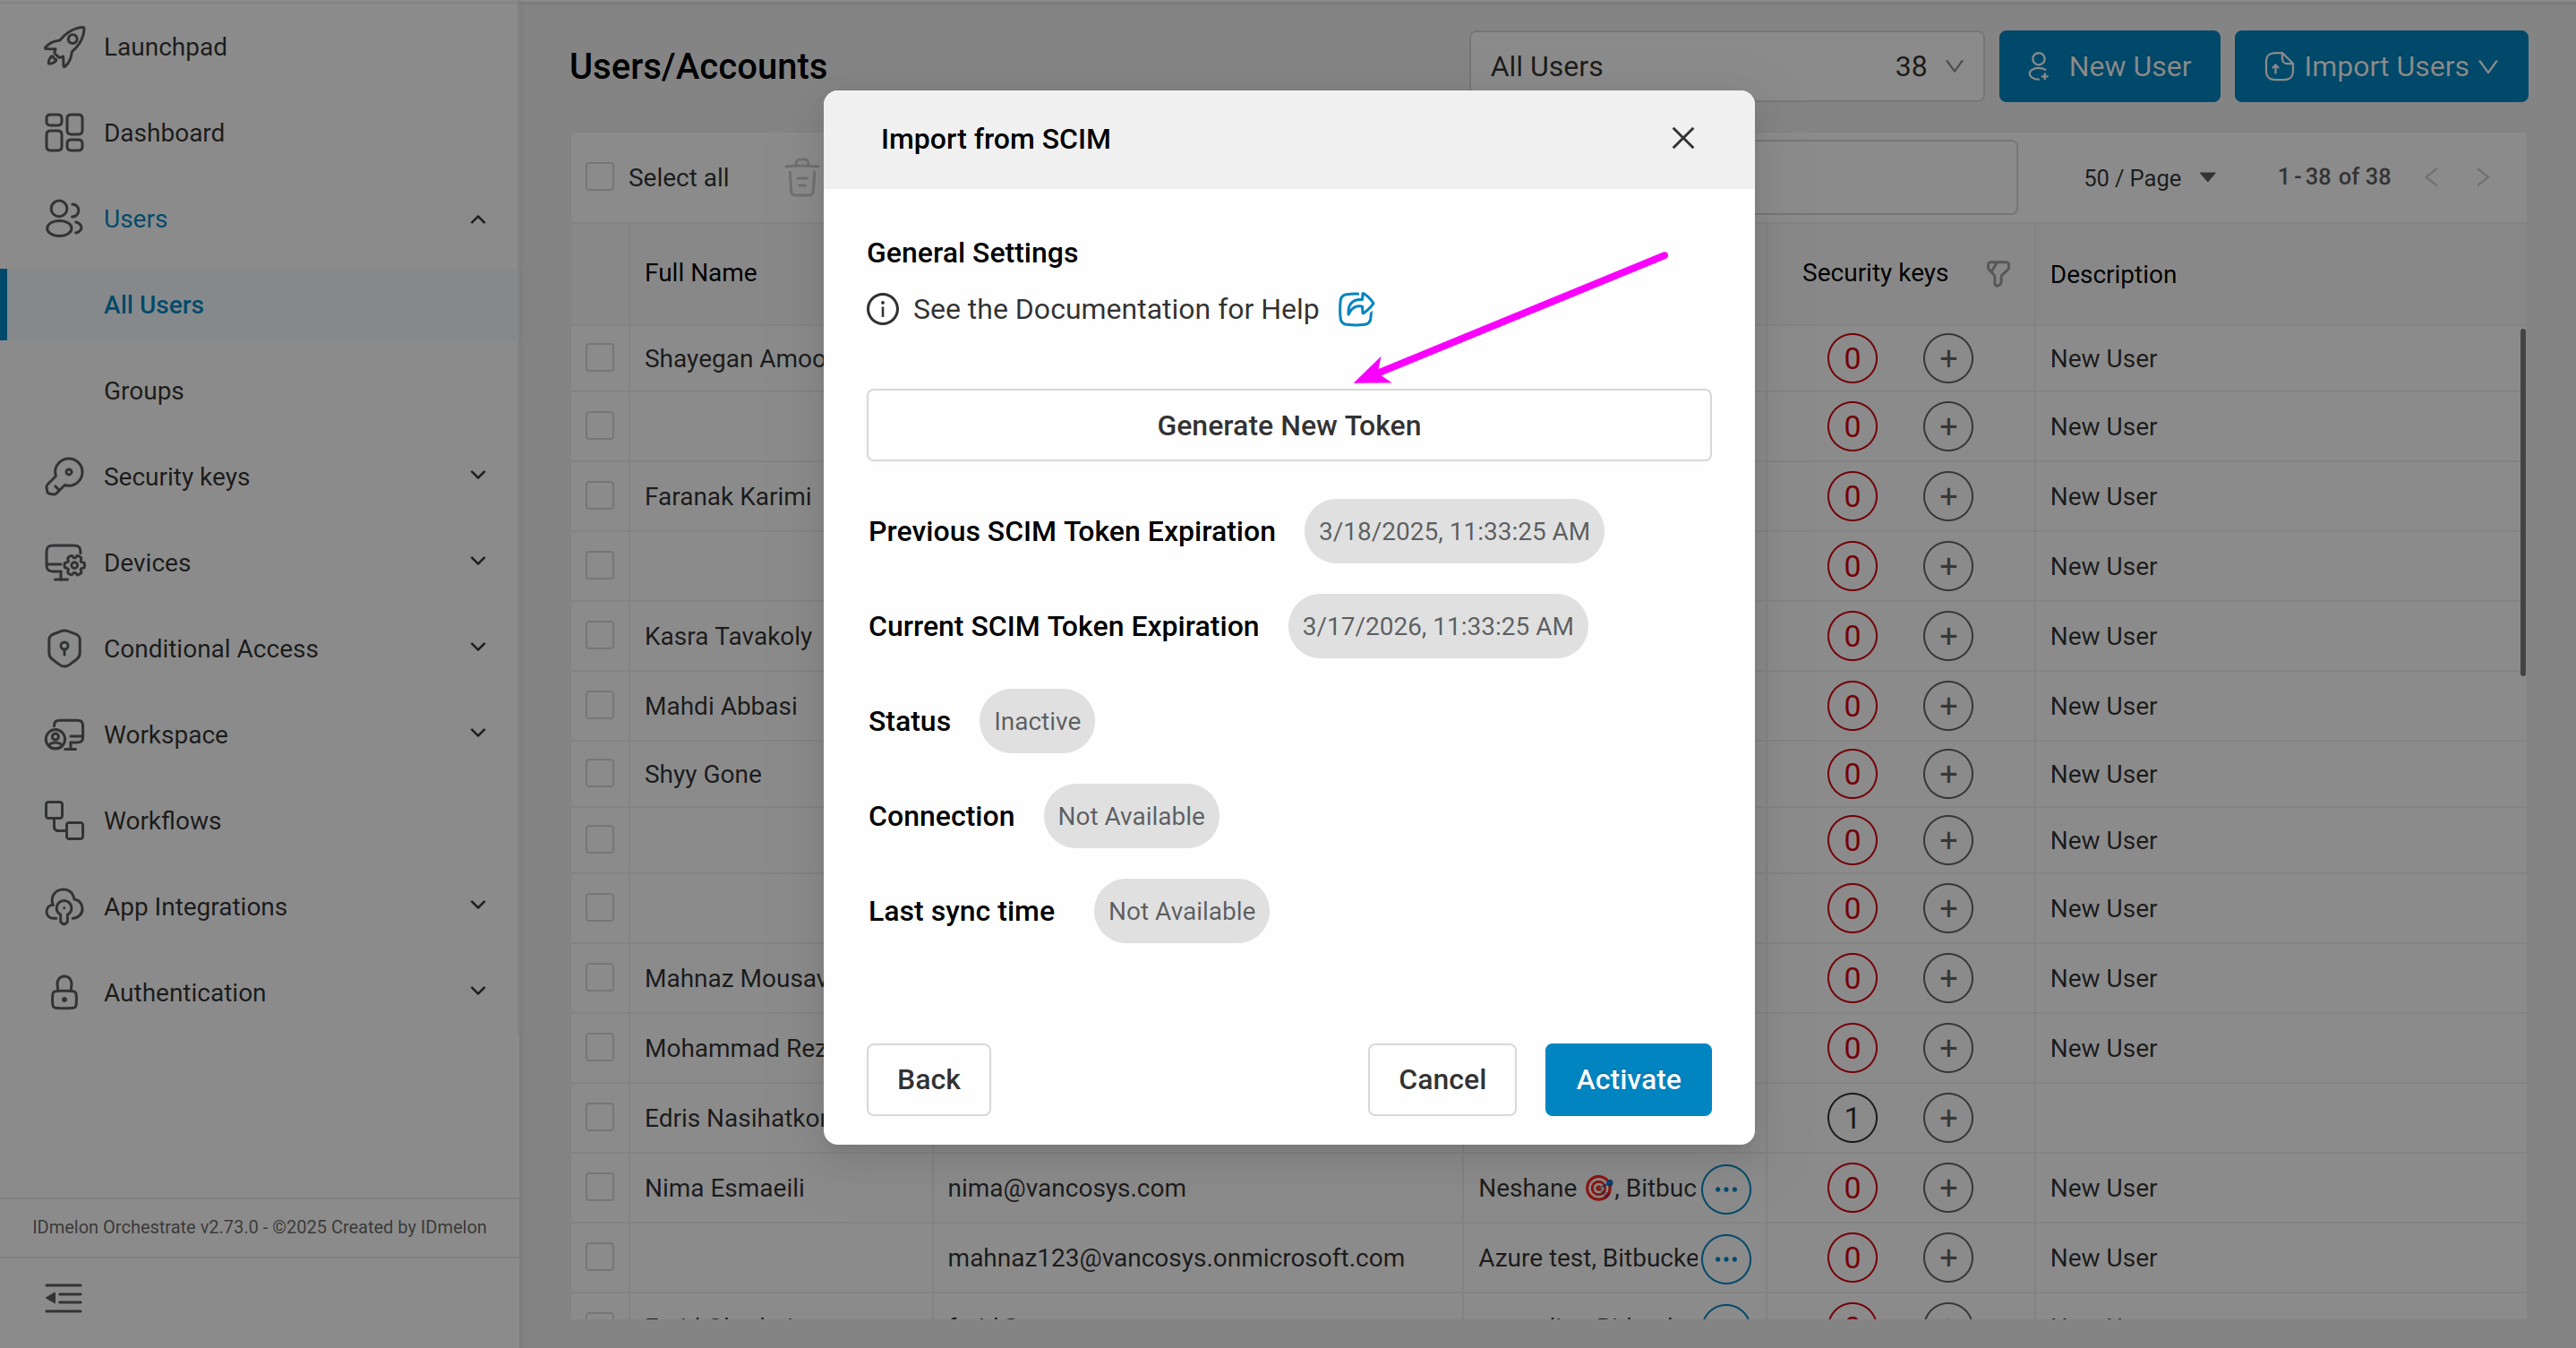
The newly generated token will be shown only once. Make sure to copy and save it. If you created the first token and want to generate a new token, you can click on the New SCIM Token icon.
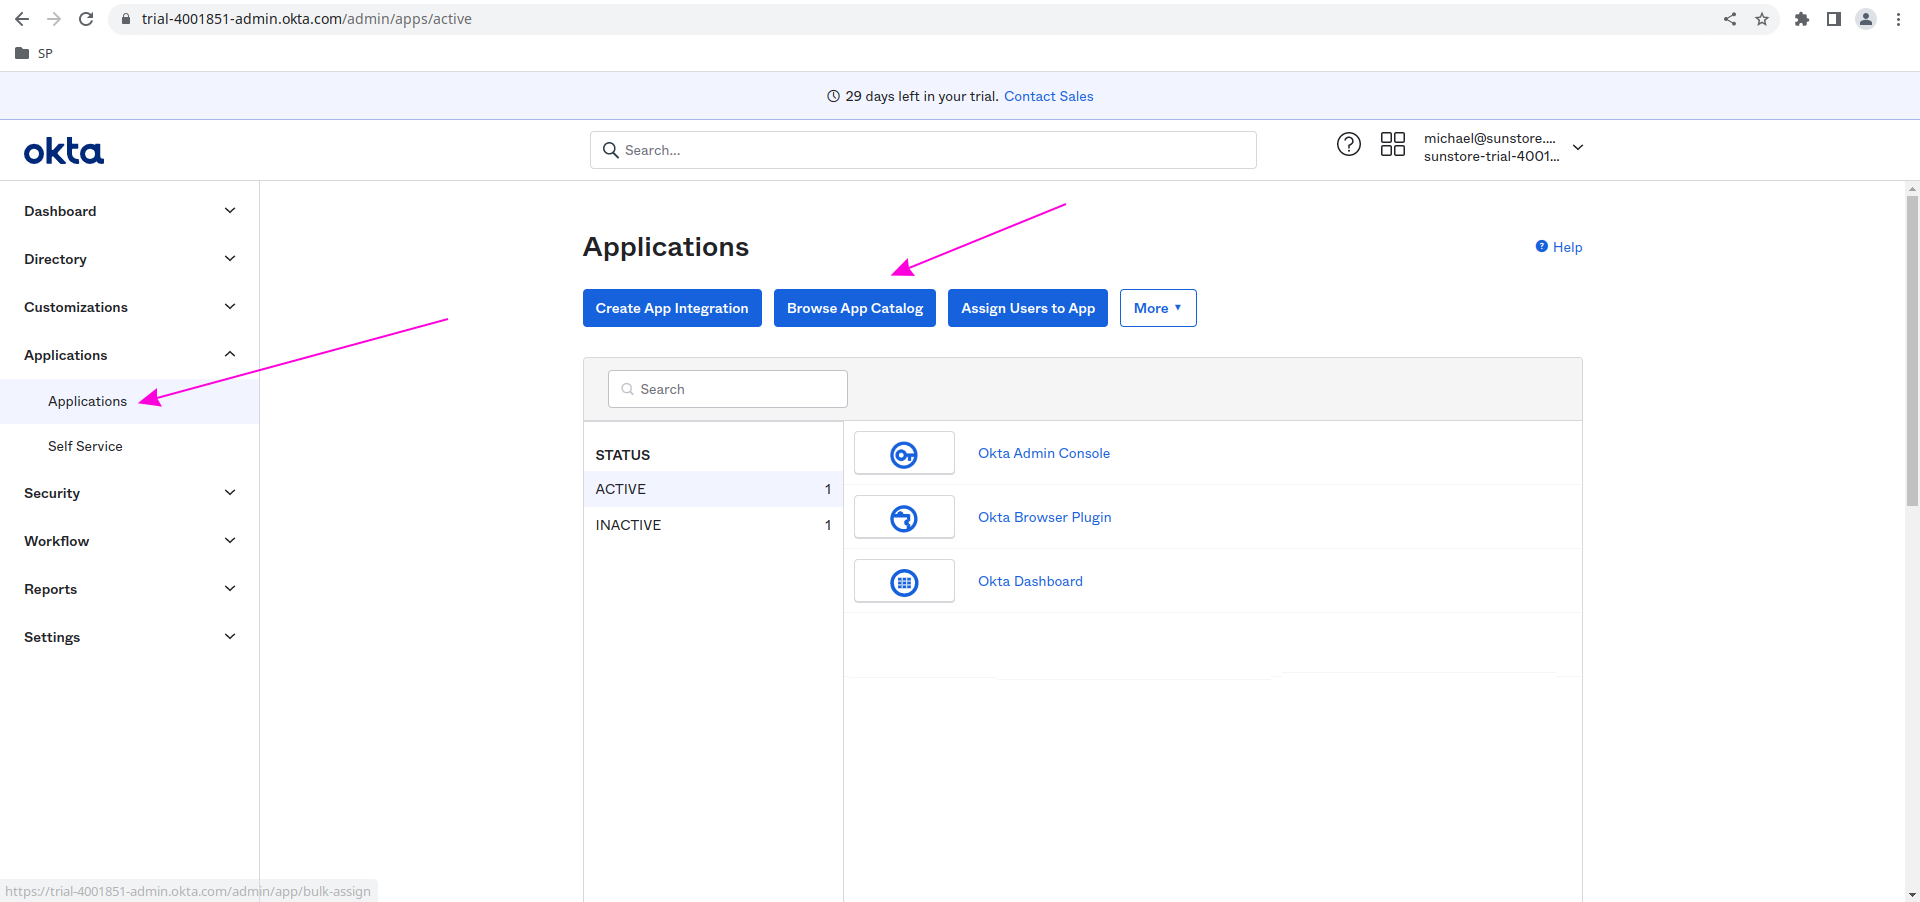
Setup Okta For Provisioning
From the Okta admin panel, click on the Applications menu, and then click on Browse App Catalog.
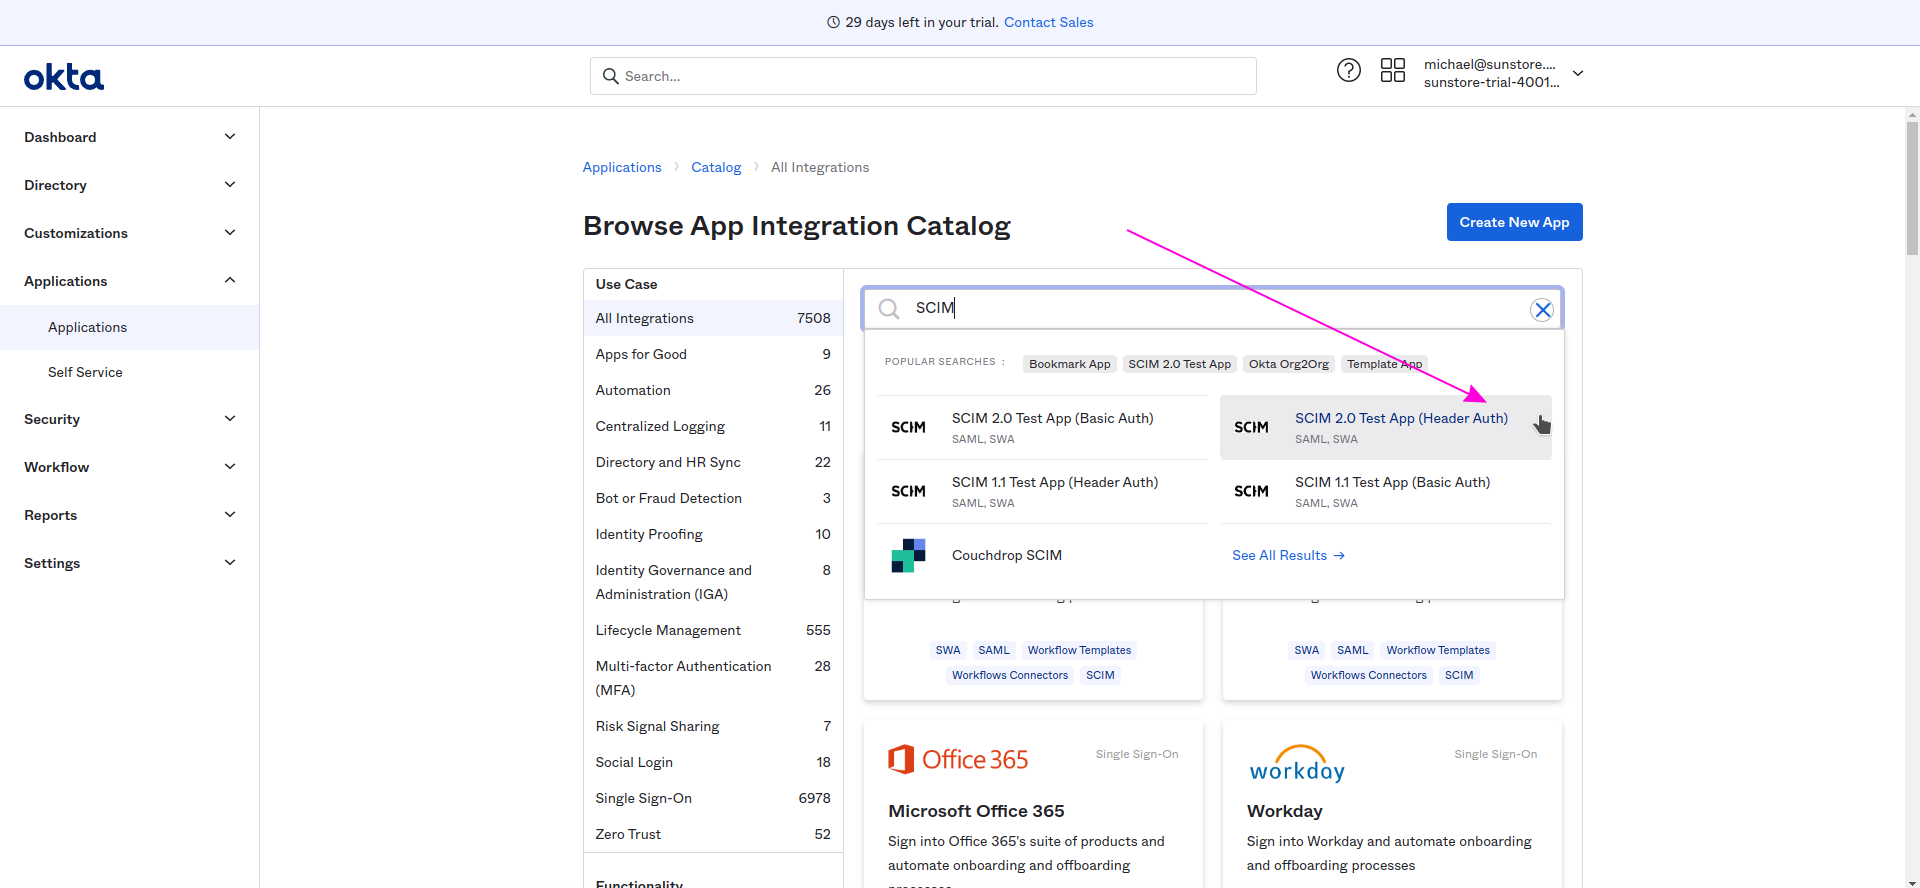
In the Browse App Integration Catalog, search for SCIM, and select the SCIM 2.0 Test APP (Header Auth).
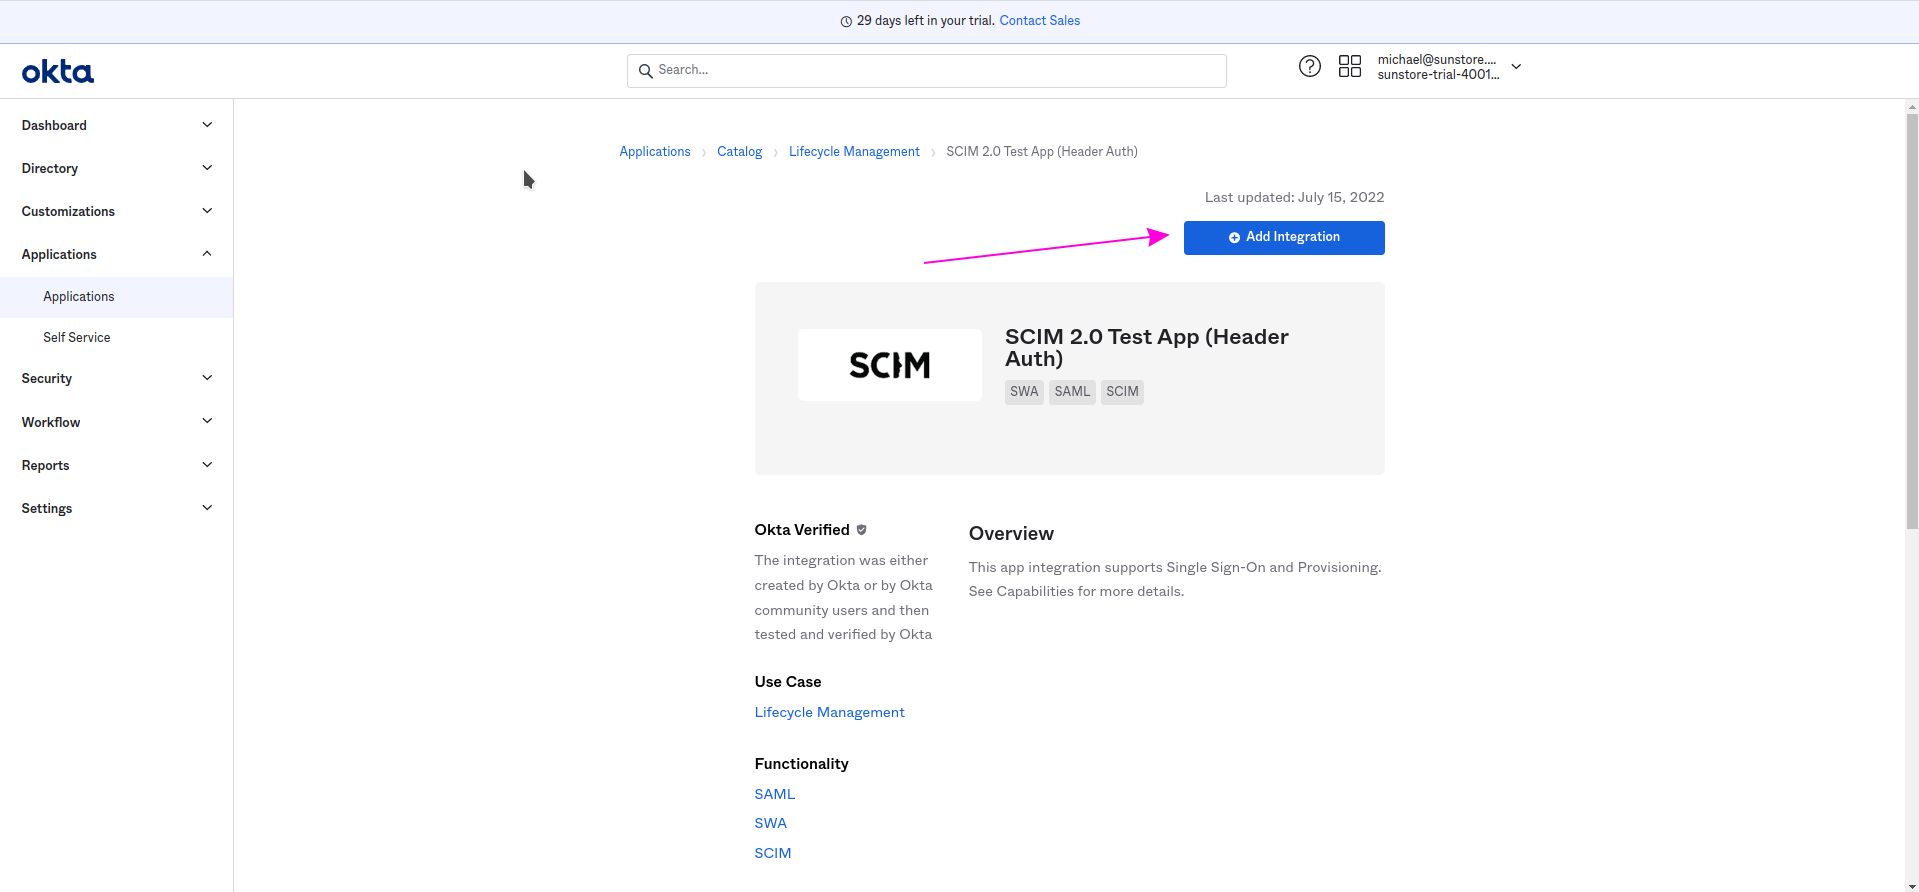
Then from the SCIM 2.0 Test APP (Header Auth) page, click on Add Integration.
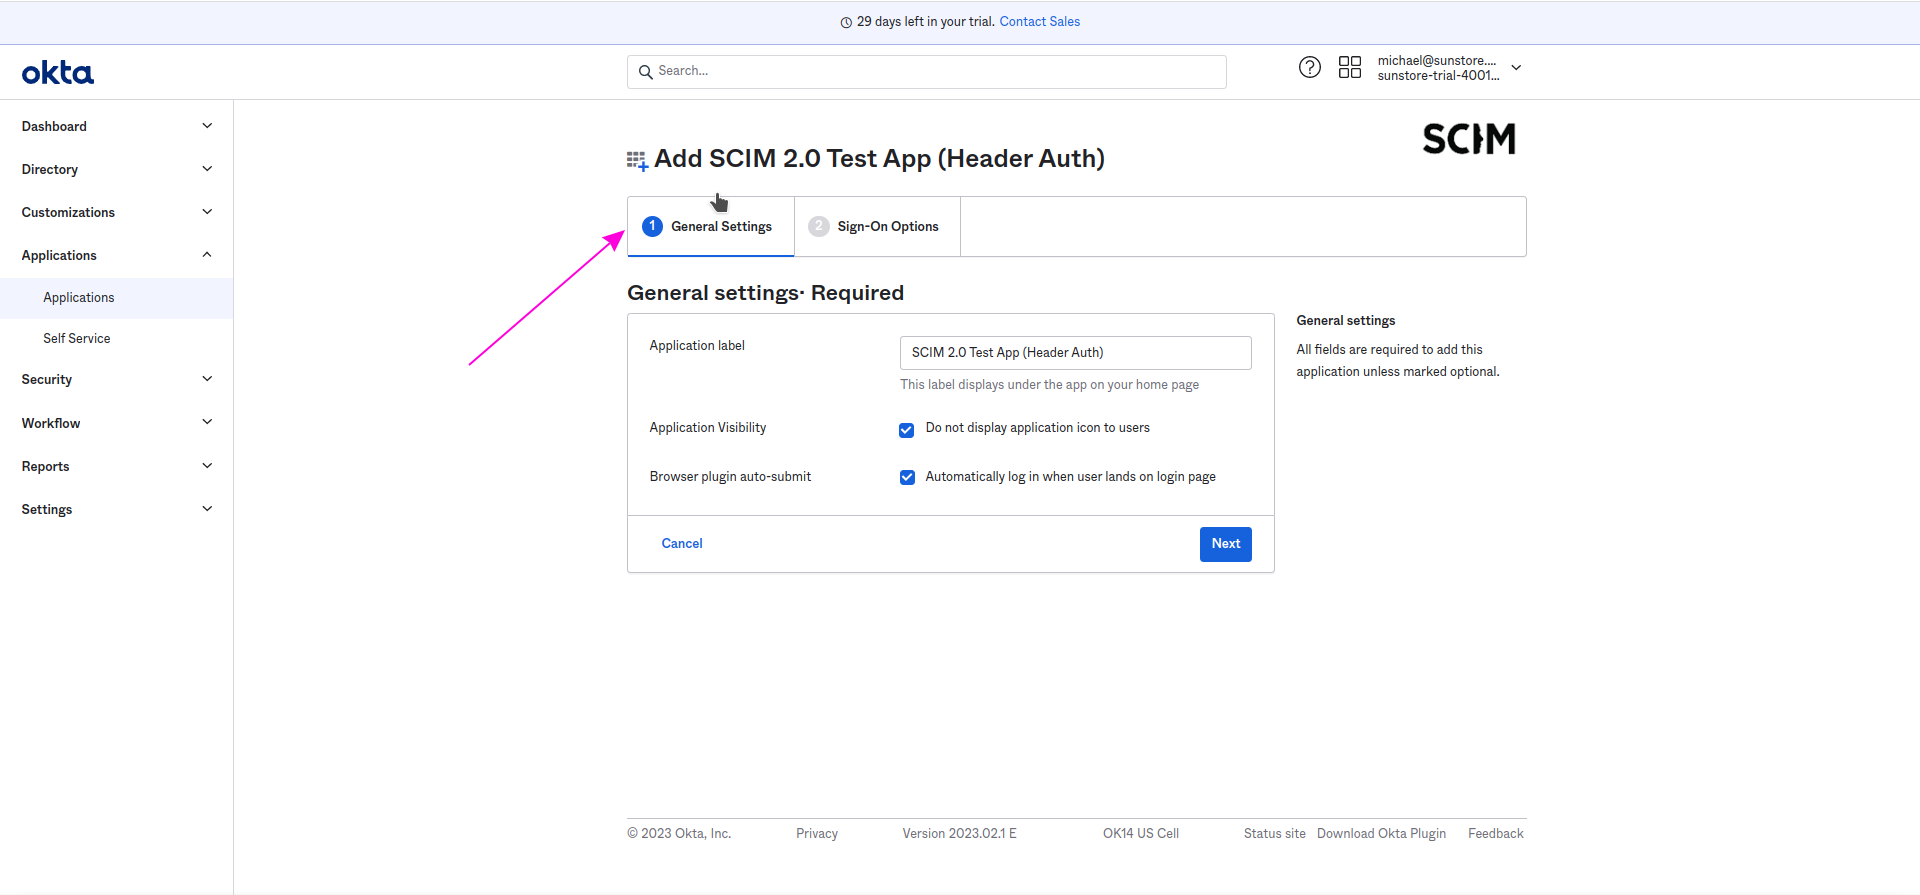
Click on General Settings and in the Application label field, enter SCIM 2.0 - IDmelon.
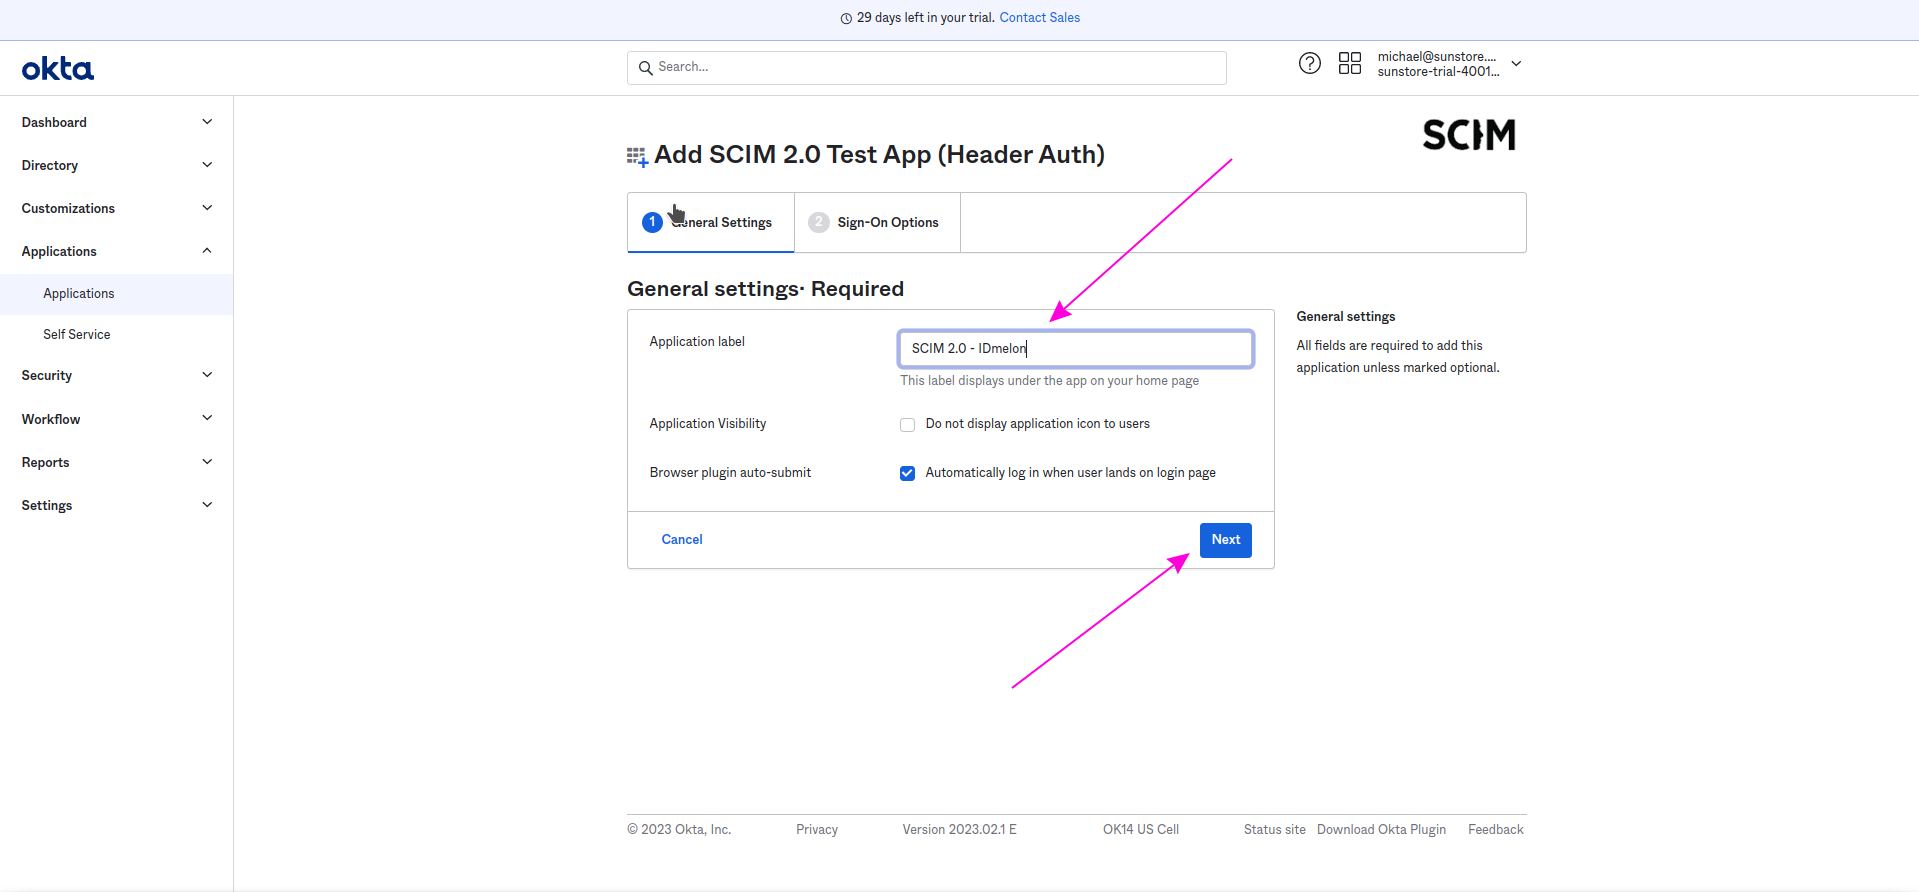
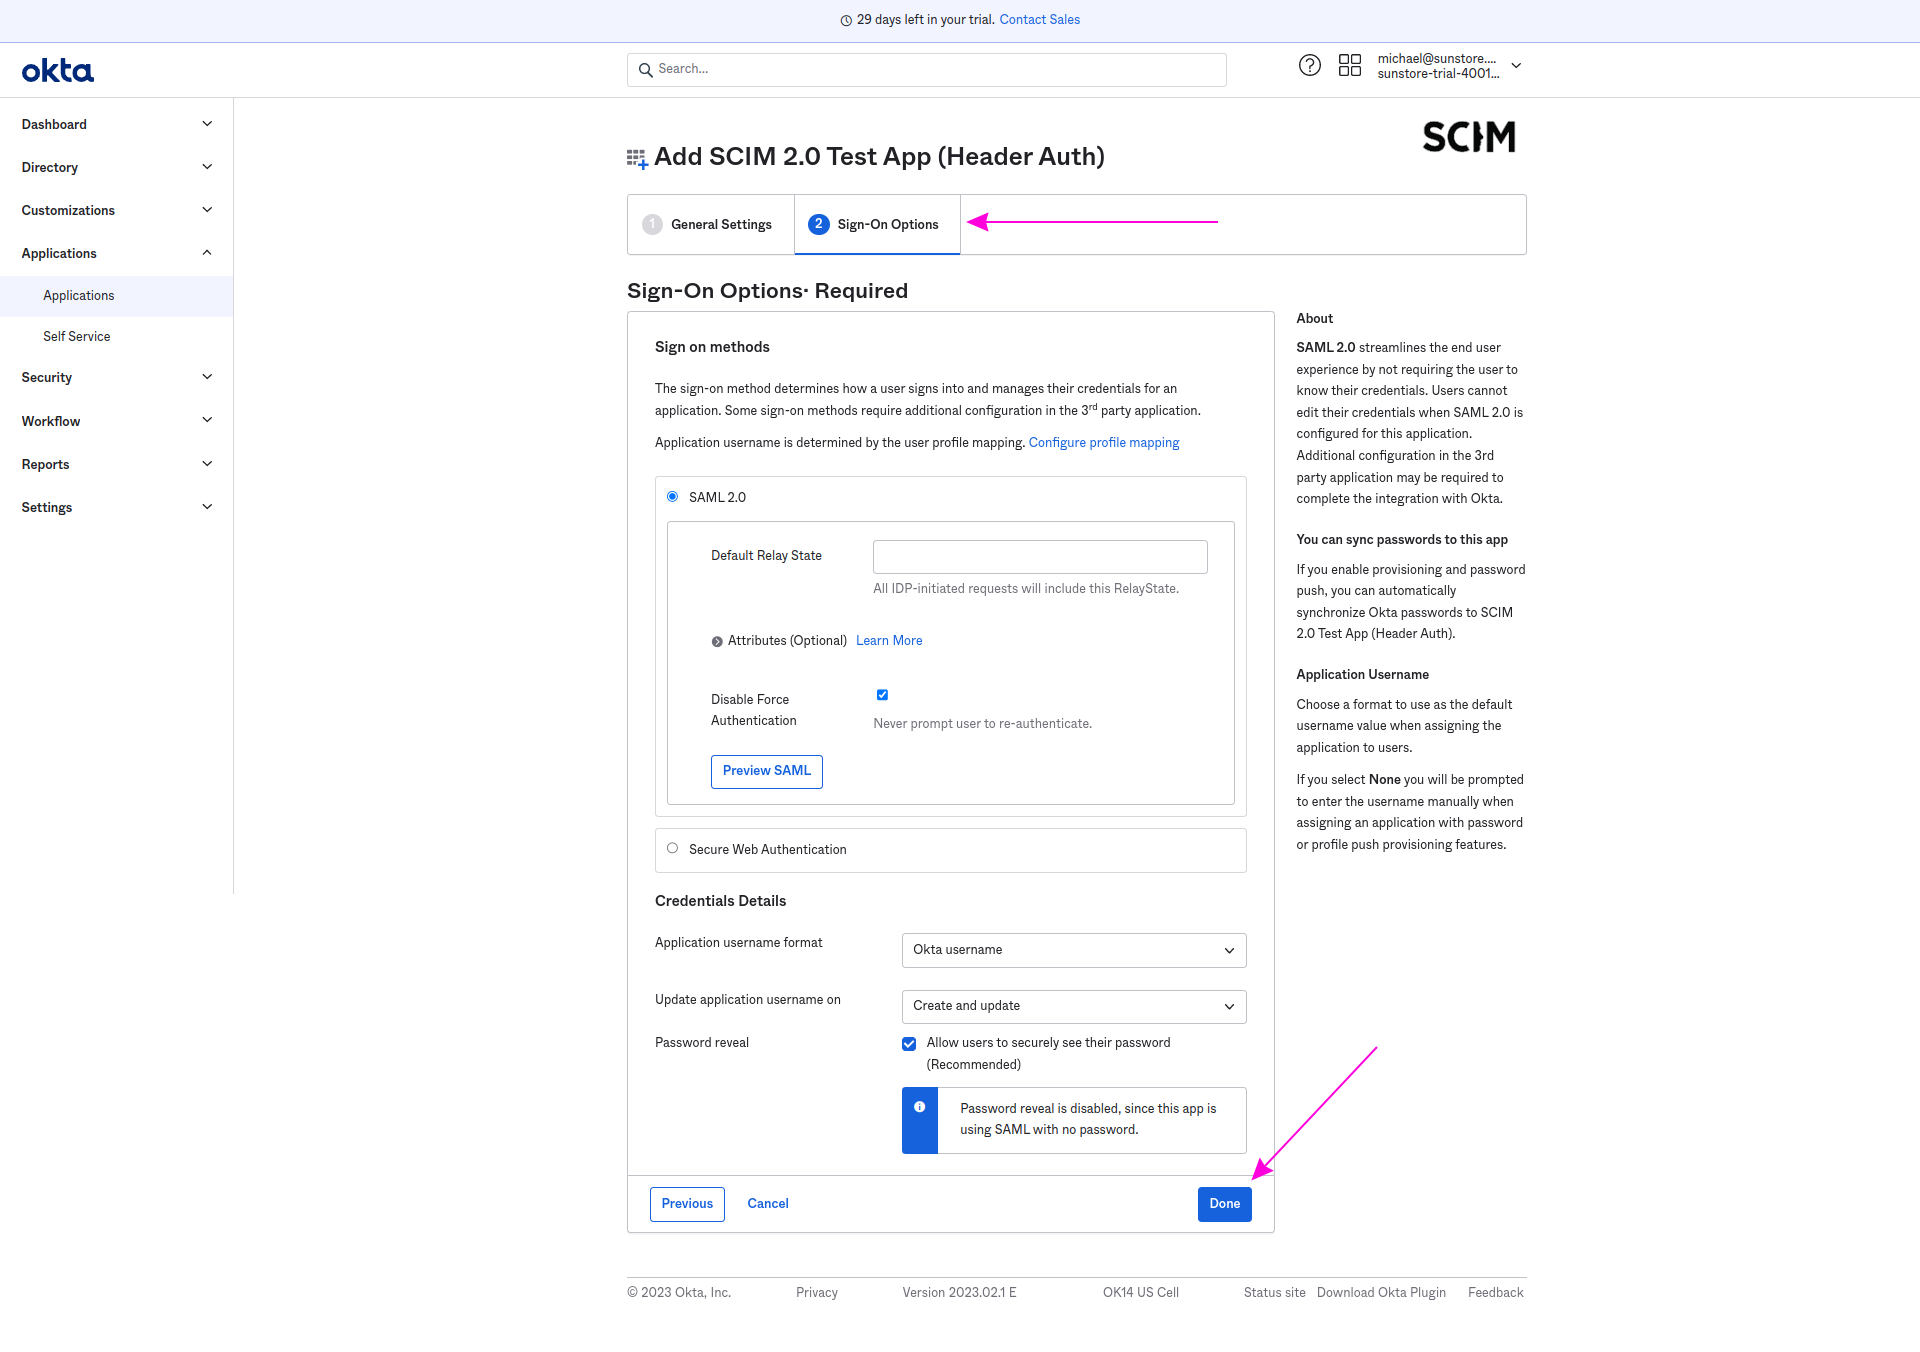
Go to the next Sign-On Options and click the Done button.
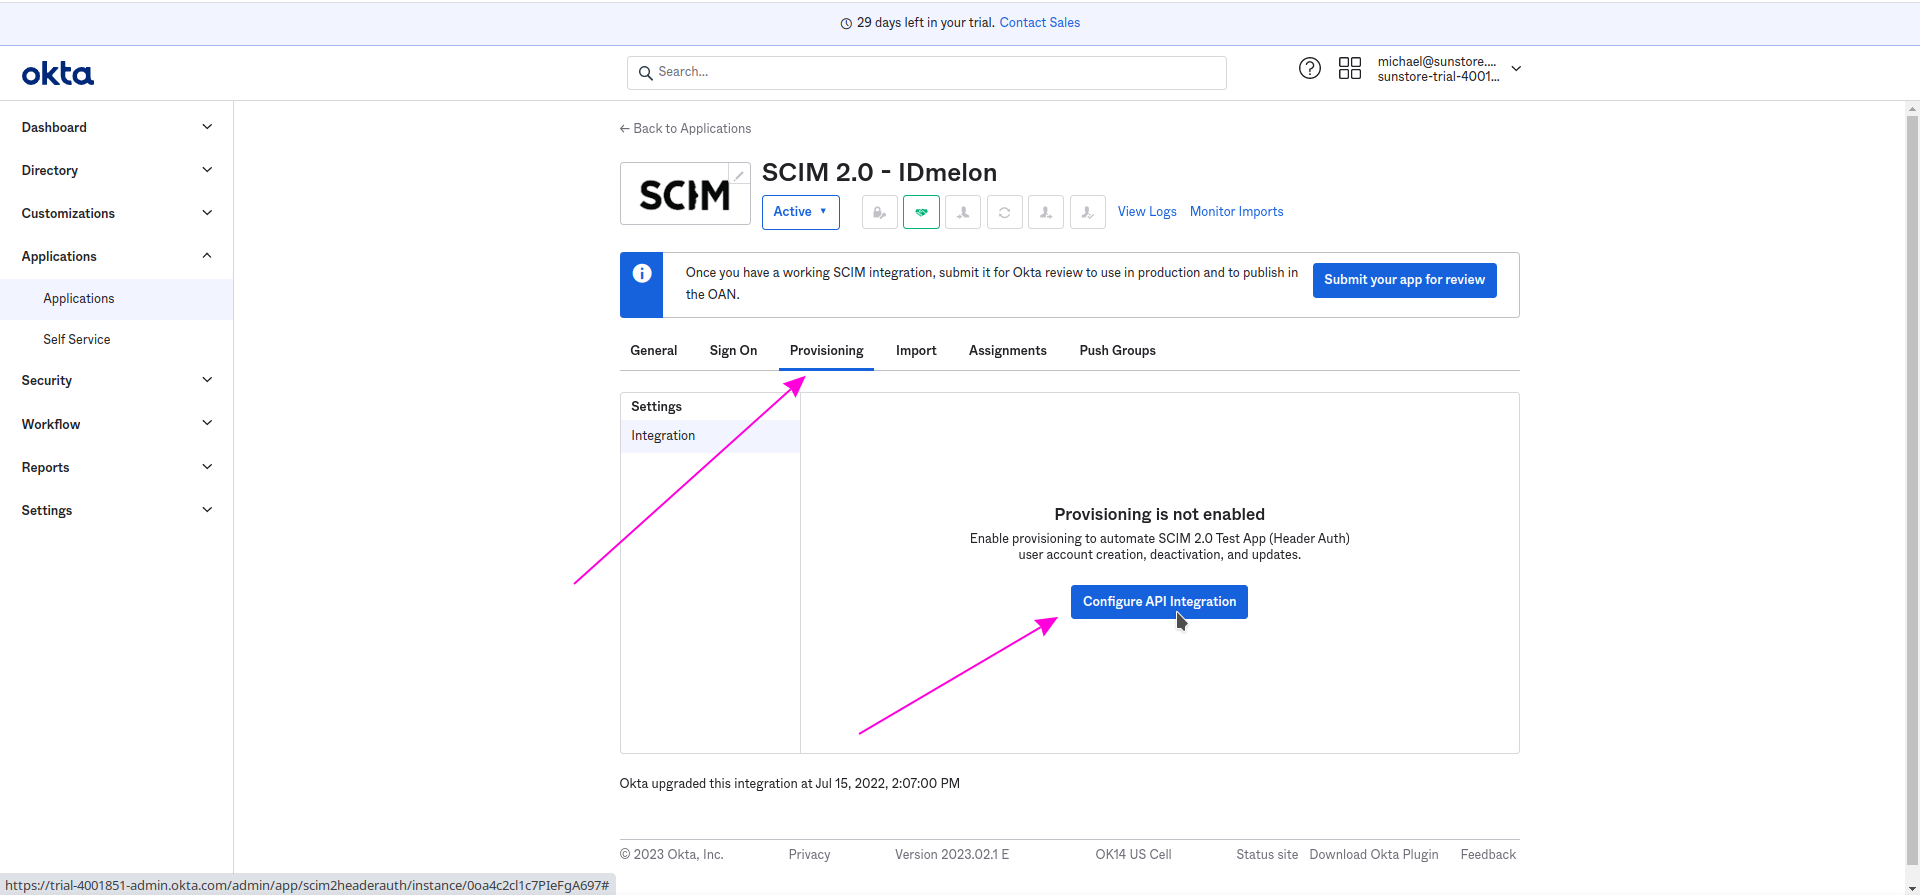
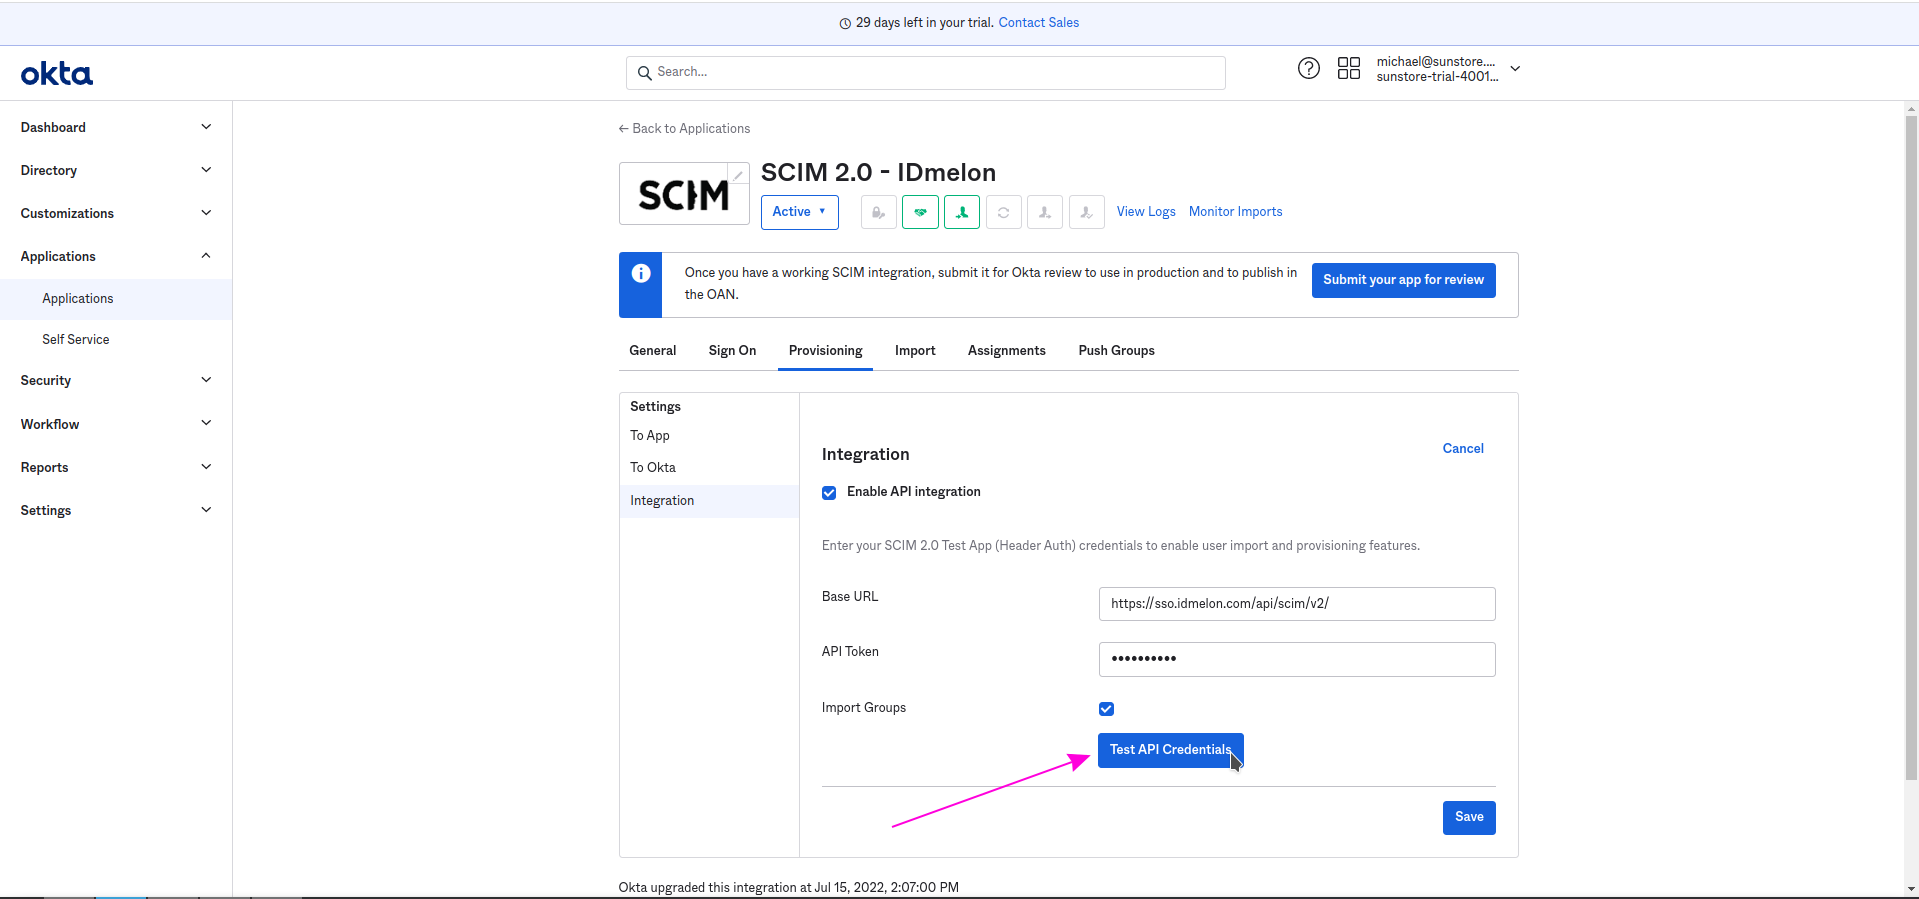
Now go to the Provisioning tab of the created app, and click on Configure API Integration.
Click Enable API Integration and fill in the Base URL and API Token based on the values received from the IDmelon Panel.
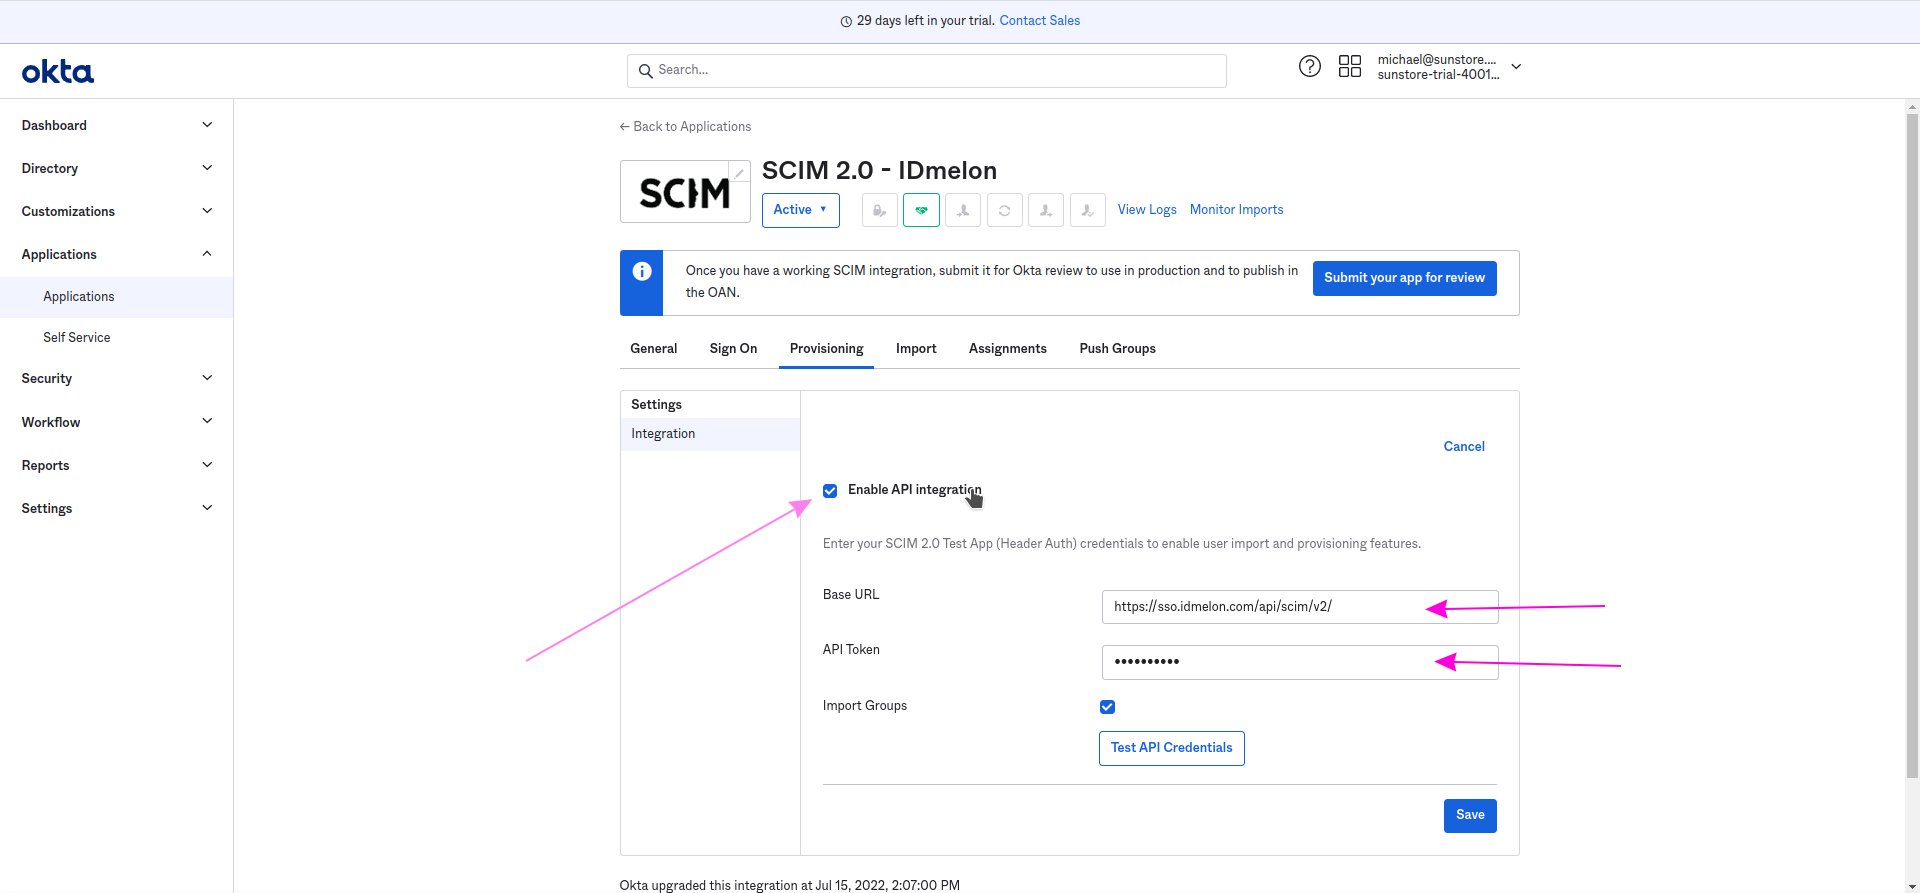
Click on the Test API Credentials button.
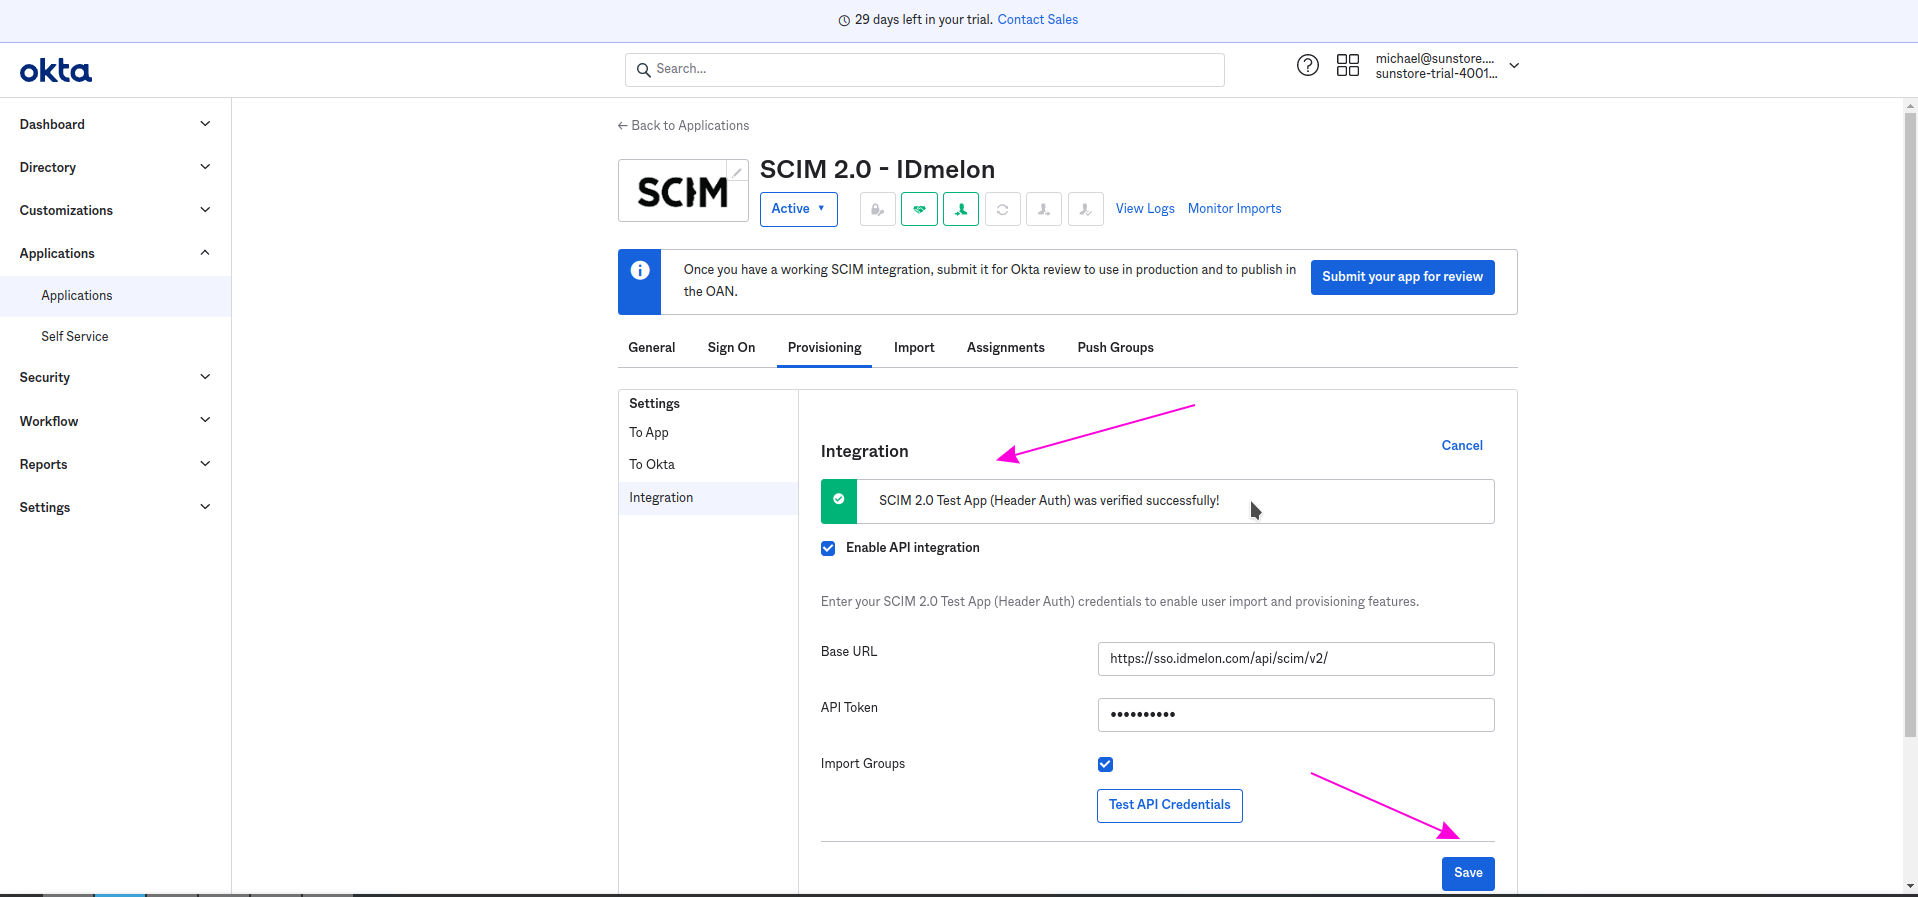
You should see a success message. Now click the Save button.
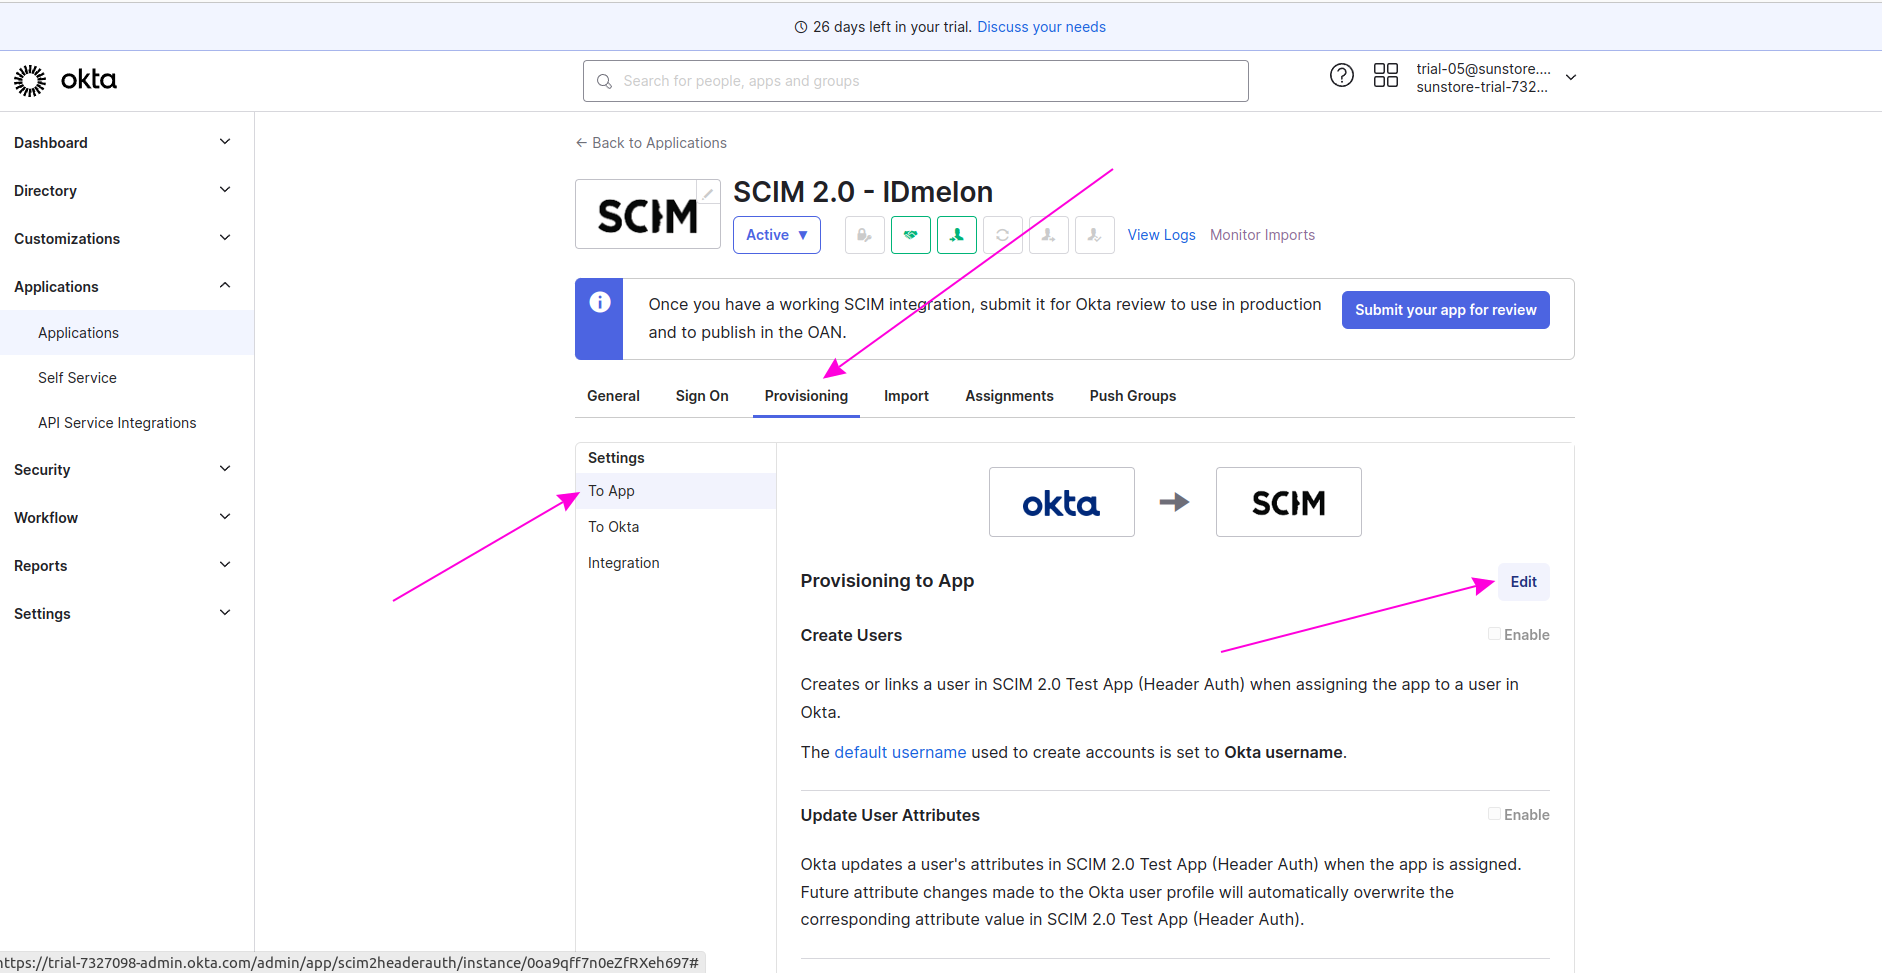
Go to the Provisioning tab and select the To App settings from the sidebar menu, then click the Edit button.
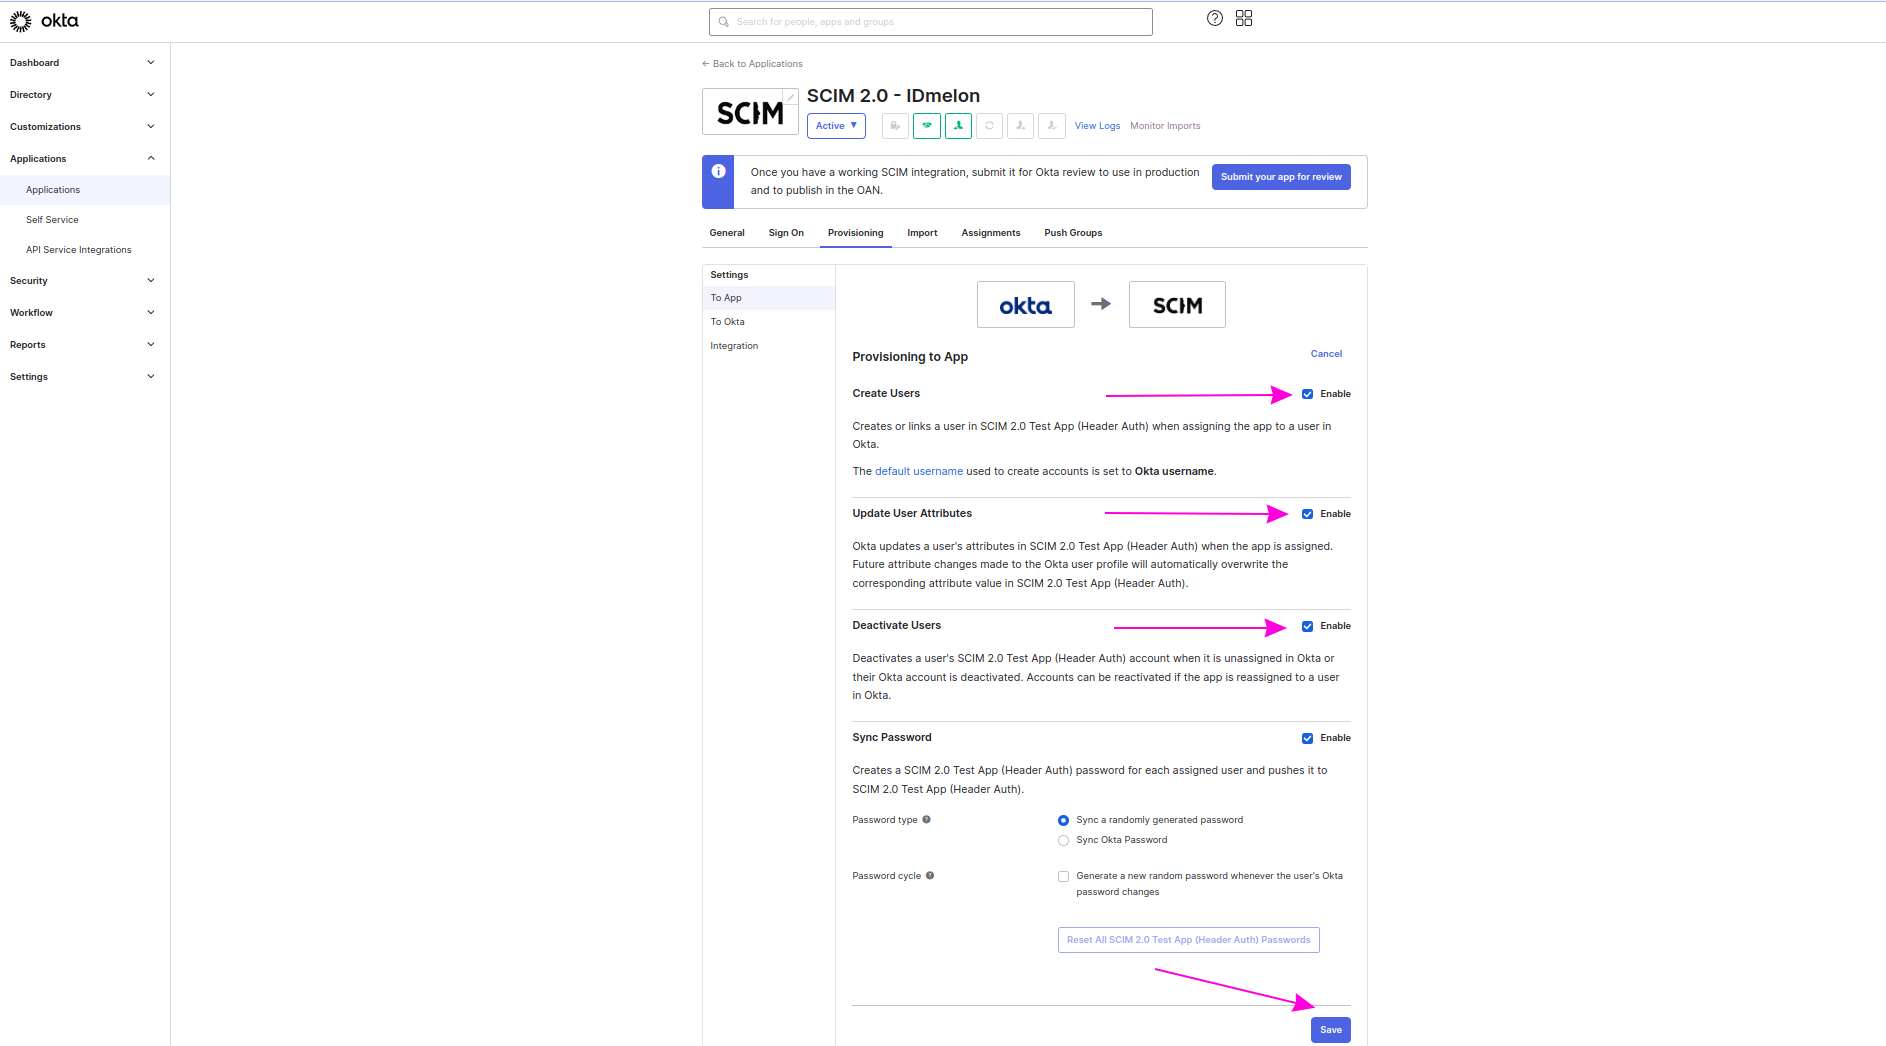
Enable the checkboxes for Create Users, Update User Attributes, and Deactivate Users, and then click the Save button.
Sync Users of One Group
To sync all users inside a group:
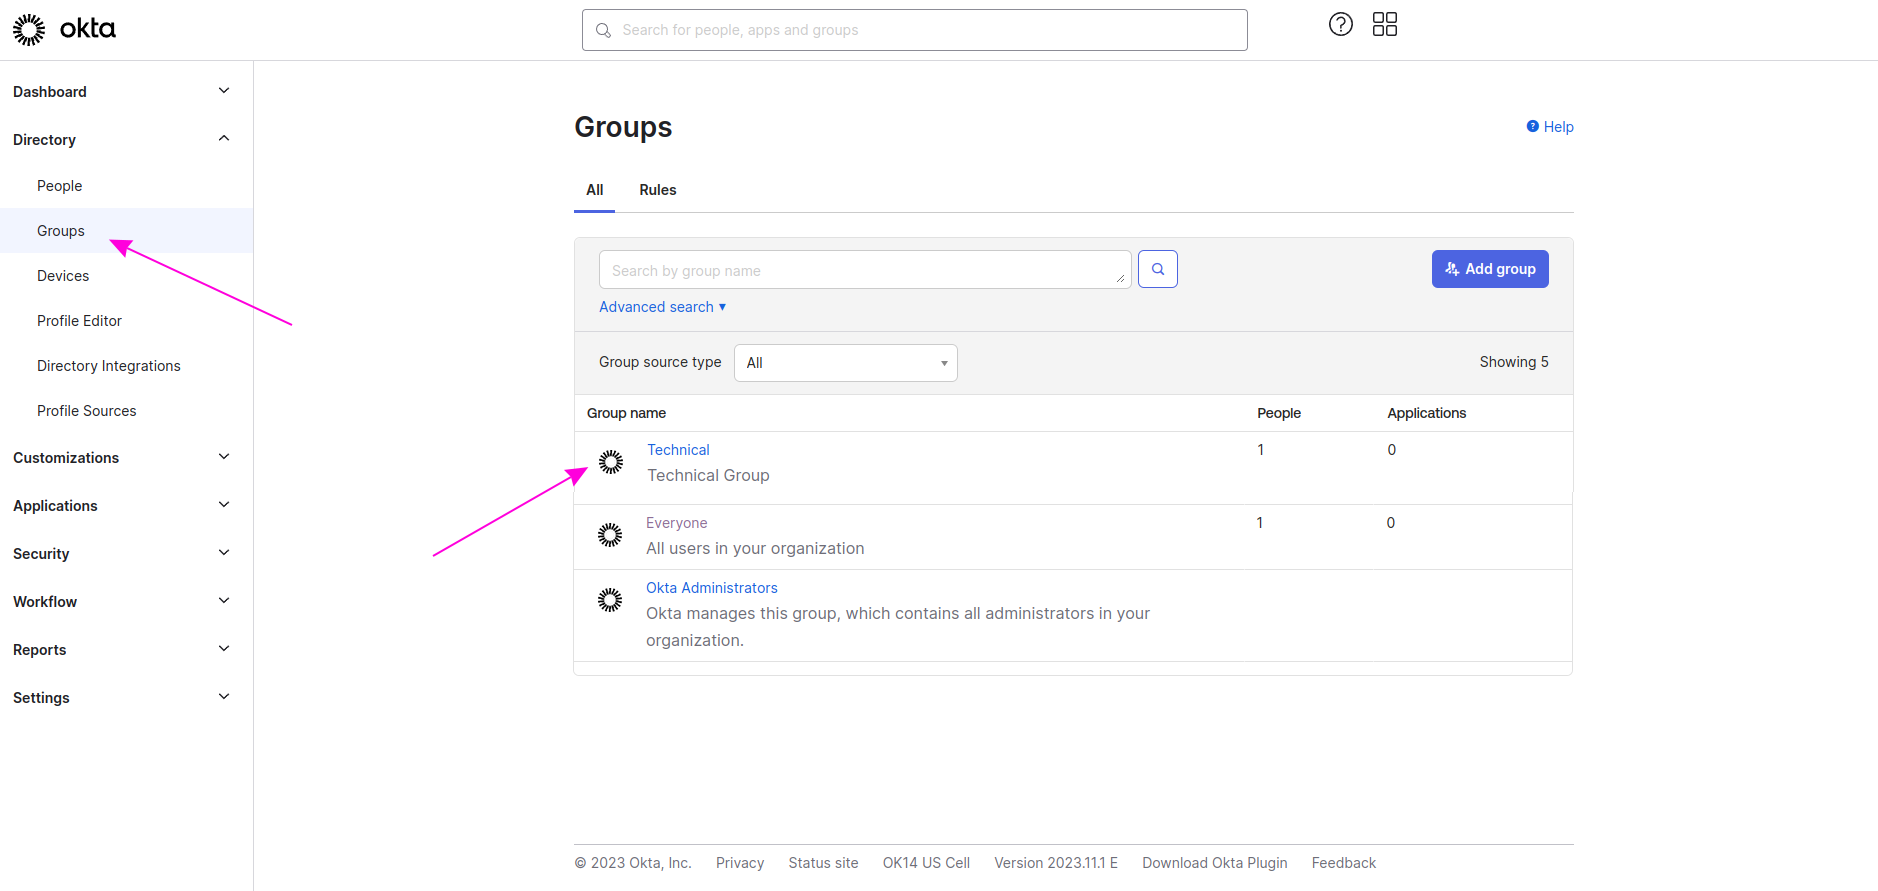
Go to the Groups directory and select the group you want to sync.
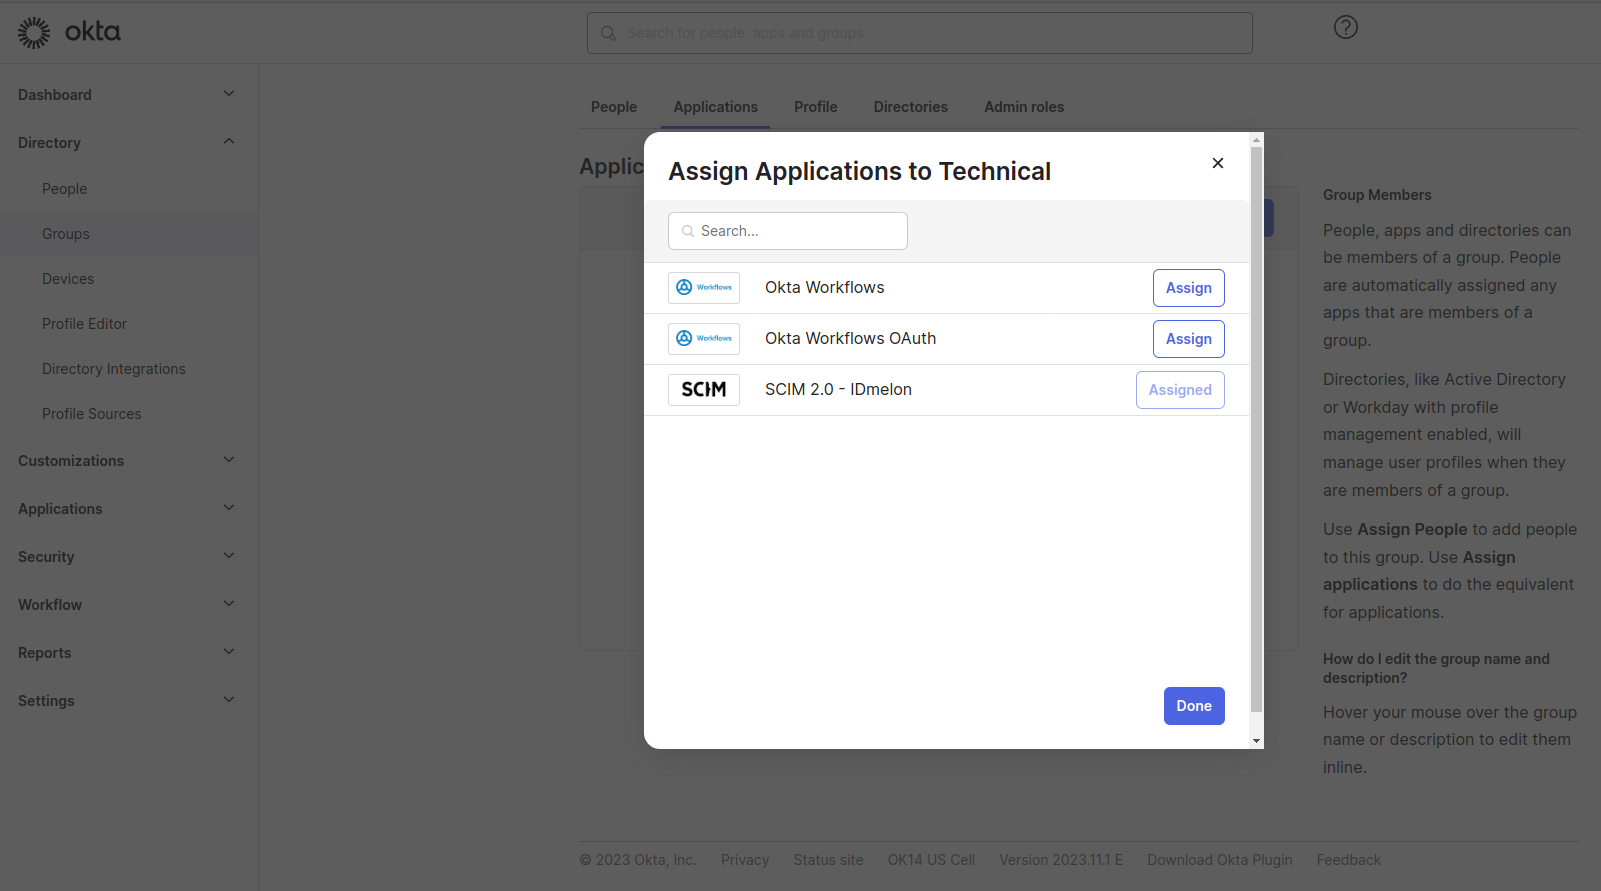
Go to the Applications tab and click on the Assign Application button.
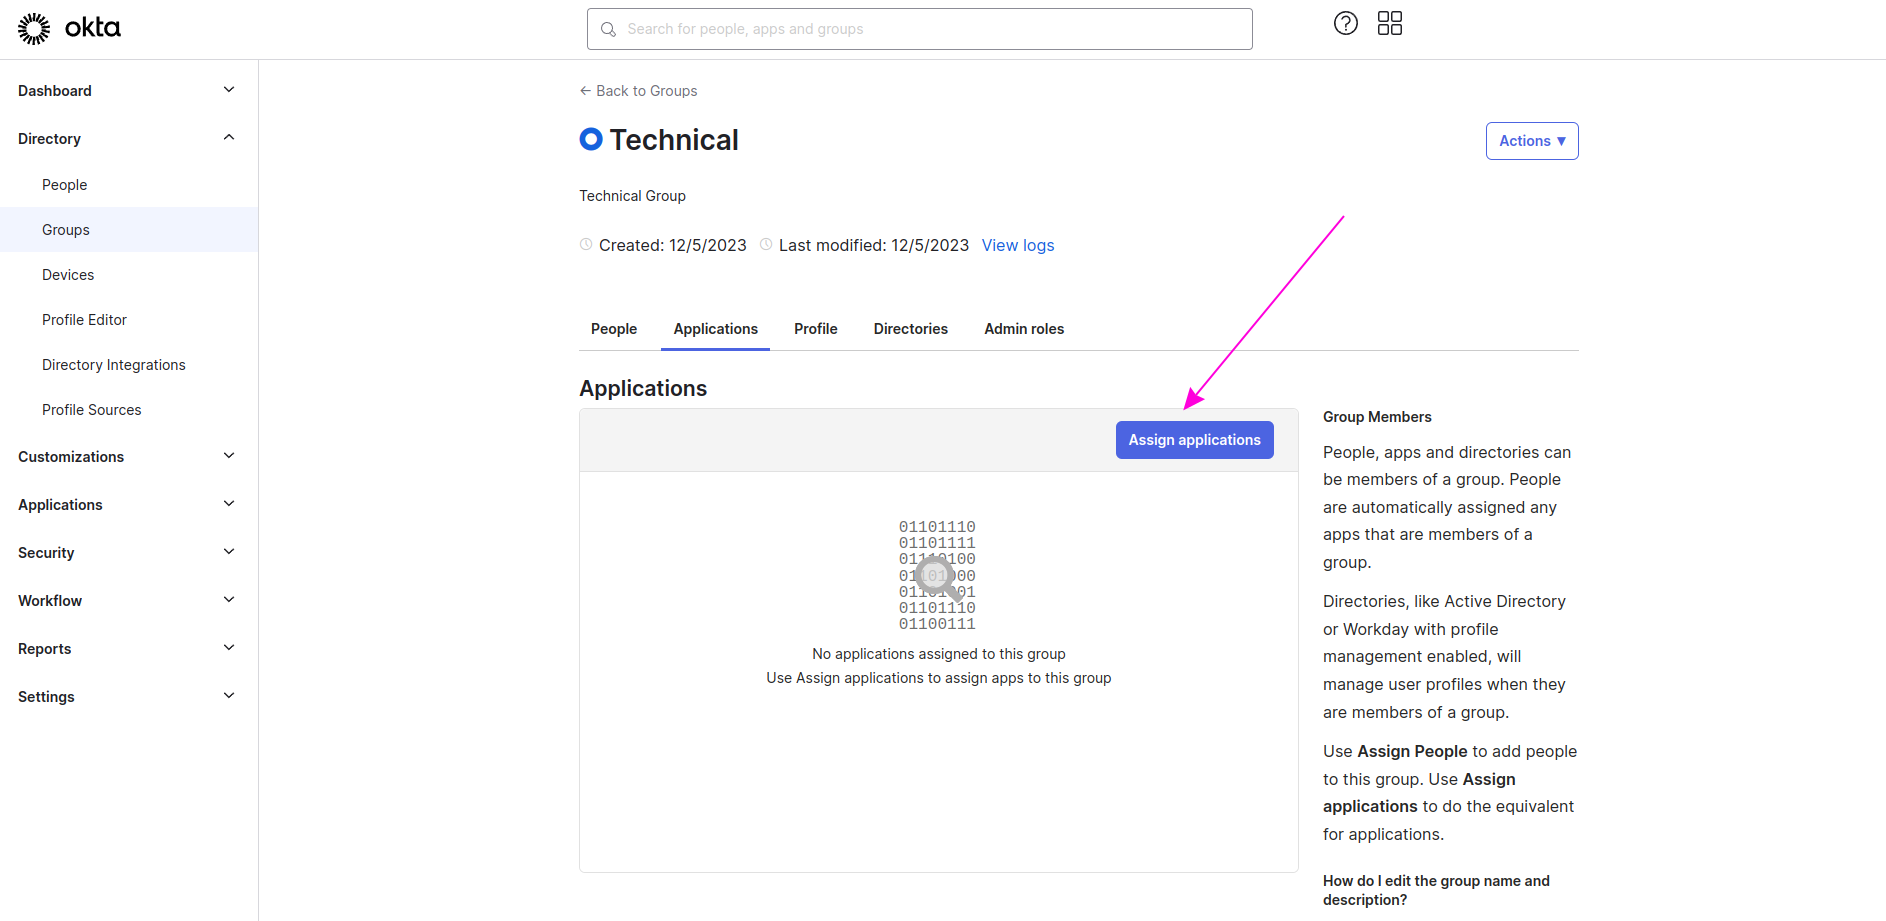
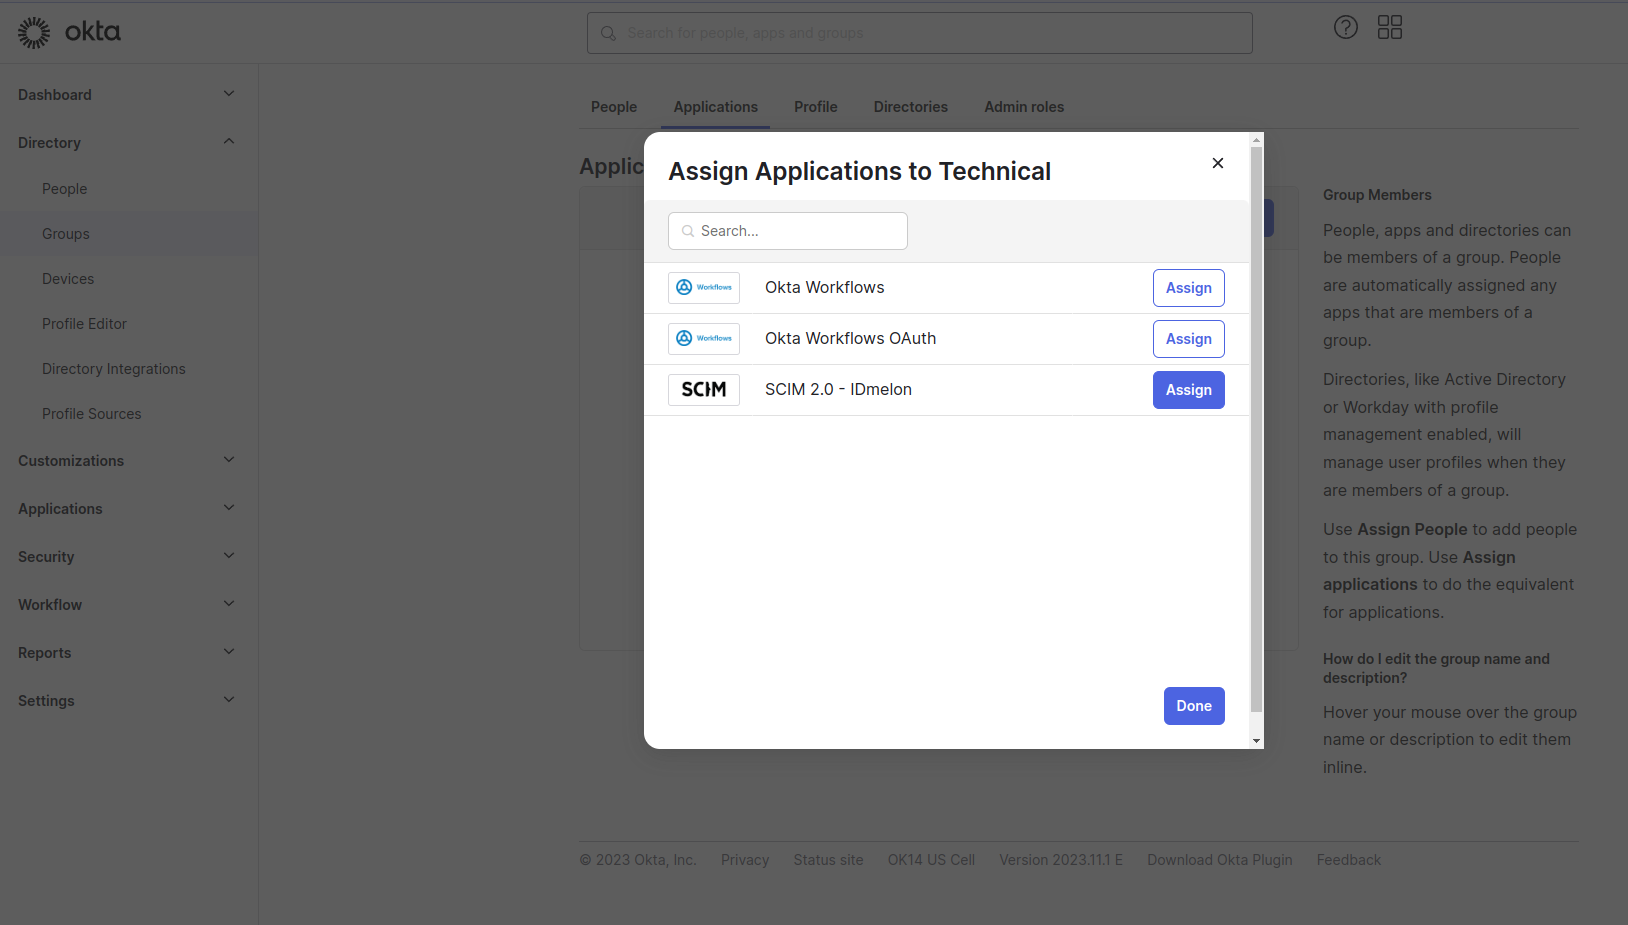
From the list, click on the Assign button for the SCIM 2.0 - IDmelon application.
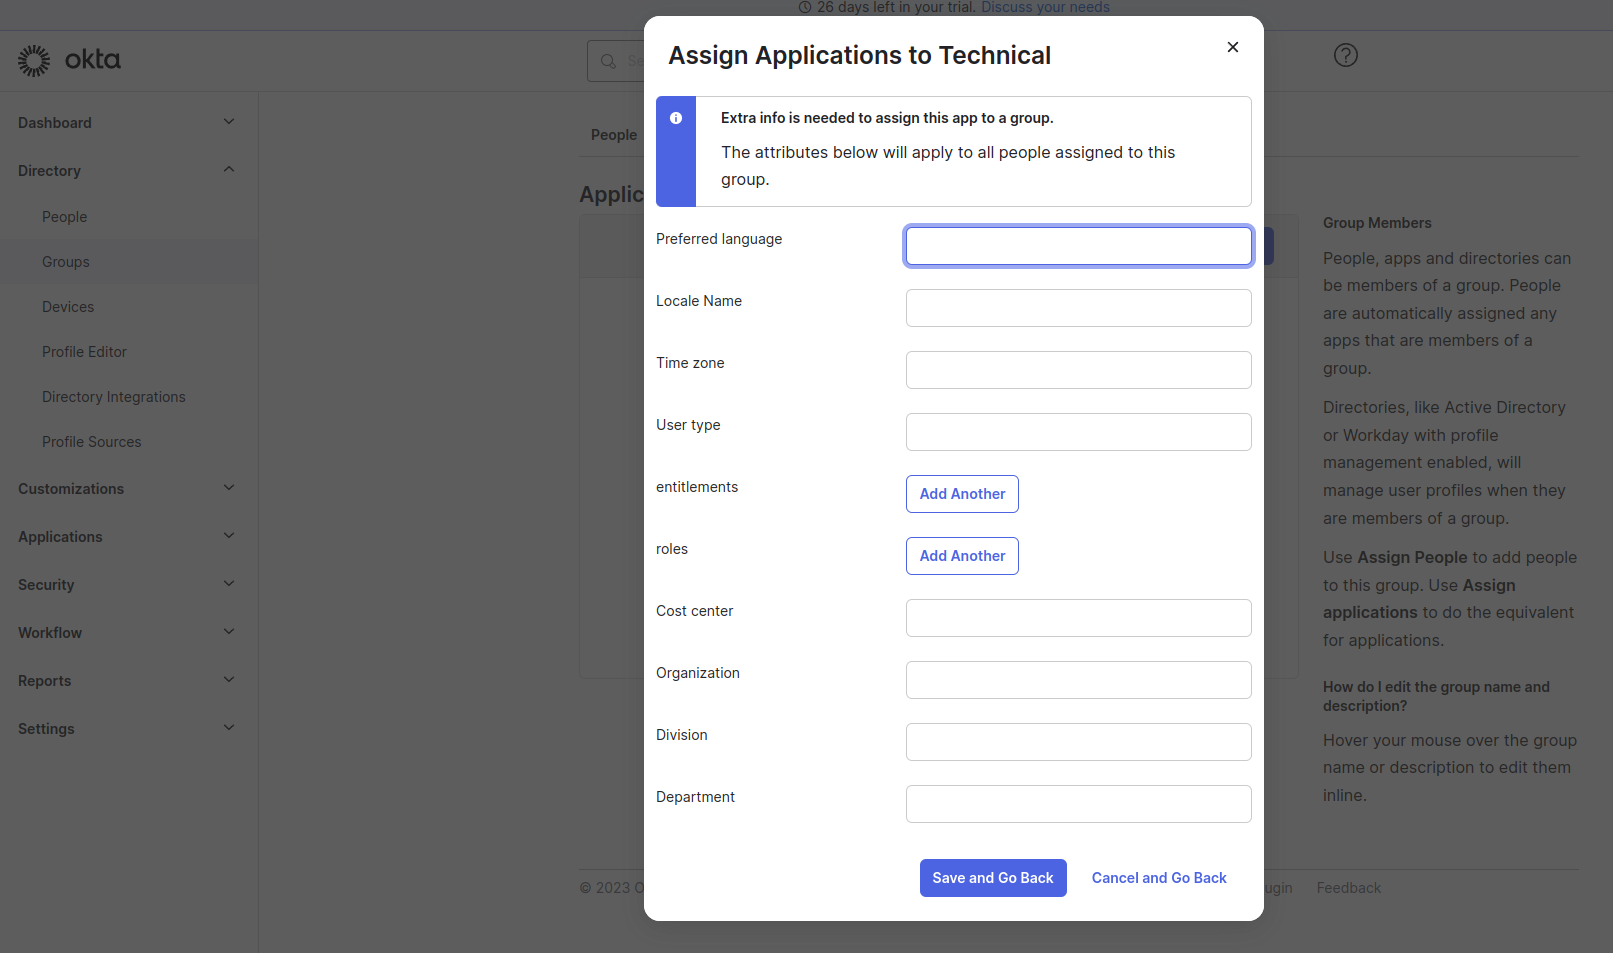
Click the Save and Go Back button and then the Done button.
Now every user or new user in this group will be synced automatically.
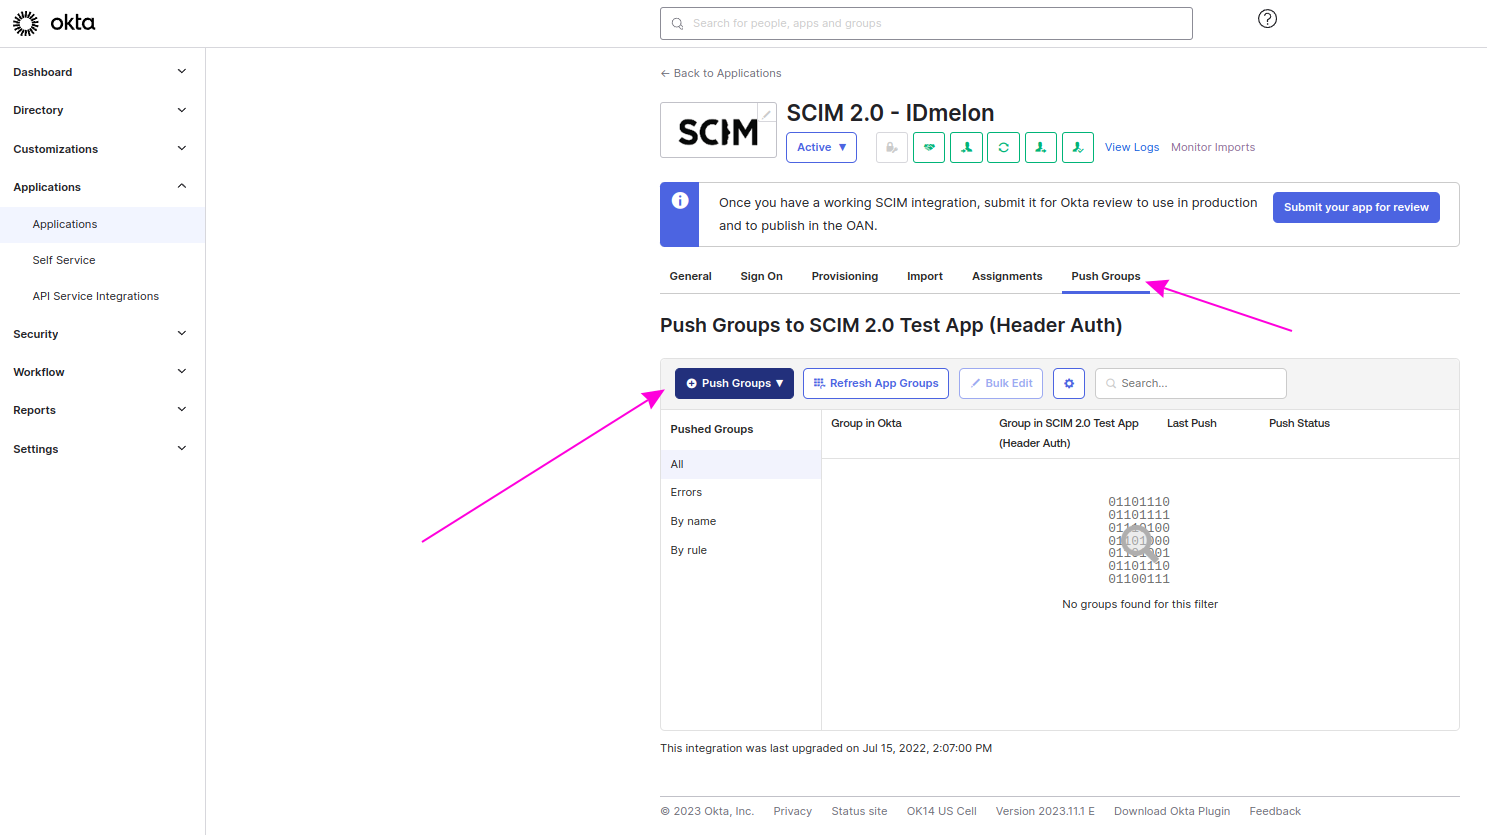
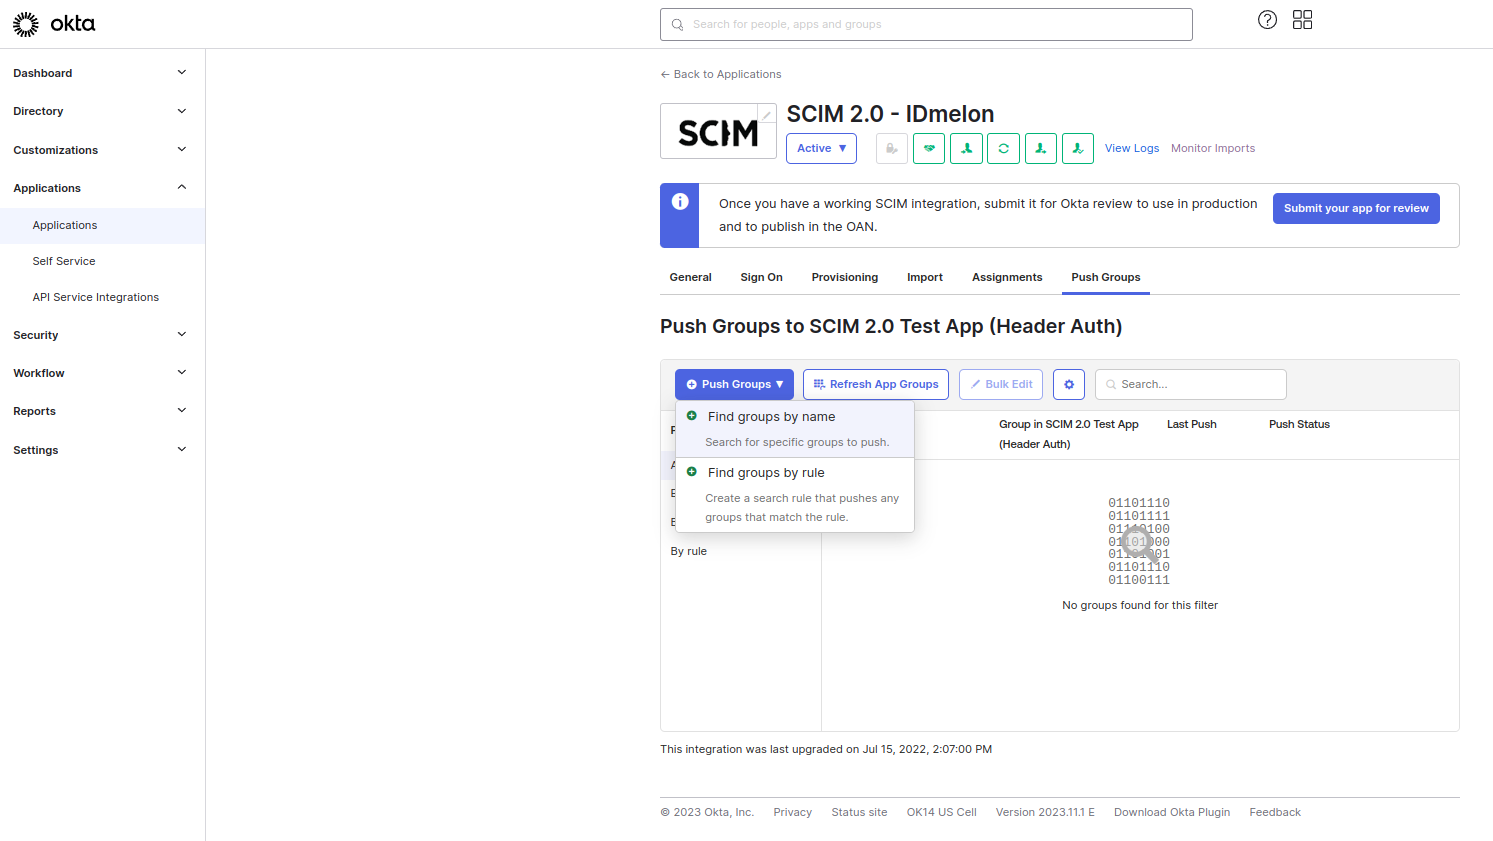
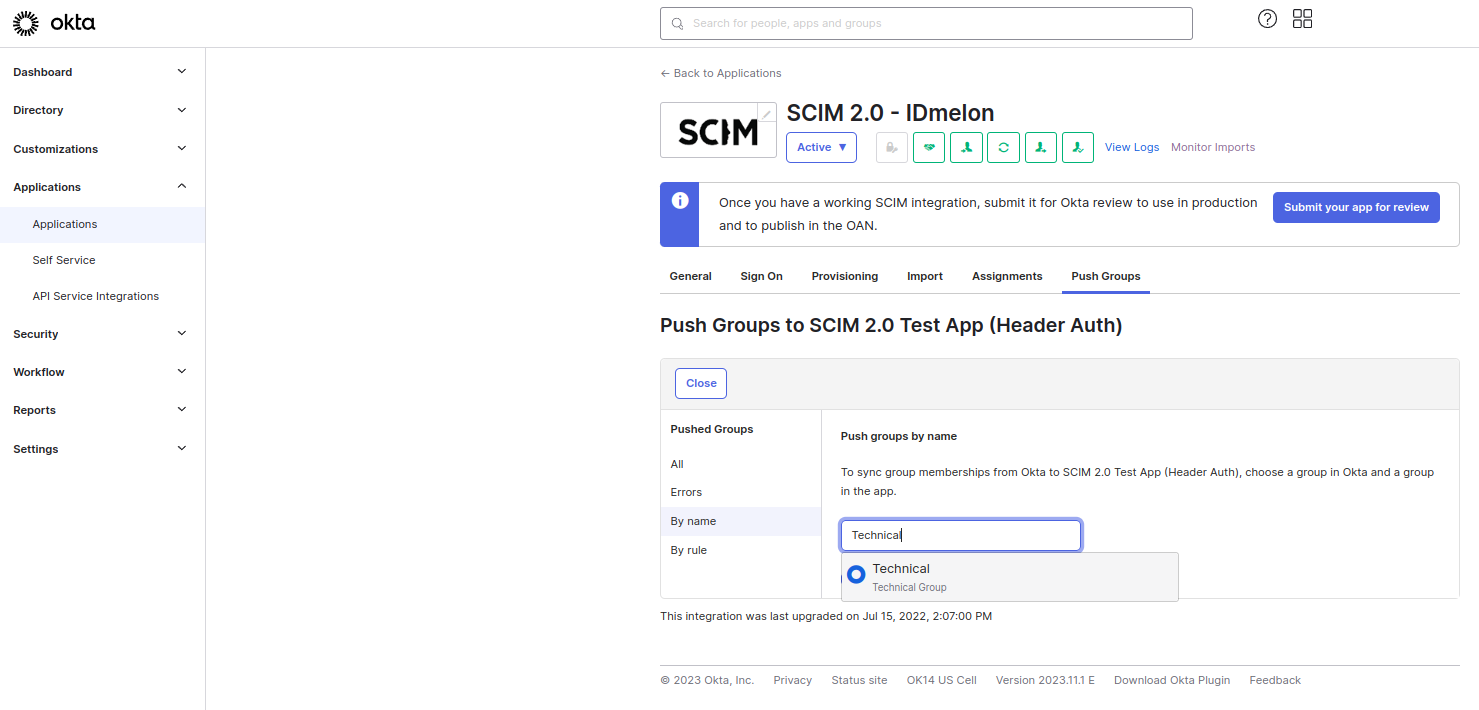
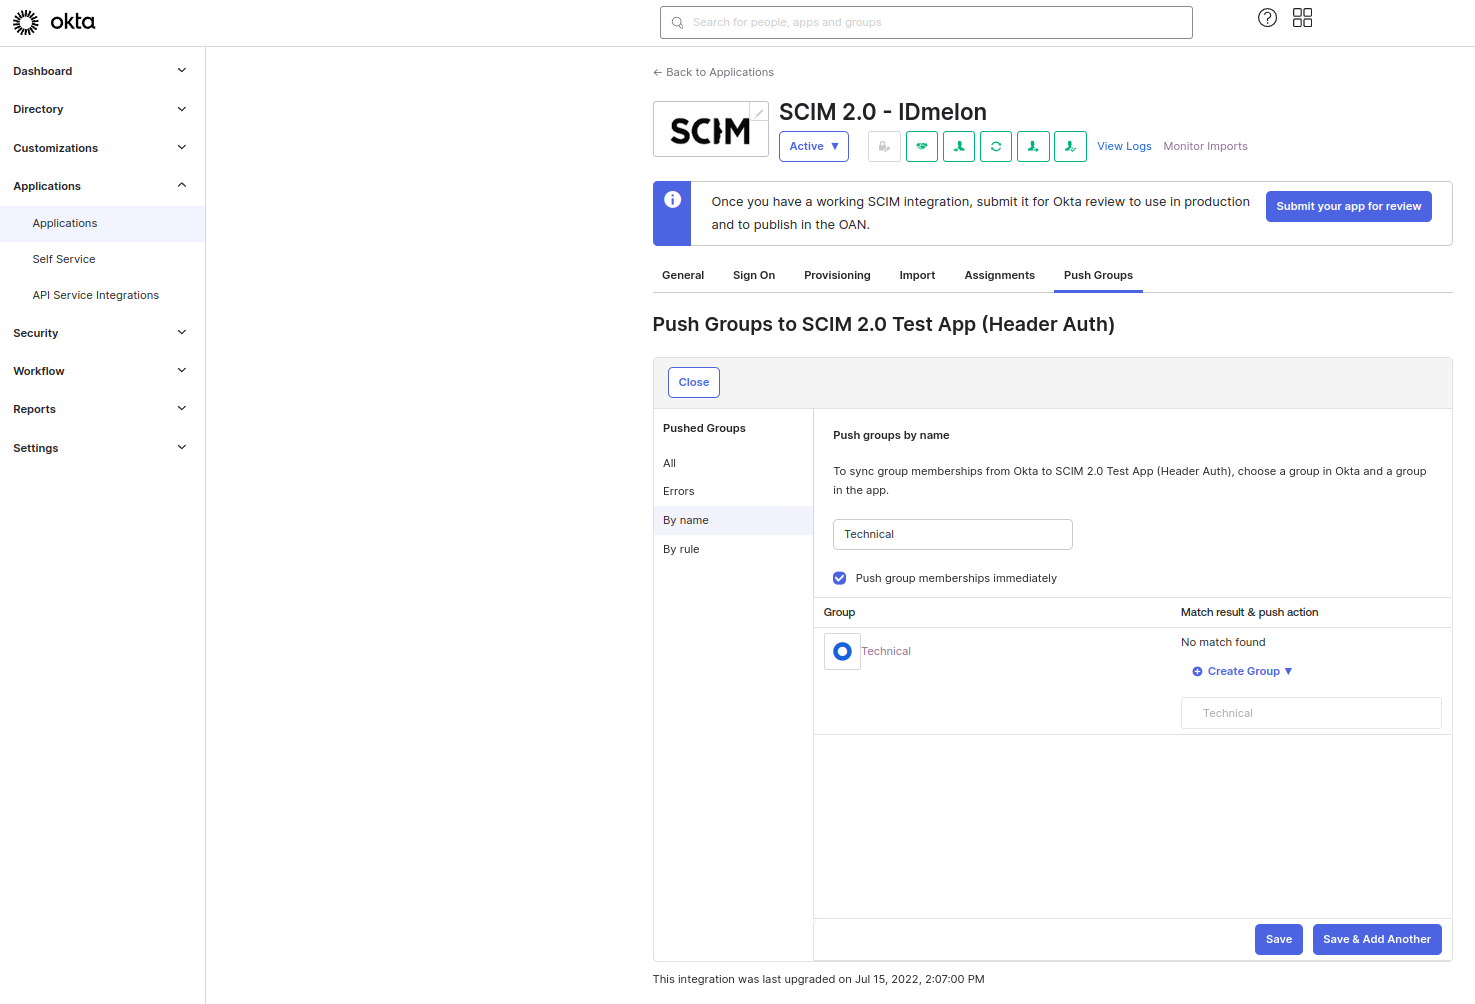
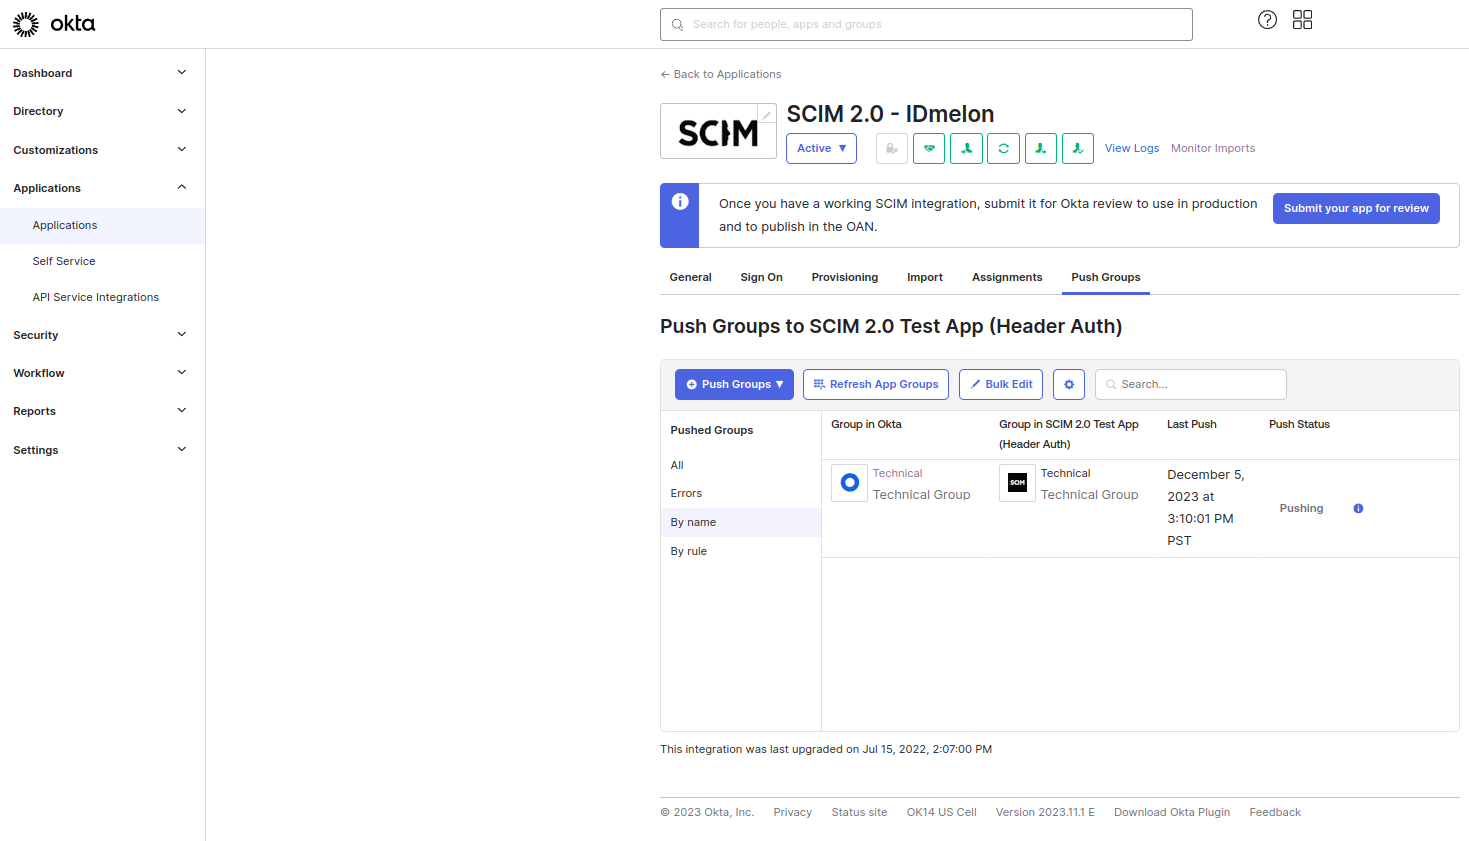
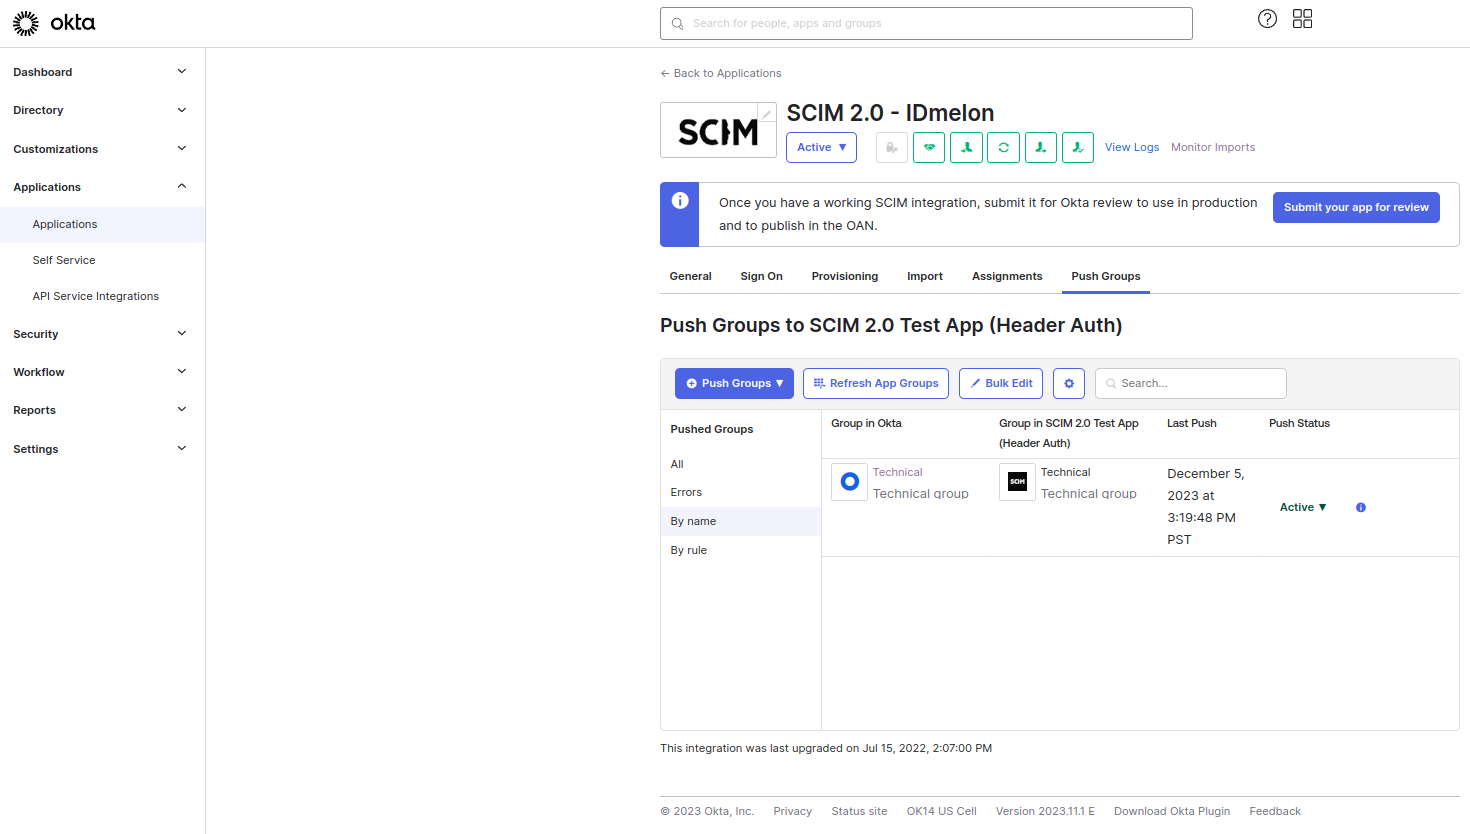
Sync Group
If you want to sync the group itself, go to the Push Groups tab of the SCIM 2.0 - IDmelon application, click on Push Groups, select Find groups by name, find your group, and then click on the Save button.