Ping Identity
In this document you are going to set up IDmelon as an external IdP to the Ping Identity.
Login to Ping Identity administration panel
- Login to Ping Identity.
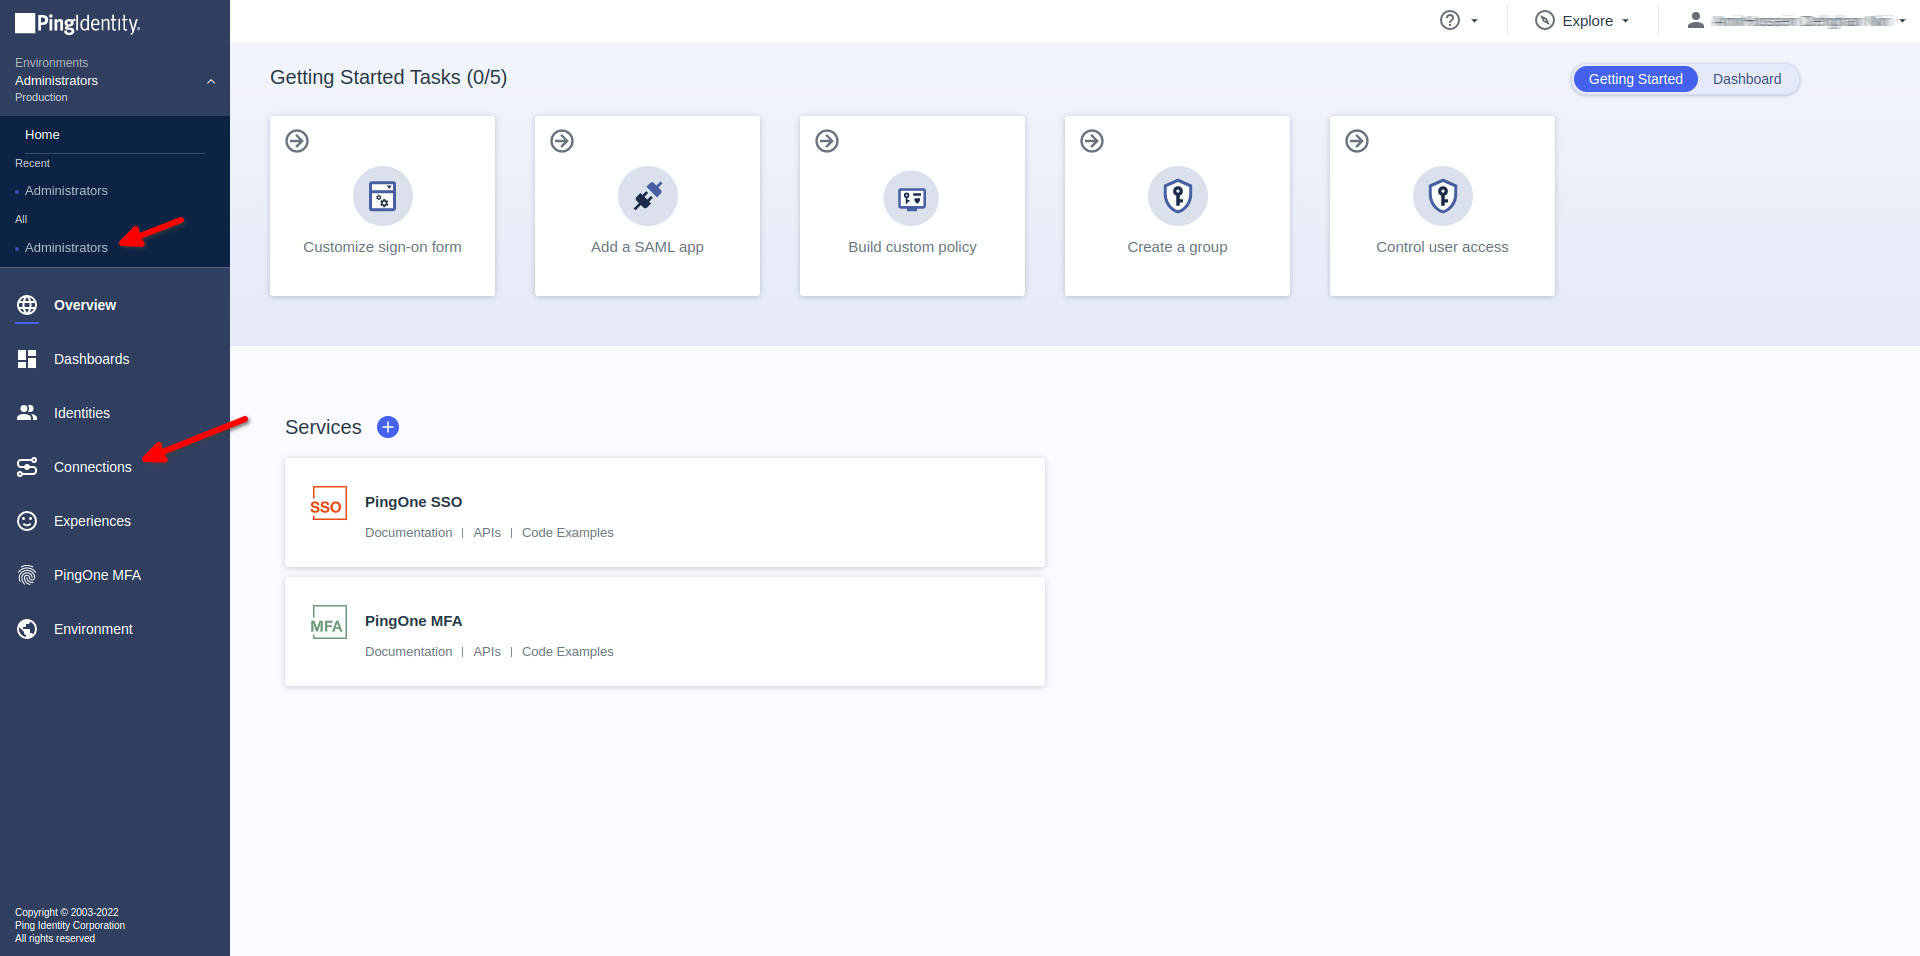
- Open Ping Identity dashboard.
- On the right side of navbar Click on Administrators
Add Identity Provider
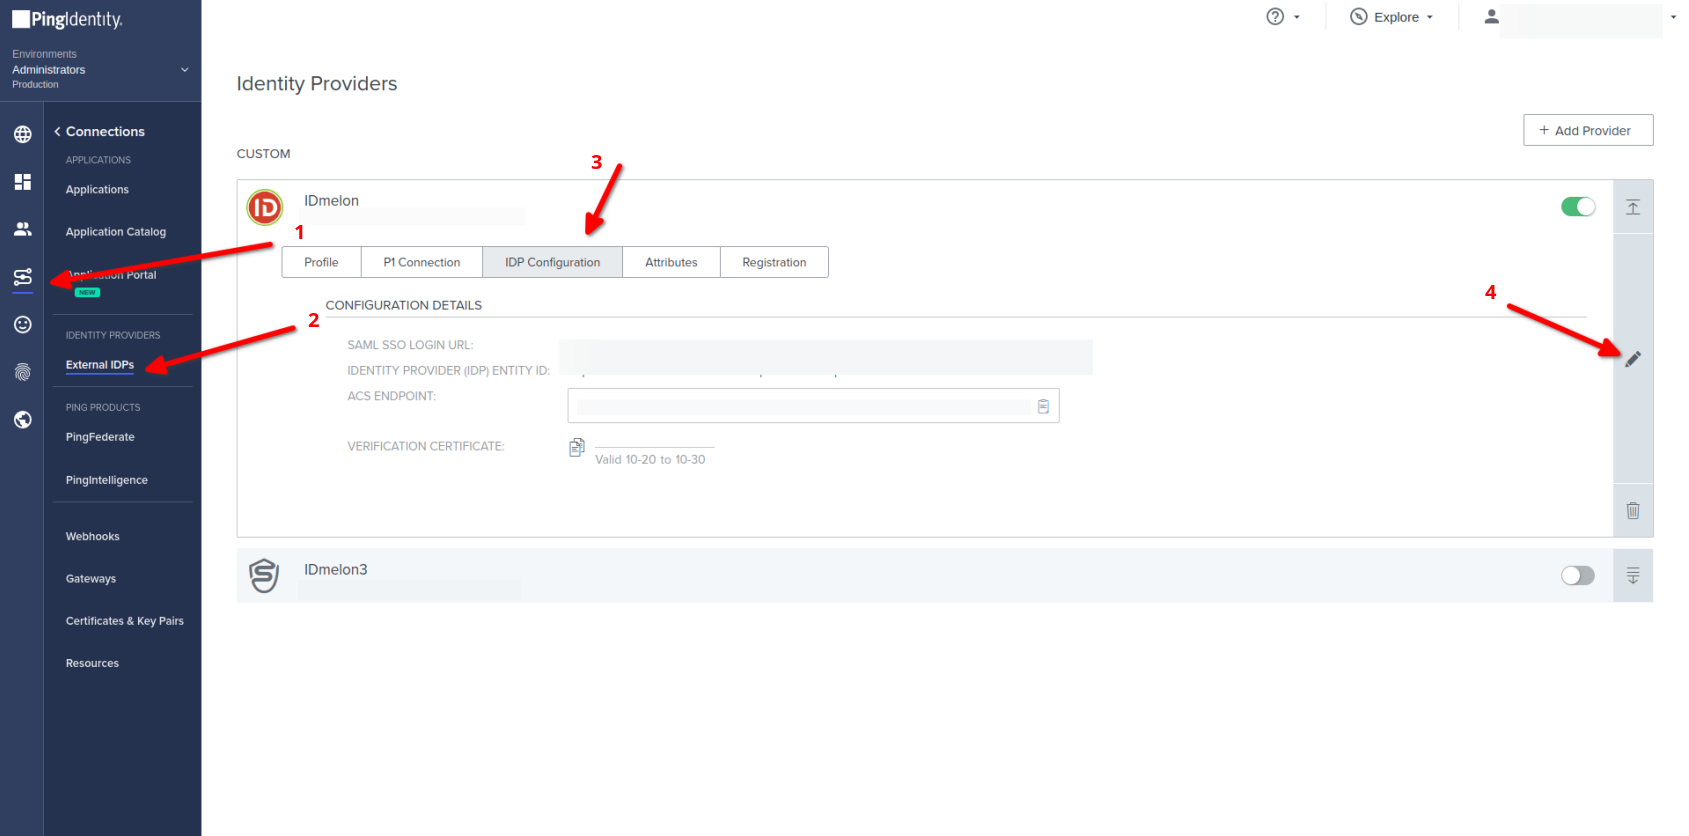
- Click Connection
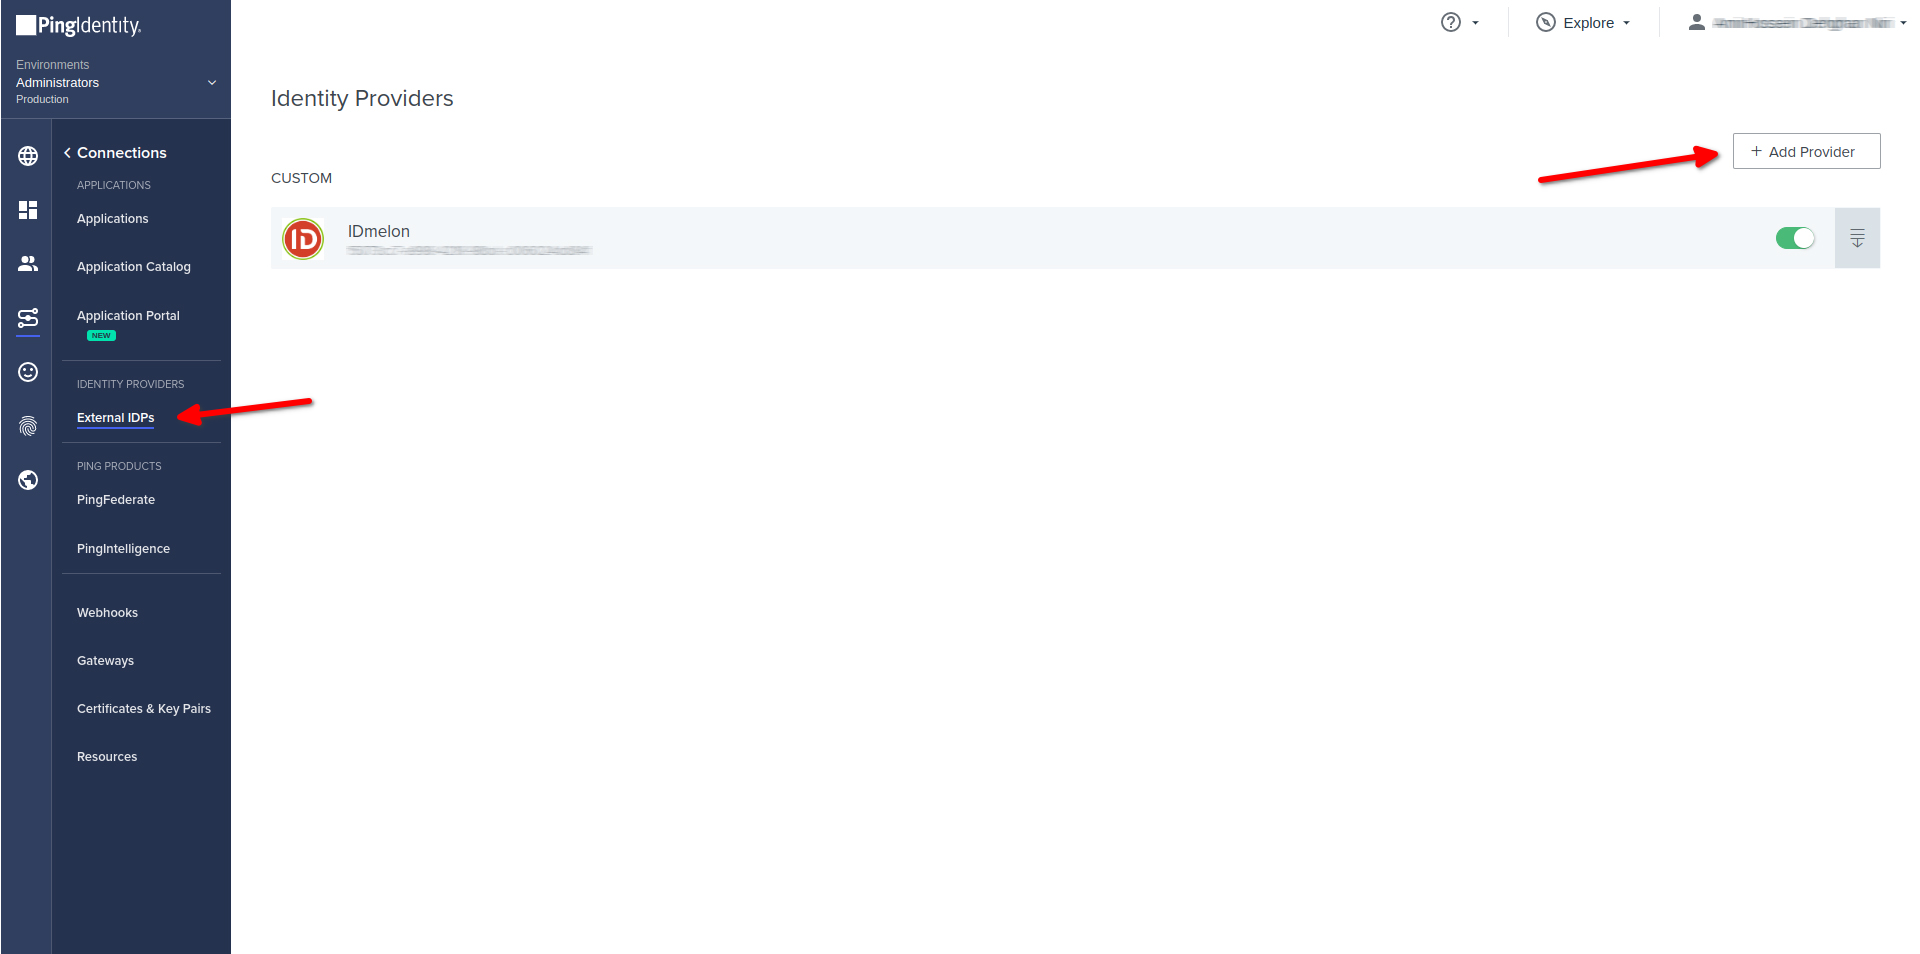
- Under IDENTITY PROVIDERS Click on External IdPs
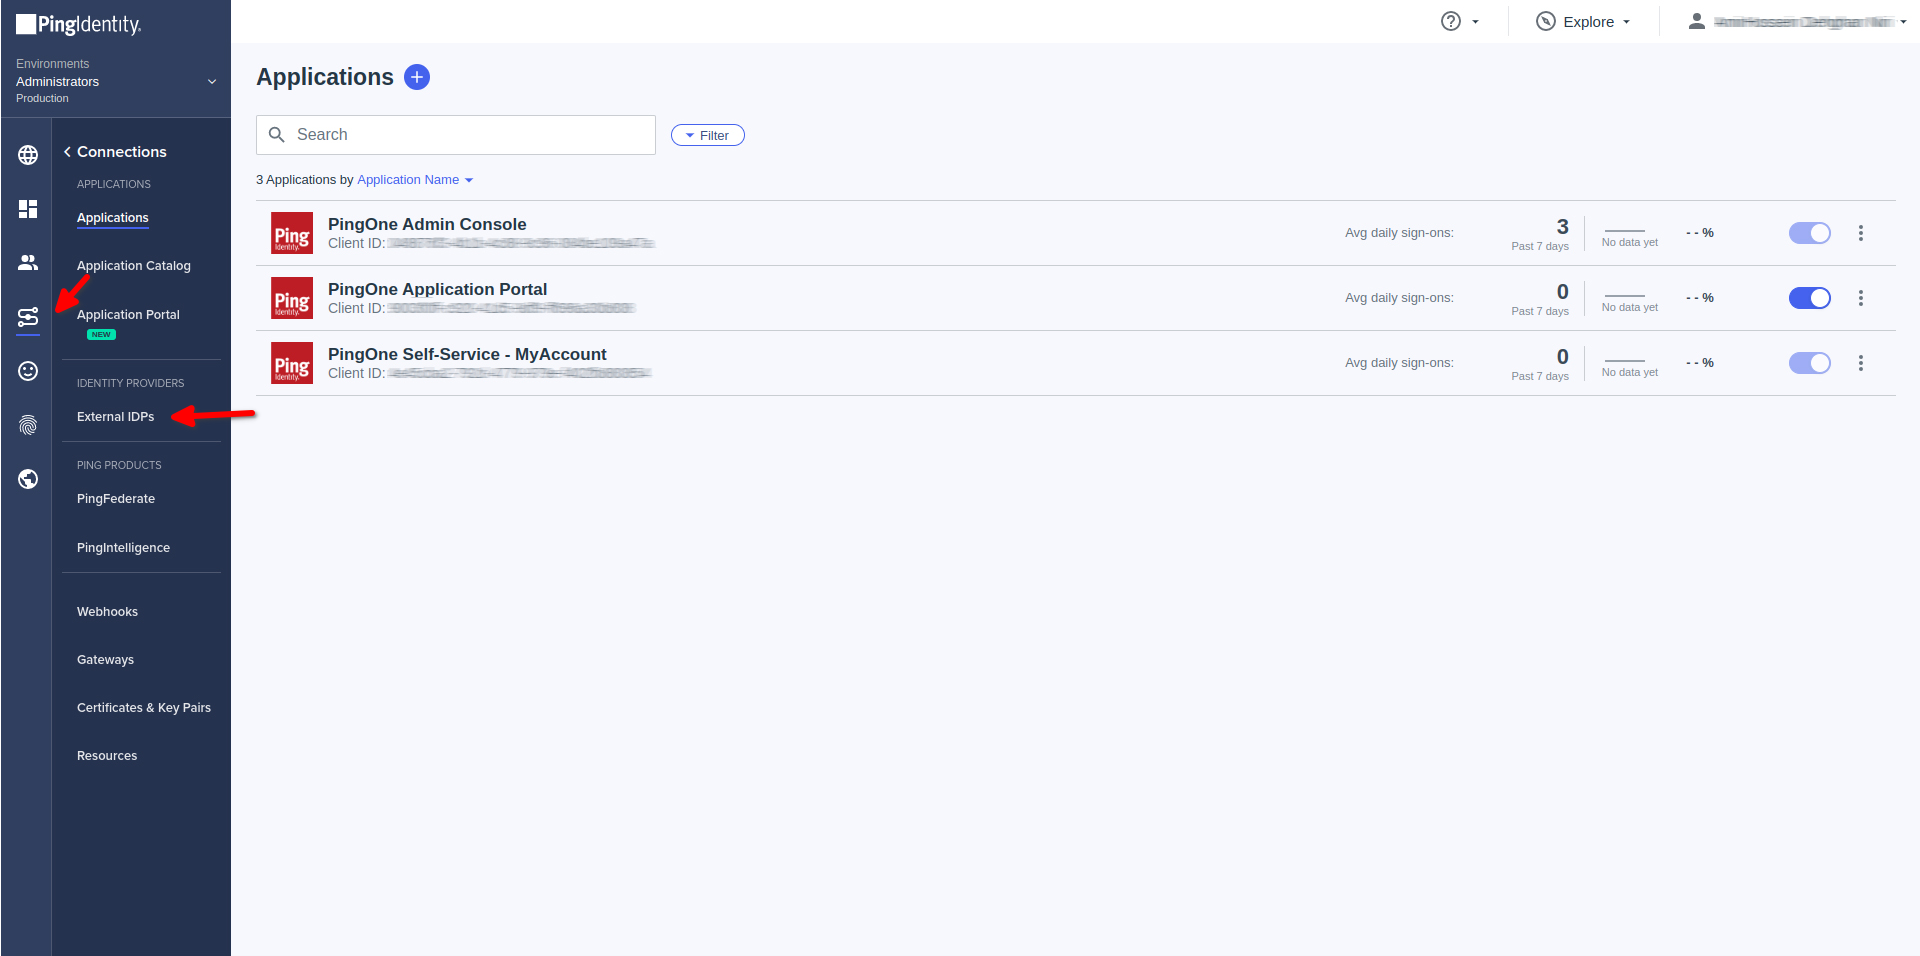
- Click on Add Provider
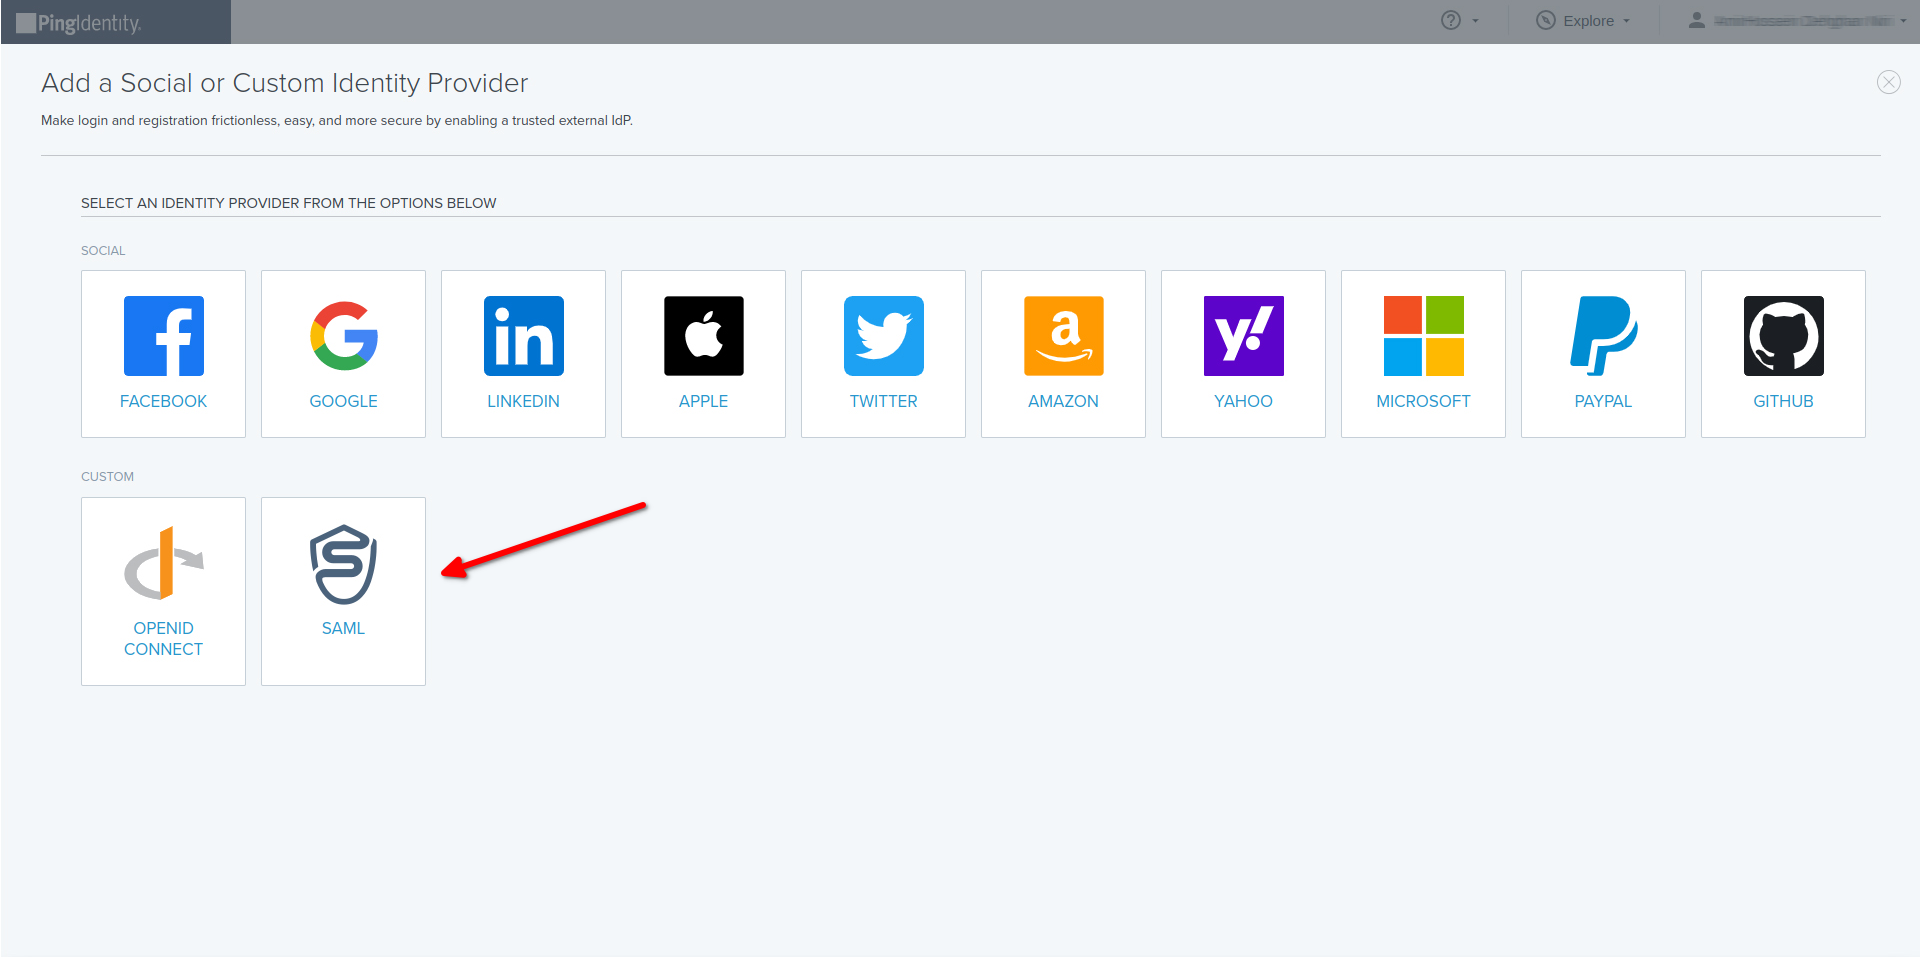
- Click on SAML
Configure SAML 2.0 IdP
- Configure SAML 2.0 IdP
- Create IdP Profile
- NAME : Custom_name
- DESCRIPTION : Custom_description
- ICON : Custom_icon
- LOGIN BUTTON : Custom_login_button
- Continue
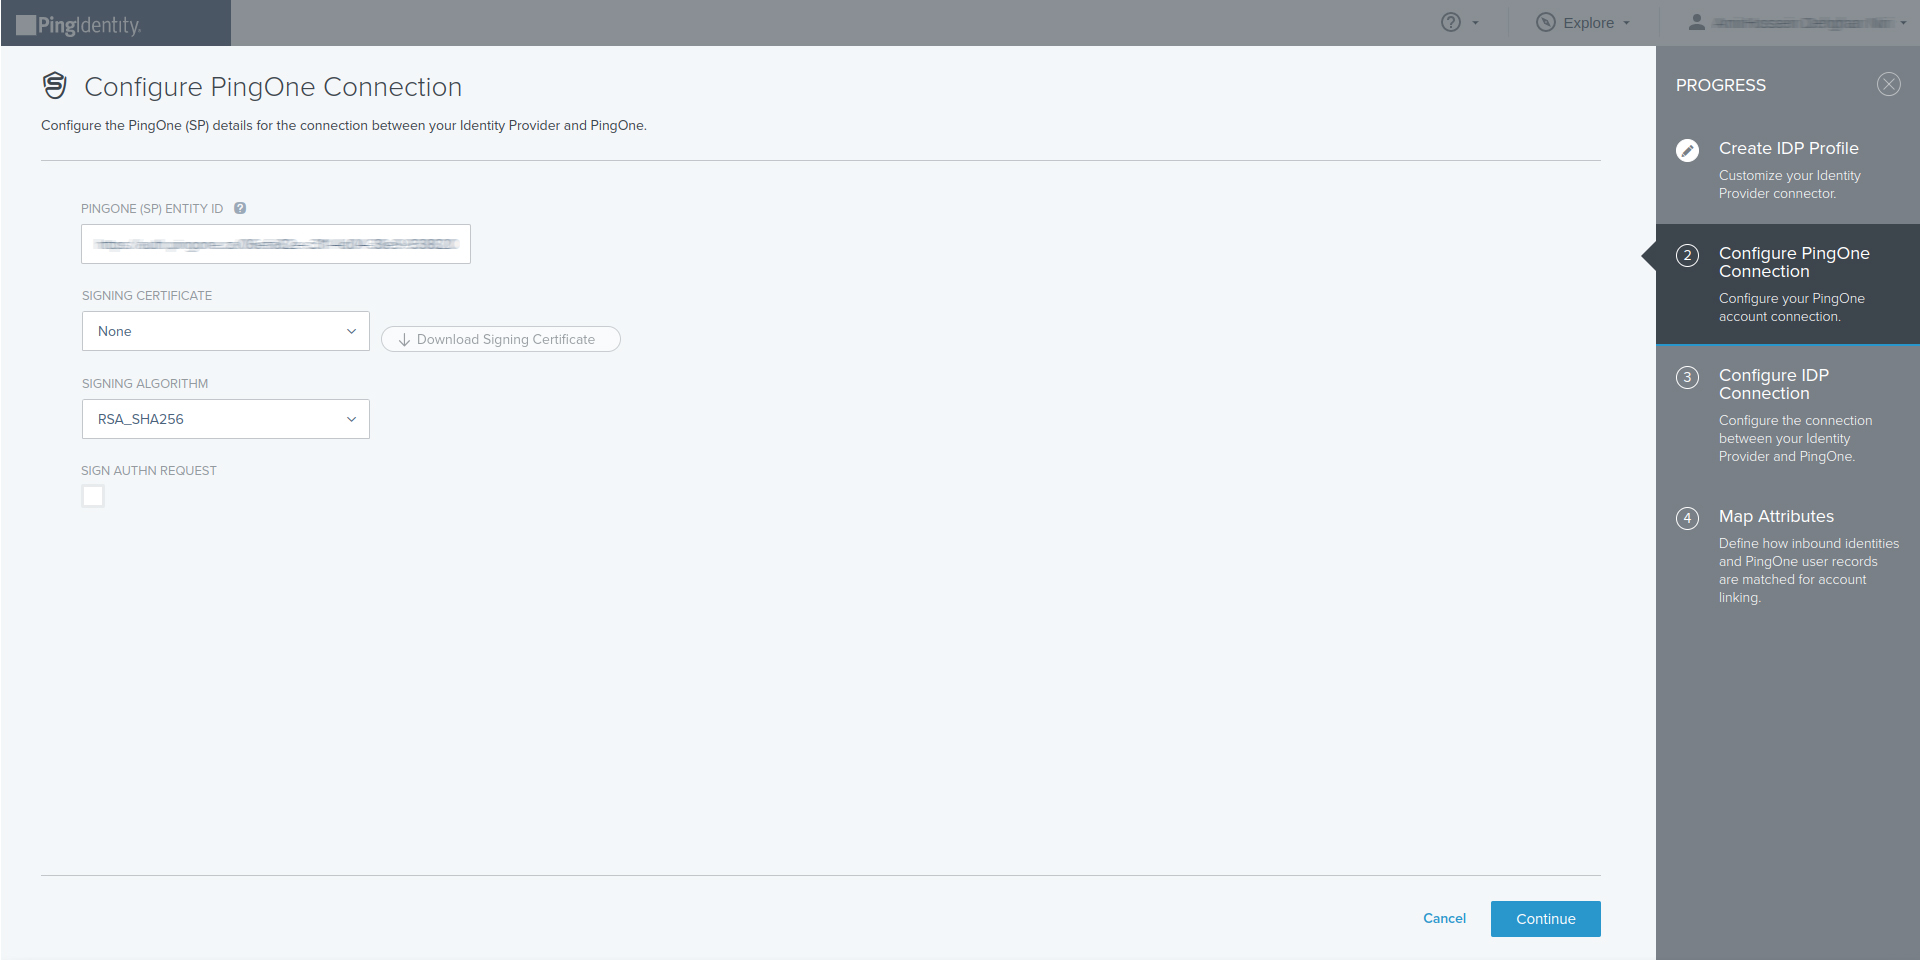
- Configure PingOne Connection then select Continue
- Configure IdP Connection
- Choose : Manually enter the following metadata information
Get all values for {..} from your IDmelon panel. If you are currently login here, you will see the replaced values instead.
- SSO endpoint : idmelon single sign on url
- IdP entity ID : idp_issuer_uri
- SSO binding : Specifies the binding to use for the authentication request. Select HTTP Post or HTTP Redirect.
- VERIFICATION CERTIFICATE : idp_certificate_download_url

- Save and Continue
- On the Map Attributes page, define how the PingOne user attributes are mapped to identity provider attributes. For more information, see Mapping attributes
- Enter the PingOne user profile attribute and the external IdP attribute. For more information about attribute syntax, see Identity provider attributes
- To add an attribute, click \+ Add attribute
- To use the expression builder, click Build and test or Advanced Expression. See Using the expression builder
- Select the update condition, which determines how PingOne updates its user directory with the values from the identity provider. The options are:
- Empty only: Update the PingOne attribute only if the existing attribute is empty.
- Always: Always update the PingOne directory attribute.
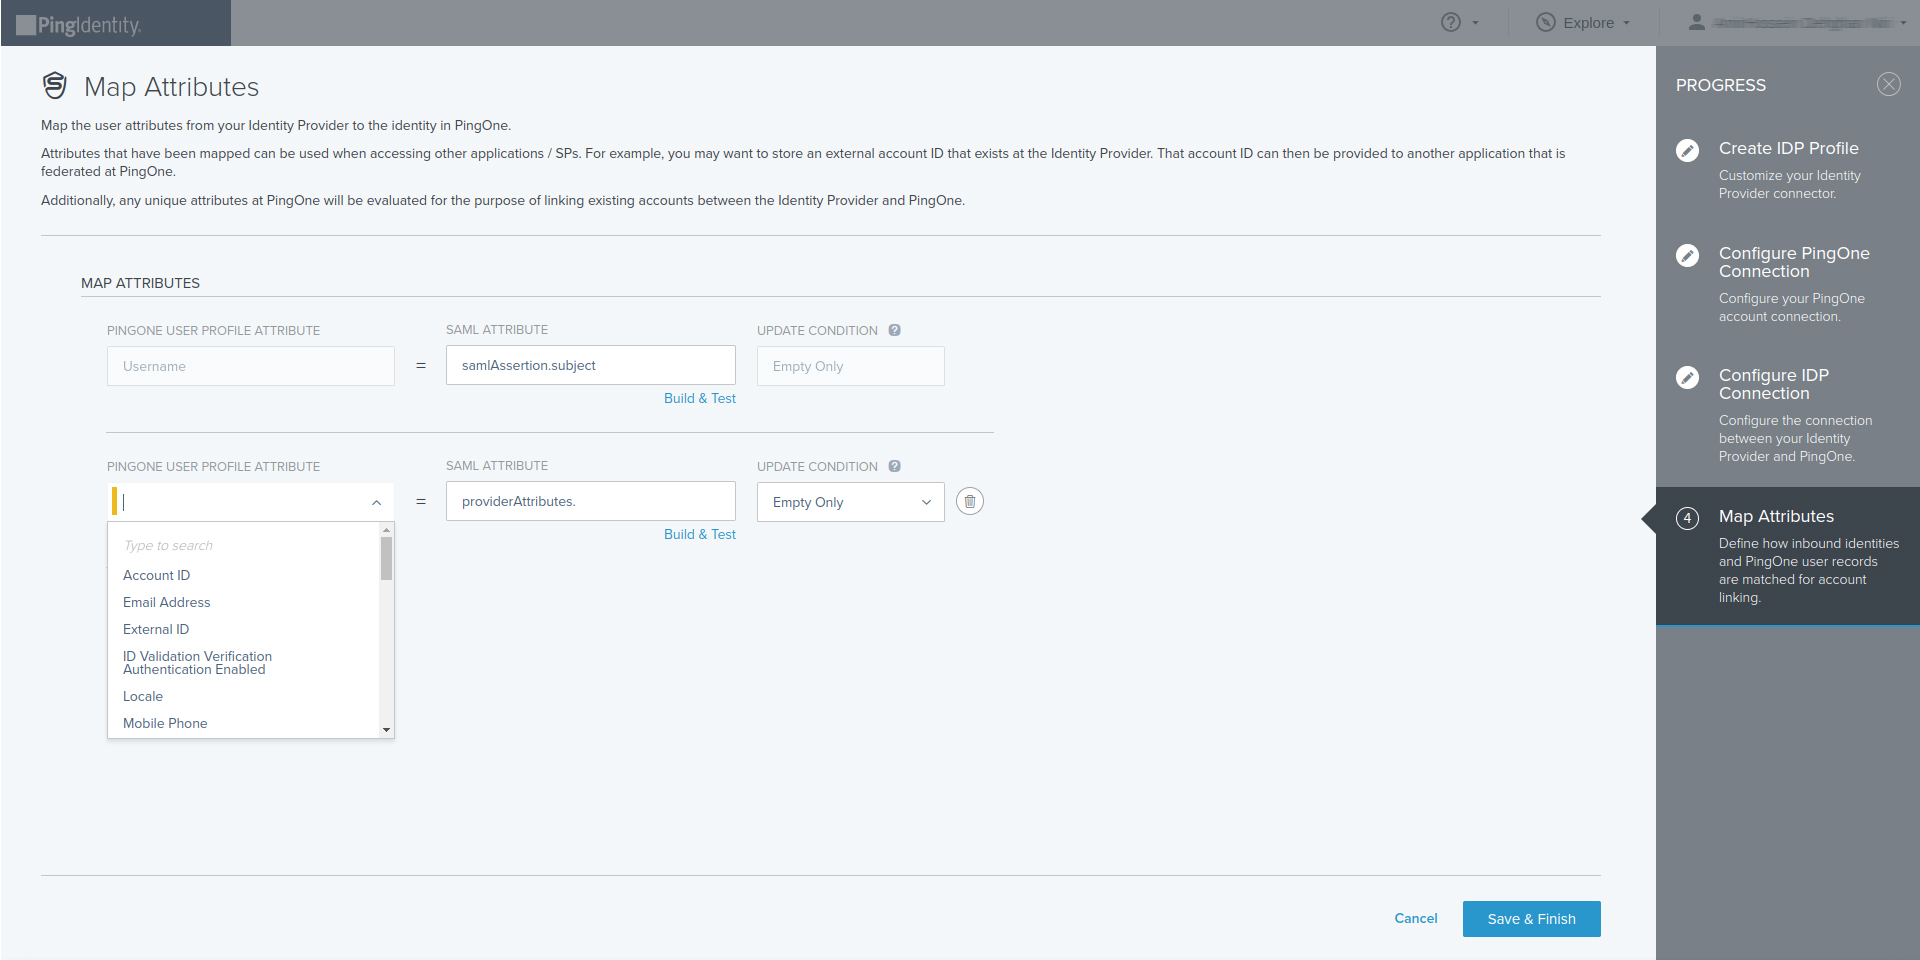
- Save & Finish
- Enabling or disabling IDmelon as Identity Provider : Reference
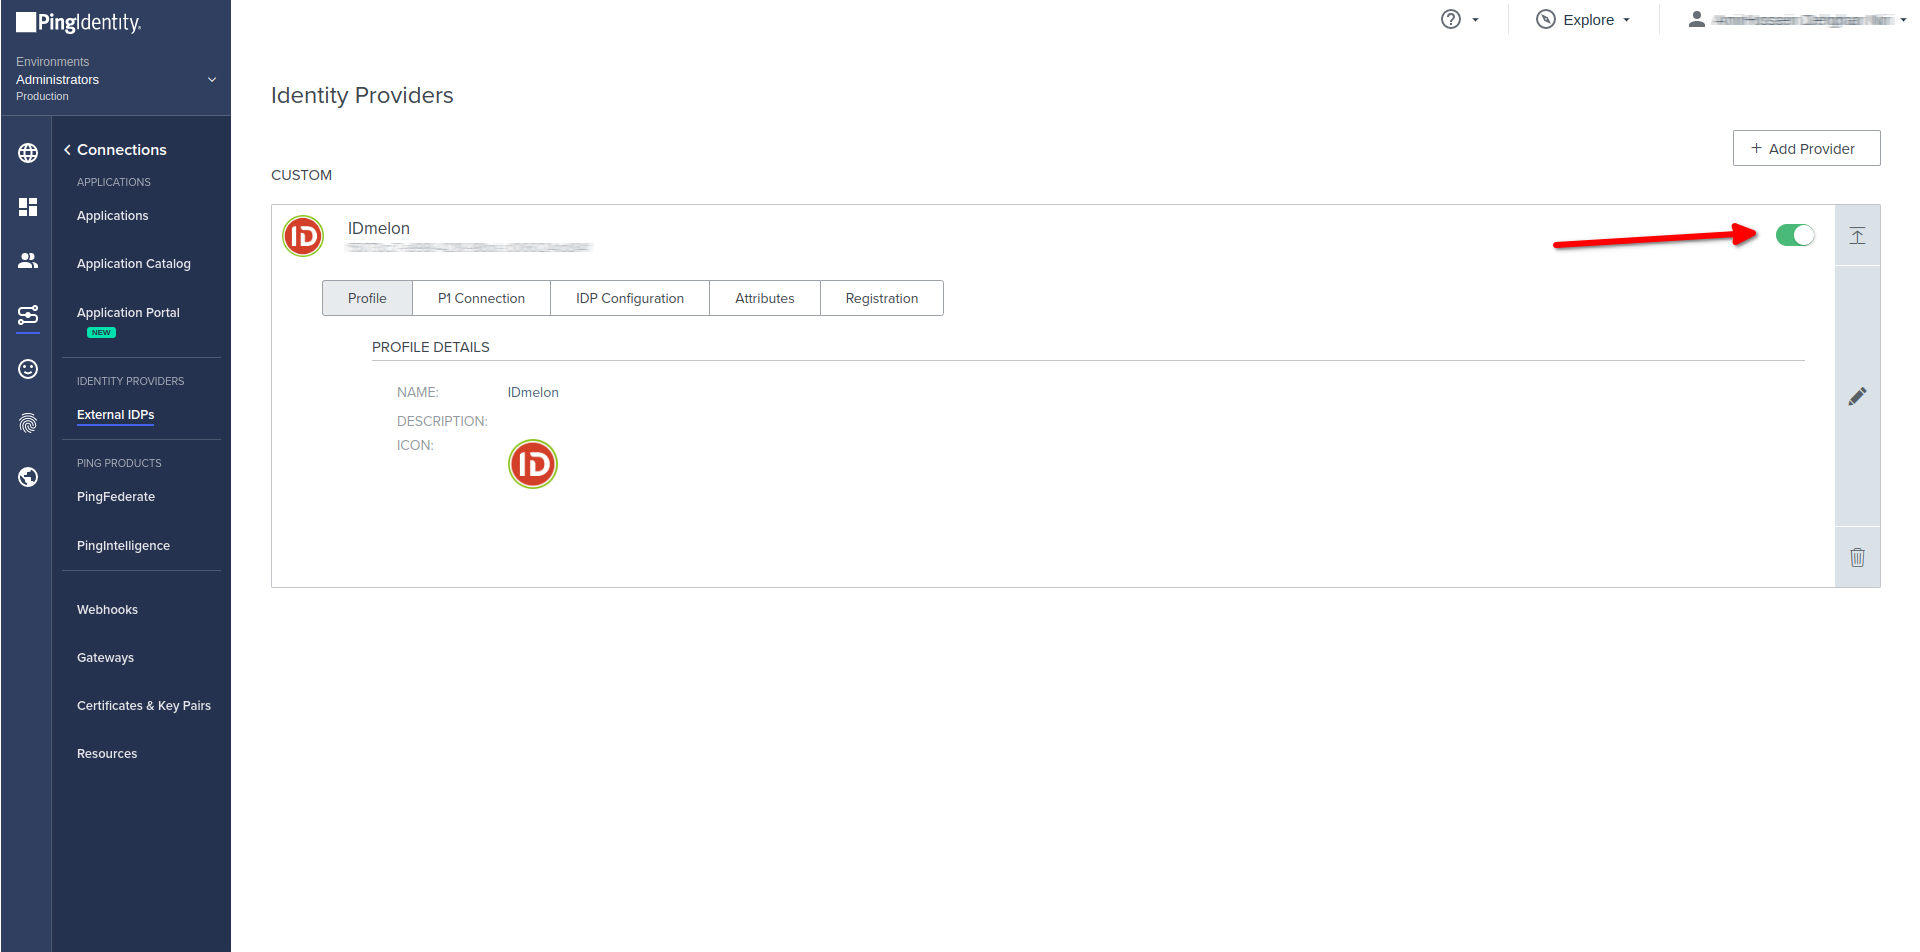
- Finish
Setting idp-init for Ping Identity
- According to Ping Identity document
- Go to Connections → Applications
- Add a new Oidc Application
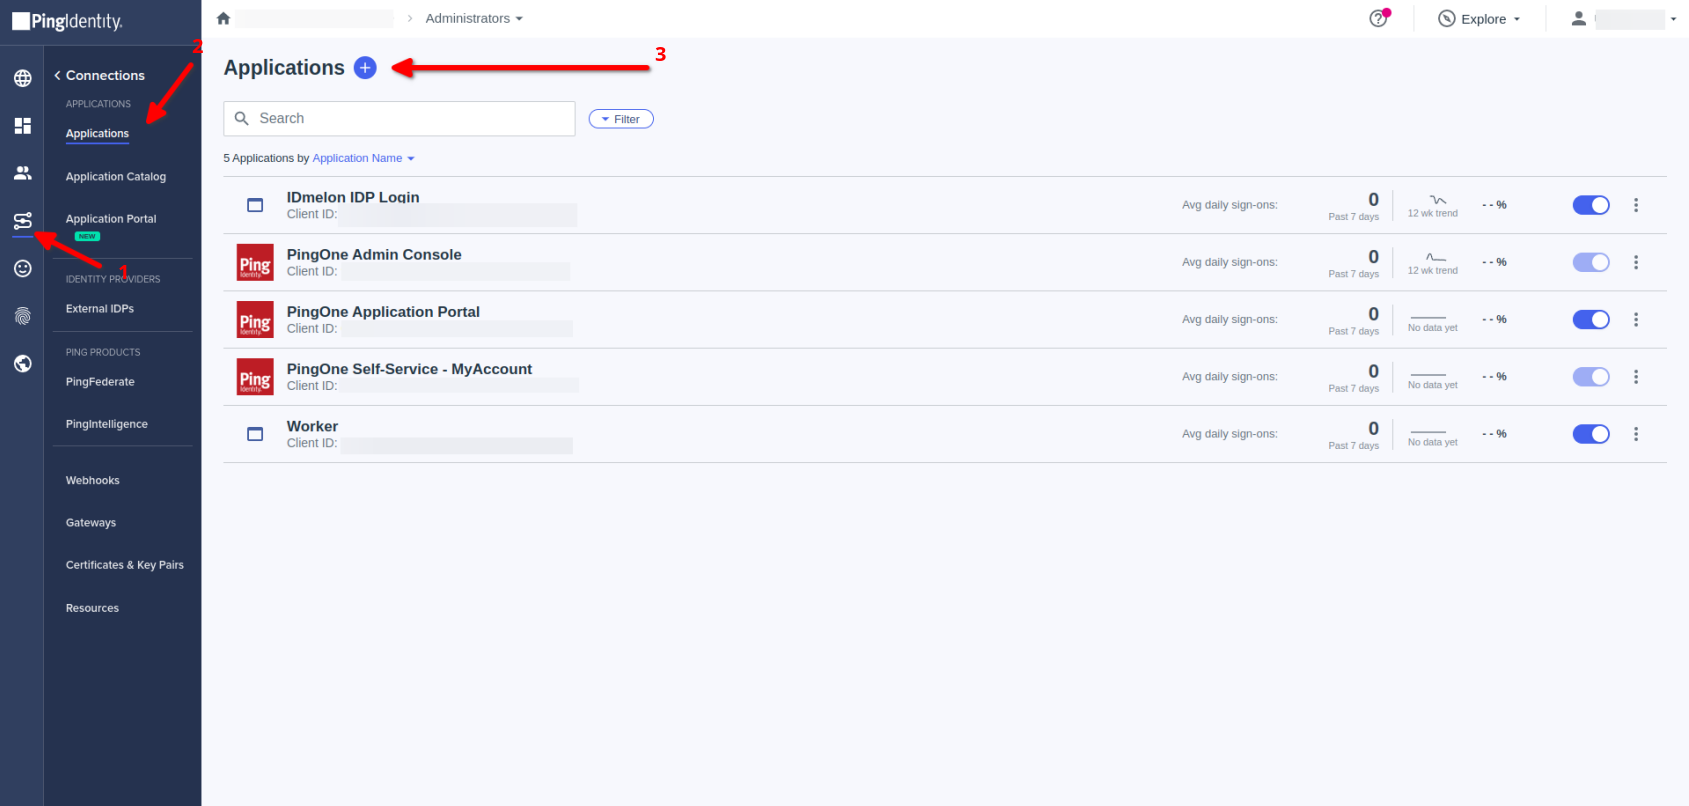
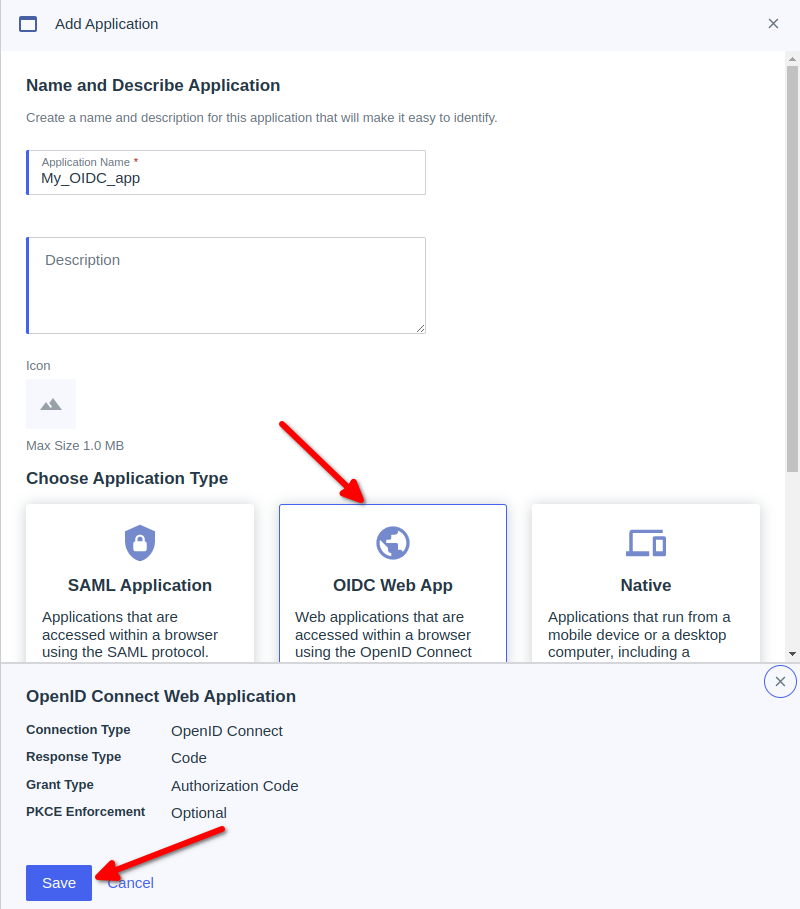
- Add Application
- Choose a custom application Name
- Choose a custom application Description
- Choose a custom application ICON
- Choose OIDC Web App
- Save
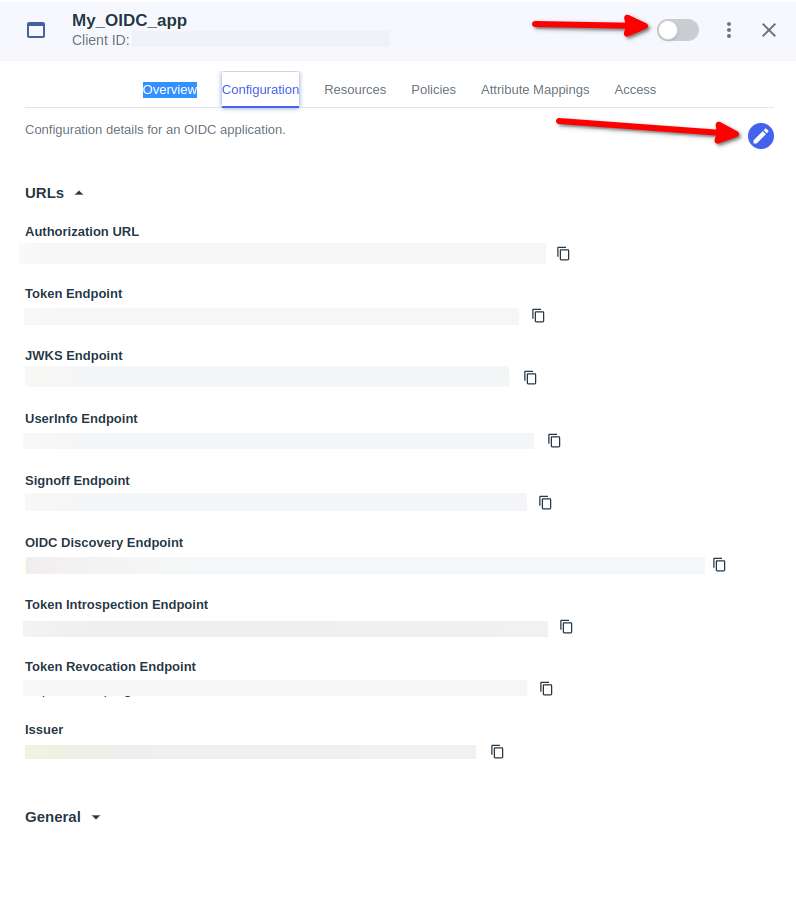
- Go to Oidc app which created
- Activate Oidc app which on the rightside
- Go to Configuration then click on Icon edit
Go to Connections → Applications
For Admins IdP init Login
- Click on PingOne Admin Console
- Copy Home Page URL
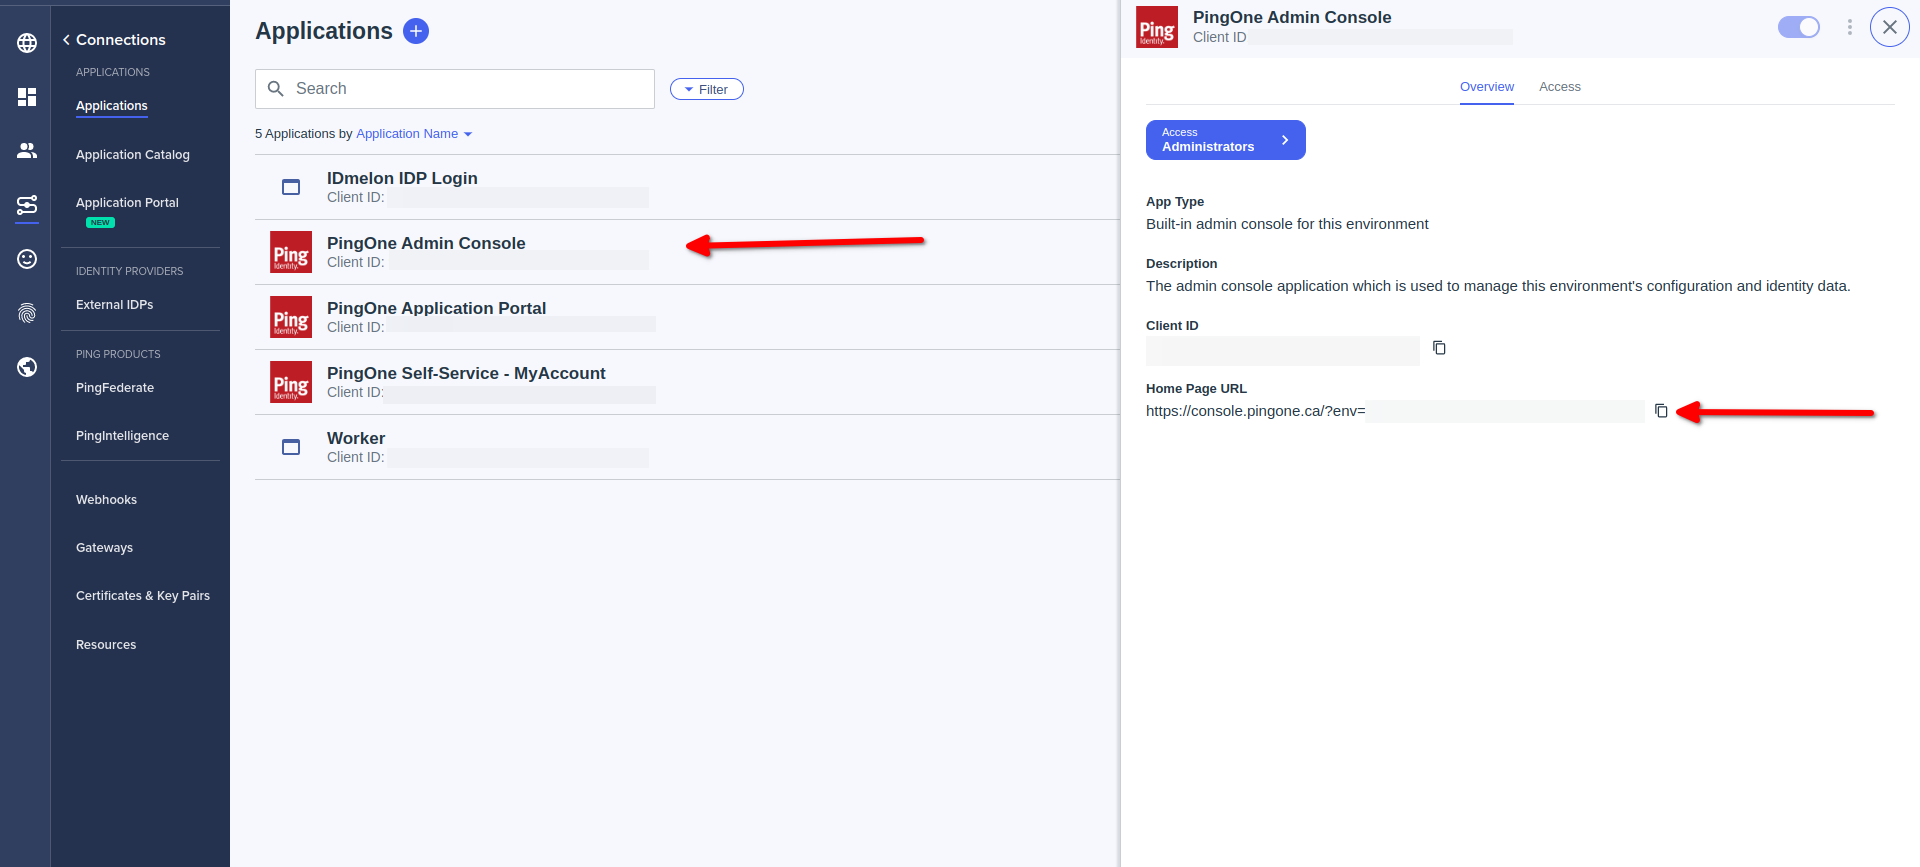
- Done
For users IdP init Login:
- Click on PingOne Application Portal
- Copy Home Page URL
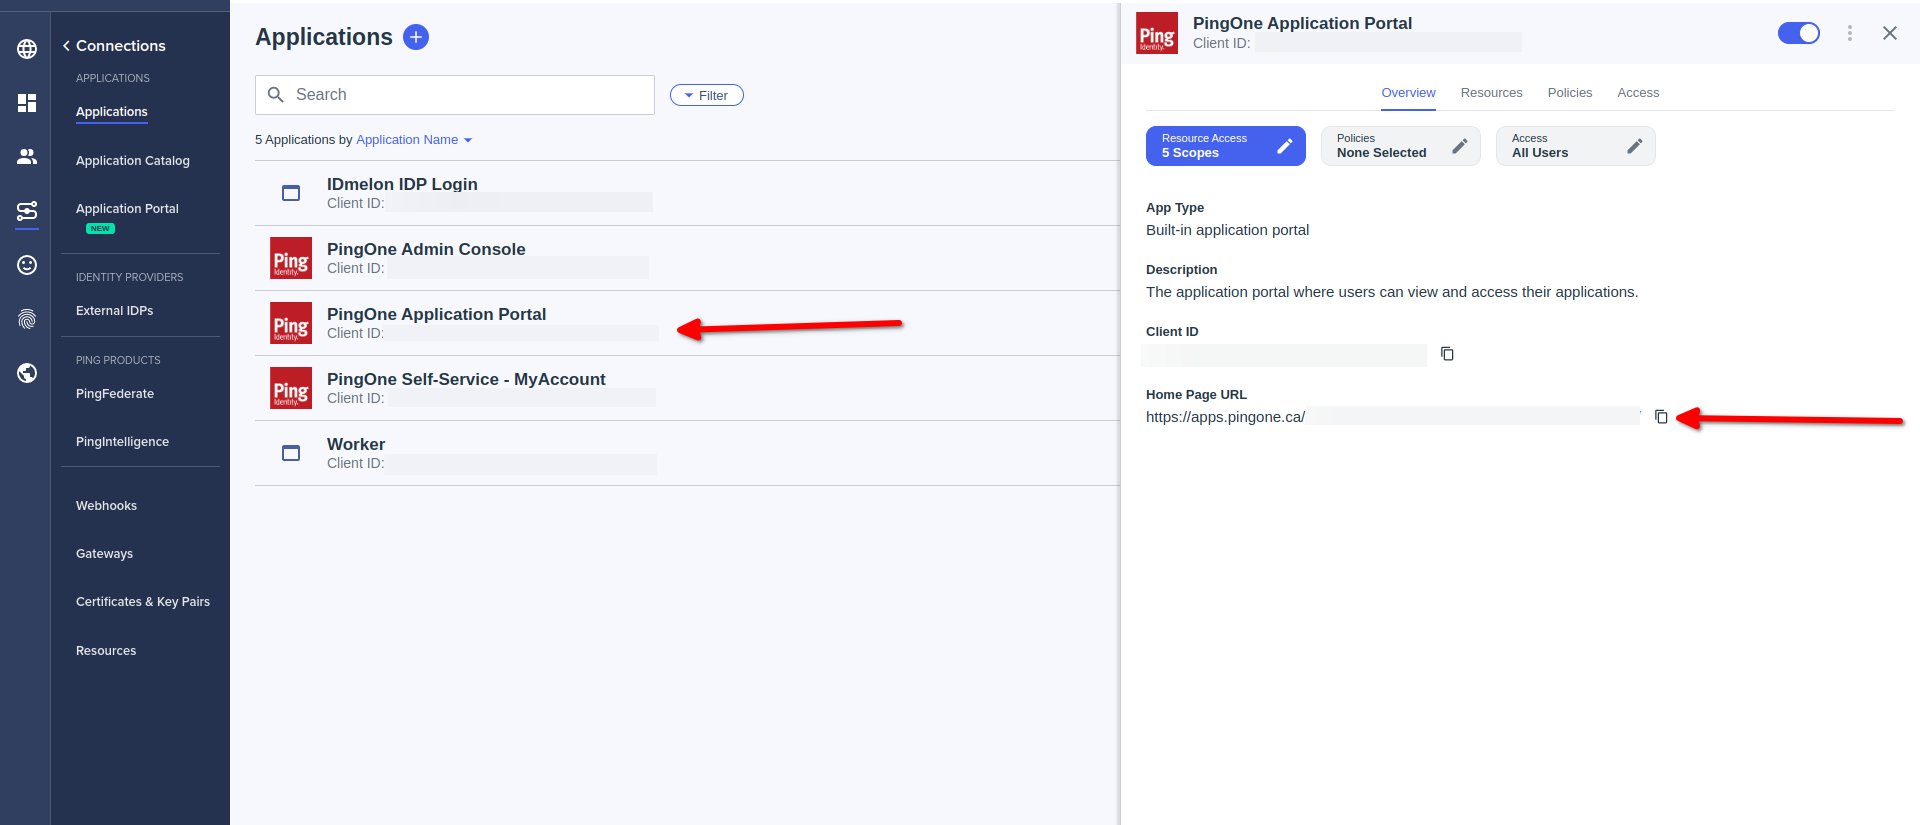
- Done
Paste Home Page URL to Initiate Login URI field
Paste Home Page URL to Target Link URI field
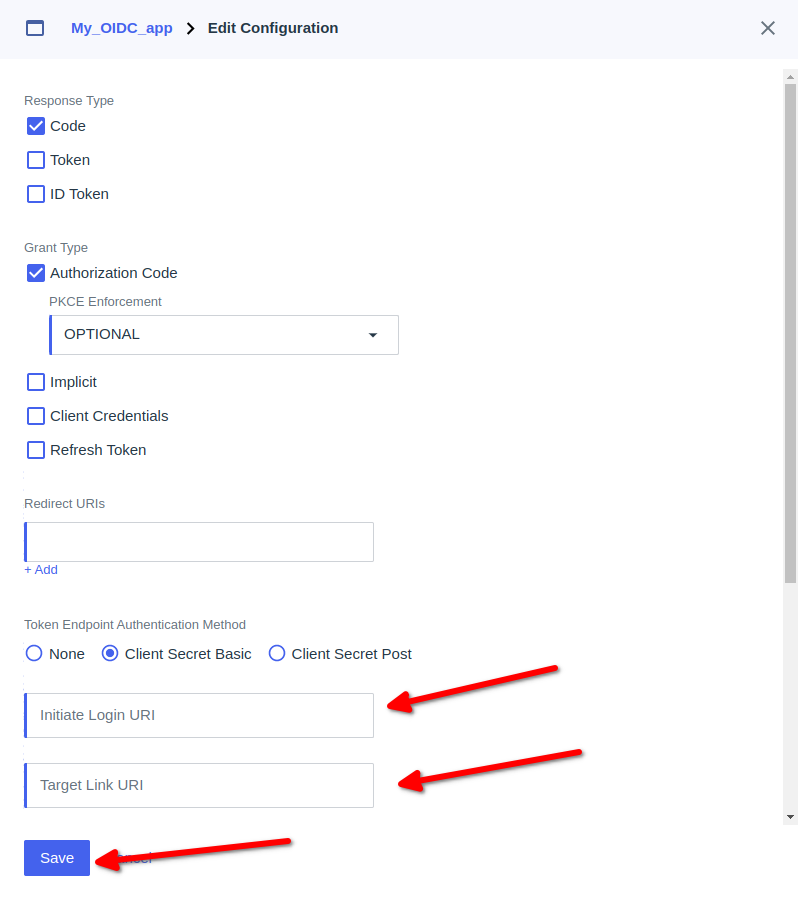
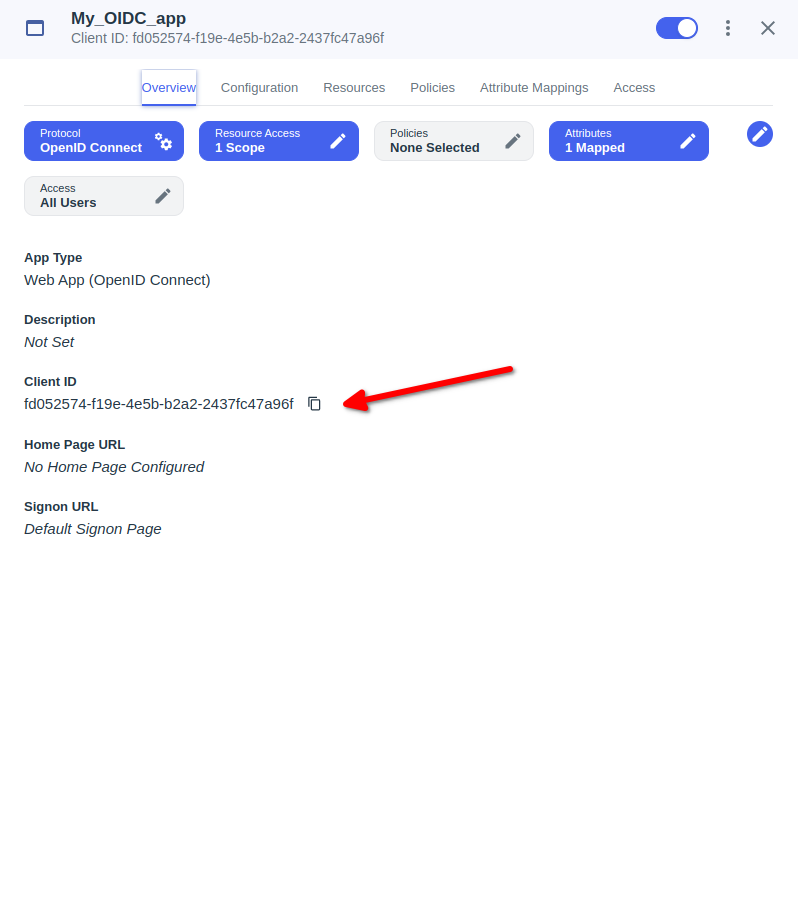
- Click the Overview tab.
- Locate the Client ID and copy it to a relaystate field of IDmelon.
- Example : Relaystate = applicationId=Custom Client ID
IDmelon SAML configuration
- Go toConnections → External IdPs
- Go to IDmelon IdP then click on IdP Configuration click edit
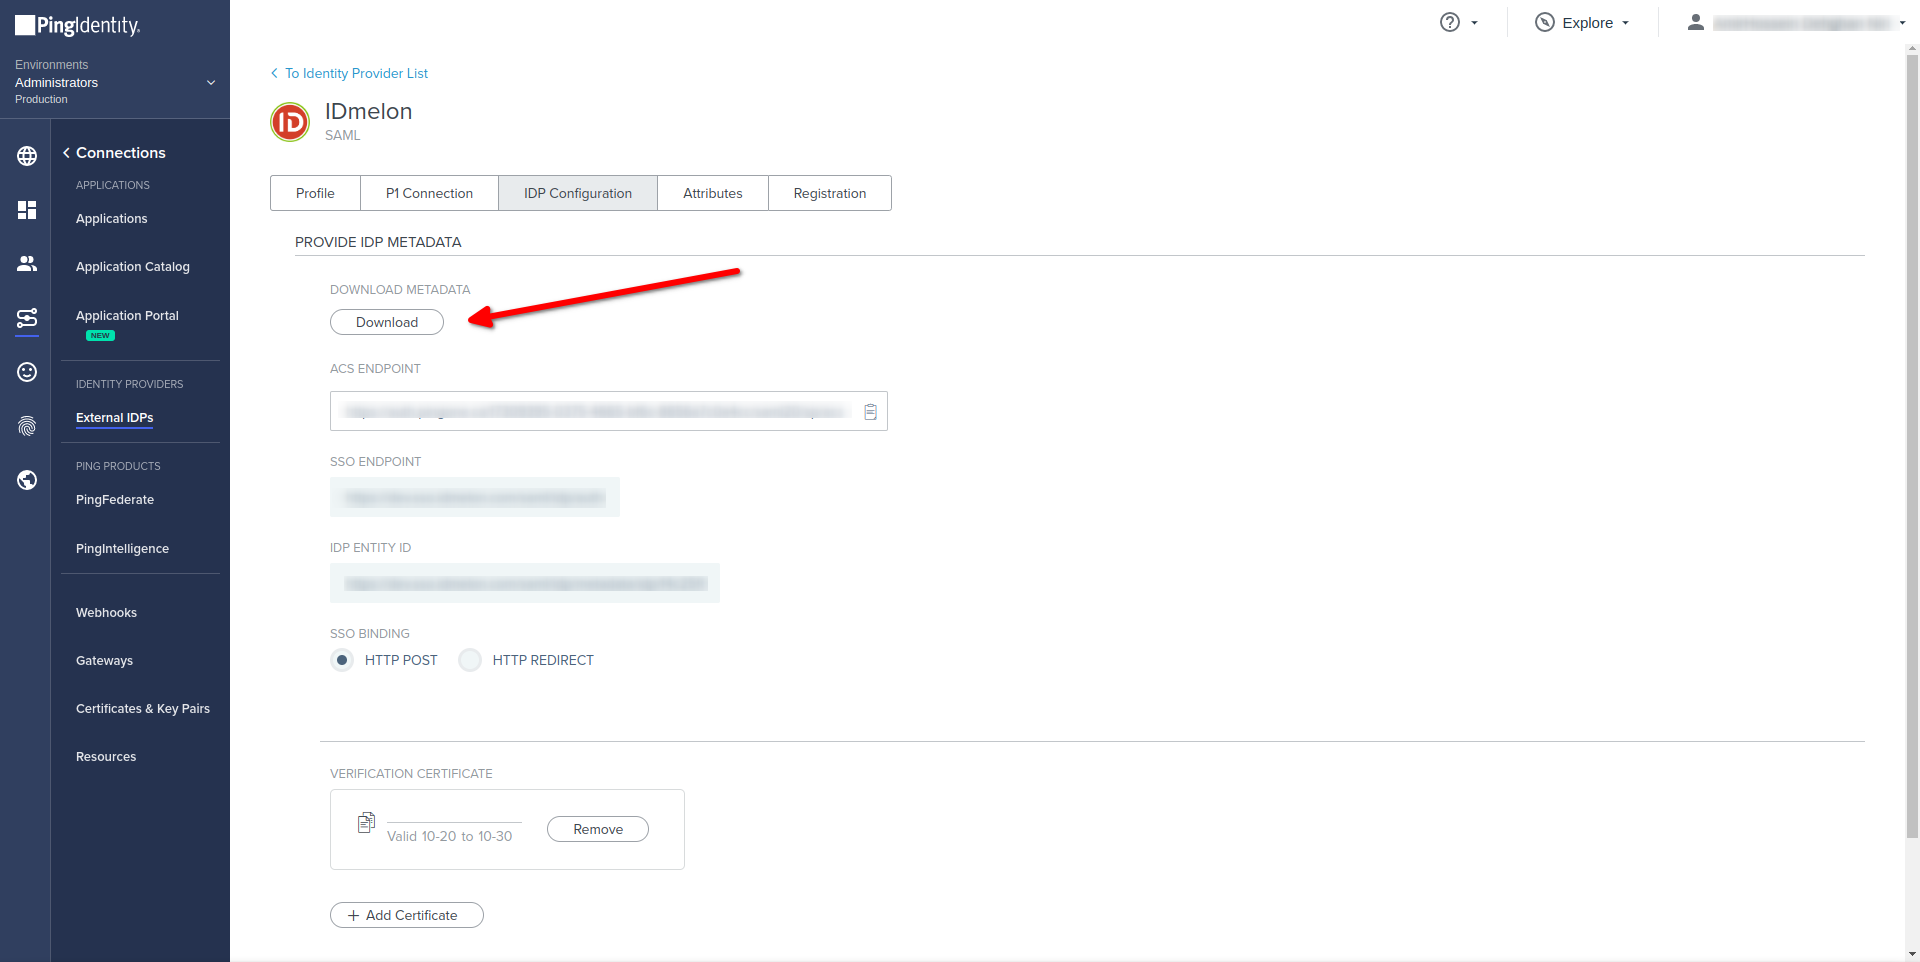
- Download -> DOWNLOAD METADA File
- You should upload metadata file and copy values of below fields from this Ping Identity panel to IDmelon Panel.
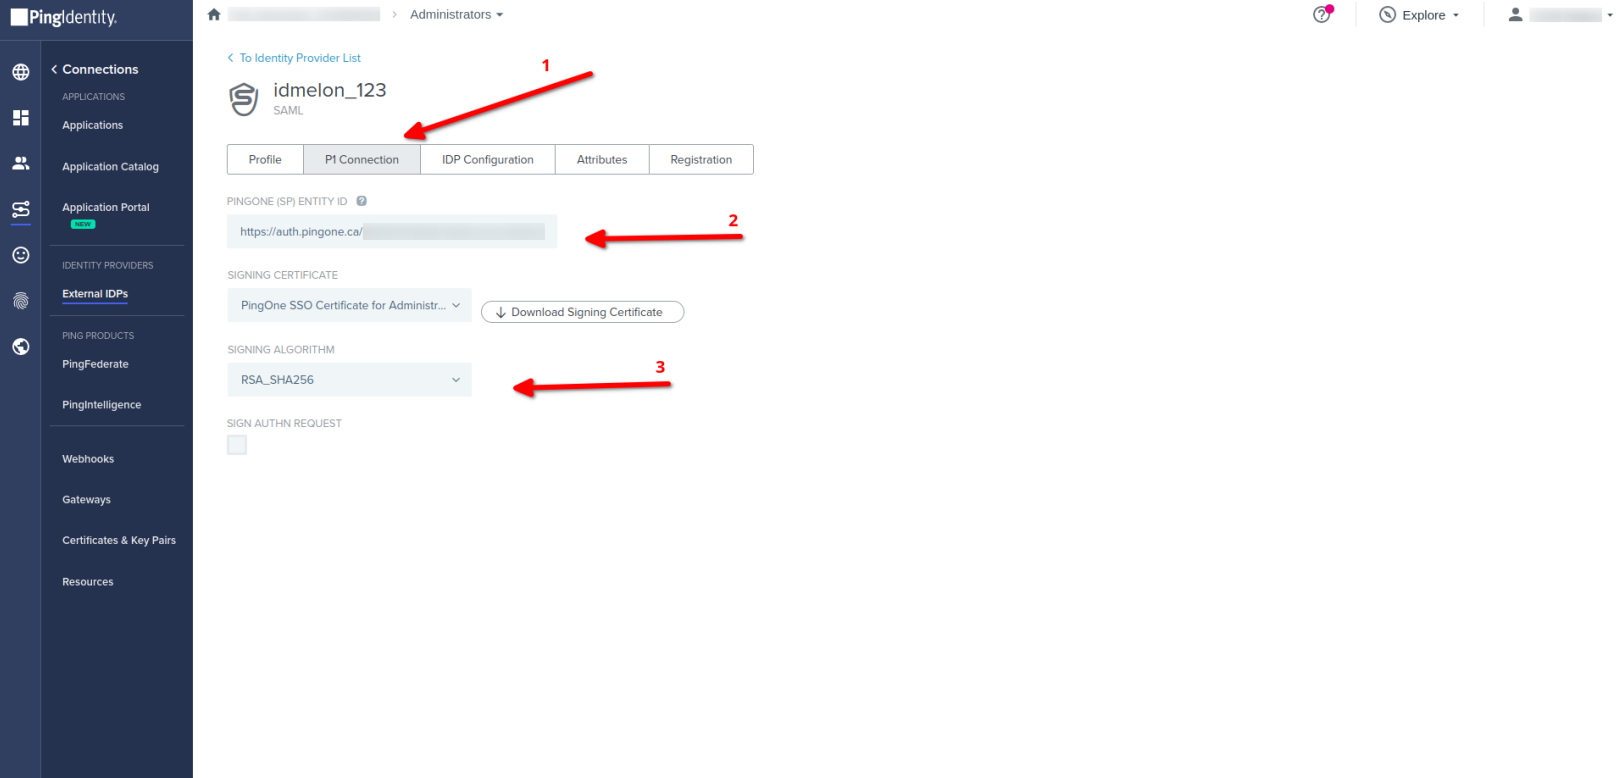
- Go to IDmelon IdP then click on P1 Connection click edit
- Copy -> PINGONE (SP) ENTITY ID
- Select your SIGNING CERTIFICATE
- Select RSA_SHA256 in SIGNING ALGORITHM field
- You should copy values of below fields from this Ping Identity panel to IDmelon Panel.
Passwordless
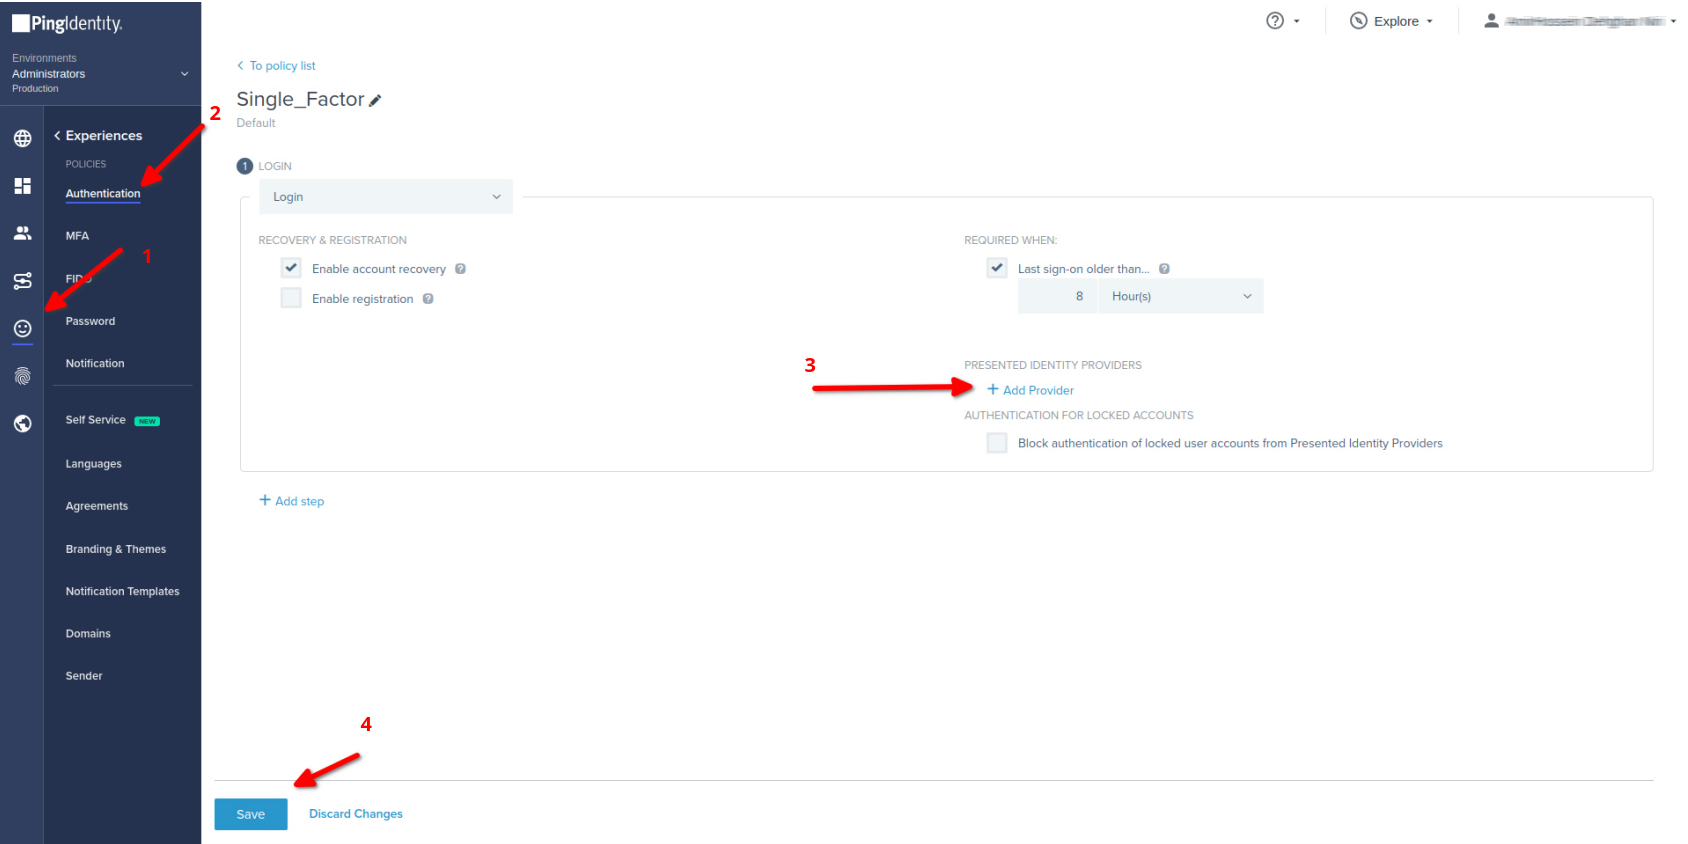
- Open Admin dashboard of Ping Identity
- Click on Experiences then Authentication Admin dashboard of Ping Identity
- Under Authentication Policies
- Choose or createyour custom Authentication
- example :
- Click on PRESENTED IDENTITY PROVIDERS
- Choose IDmelon as Identity Provider
- Save
API Token
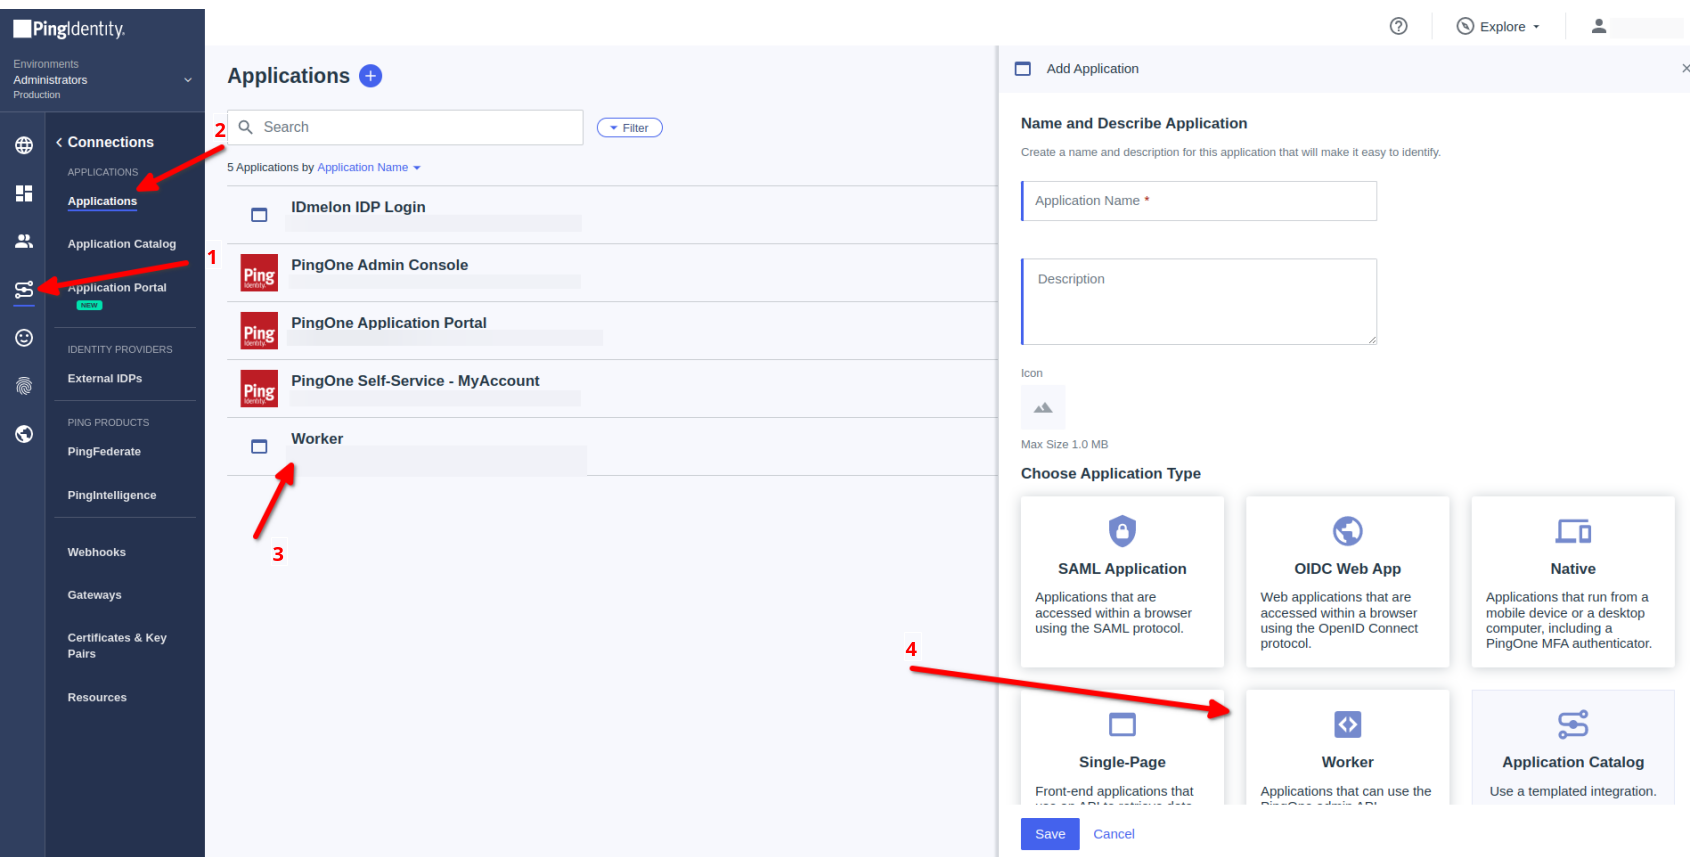
- Click on Connections then Applications
- Click on Add Applications then Choose Worker
- Choose Custom name
- Optional : Custom description
- Click on Save
- Click on Worker hen Click on Configuration
- Scroll down then Click on Get Access Token
- Copy Access Token click on Done
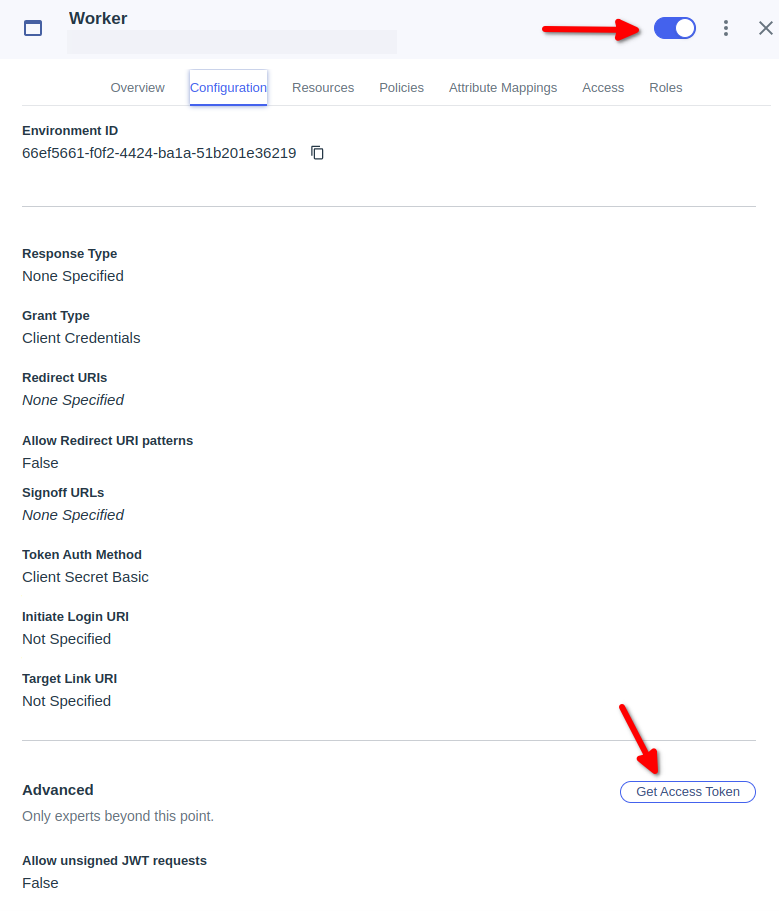
Note : Activate Worker Application
- Done