AWS
In this document, you are going to set up IDmelon as an external IdP to the AWS.
Login to AWS administration panel
- Sign in to the AWS Management Console with your AWS Organizations management account credentials.
- Open the AWS SSO console.
- Choose Enable IAM Identity Center.
- If you have not yet set up AWS Organizations, you will be prompted to create an organization. Choose Create AWS organization to complete this process.
- Choose external identity provider.
Add Identity Provider
- Open the AWS SSO console.
- Choose Settings.
- On the Settings page, choose the Identity source tab, and then choose Actions > Change identity source.
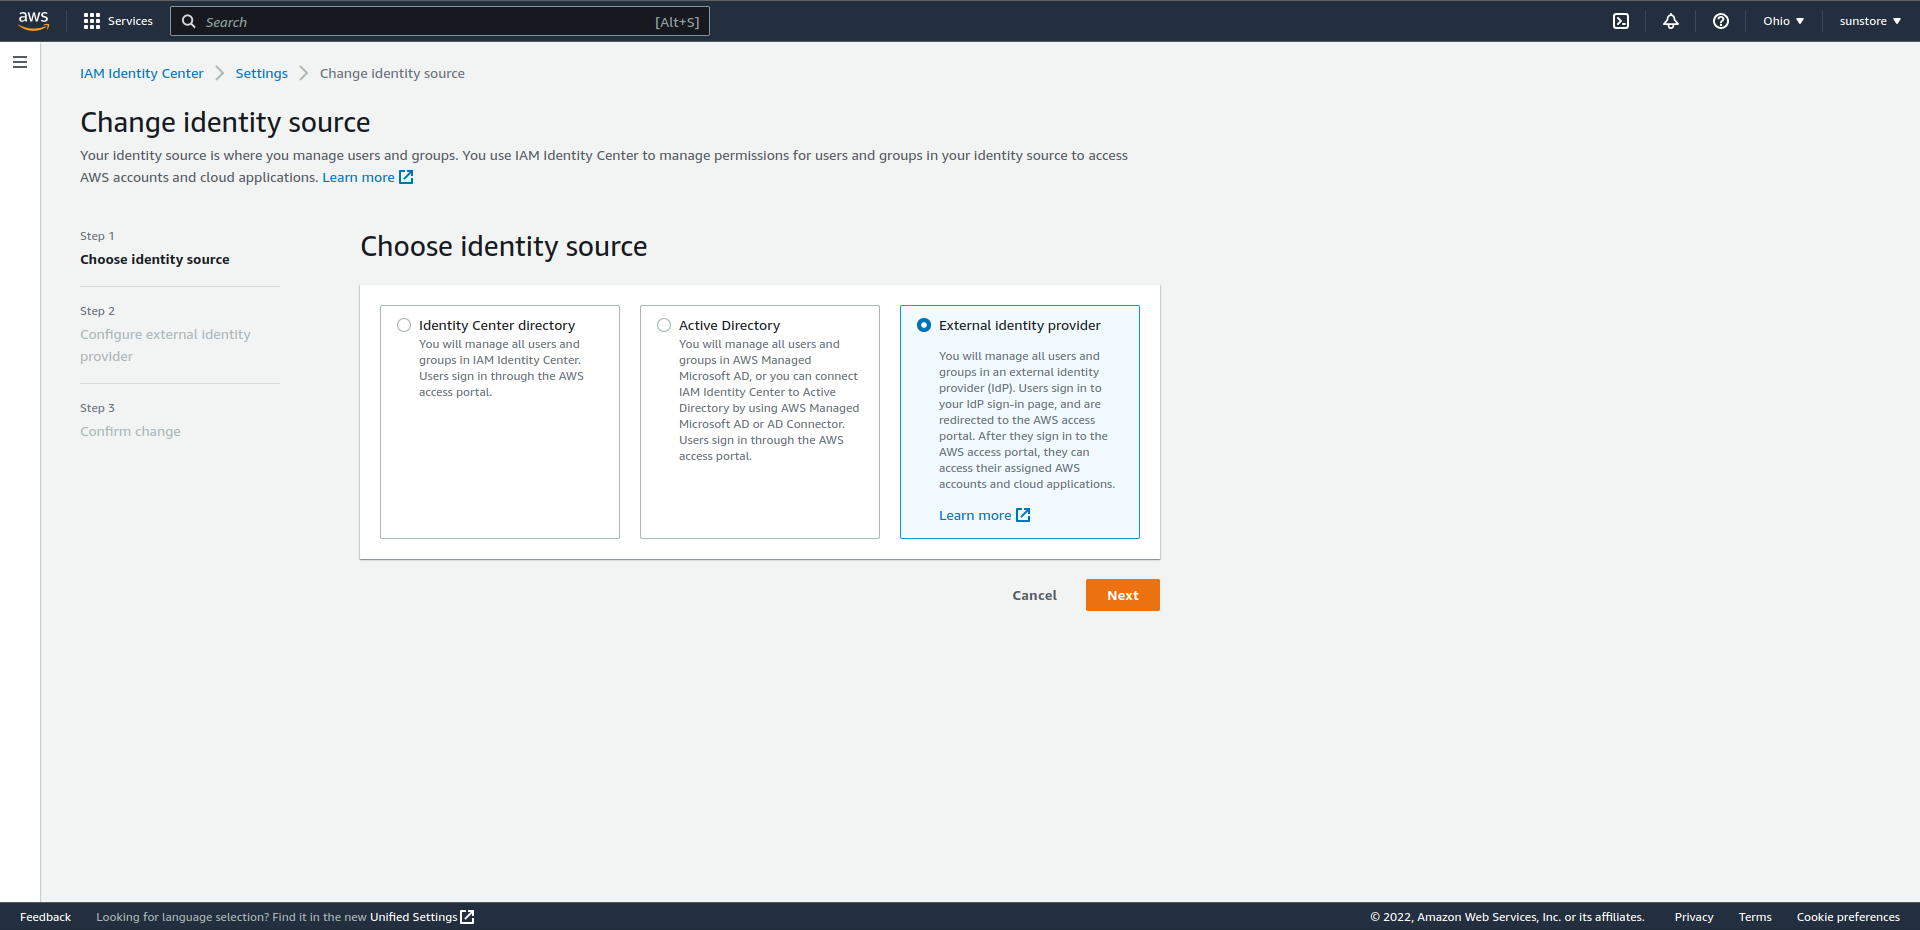
- Under Choose identity source, select External identity provider, and then choose Next.
Under Configure external identity provider, do the following:
- Under Service provider metadata, choose Download metadata file to download the metadata file and save it on your system. The AWS SSO SAML metadata file is required by your external identity provider.
Get all values for
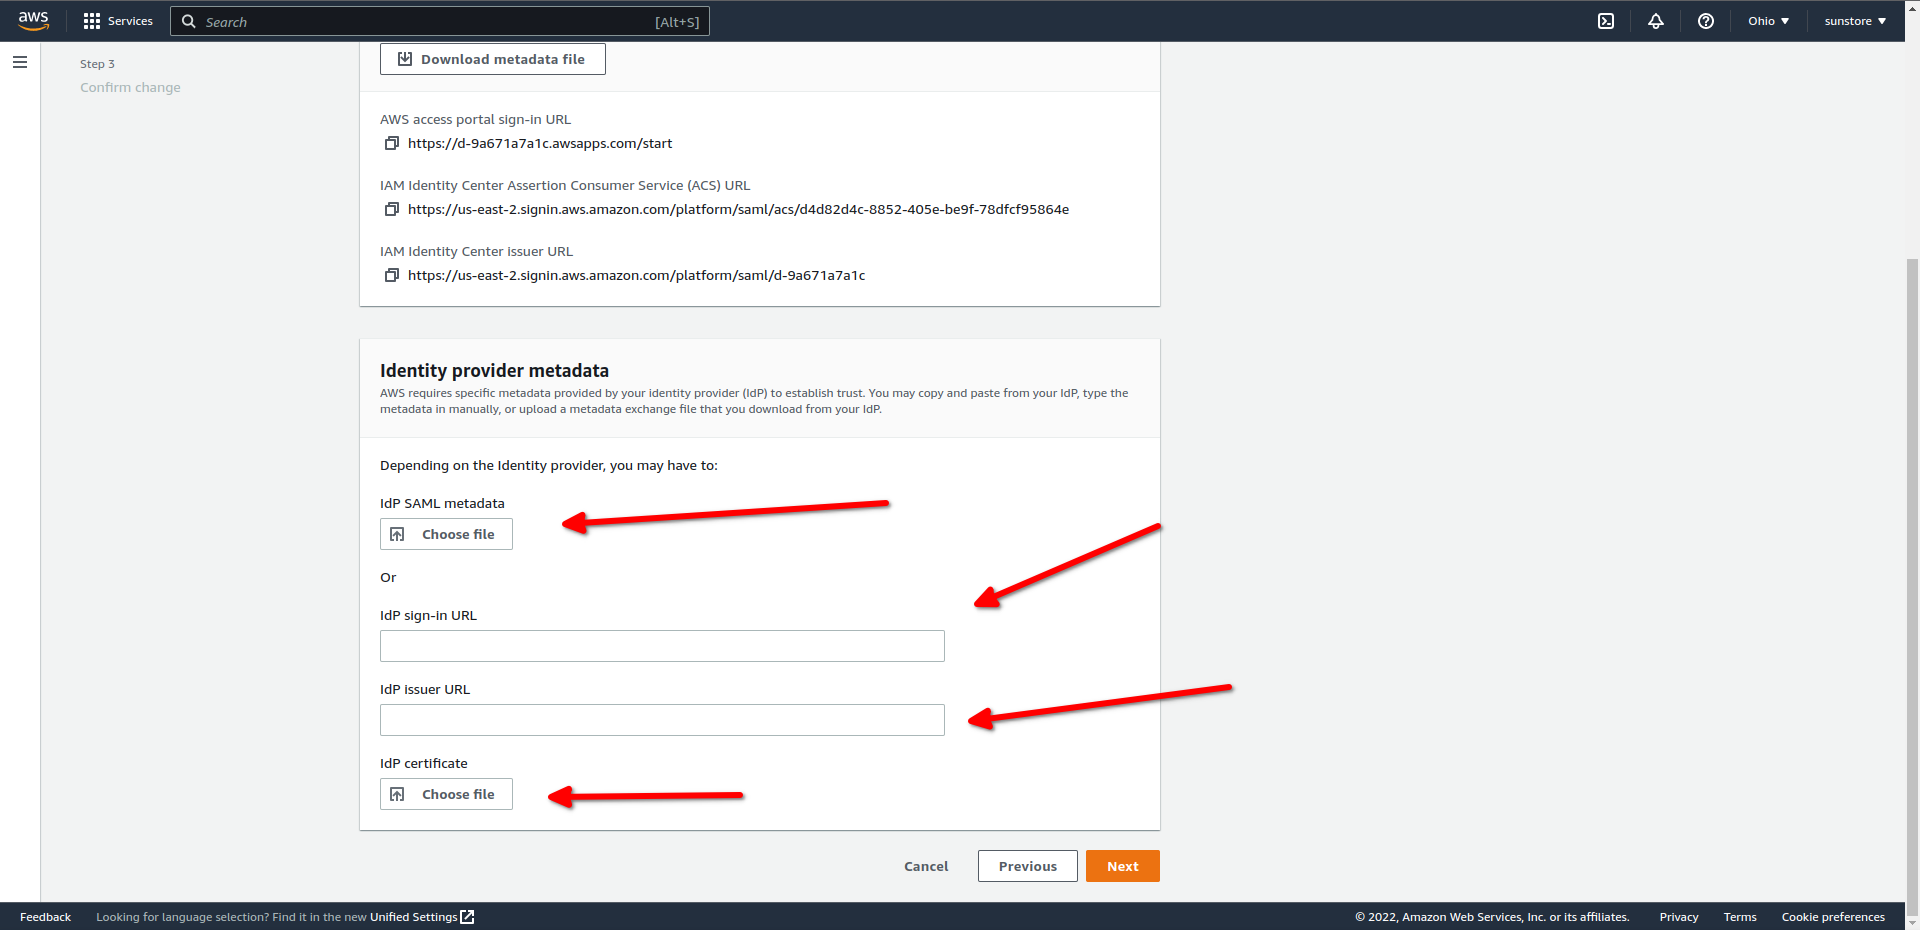
{..}from your IDmelon panel. If you are currently logged in here, you will see the replaced values instead.Under Identity provider metadata, use the following values from your IDmelon panel:
- choose IdP sign-in URL: idp_single_sign_on_url
- choose IdP issuer URL: idp_issuer_uri
- IdP certificate: idp_certificate_download_url
- Choose Next.
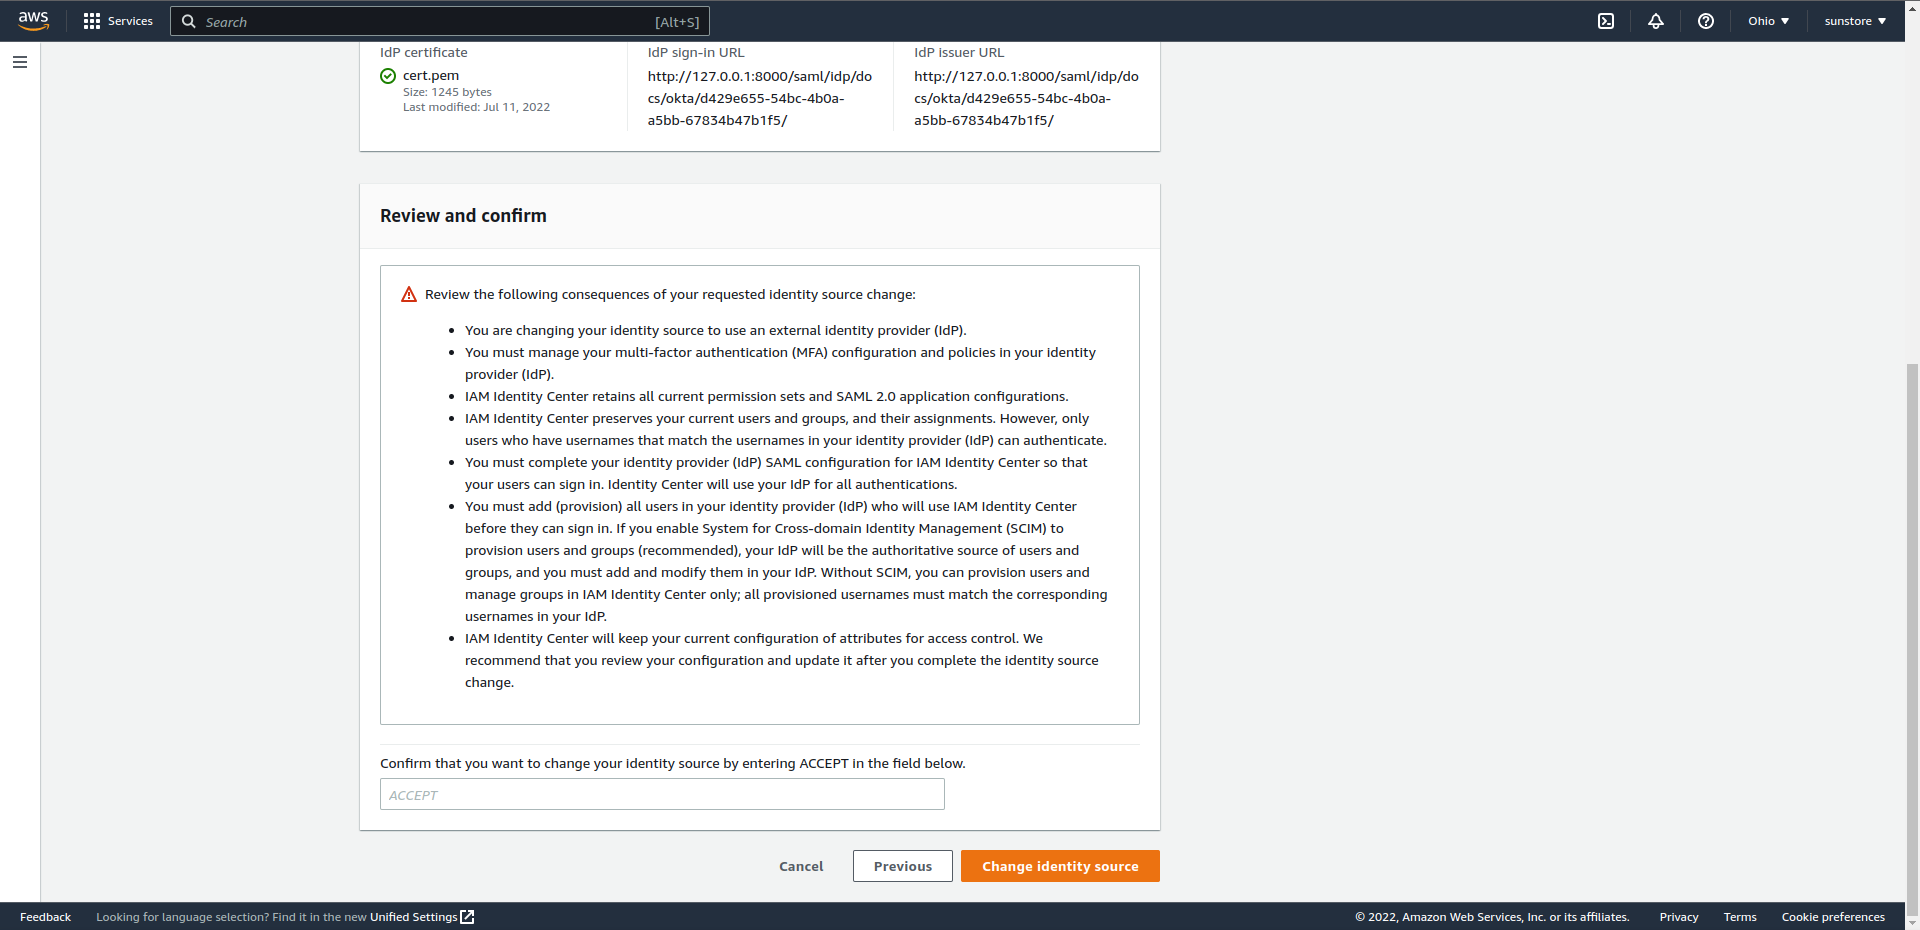
After you read the disclaimer and are ready to proceed, enter ACCEPT.
Click Change identity source.
Attribute mappings
- Open the AWS SSO console.
- Choose Settings.
- On the Settings page, choose the Attributes for access control tab, and then choose Add attribute.
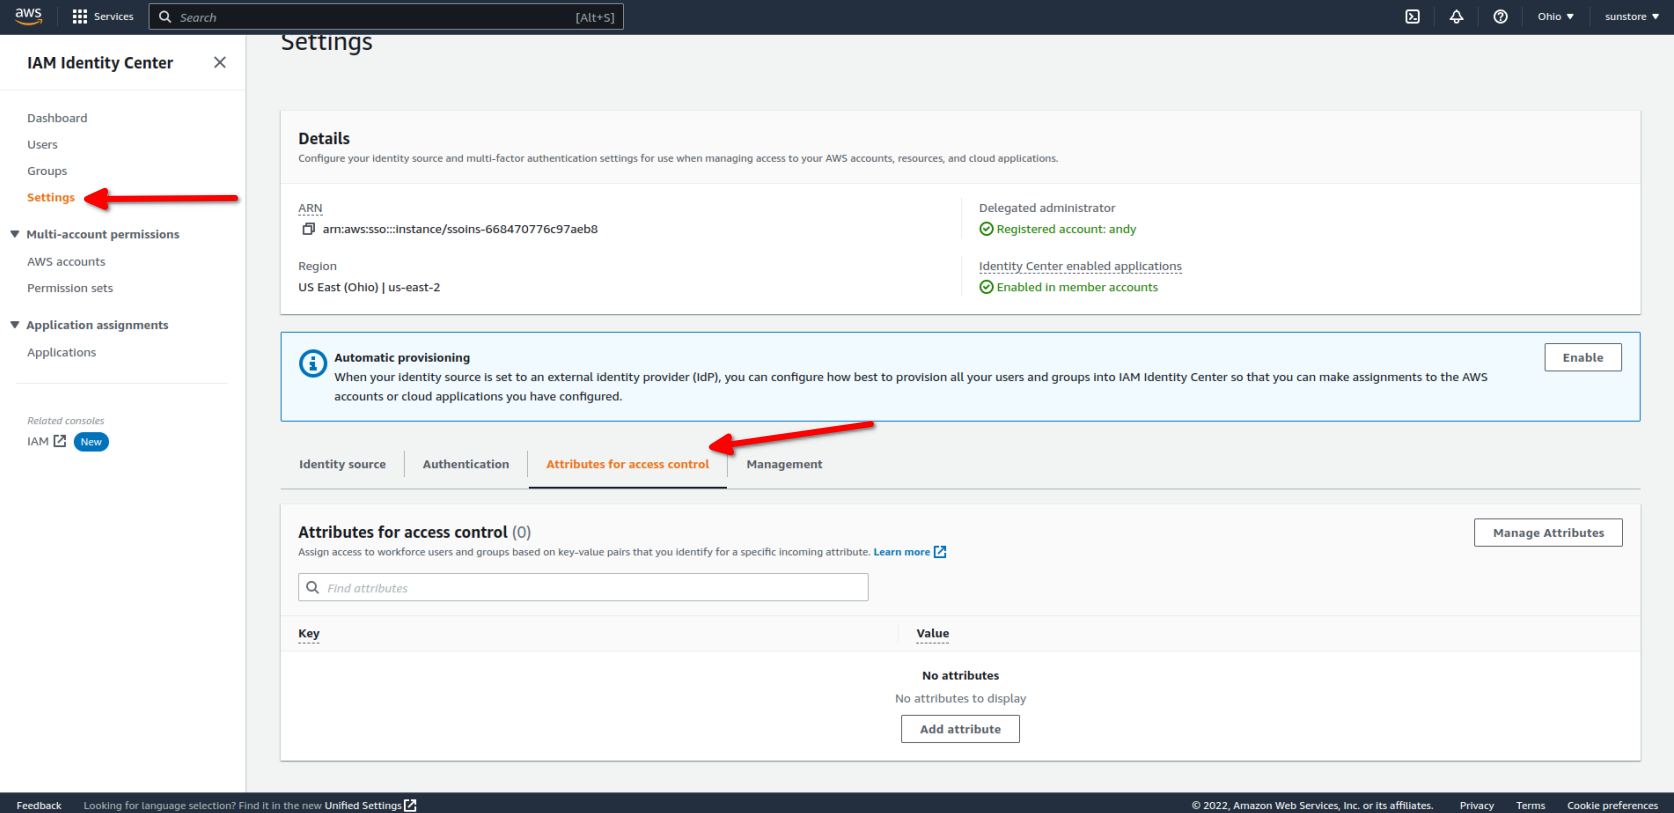
- Choose Add attribute.
- Key : Email, Value :
${path:emails[primary eq true].value} - Key : Firstname, Value :
${path:name.givenName} - Key : Lastname, Value :
${path:name.familyName} - Key : Username, Value :
${path:emails[primary eq true].value}
- Key : Email, Value :
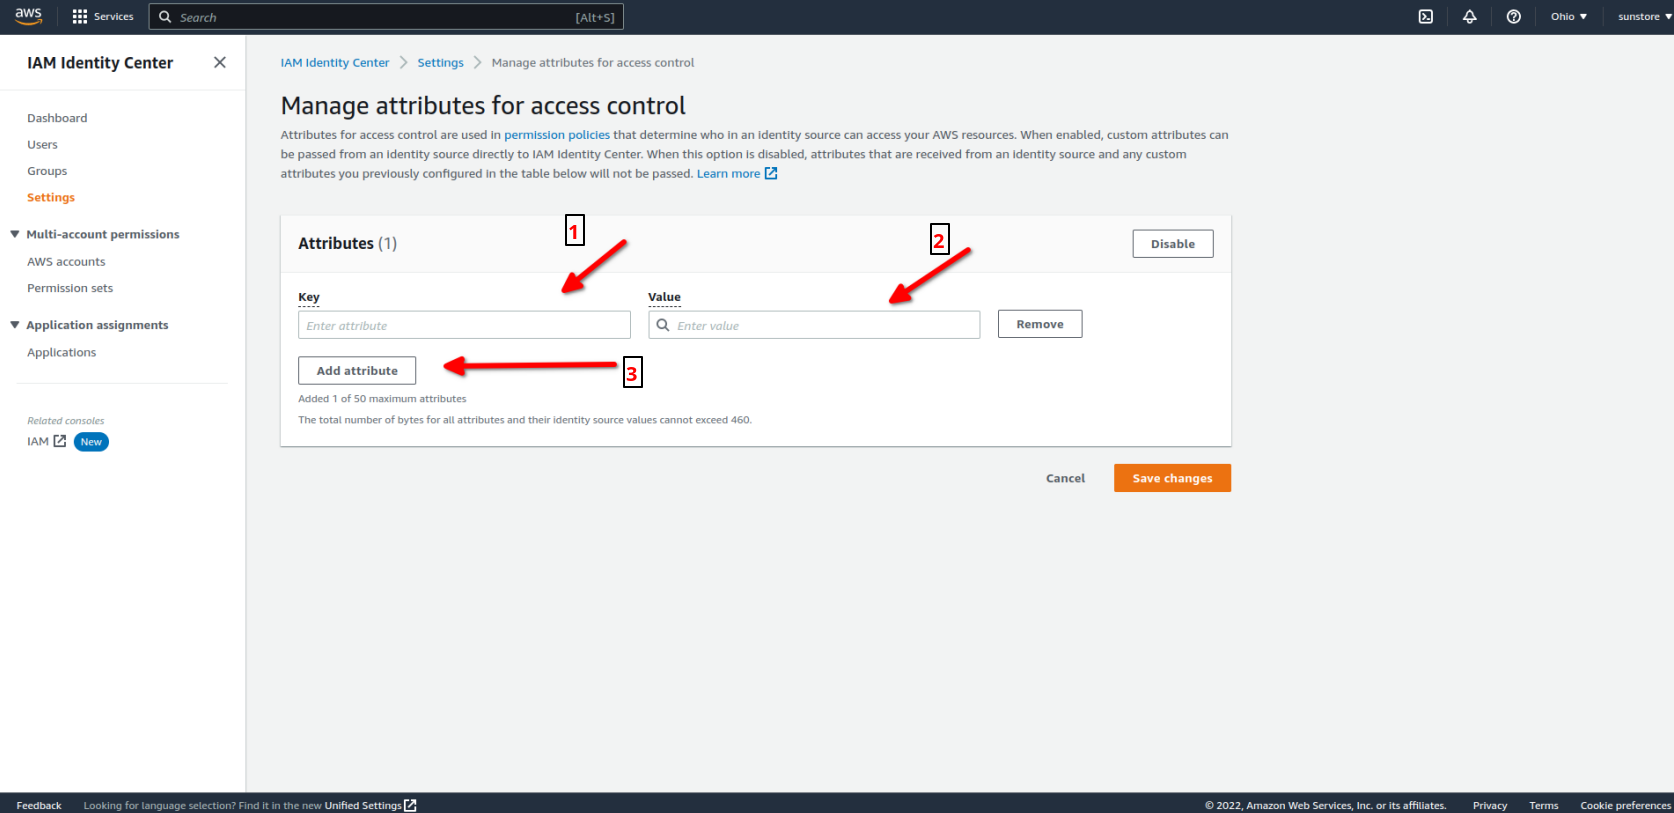
- Choose Save changes.
IDmelon SAML configuration
- You should copy values of below fields from the AWS panel to the IDmelon Panel.
- Copy
AWS Access portal sign-in URL: this is your SP-initiated portal. - Copy
IAM identity Center Assertion Consumer Service (ACS) URL: Assertion consumer service - Copy
IAM identity Center issuer URL: entity id
- Copy

API Token
- Open the AWS SSO console.
- Choose Settings in the left navigation panel.
- On the Settings page, locate the Automatic provisioning information box, and then choose Enable. This immediately enables automatic provisioning in IAM Identity Center and displays the necessary SCIM endpoint and access token information.
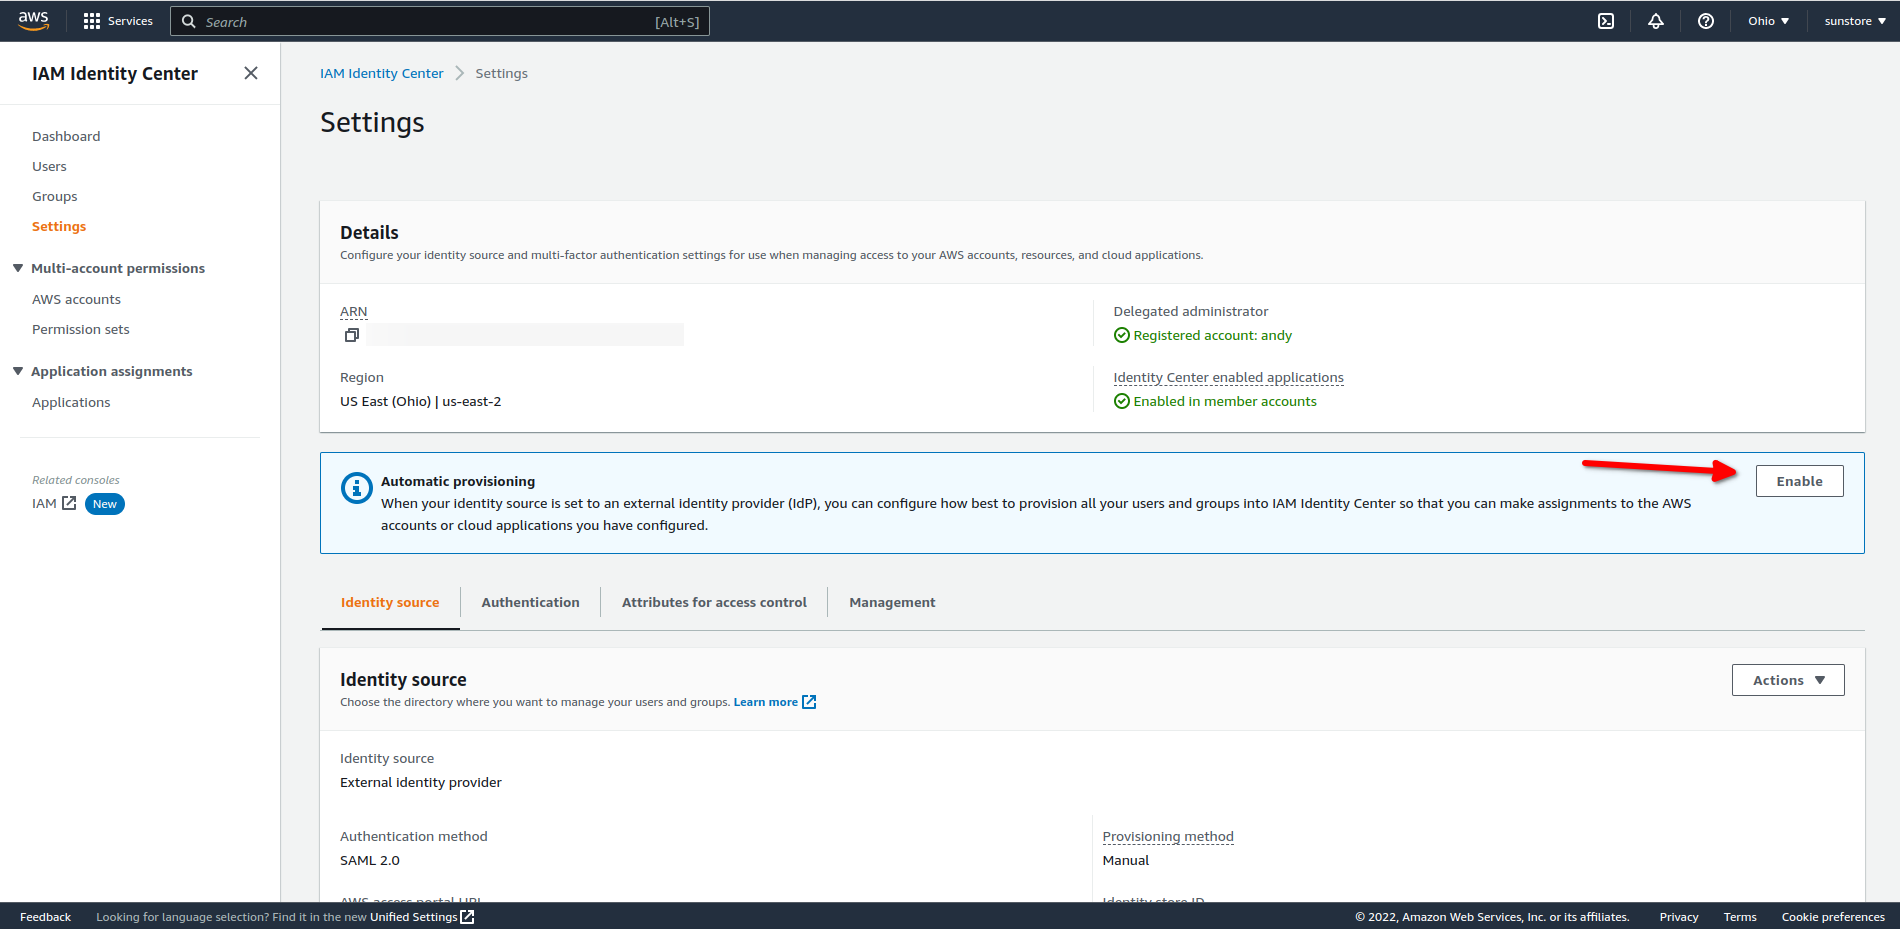
- In the Inbound automatic provisioning dialog box, copy each of the values for the following options. You will need to paste these in later when you configure provisioning in your IdP.
- Copy SCIM endpoint
- Copy Access token
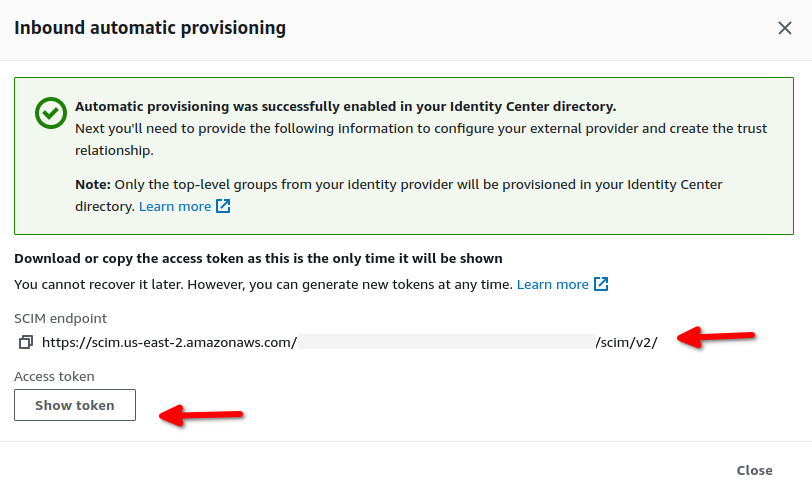
- For Access token, click on Show token
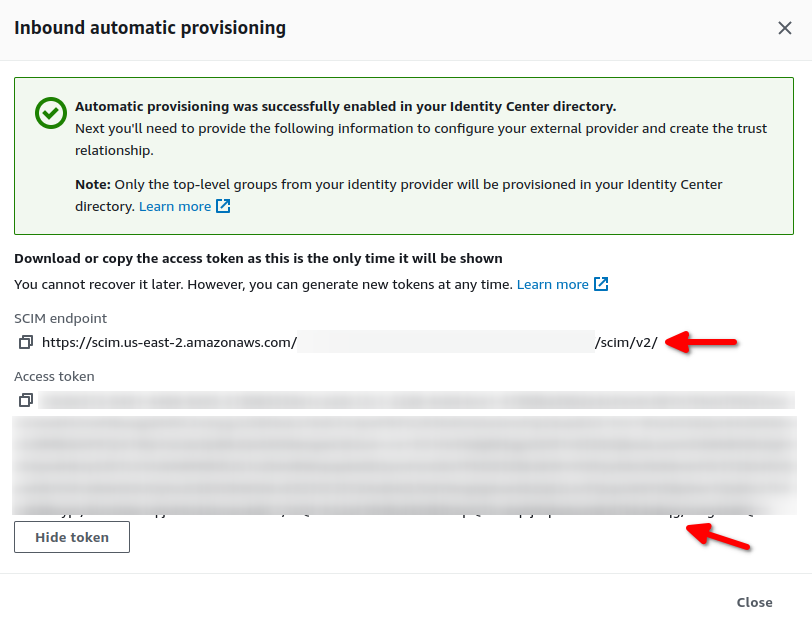
- Choose Close.