Quick Guide for Azure AD Passwordless Deployment
This document will show you how to deploy the IDmelon solution from A to Z. Please follow the instructions step by step and make sure no step is skipped. The following steps are documented for the workspace admins. For further assistance at any time, please contact [email protected].
Prerequisites
Enabling FIDO security keys from the Azure Portal.
Installing the following apps or drivers according to what type of security keys (either smartphone or contactless card) you choose to use. The downloadable items can be found here.
Smartphone as a Security Key
Single User Devices
Install the IDmelon Authenticator app on your smartphone,
Install the IDmelon Pairing Tool on your computer,
Pair your phone with computer using both apps,
As soon as a security key is assigned to you over the admin panel, your phone will receive a notification each time you want to log in. Approving it will log you in.
Shared Devices
Install the IDmelon Authenticator app on your smartphone,
Purchase the IDmelon Reader and plug it into a USB port on your computer
As soon as a security key is assigned to you over the admin panel, you can tap your phone on the Reader to log in.
ID Badge as a Security Key
Depending on the type of reader you have, install the adequate reader driver on your computer,
Plug your reader into your computer,
Once a security key is assigned to you over the admin panel, you can tap your card on the reader to log in.
Step 1: Creating the Workspace
Go to https://idmelon.com/ and click on the “Sign Up” button on the top left.
Click “Work or School”, and enter your business email, name and last name.
Check your email for the verification code and enter the code.
Name your workspace.
When the “creating security key” page comes up, you can either set the security key right now or skip and do it later:
If you want to set it up right now:
For Smartphone: Select the smartphone option and scan the QR code on the screen with the IDmelon Authenticator app. Make sure you have completed the prerequisite steps.
For ID Badge: Select contactless card option and tap your card on the reader. Make sure you have completed the prerequisite steps.
If you don’t want to add a security key right away, you can skip this step for the time being and sign in to the admin panel using your email for your first sign-in and add a security key then.
Step 2: Adding Users to the Workspace
You can add users in different ways:
The New User button on the top right of the All Users section is one option. To see this page, go to Users on the side menu on the left.
Second option is bulk import. Next to the New User button on the same page, you can see the Import Users Option. Under the Import Users button, there are 3 options: you can import users from a CSV file, Entra ID (Azure AD), or SCIM Connector. For further help on these, please reach out to [email protected]
Using the second option will automatically import the users and you will be able to view them on the All Users.
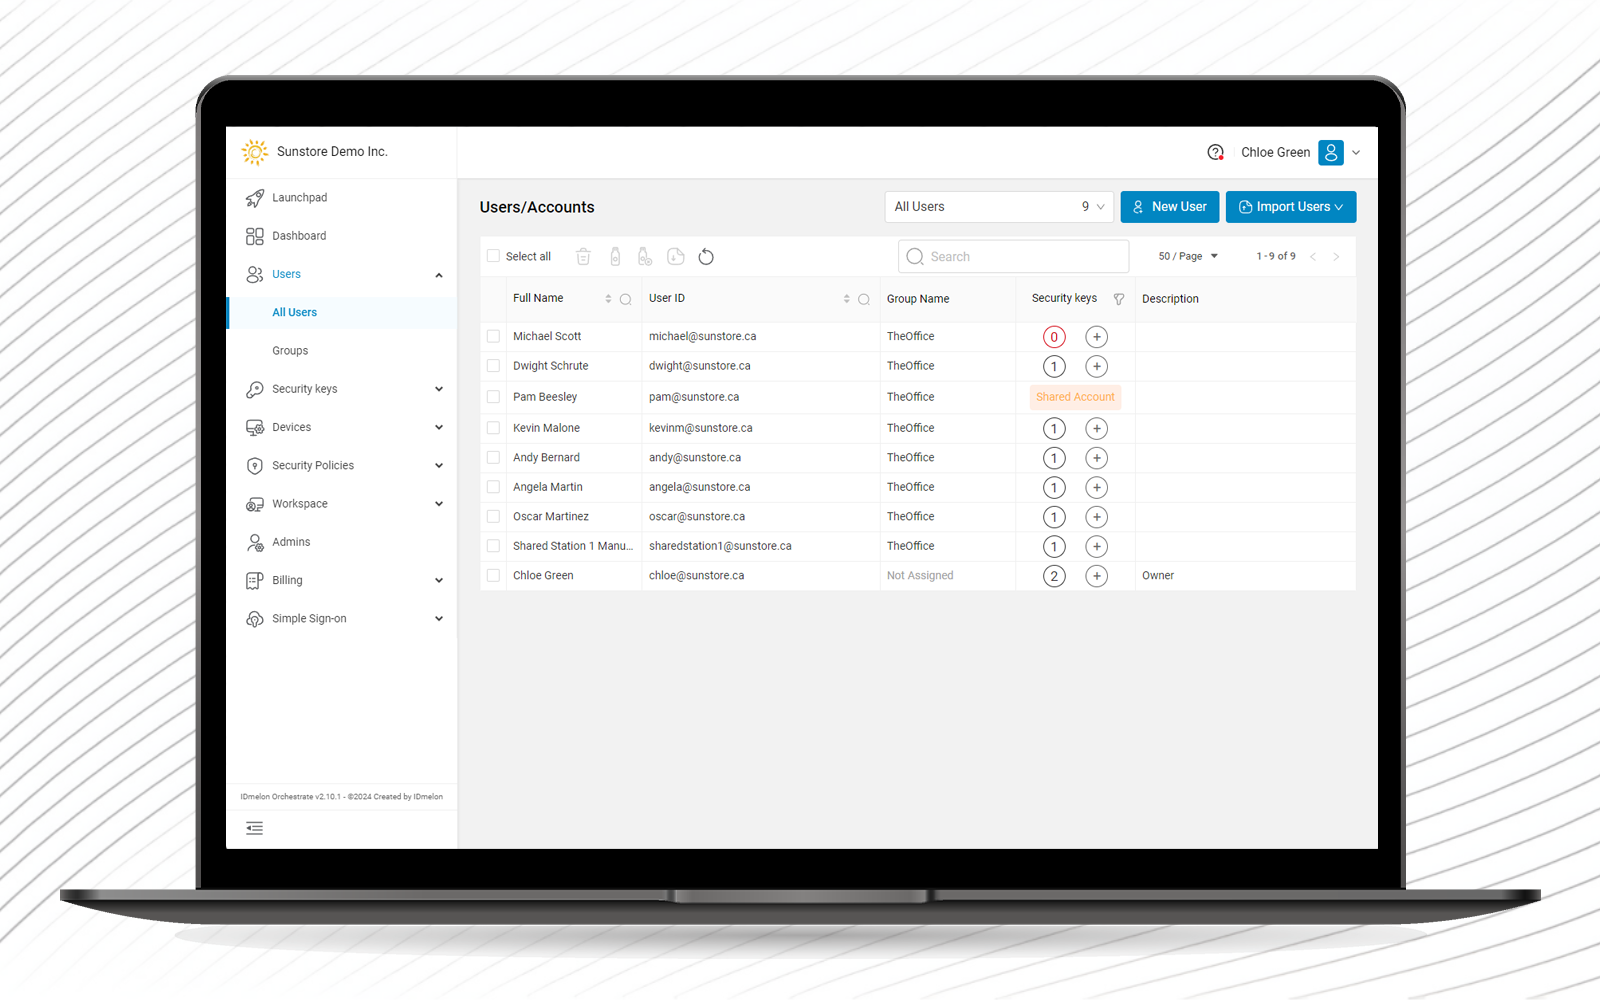
Step 3: Assigning Security Keys to Users (One by One)
From the Users page, you can see the security keys that have been assigned to users. In order to assign a security key to a user (one by one) one of the following ways have to be followed, assuming that the adequate downloadable items discussed in the prerequisites have been installed.
Go to the Users section on the left-side menu, click the All Users, select the users you would like to assign a security key to by ticking the box next to them, and then click on the security key icon on the top. A pop-up will appear where you can choose the type of security key you want: Card, Smartphone, Fingerprint, USB Key.
Go to the Users section on the left-side menu, click the All Users, the users you would like to assign a security key to is in a row whose end contains a +. Click on the + button, so that a pop-up will appear where you can choose the type of security key you want: Card, Smartphone, Fingerprint, USB Key.
Go to the Users section on the left-side menu, click the All Users, click the users you would like to assign a security key to, so that you will be taken to a page where you can read the user’s information. There, from the top menu, click the Security keys tab, and then click the New Security key button on the right. A pop-up will appear where you can choose the type of security key you want: Card, Smartphone, Fingerprint, USB Key.
Step 4: Assigning Security Keys to Users in Bulk
It is possible to match users with security keys. This is possible in a scenario where users already have ID Badges, HID badges for instance, in their hands and the organization is adopting IDmelon. It would be difficult to call in every user or send them an activation email to onboard, so it is possible to match the users and badges by uploading a CSV file.
This file should include the “user principal name”, which is the email of the user (Required), HID badge numbers (Required), their names, (optional) phone numbers, (optional) and which should be known by the IT. Once this file is uploaded, the users will be assigned the cards they already have as FIDO security keys and will receive a PIN to start using them.
Step 5: Registering Passkeys for Users
Once the steps above are followed and users have their security keys, it is possible for them to log into the IDmelon panel and Windows machines. In order to start signing into other web applications, it is necessary to register a passkey for the user. As an example, this guide will tell you how to add IDmelon to Microsoft accounts. There are two ways for this. One manual and one automated.
- The first way to add IDmelon to Microsoft 365

Once this step is done, the user can log in to their account by IDmelon. Every single user in the organization has to do this step to be able to log in into 365 using IDmelon.
- The second and easier method to add IDmelon to Microsoft
Use Automated RP Provisioning. This can only be done if the user has been imported from Microsoft Entra ID (Azure AD).
If a user is imported from Entra ID (Azure AD), the provisioning can be done and the credential or passkey would be registered automatically. To do this, contact the IDmelon team to get help with this.
Step 6: Managing Security Keys
IDmelon Admin Panel gives complete control over security keys to admins. Admins are able to view security key activities, add/restrict/delete security keys and users.
On the Security keys page, by clicking on the clock icon on the right side of each user’s row, it is possible to see all login activities of that user, which security keys they have been used, and which websites or applications they have logged in to. From the top right of the same page, it is possible to suspend or delete the security key. Also, you can select a security key by ticking the checkbox next to it, then you can use the icons on the top menu to , delete, suspend or reset the PIN of that specific security key.
To change a user’s information, the admins should click on a user’s email from the User ID column from the All Users section in the Users. The Edit button allows admin to edit the user’s information.
From the Groups tab, you can see all groups, to which groups each user belongs, and also suspend or delete a group.
Step 7: Creating Security Policies
It is possible to create security key policies and assign to specific users and groups

In order to create one, click the “New Policy” button on top right and follow these steps:
Name your policy and set a priority.
Select what type of security keys this policy should apply to.
Select which users or groups this policy should apply to from “Users and Groups.”
Create time limitations from the “Time limits” (optional).
Create IP and RP restrictions from the tabs below by clicking to the + sign next to them. (optional).
Restrict access from specific locations and devices form the tabs below. (optional). And click next.
Select if these actions should be blocked or allowed, and then confirm.
You can edit or delete the policies from the same tab.
Step 8: Using the “Password Filler” Option (Optional) (Only for Cards)
For applications that don’t support FIDO2 or SSO, it is possible to use the password filler option. In order to use this, there are some pre-requisites. If you think that your organisation is using an application that needs the password filler, please reach out to us to confirm with you.
A if this is a web application, Chrome browser should be used, and “IDmelon Web Login” should be installed., regardless of the application type.
Once this step is done, go to the IDmelon Admin Panel > Go to your own account > Go to the “passwords” tab > Add Password > Choose the application type > if it is a web application put in your credentials, if it is a web application copy and paste link of the login page of the website and then your credentials.
Once these steps are done, you should get a user experience as in this video.