Microsoft Entra ID (OIDC)
In this document you are going to set up Entra ID as an external IdP to IDmelon over OpenID Connect. IDmelon is the relying party.
This is not the SAML guide. SAML Entra ID is Azure Active Directory (AAD). On the picker, use the Entra ID card, then choose OpenID Connect. Do not choose SAML 2.0, and do not open Enterprise applications.
Users are matched by preferred_username (the Entra UPN), not by the email claim. The Entra user must already exist in IDmelon with that same username.
Initialize IDmelon Configuration as SP
Log in to the IDmelon panel. In the left menu open Authentication, then External Identity Providers.
Click + New Identity Provider.
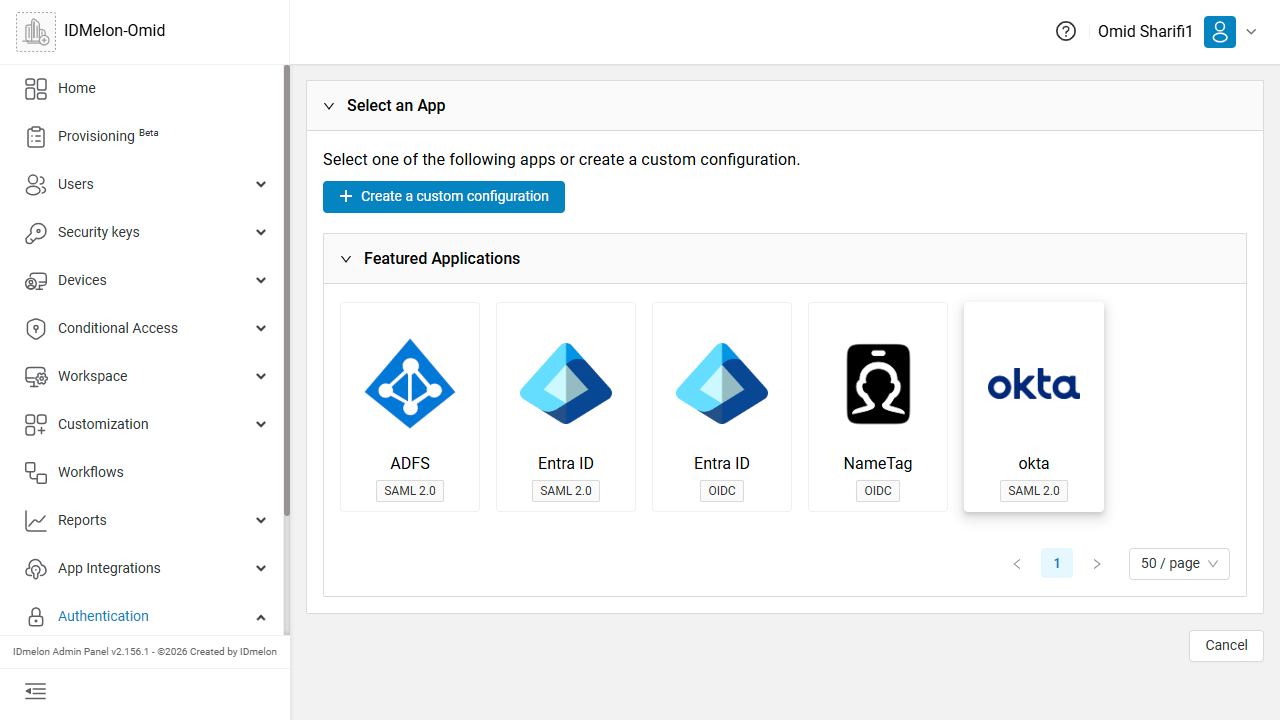
The next screen is Select an App. Under Featured Applications, click the Entra ID card. It shows both OIDC and SAML tags.
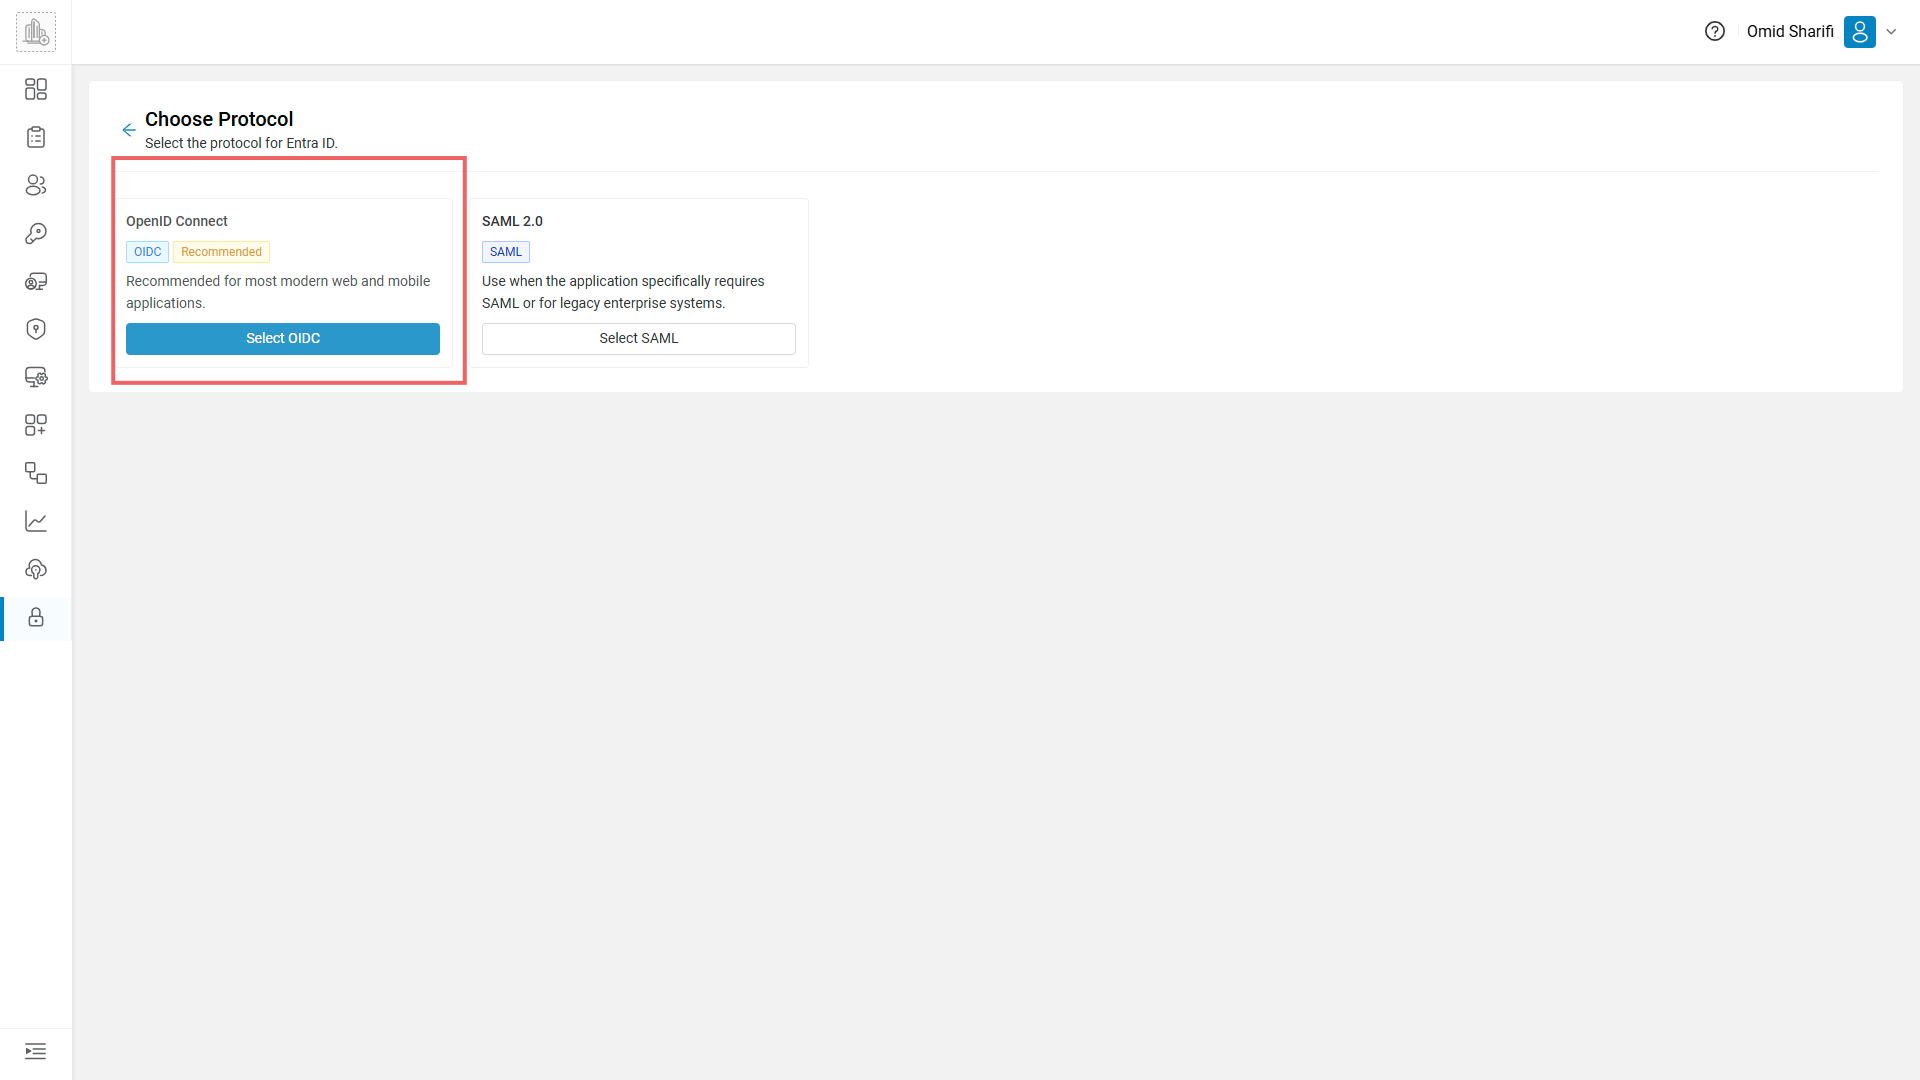
Choose Protocol opens. Select OpenID Connect. The card is tagged OIDC and Recommended. Click Select OIDC. Do not click Select SAML.
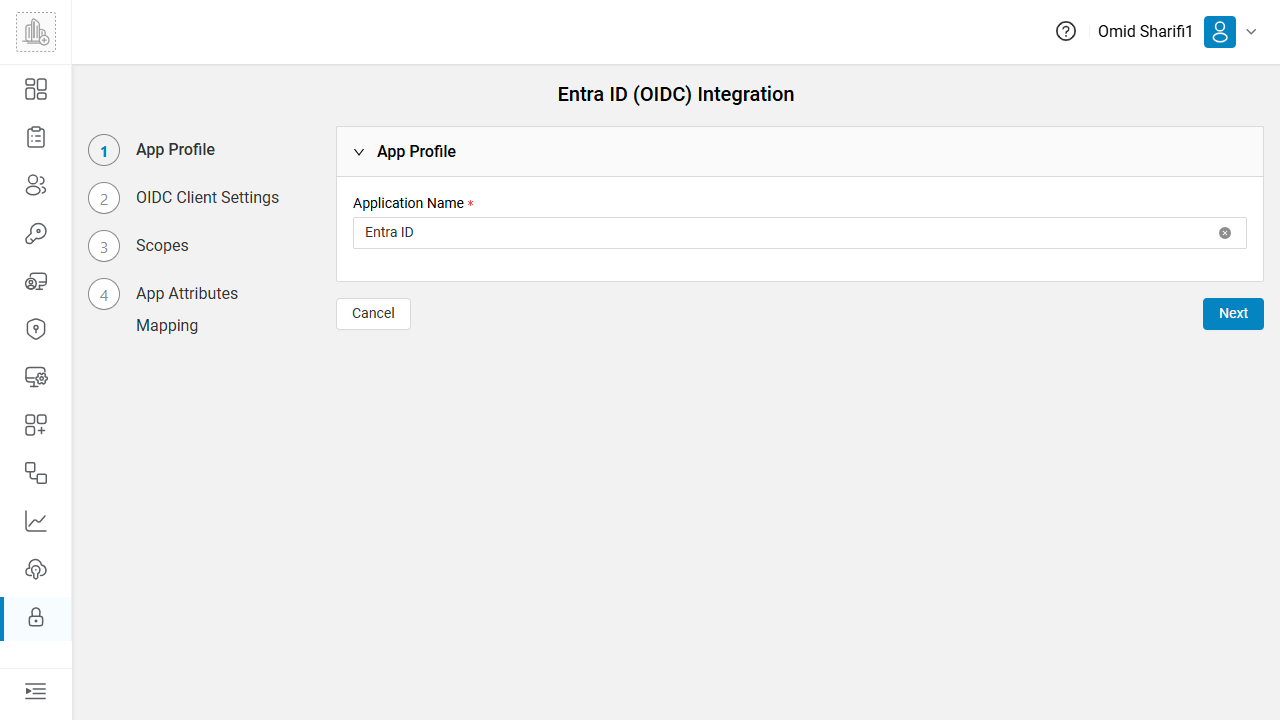
The wizard title is Entra ID Integration. The steps are App Profile, OIDC Client Settings, Scopes and claims, and App Attributes Mapping.
On App Profile, Name is already Entra ID. Leave it and click Next.
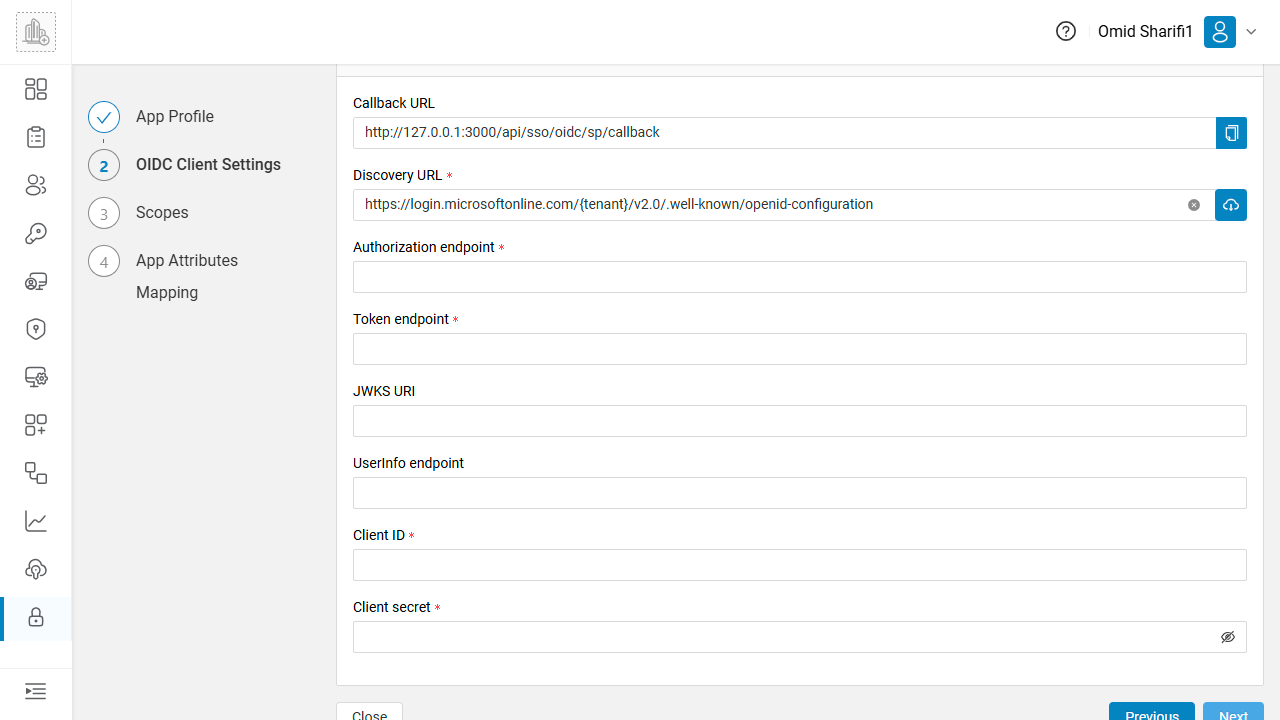
OIDC Client Settings opens. Copy Callback URL with the copy button. You will paste that exact value as the Web redirect URI in Entra. The host depends on your environment. The path is /api/oidc/sp/callback. Leave this window open.
Discovery URL is prefilled as https://login.microsoftonline.com/{tenant}/v2.0/.well-known/openid-configuration. Do not click fetch yet. {tenant} is still in the URL, and the endpoint fields below are empty until you replace it.
Configuring Entra ID
Sign in to the Microsoft Entra admin center or the Azure portal and open App registrations (Home > App registrations).
Click + New registration.
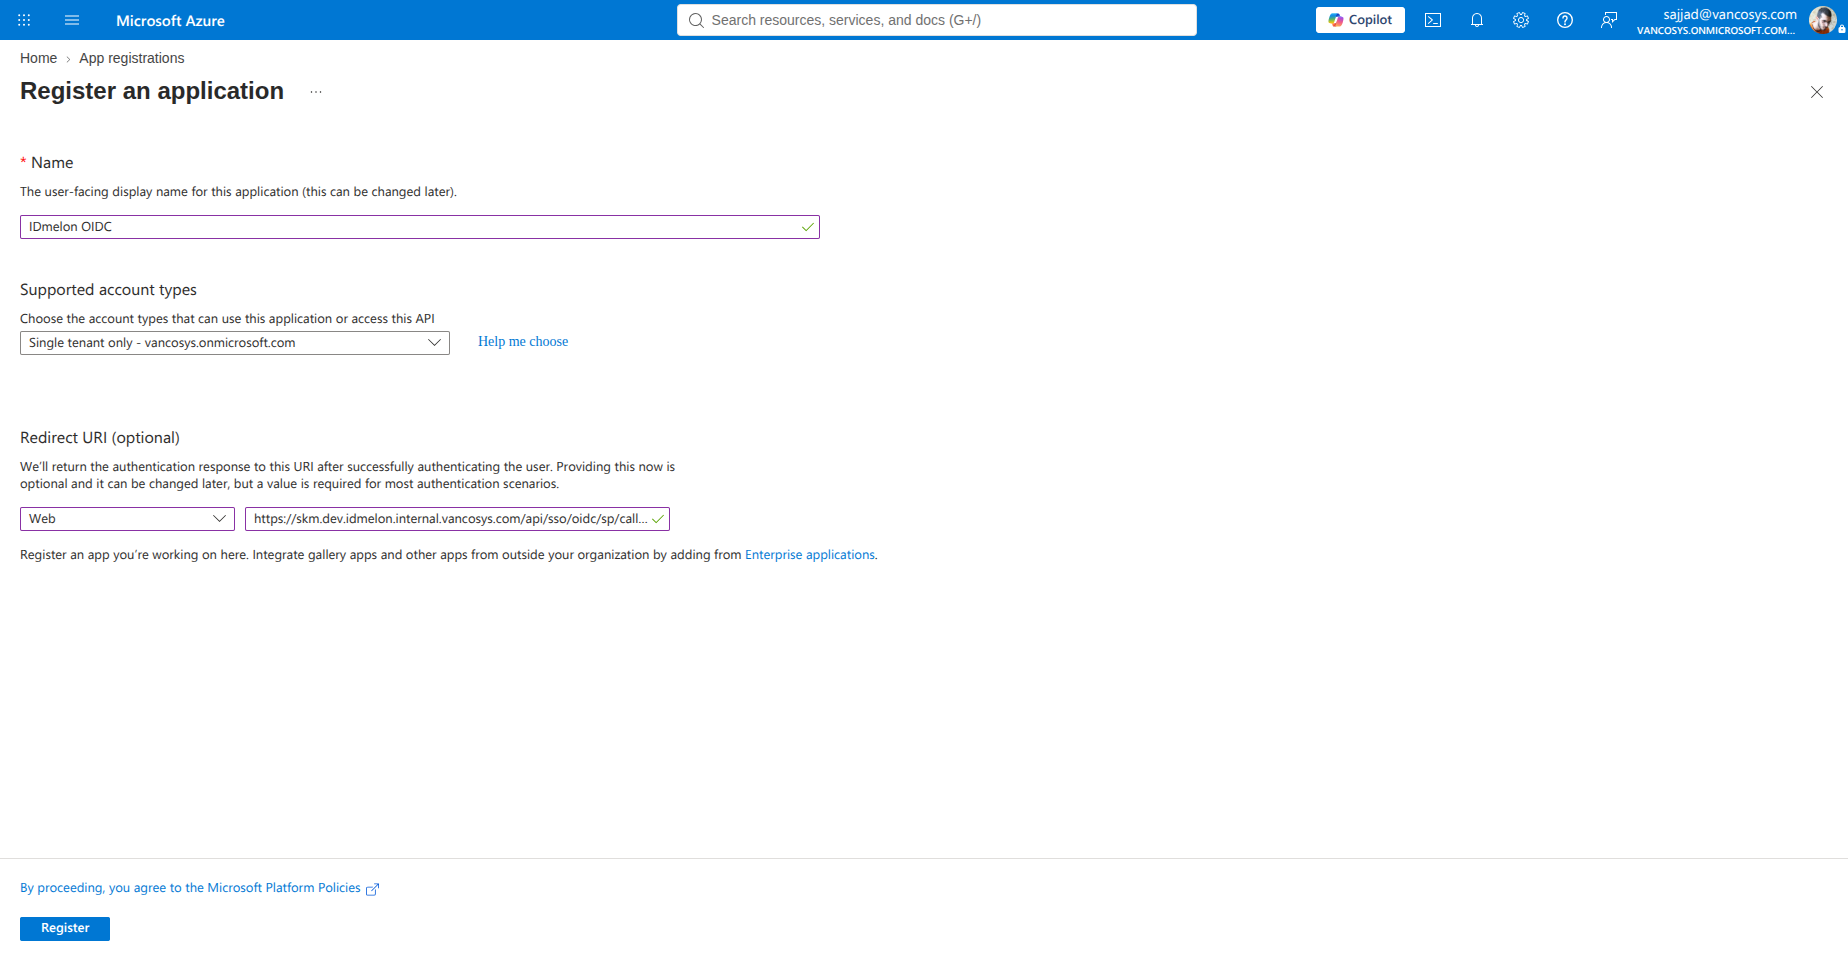
On Register an application:
- Name: a display name, for example
IDmelon OIDC. - Supported account types: Single tenant only. The line shows your directory name.
- Redirect URI: in the platform dropdown choose Web, then paste the Callback URL copied from IDmelon.
Click Register.
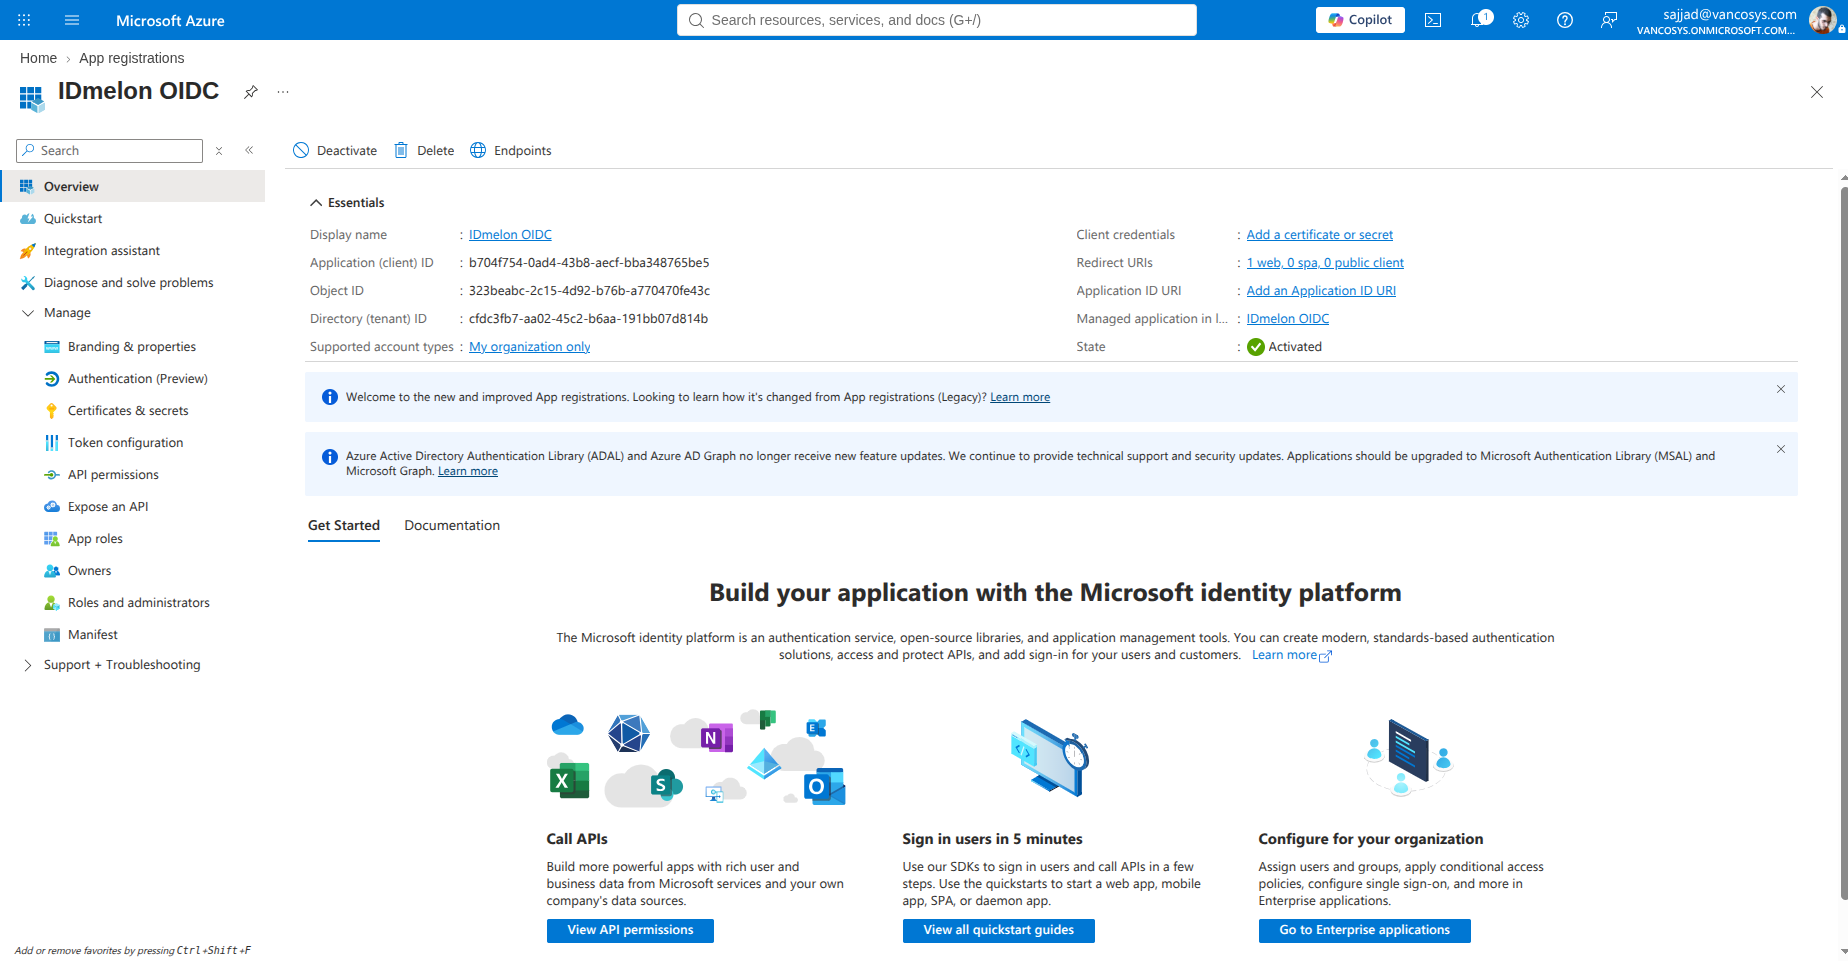
The app Overview opens. Copy these two values. Do not click Go to Enterprise applications.
- Directory (tenant) ID. This replaces
{tenant}in the IDmelon discovery URL. - Application (client) ID. This is the IDmelon Client ID.
Redirect URIs should read 1 web. That is the callback you just registered.
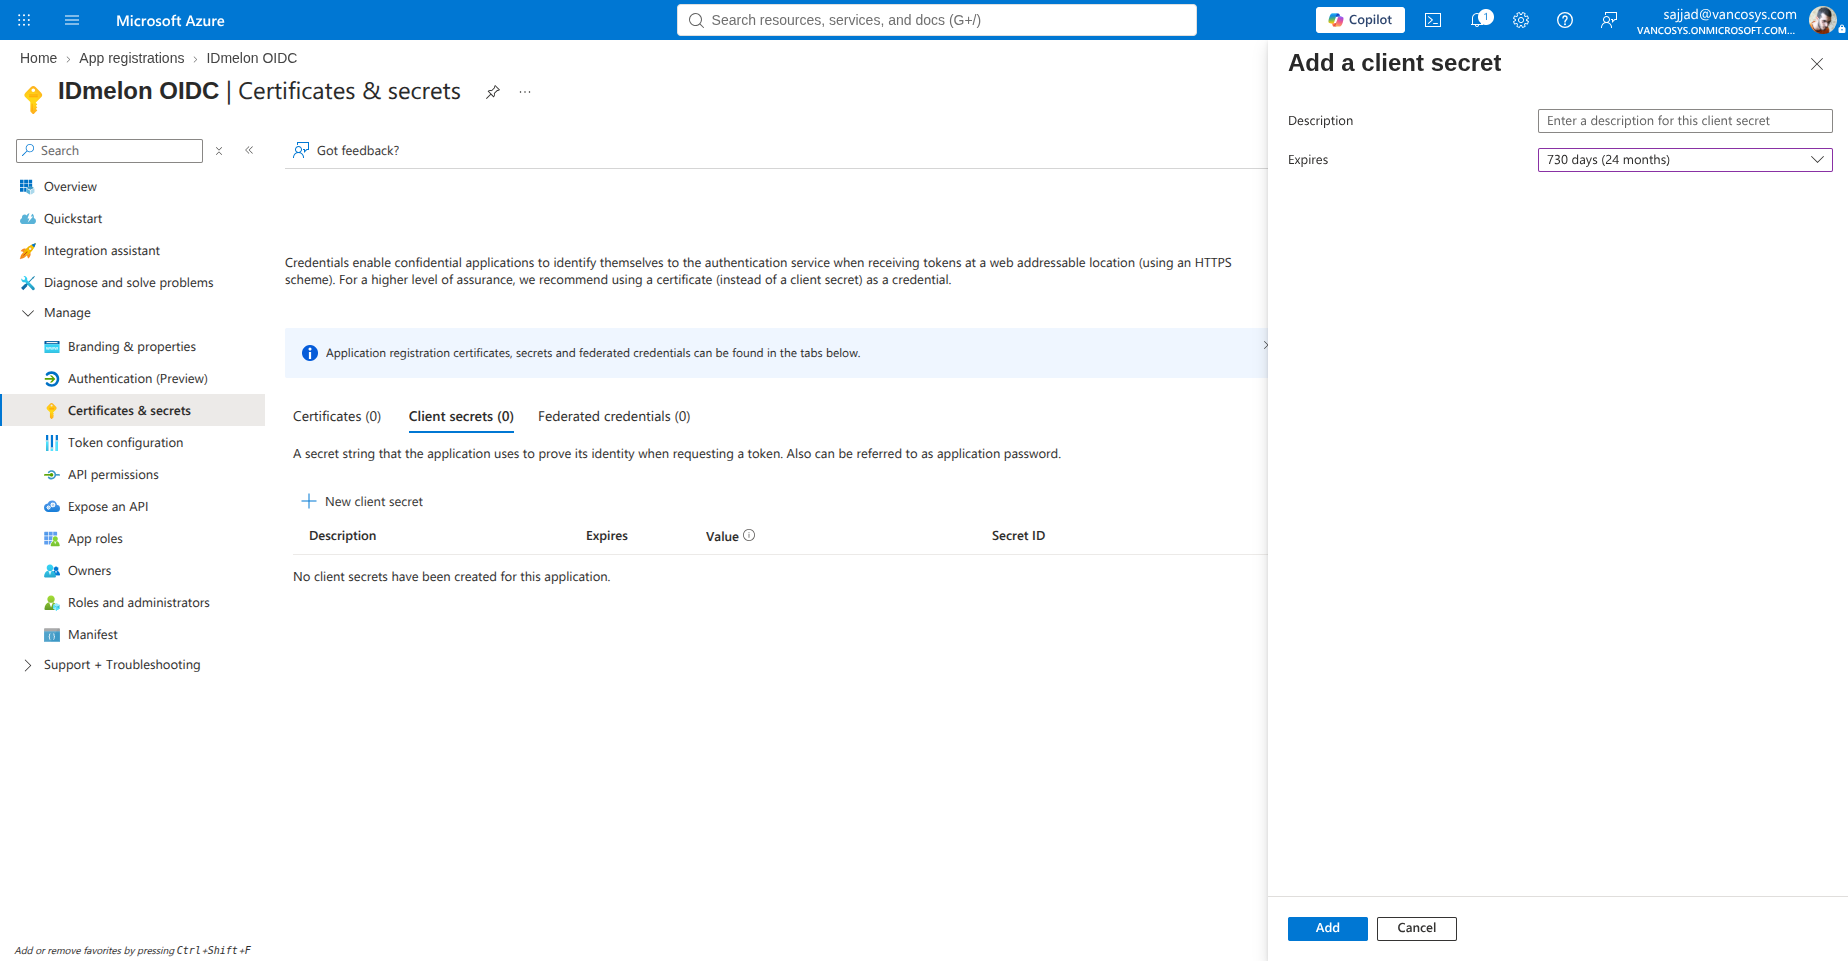
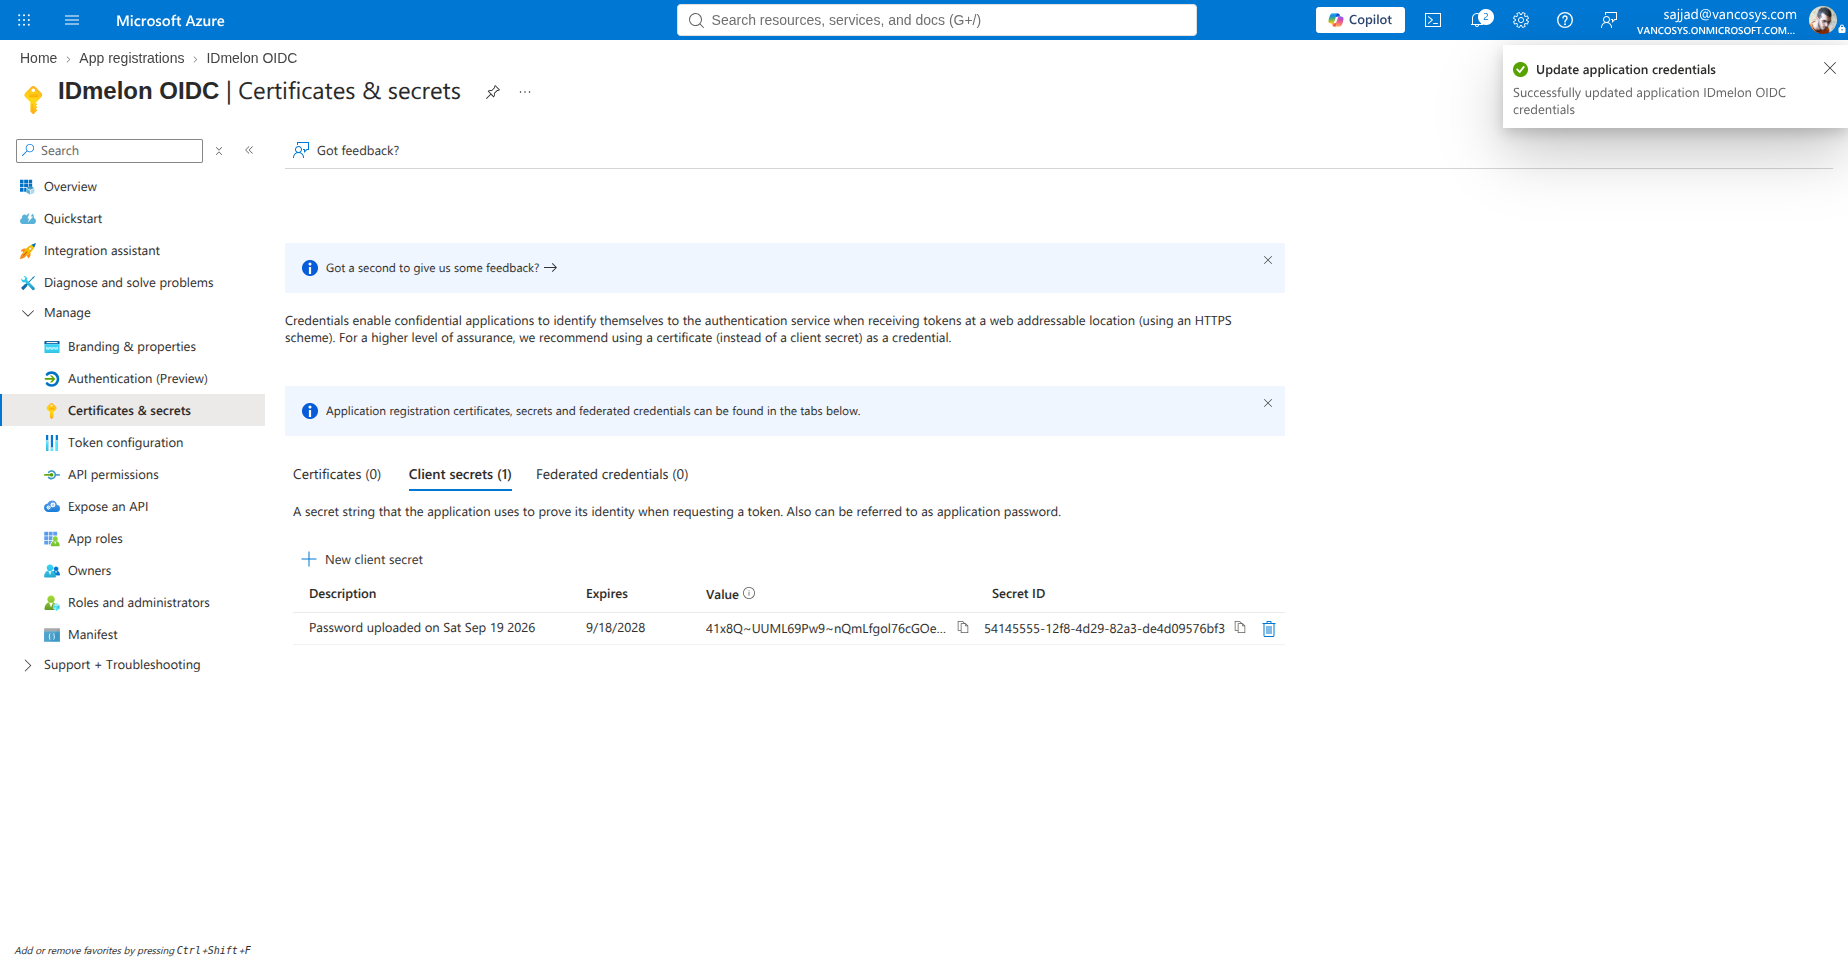
In the left menu, under Manage, open Certificates & secrets. Open the Client secrets tab and click + New client secret.
In Add a client secret:
- Description: any label for this secret.
- Expires: pick a lifetime, for example 730 days (24 months).
Click Add.
The new row appears under Client secrets. Copy the Value column immediately. Entra hides it after you leave the page. That value is the IDmelon Client secret. Do not copy Secret ID.
Finishing IDmelon Configuration as SP
Return to OIDC Client Settings.
- In Discovery URL, replace
{tenant}with the Directory (tenant) ID you copied. You can use the tenant domain instead, such ascontoso.onmicrosoft.com. Fetch stays blocked while{tenant}is still in the URL. - Click the fetch button at the end of Discovery URL. IDmelon fills issuer, authorization_endpoint, token_endpoint, jwks_uri, and userinfo_endpoint. Do not type those by hand.
- Paste Application (client) ID into Client ID.
- Paste the secret Value into Client secret.
- Click Next.
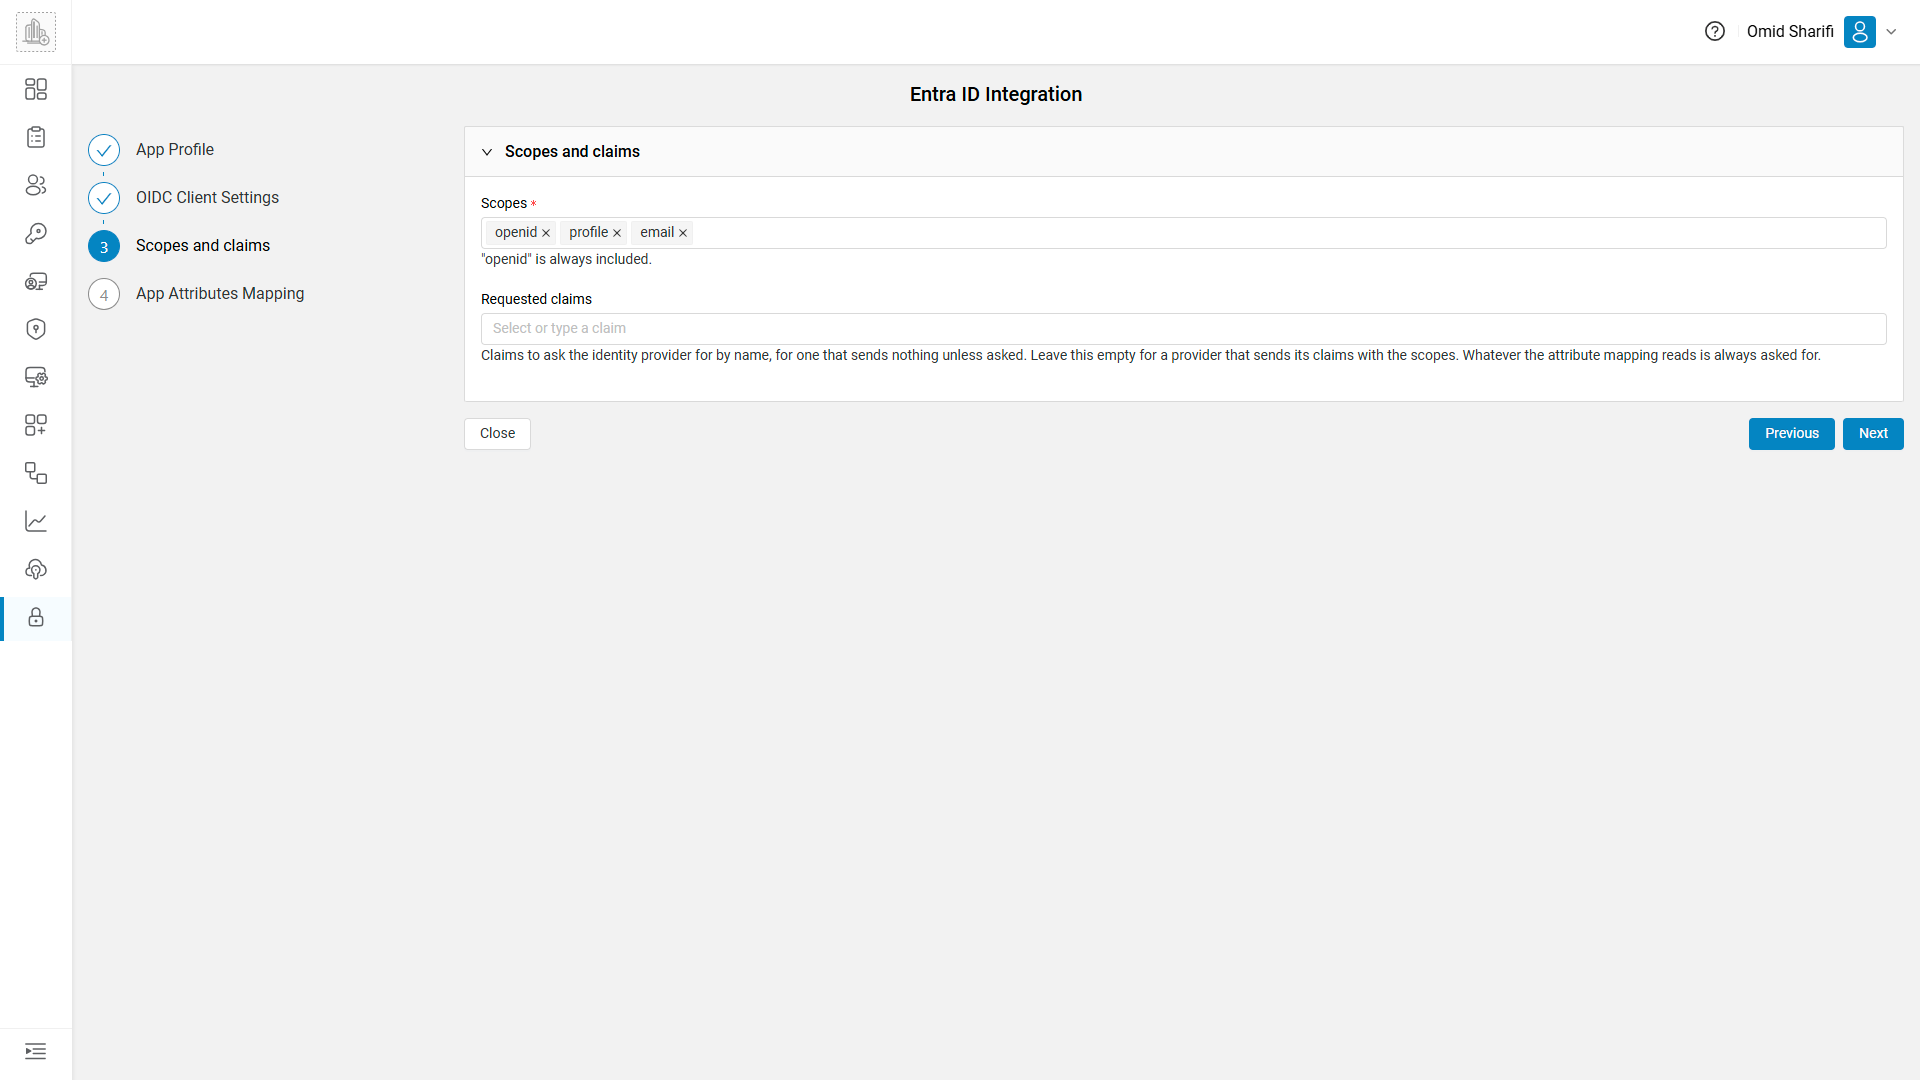
On Scopes and claims:
- Scopes: leave
openid,profile, andemail."openid"is always included. - Requested claims: leave empty. Entra sends the claims used here with the scopes.
Click Next.
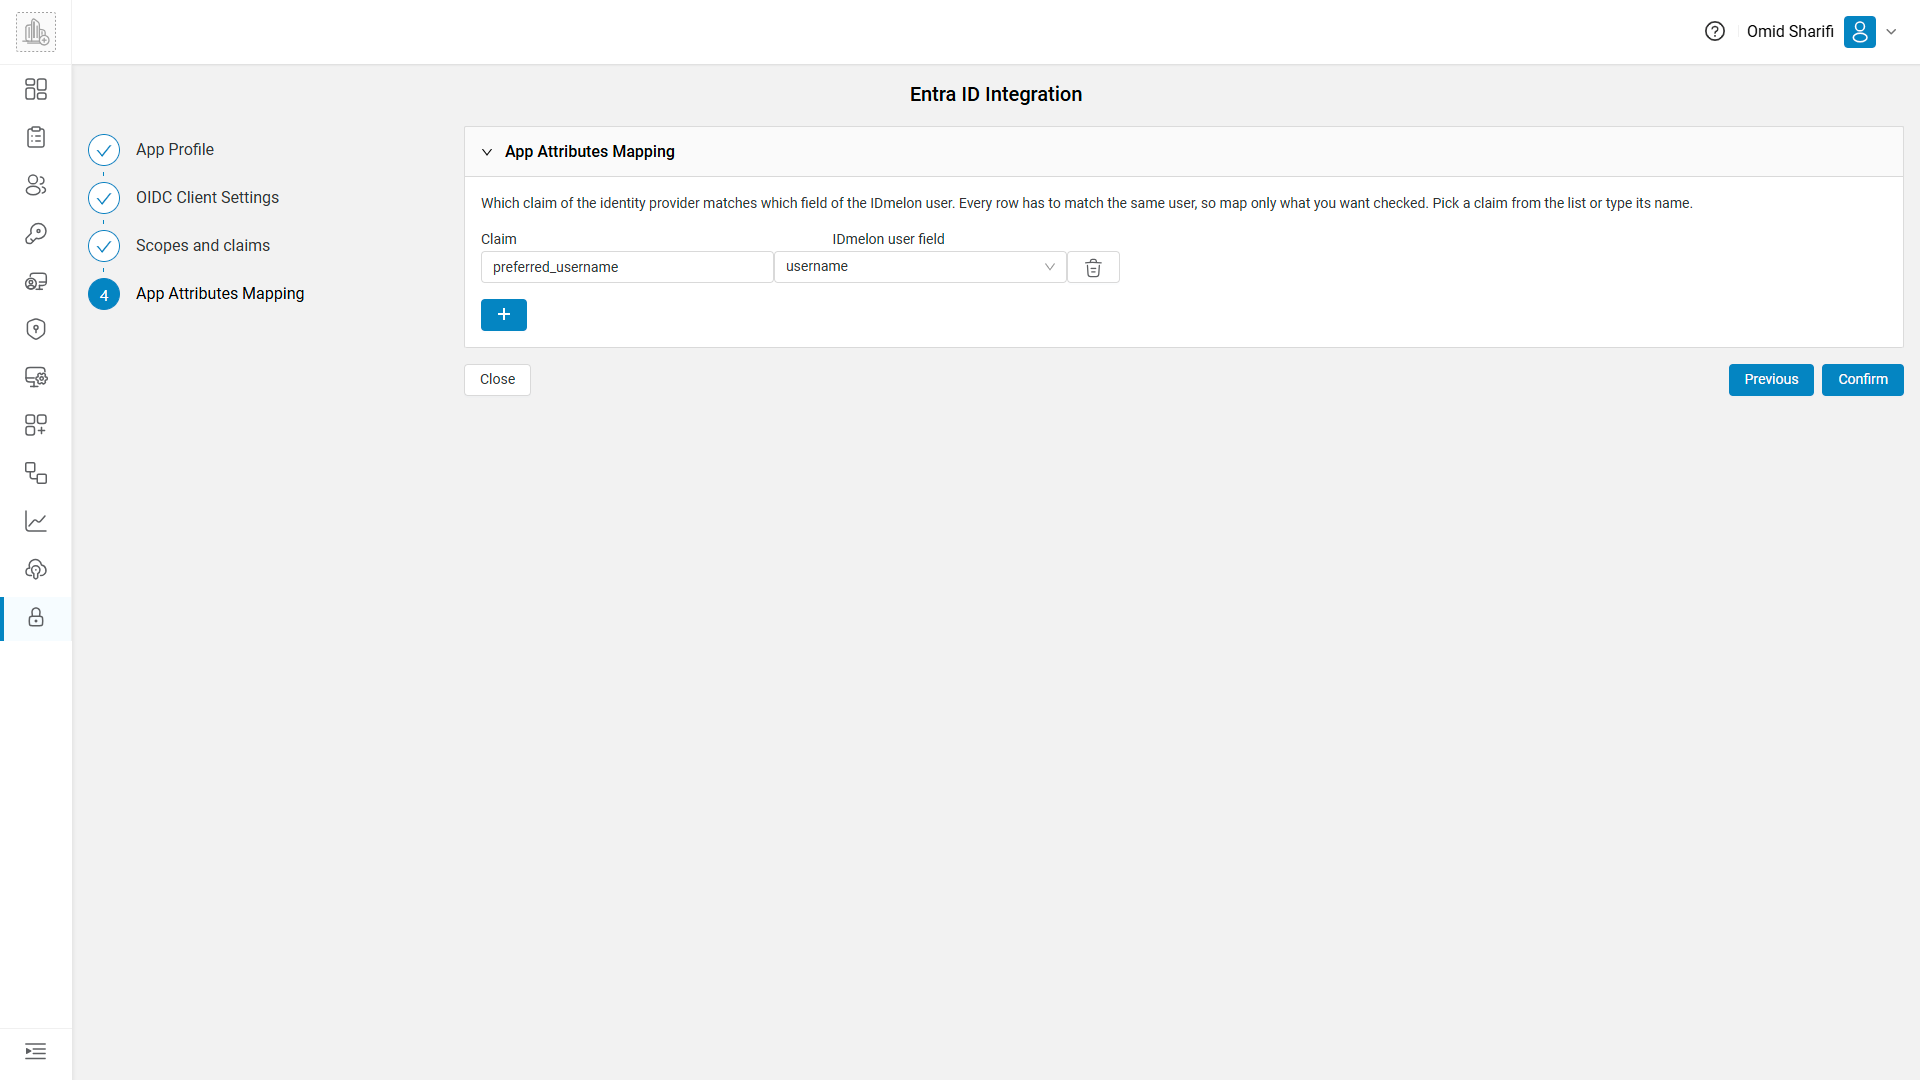
On App Attributes Mapping, keep the one row and click Confirm:
| Claim | IDmelon user field |
|---|---|
preferred_username | username |
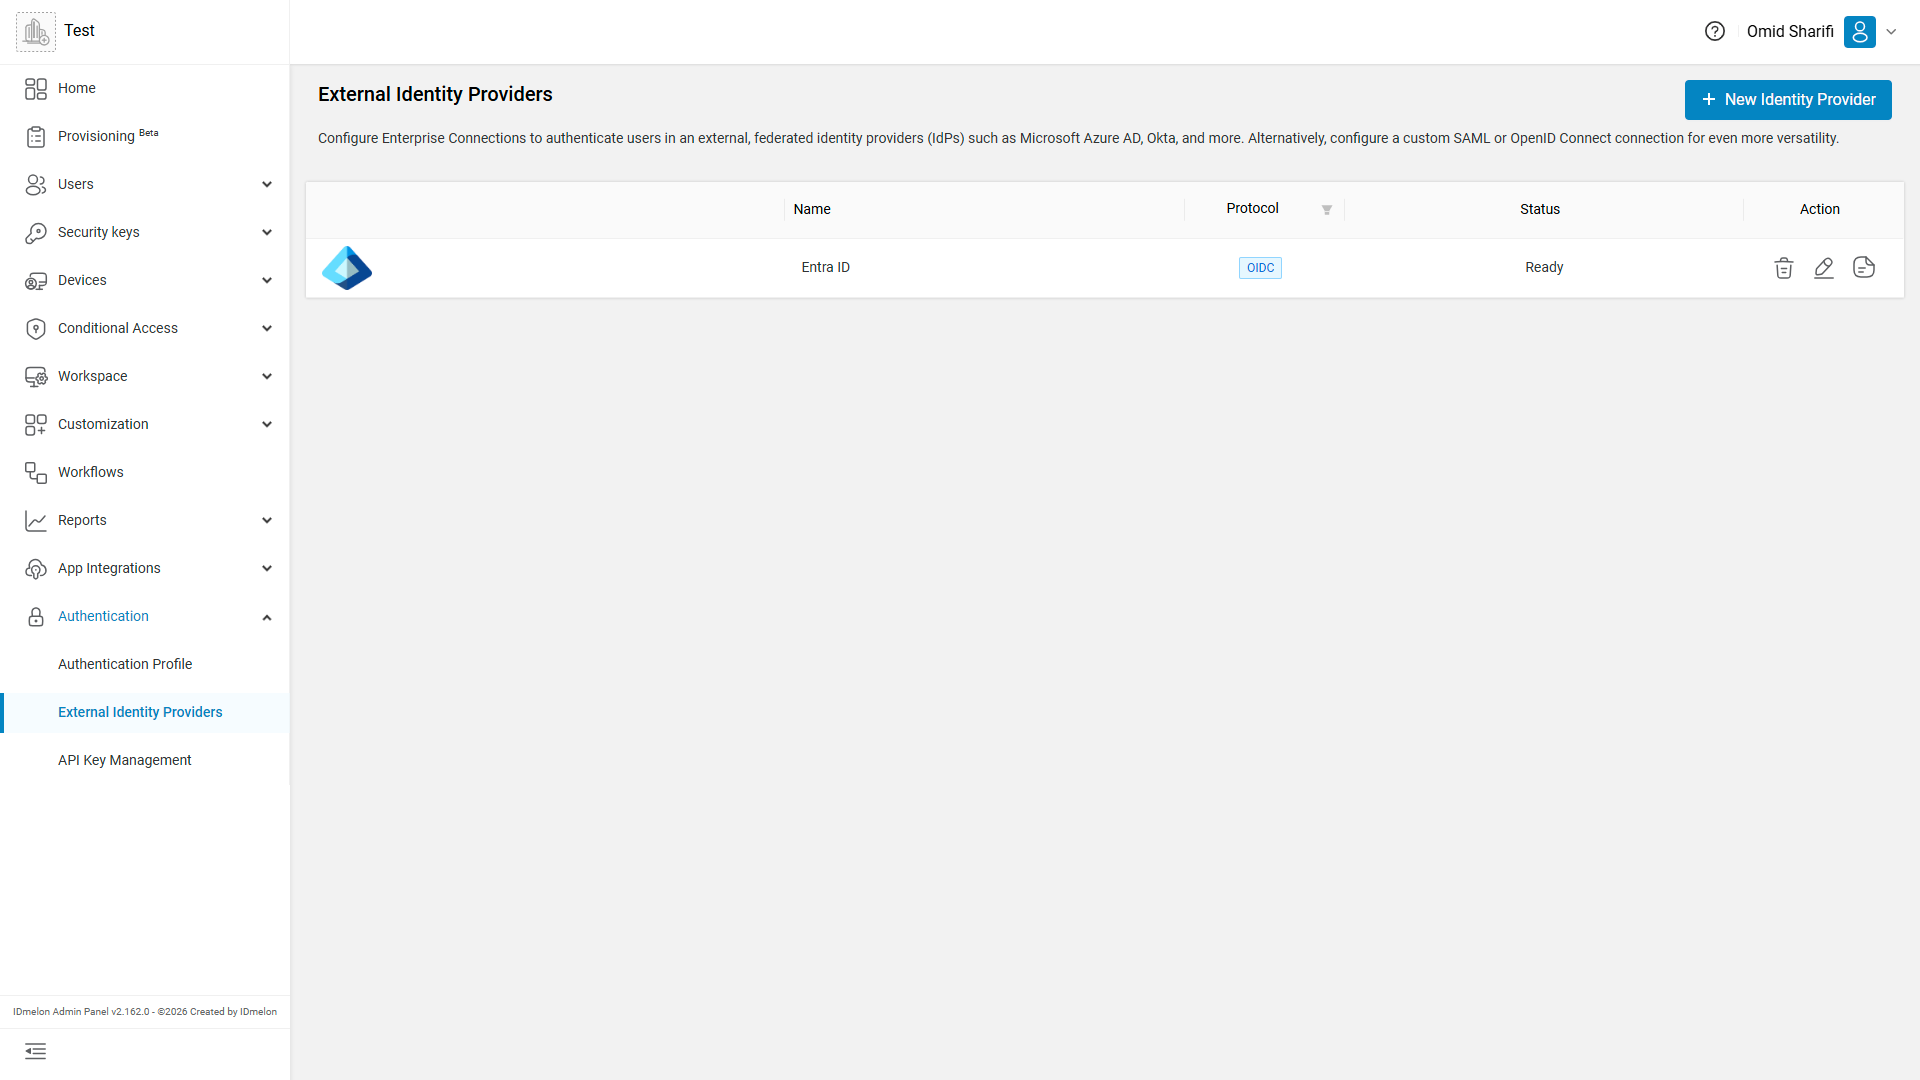
You return to External Identity Providers. The new row shows Entra ID, protocol OIDC, and status Ready.
Open Authentication > Authentication Profile and select External in Identity Provider. Save if the control is enabled.
Users can then sign in through Entra ID. After they authenticate, Entra sends the browser to the callback URL you registered.