Ping Identity
⚠️ Important Notice
The content in this document is currently under review and will be updated soon. We are actively working on providing you with the most accurate and up-to-date information. Thank you for your patience and understanding.
In this document you are going to set up IDmelon as an external IdP to the Ping Identity.
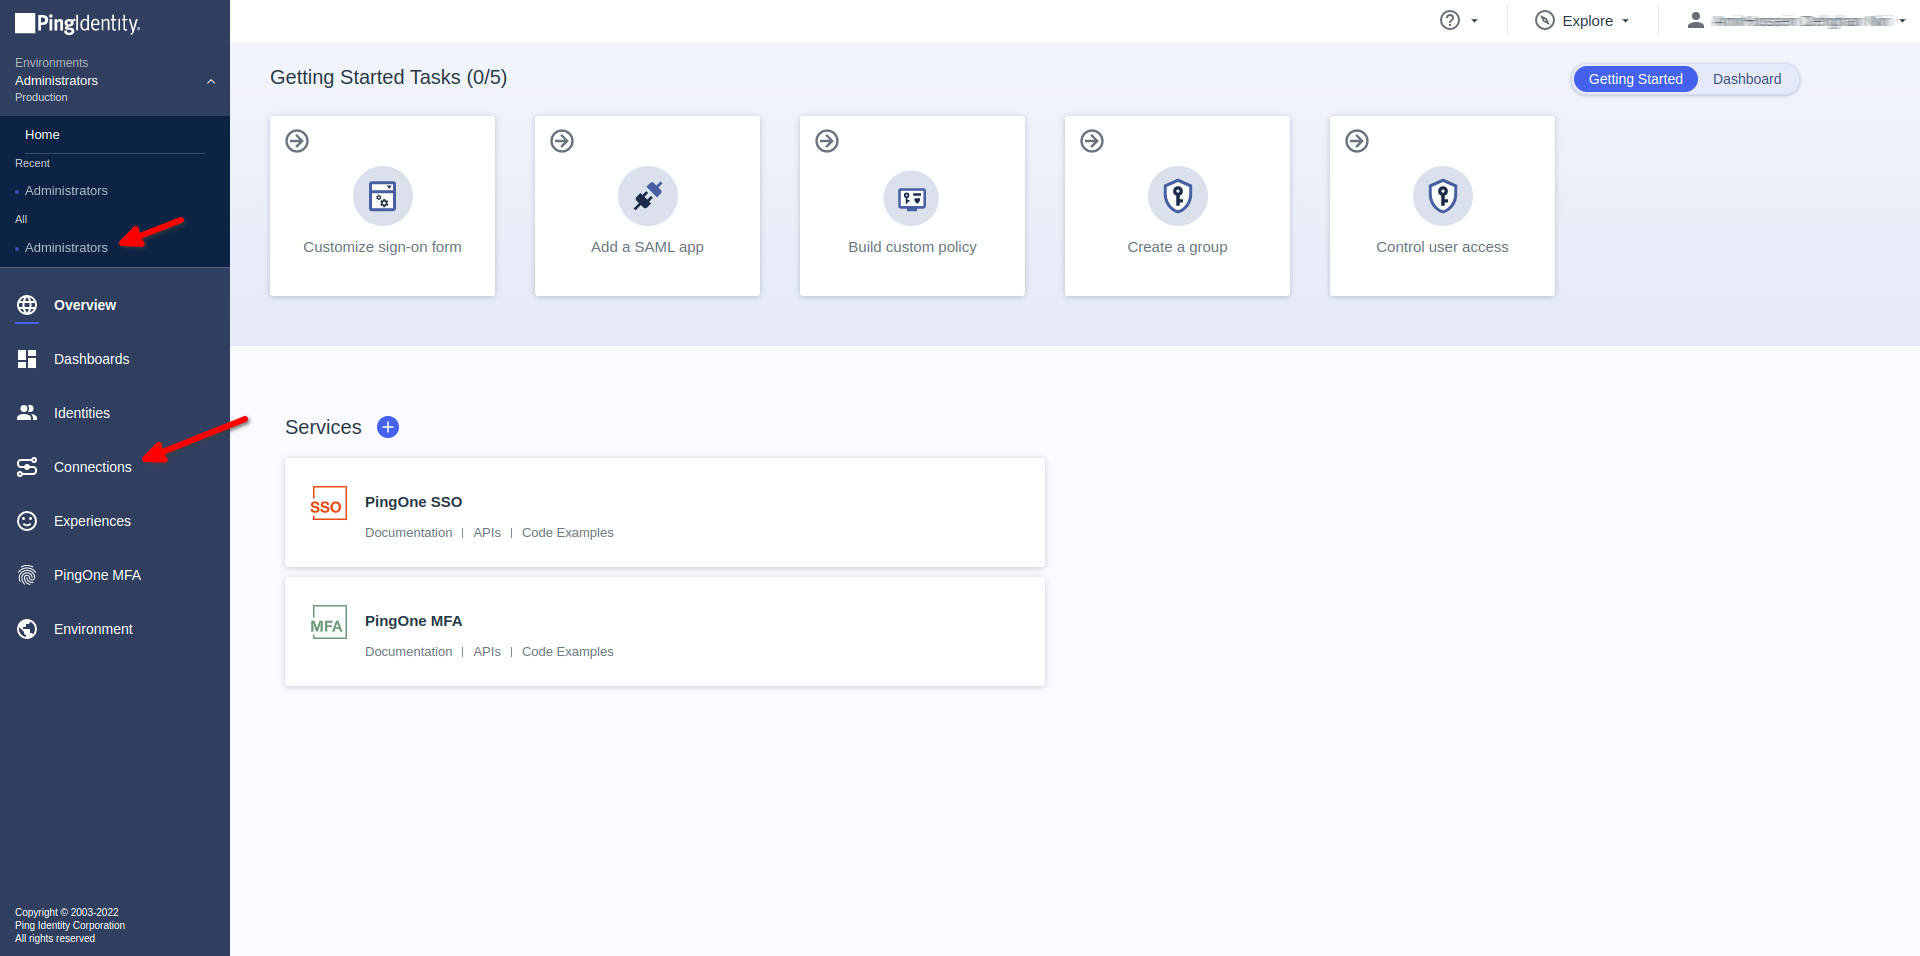
Login to Ping Identity administration panel
- Login to Ping Identity.
- Open Ping Identity dashboard.
- On the right side of navbar Click on Administrators
Add Identity Provider
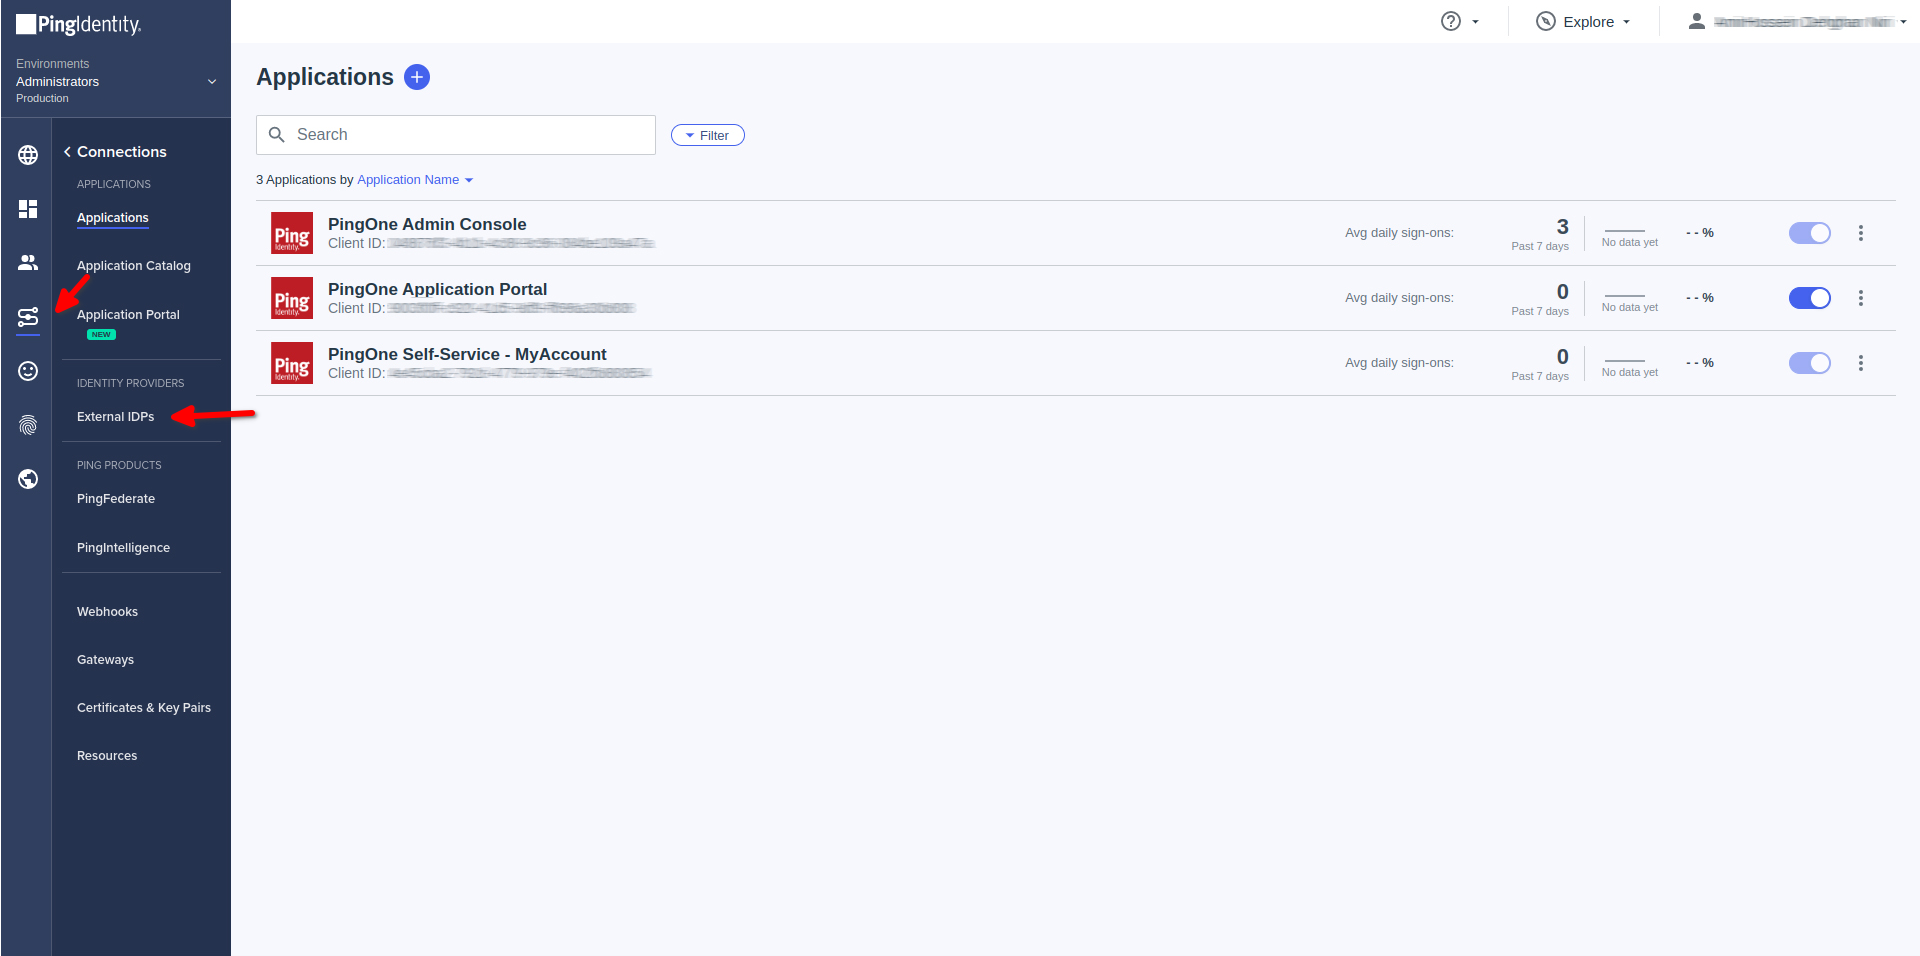
- Click Connection
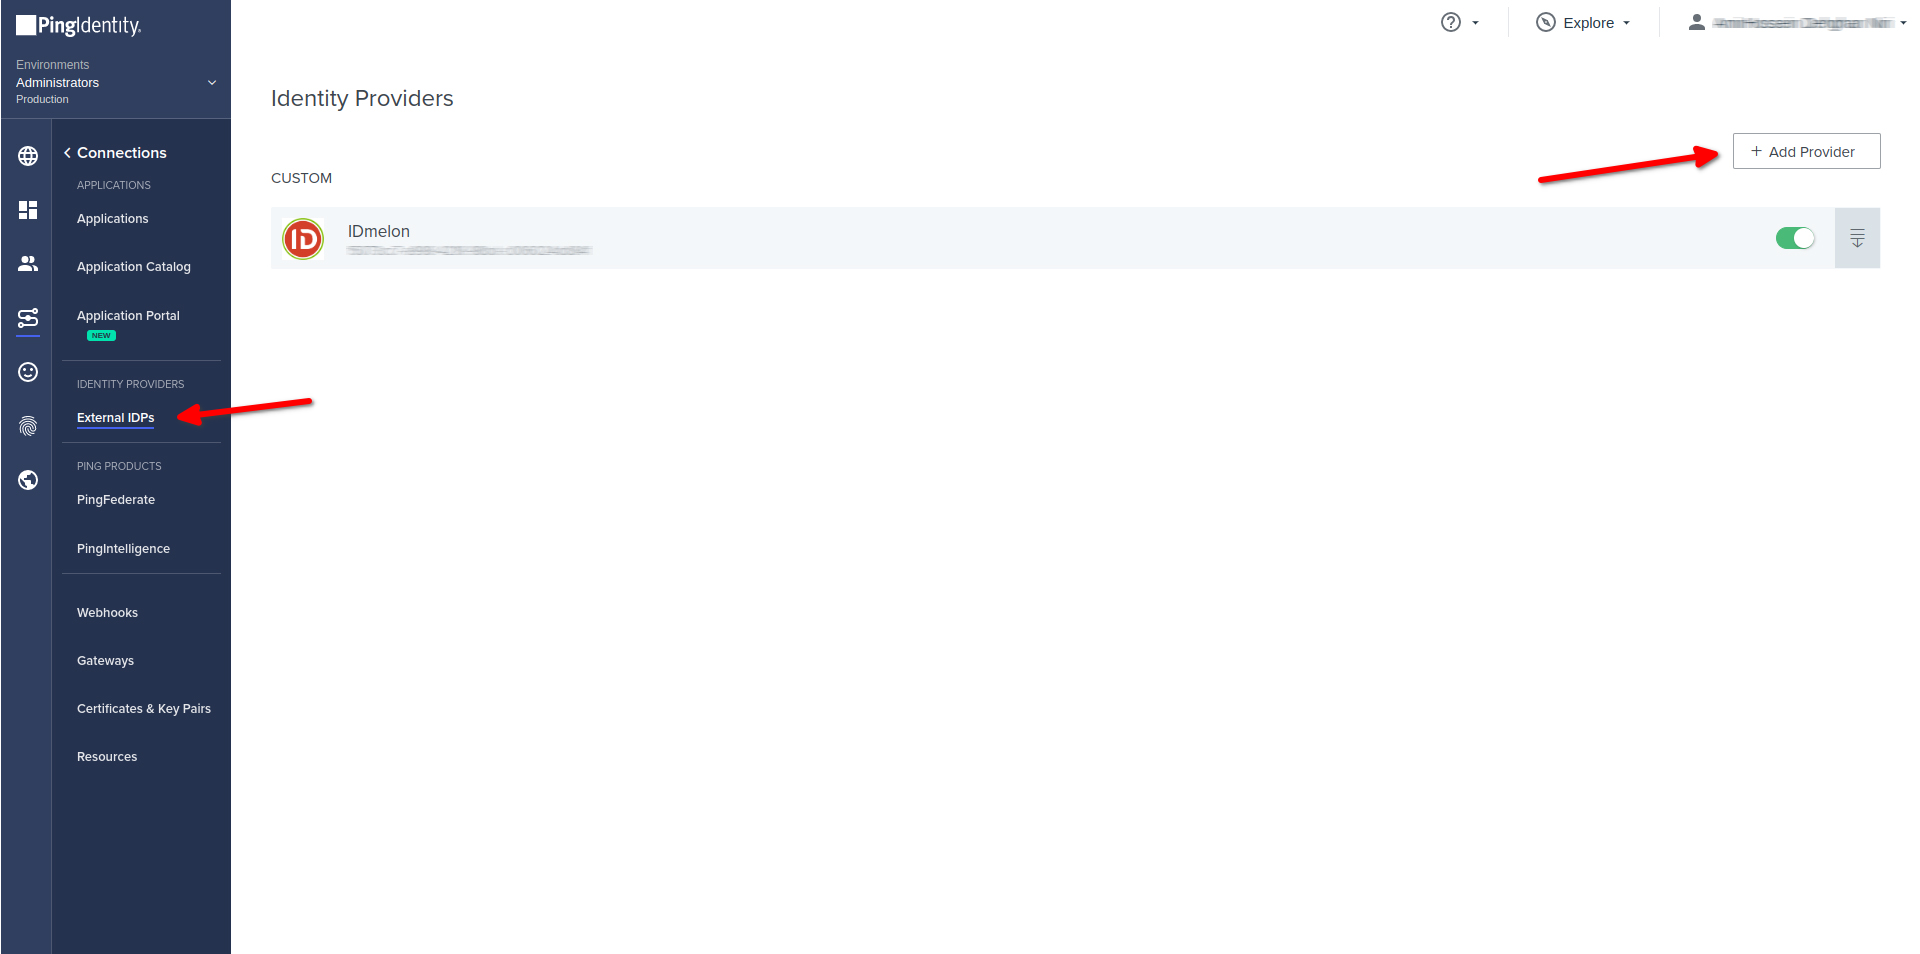
- Under IDENTITY PROVIDERS Click on External IdPs
- Click on Add Provider
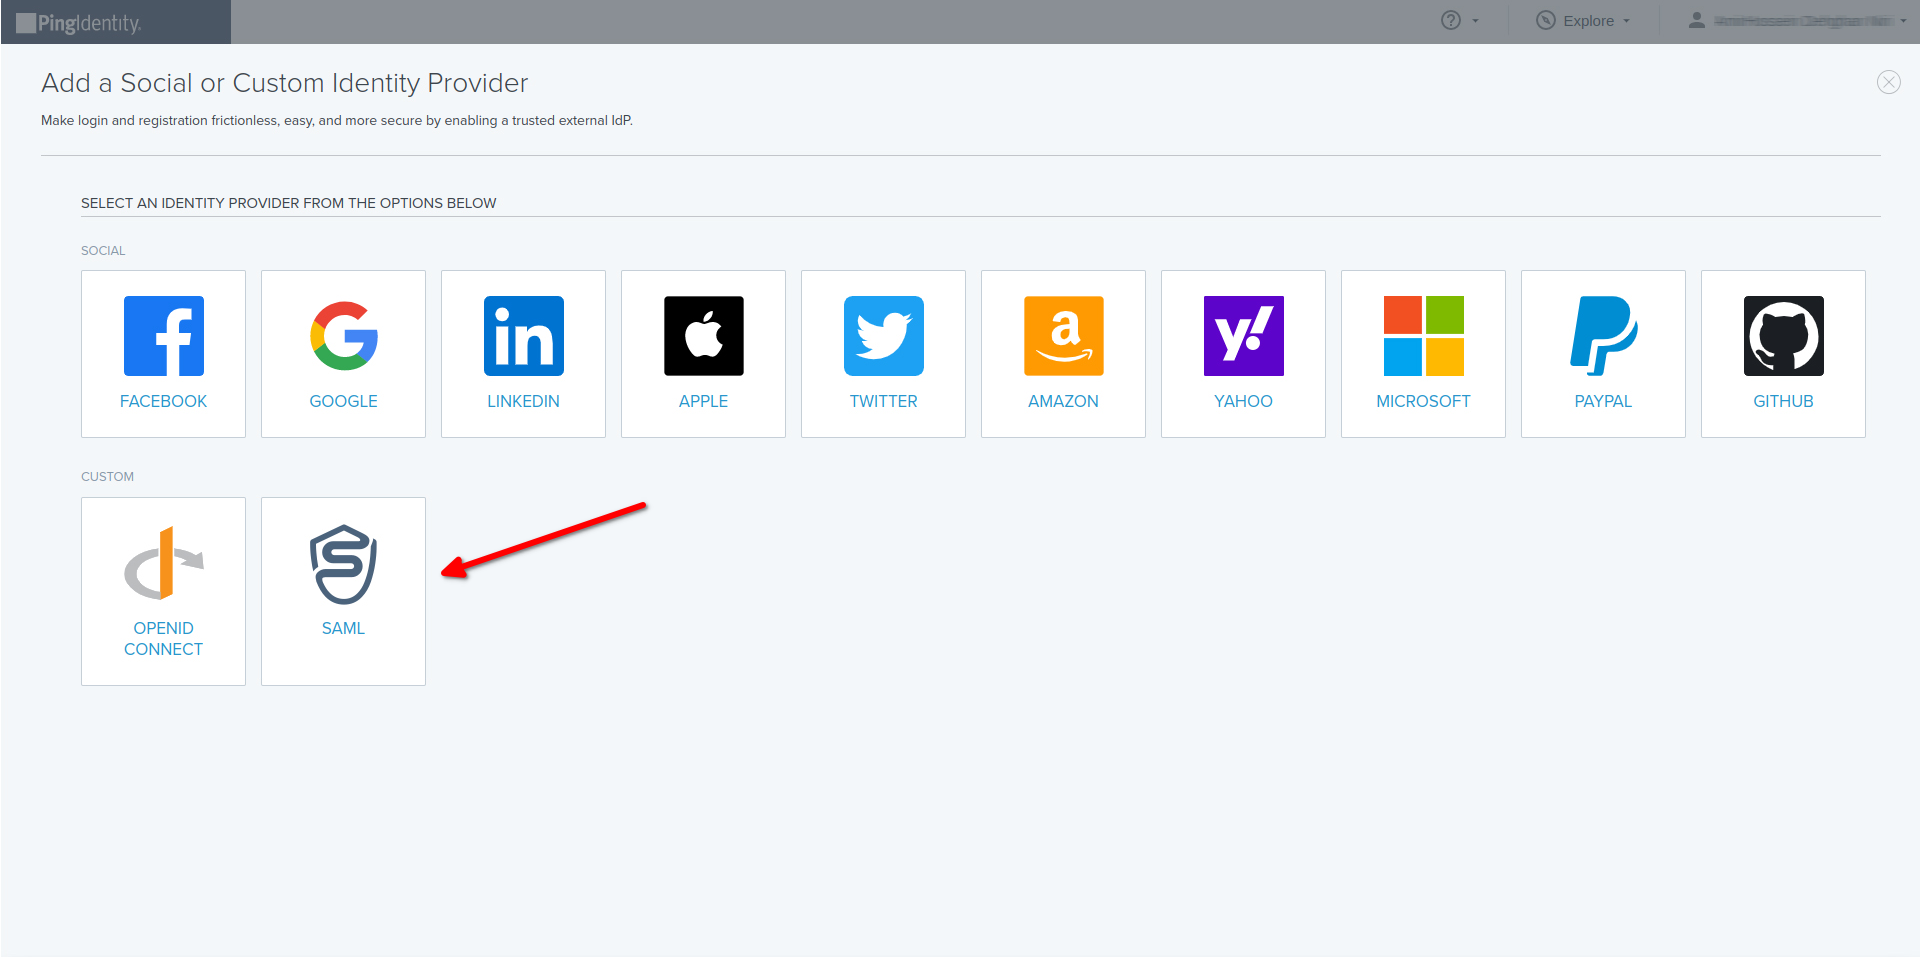
- Click on SAML
Configure SAML 2.0 IdP
- Configure SAML 2.0 IdP
- Create IdP Profile
- NAME : Custom_name
- DESCRIPTION : Custom_description
- ICON : Custom_icon
- LOGIN BUTTON : Custom_login_button
- Continue
- Configure PingOne Connection then select Continue
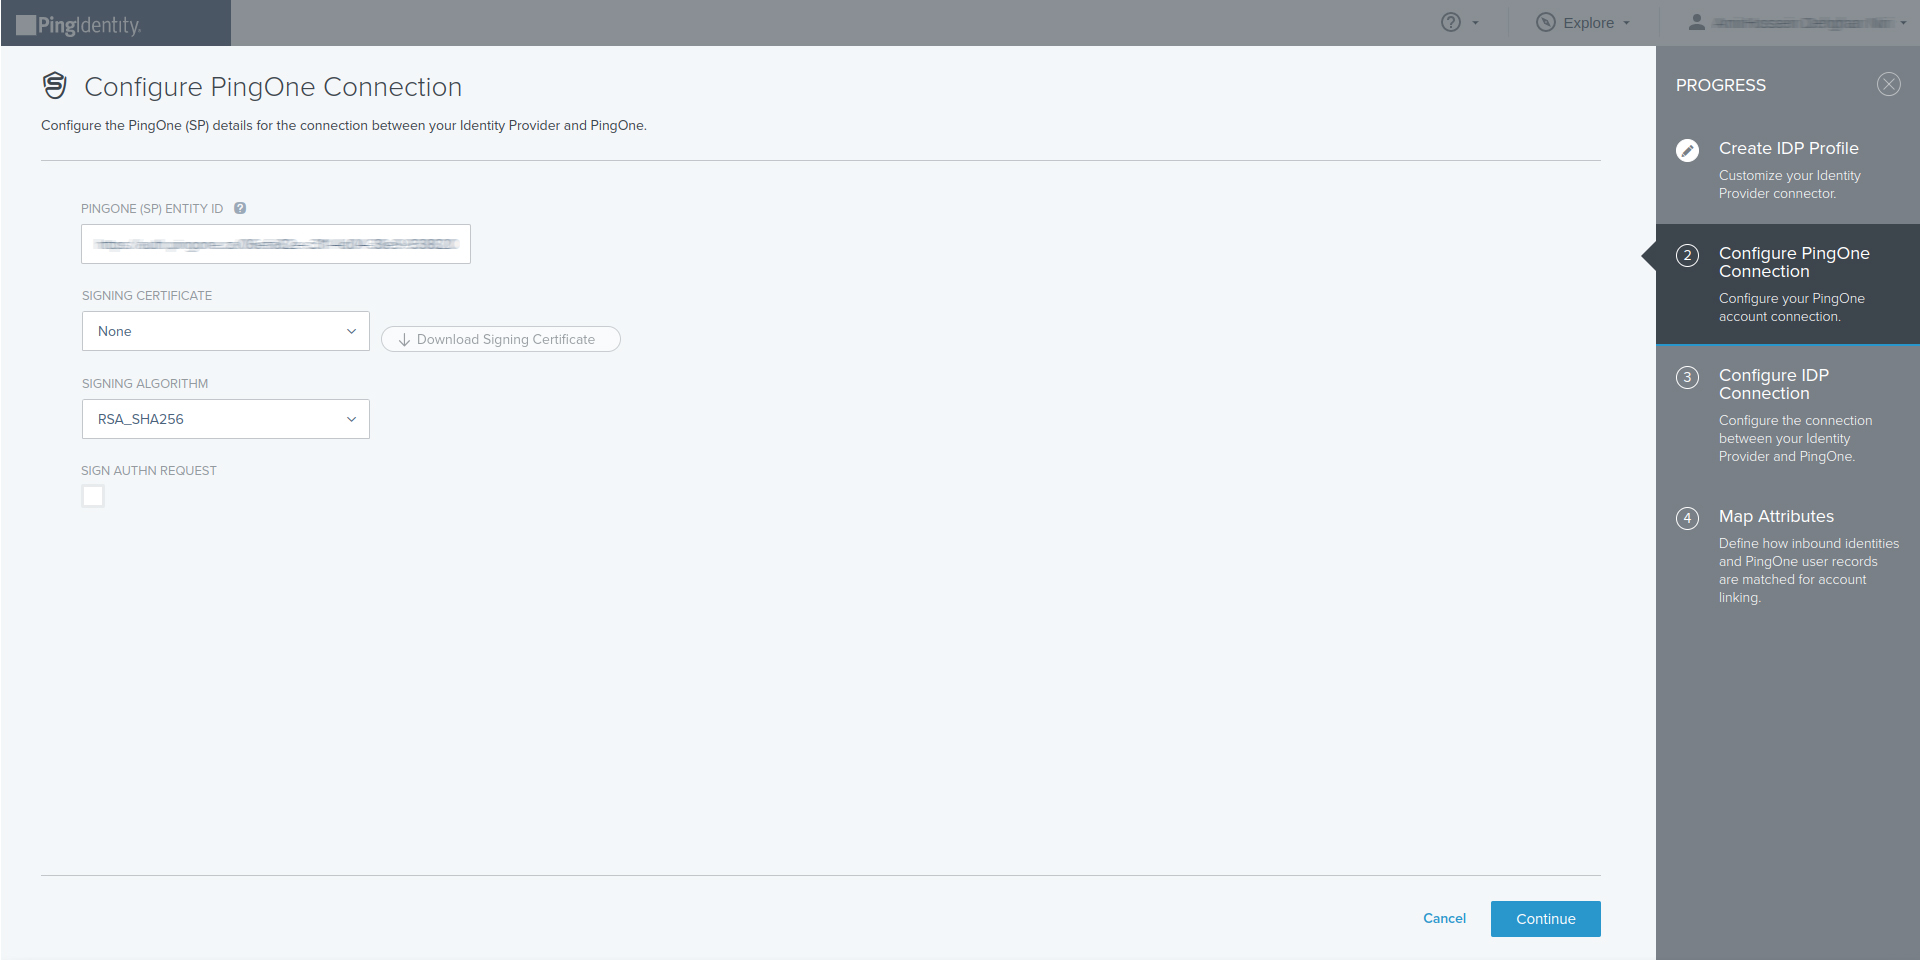
- Configure IdP Connection
- Choose : Manually enter the following metadata information
Get all values for {..} from your IDmelon panel. If you are currently login here, you will see the replaced values instead.
- SSO endpoint : idmelon single sign on url
- IdP entity ID : idp_issuer_uri
- SSO binding : Specifies the binding to use for the authentication request. Select HTTP Post or HTTP Redirect.
- VERIFICATION CERTIFICATE : idp_certificate_download_url

- Save and Continue
- On the Map Attributes page, define how the PingOne user attributes are mapped to identity provider attributes. For more information, see Mapping attributes
- Enter the PingOne user profile attribute and the external IdP attribute. For more information about attribute syntax, see Identity provider attributes
- To add an attribute, click \+ Add attribute
- To use the expression builder, click Build and test or Advanced Expression. See Using the expression builder
- Select the update condition, which determines how PingOne updates its user directory with the values from the identity provider. The options are:
- Empty only: Update the PingOne attribute only if the existing attribute is empty.
- Always: Always update the PingOne directory attribute.
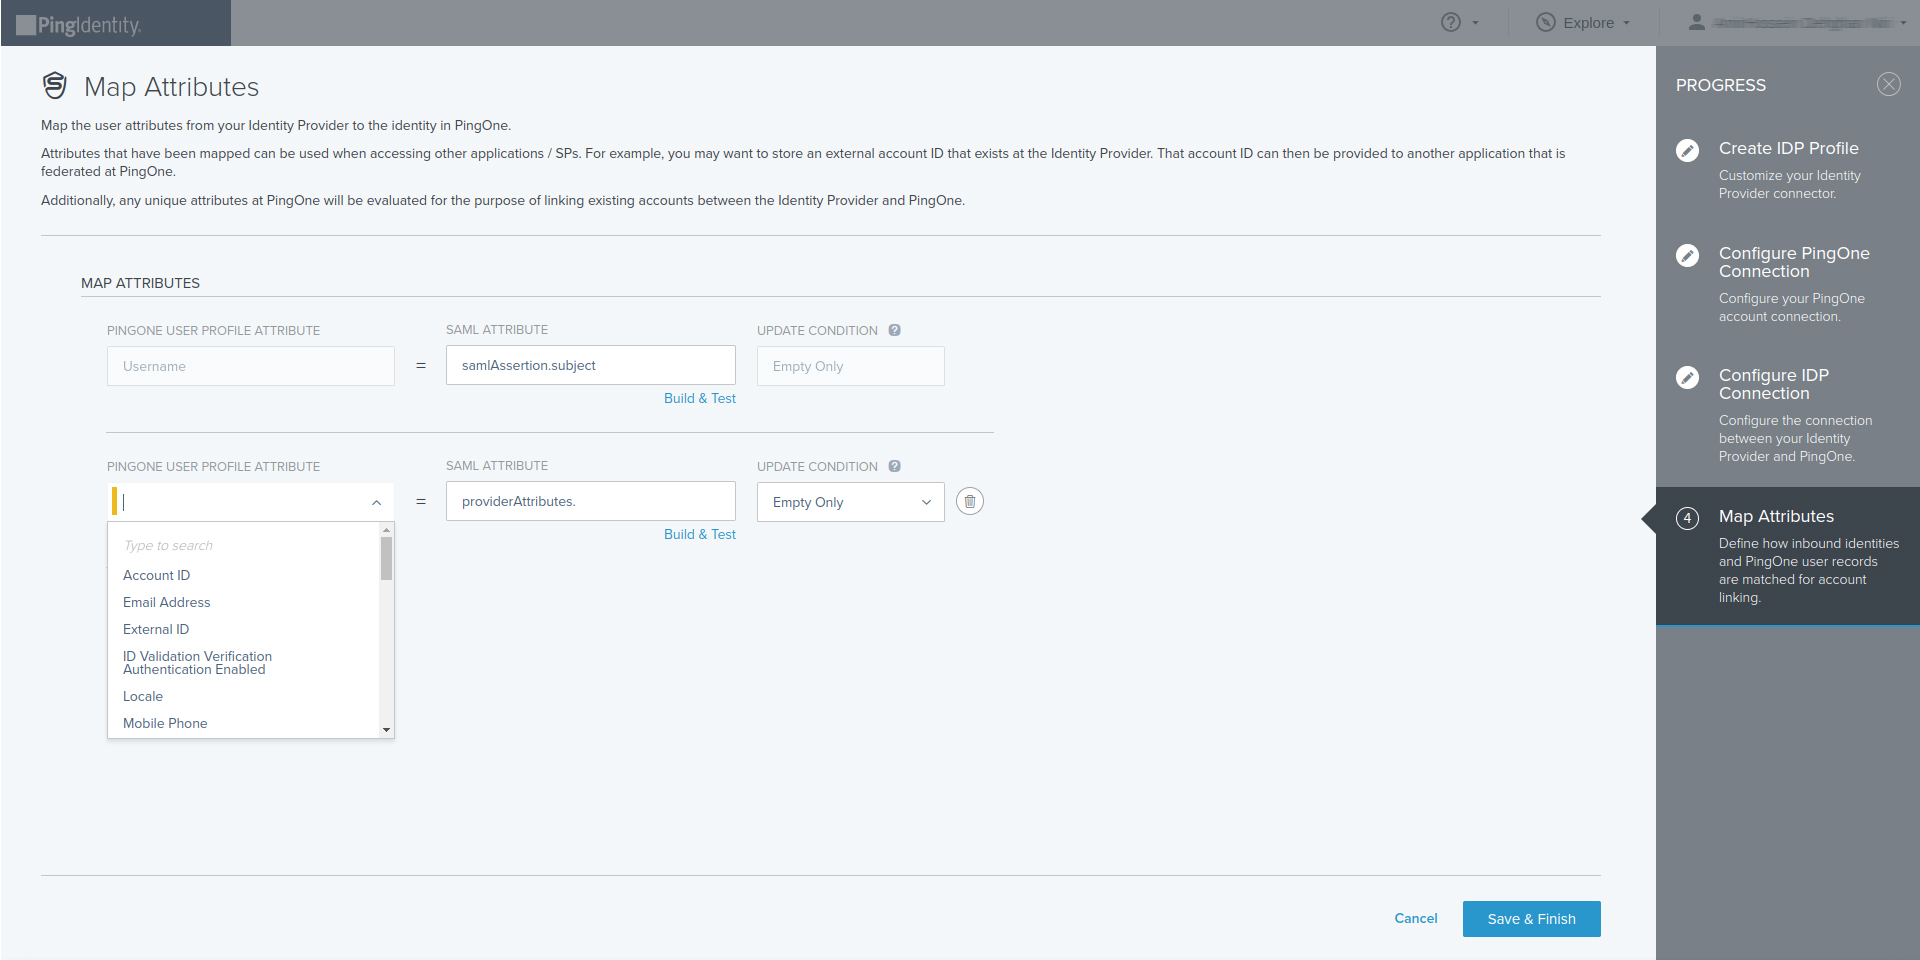
- Save & Finish
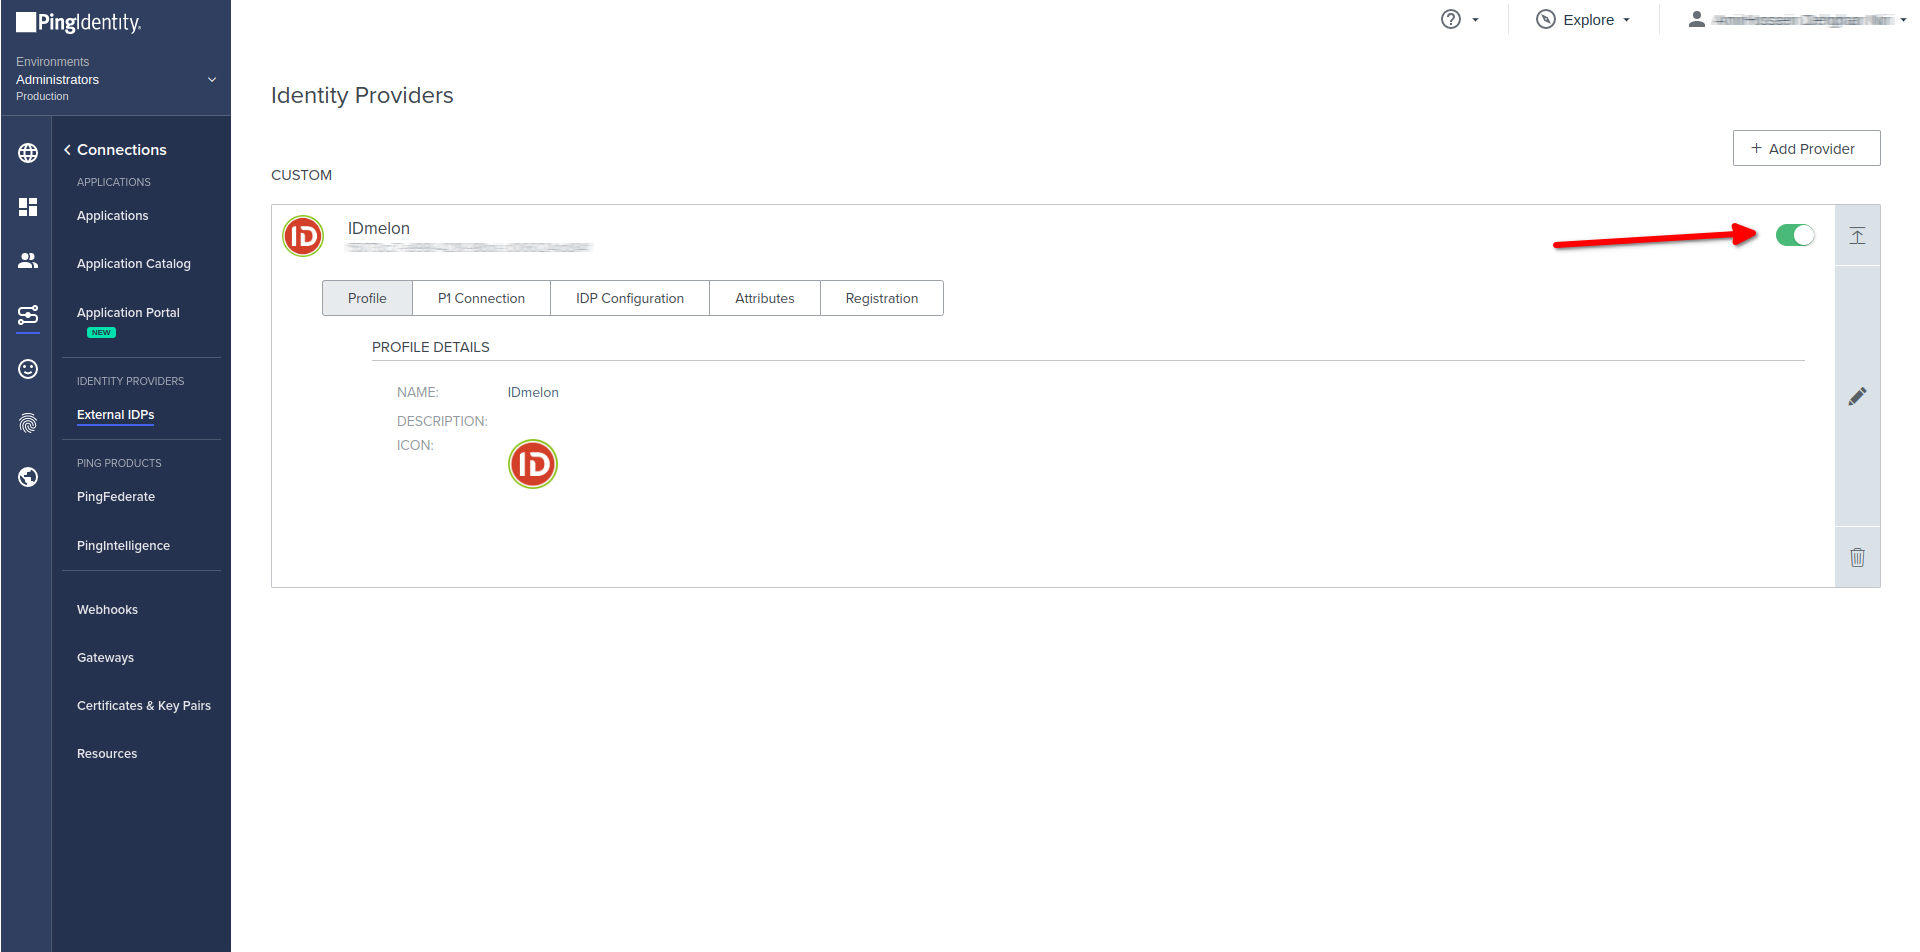
- Enabling or disabling IDmelon as Identity Provider : Reference
- Finish
Setting idp-init for Ping Identity
- According to Ping Identity document
- Go to Connections → Applications
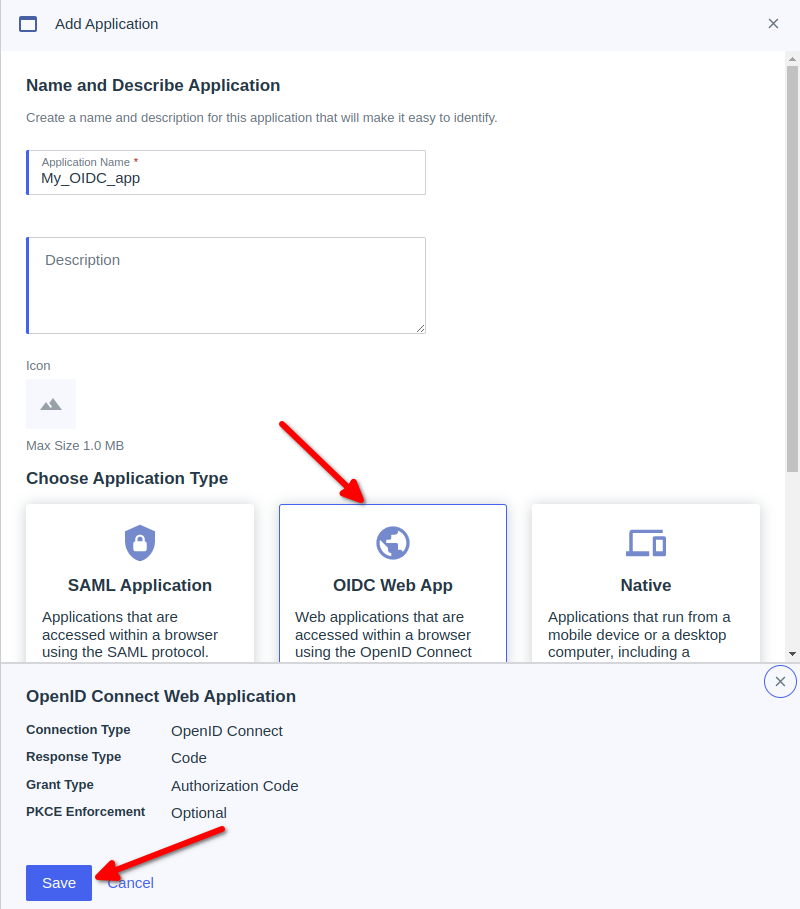
- Add a new Oidc Application
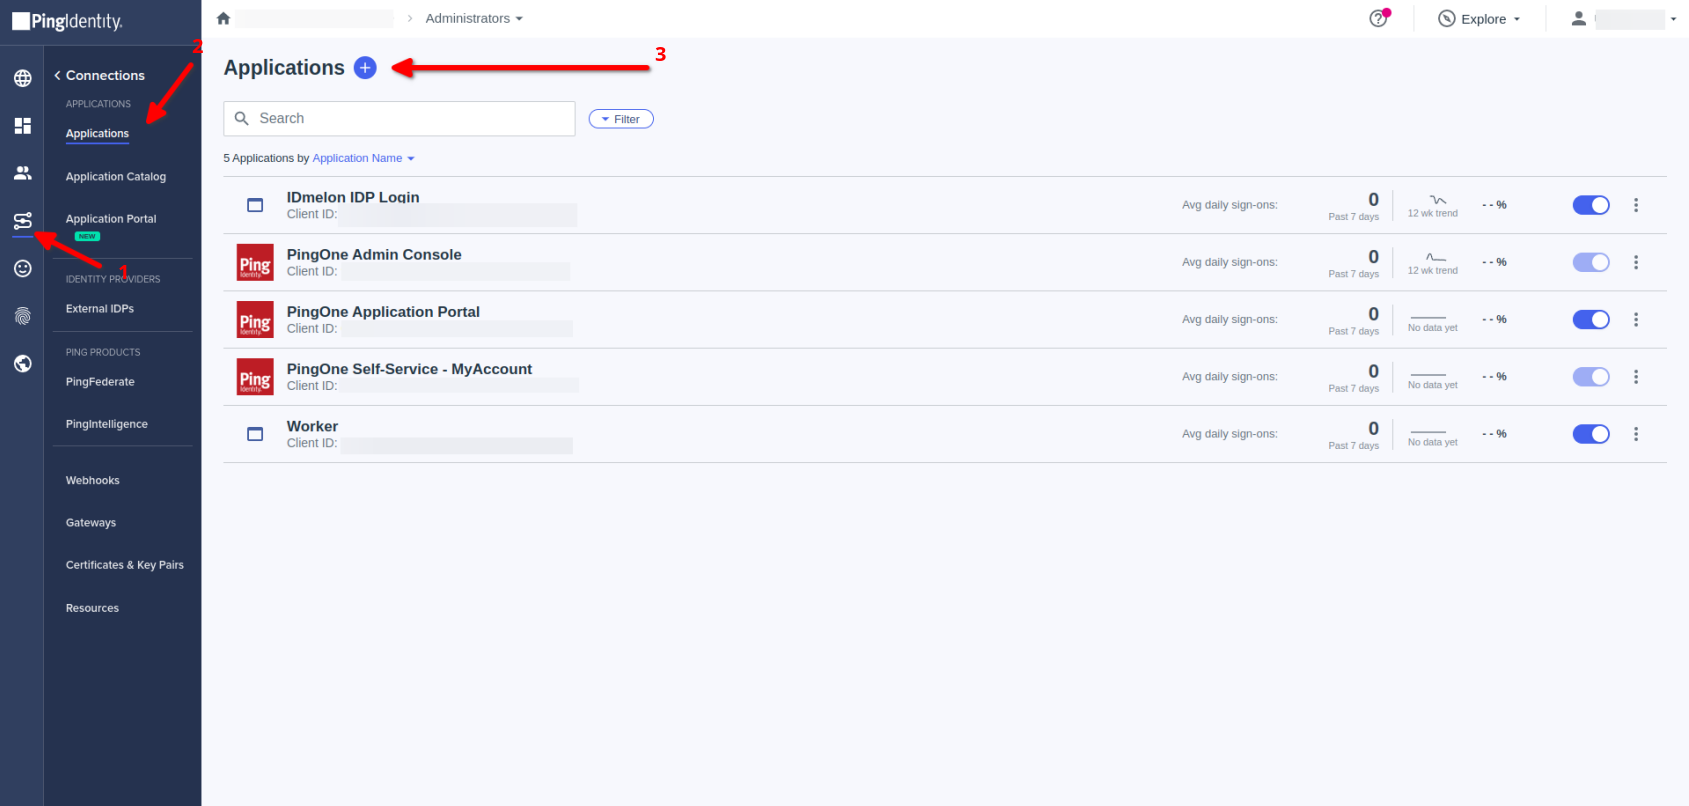
- Add Application
- Choose a custom application Name
- Choose a custom application Description
- Choose a custom application ICON
- Choose OIDC Web App
- Save
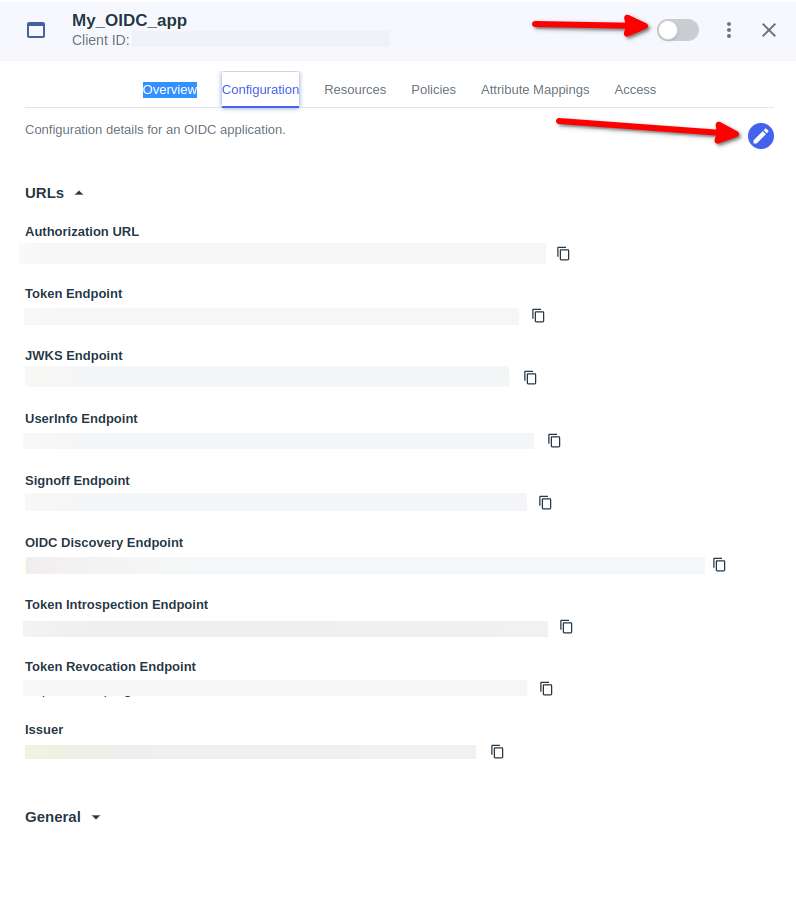
- Go to Oidc app which created
- Activate Oidc app which on the rightside
- Go to Configuration then click on Icon edit
Go to Connections → Applications
For Admins IdP init Login
- Click on PingOne Admin Console
- Copy Home Page URL
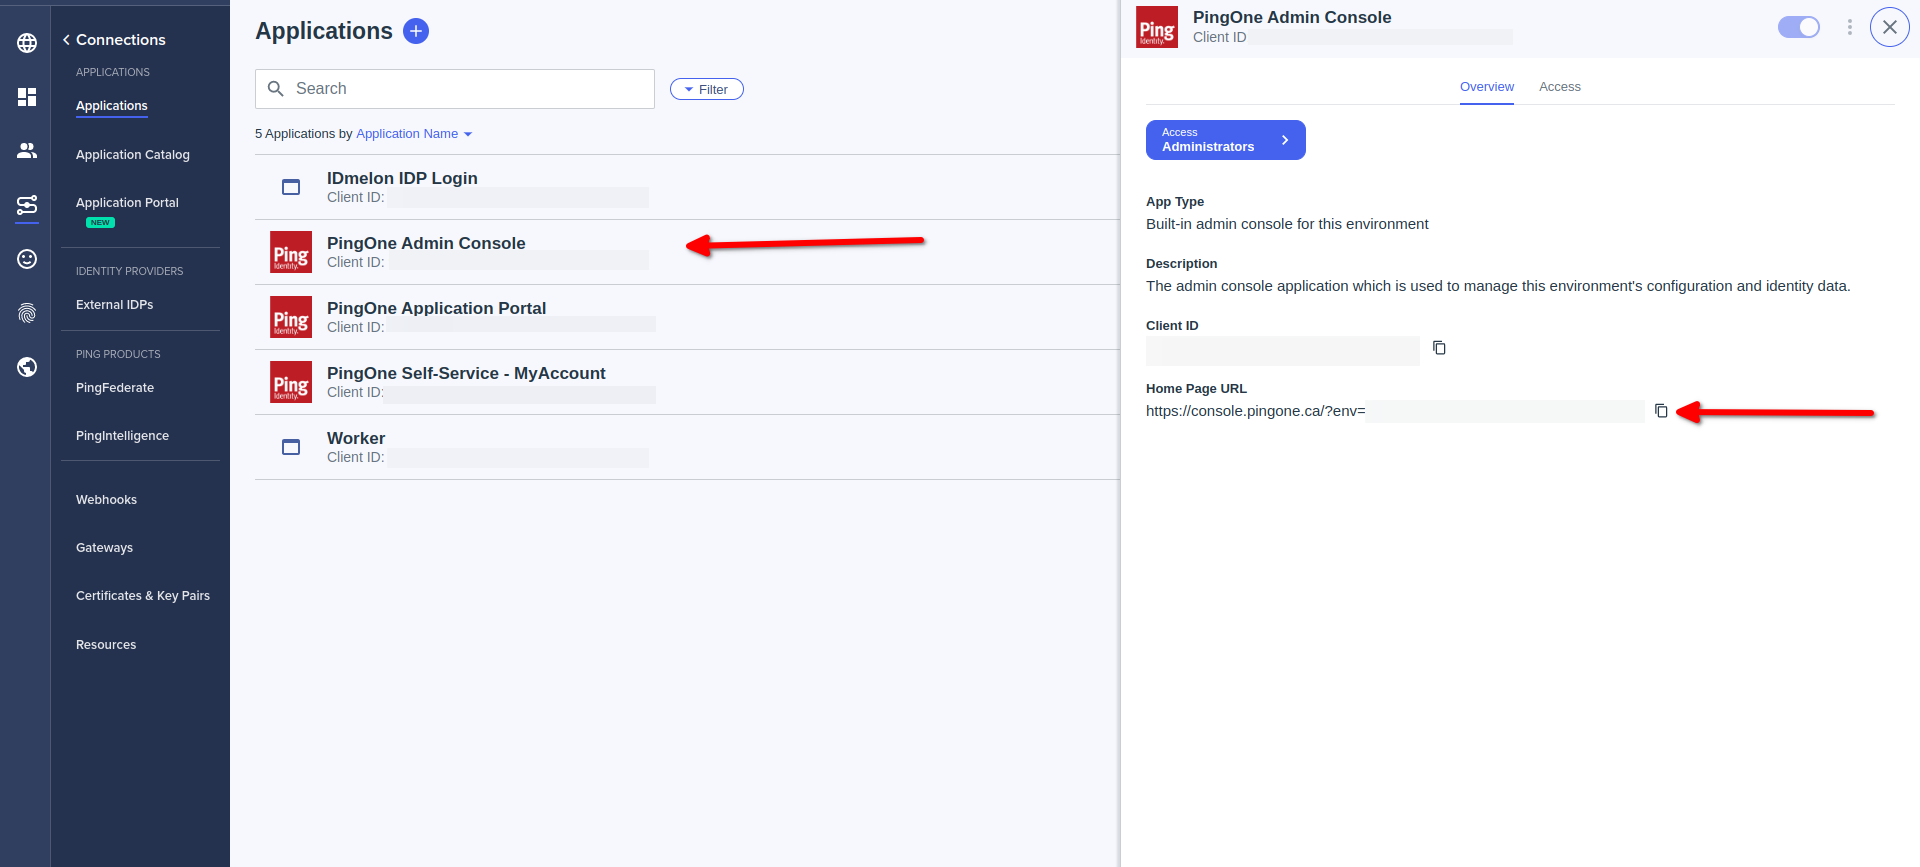
- Done
For users IdP init Login:
- Click on PingOne Application Portal
- Copy Home Page URL
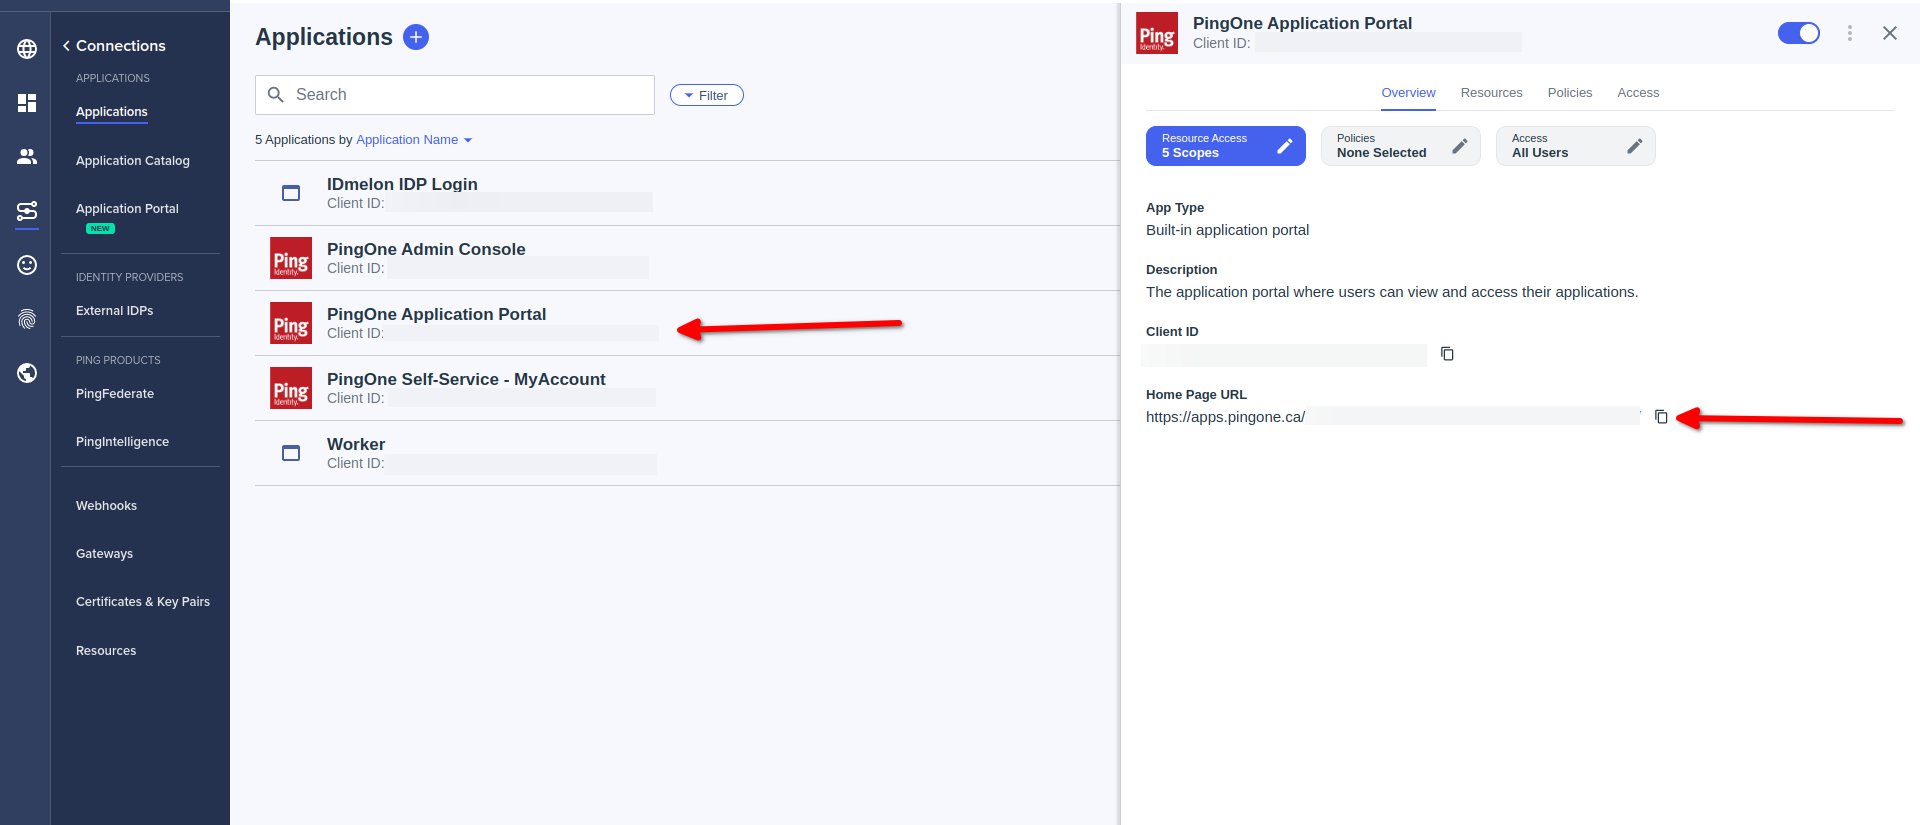
- Done
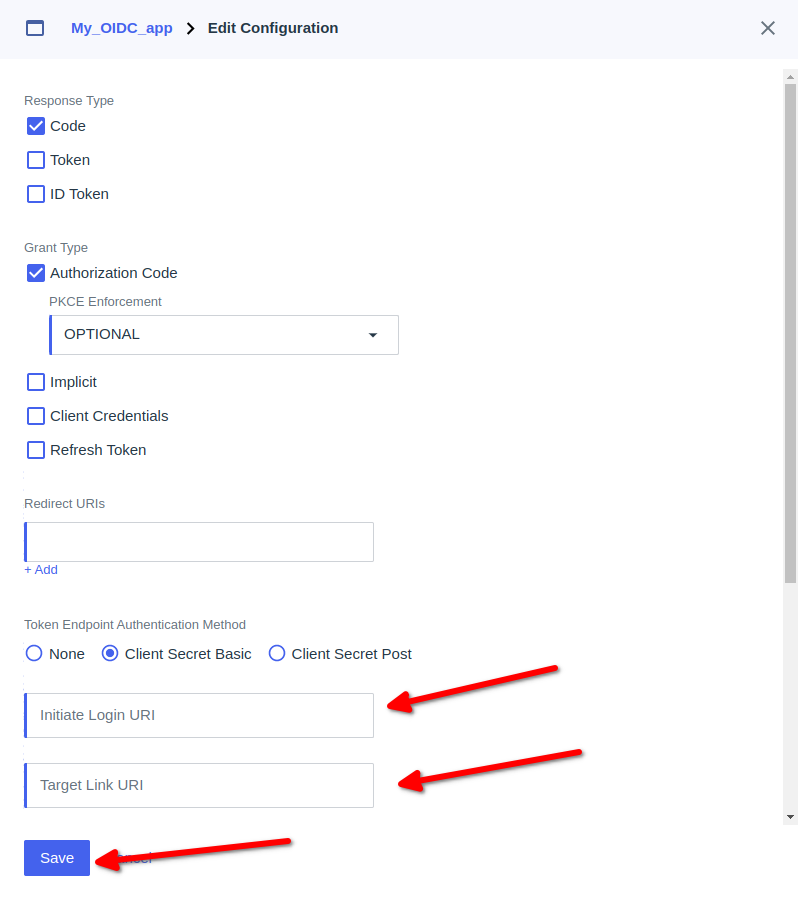
Paste Home Page URL to Initiate Login URI field
Paste Home Page URL to Target Link URI field
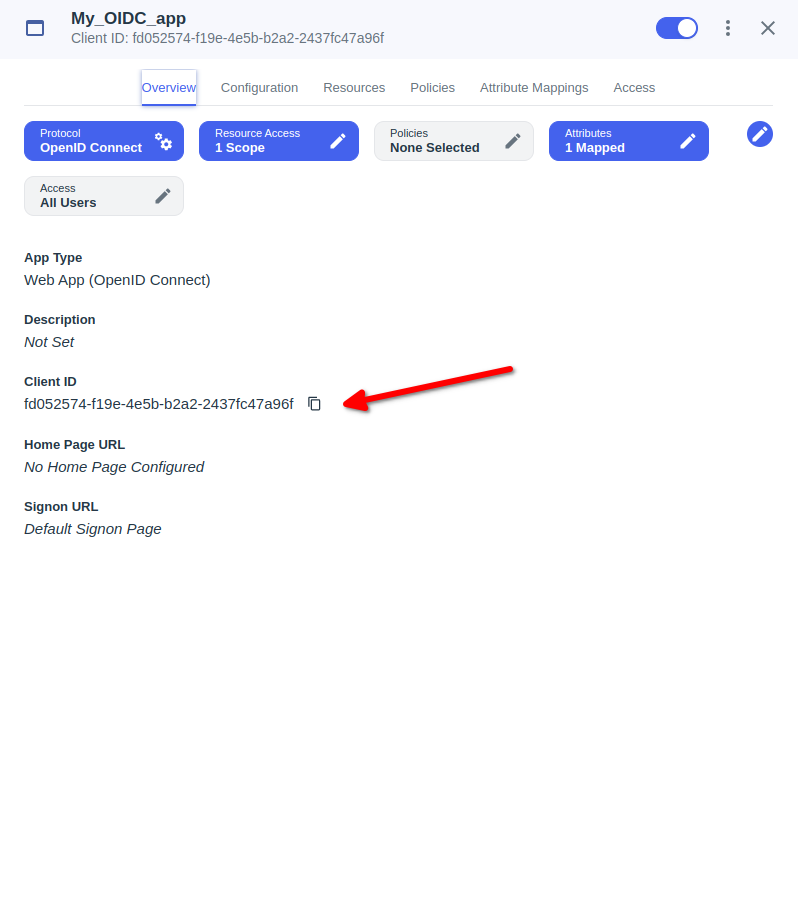
- Click the Overview tab.
- Locate the Client ID and copy it to a relaystate field of IDmelon.
- Example : Relaystate = applicationId=Custom Client ID
IDmelon SAML configuration
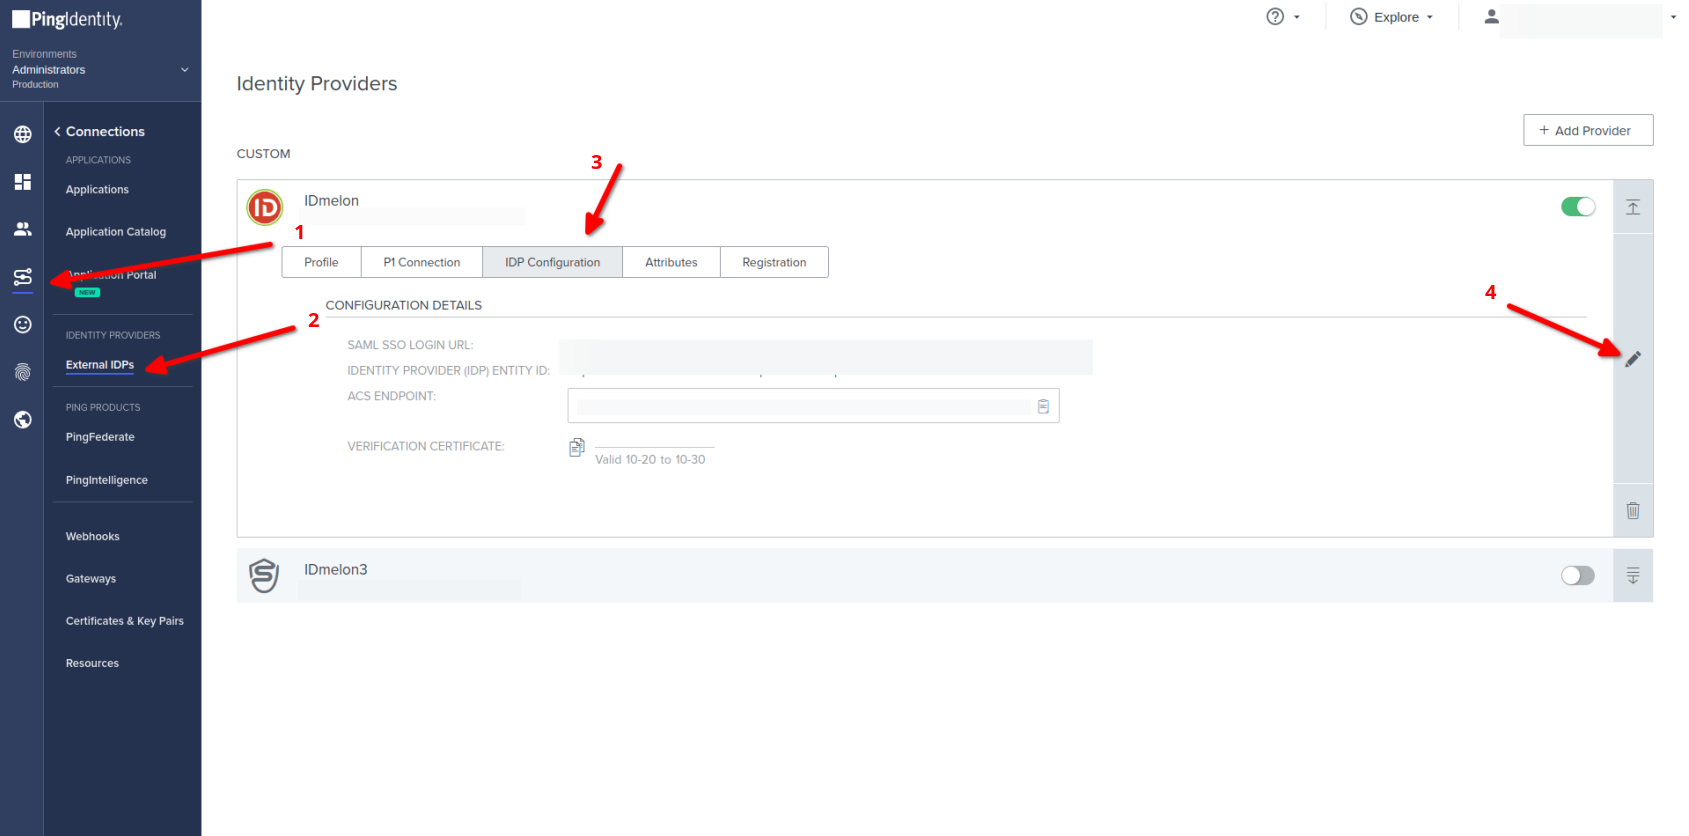
- Go toConnections → External IdPs
- Go to IDmelon IdP then click on IdP Configuration click edit
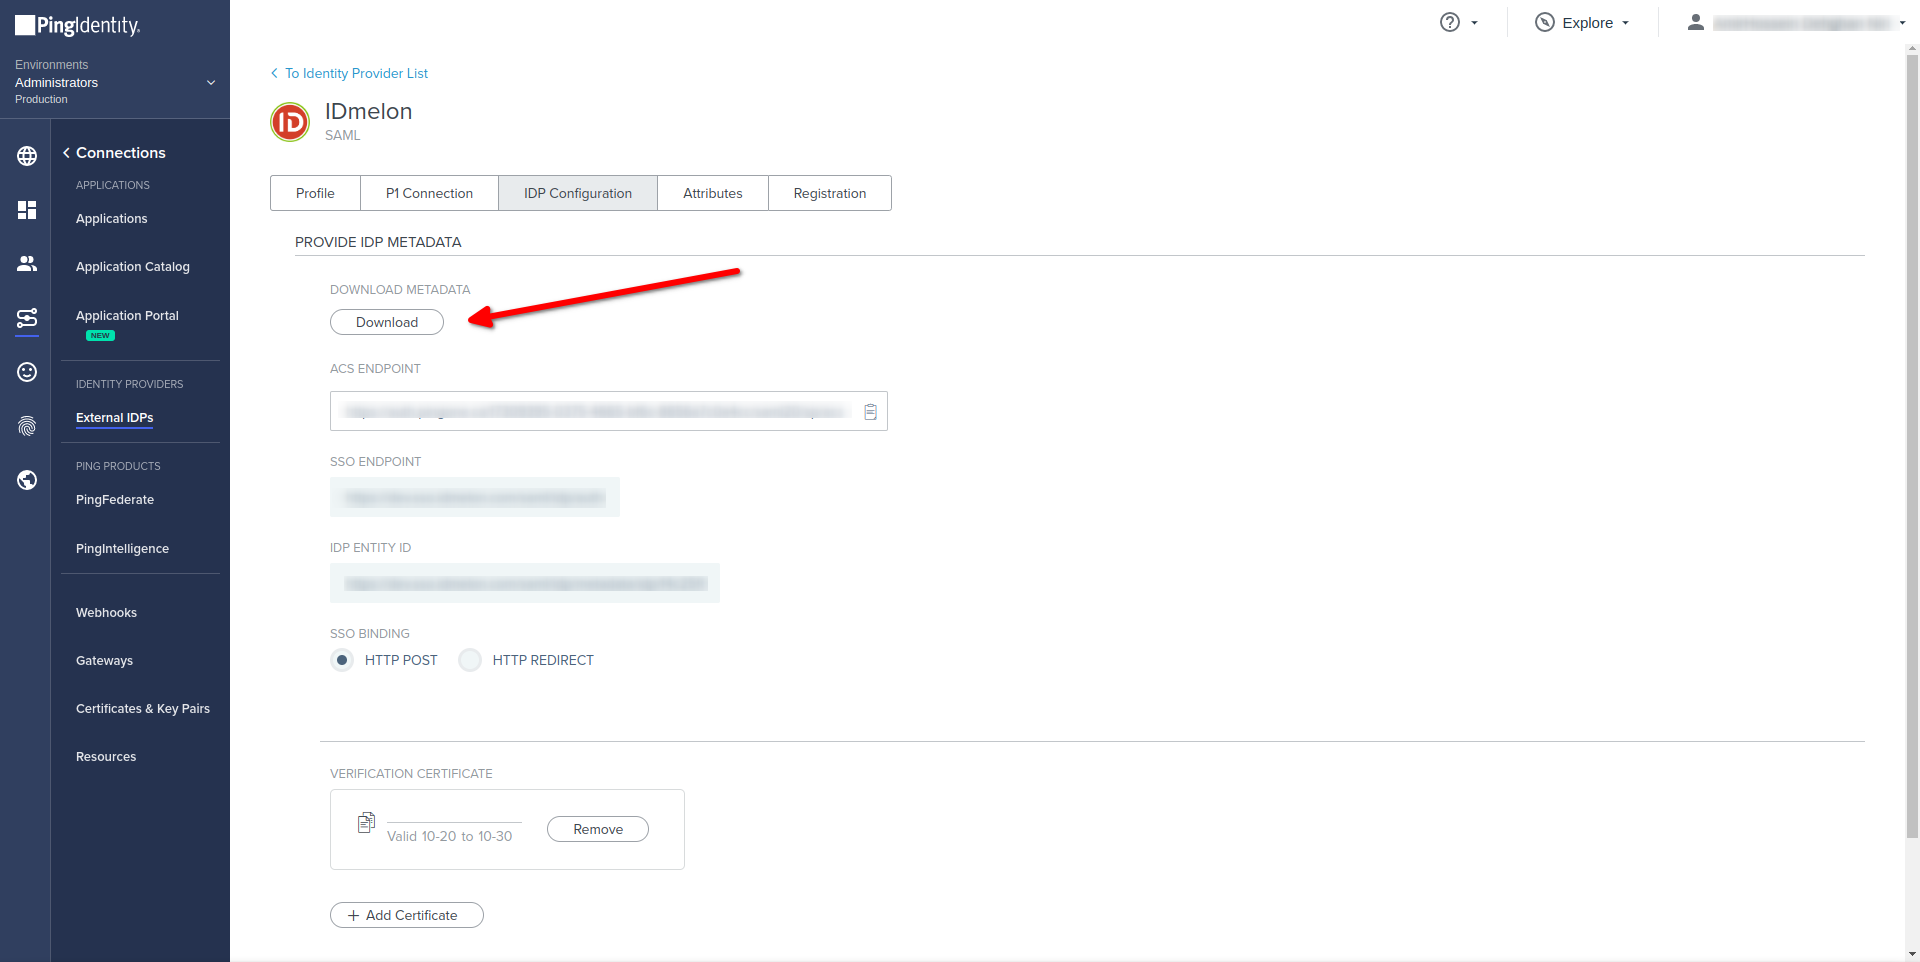
- Download -> DOWNLOAD METADA File
- You should upload metadata file and copy values of below fields from this Ping Identity panel to IDmelon Panel.
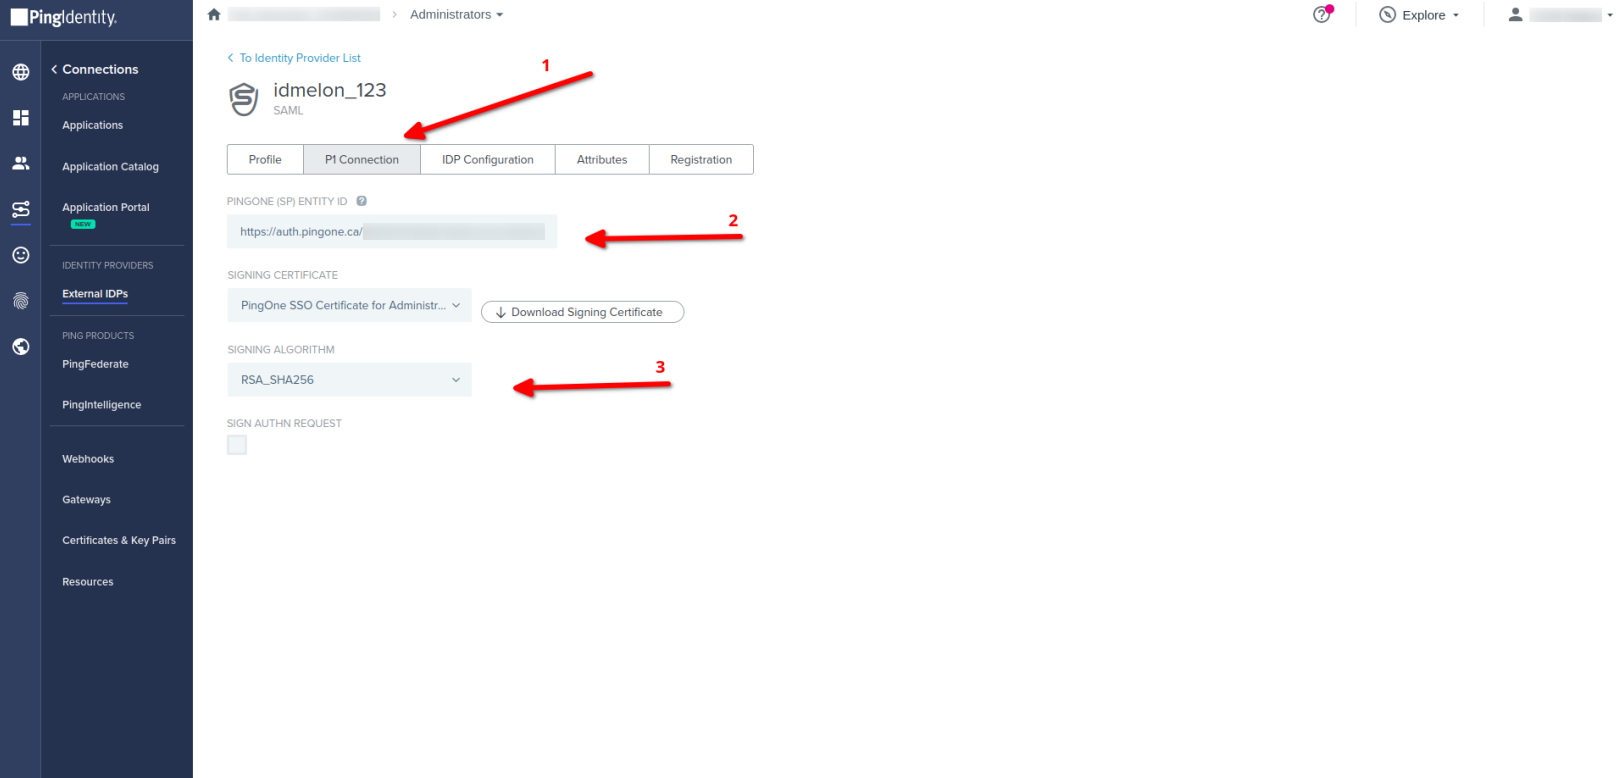
- Go to IDmelon IdP then click on P1 Connection click edit
- Copy -> PINGONE (SP) ENTITY ID
- Select your SIGNING CERTIFICATE
- Select RSA_SHA256 in SIGNING ALGORITHM field
- You should copy values of below fields from this Ping Identity panel to IDmelon Panel.
Passwordless
- Open Admin dashboard of Ping Identity
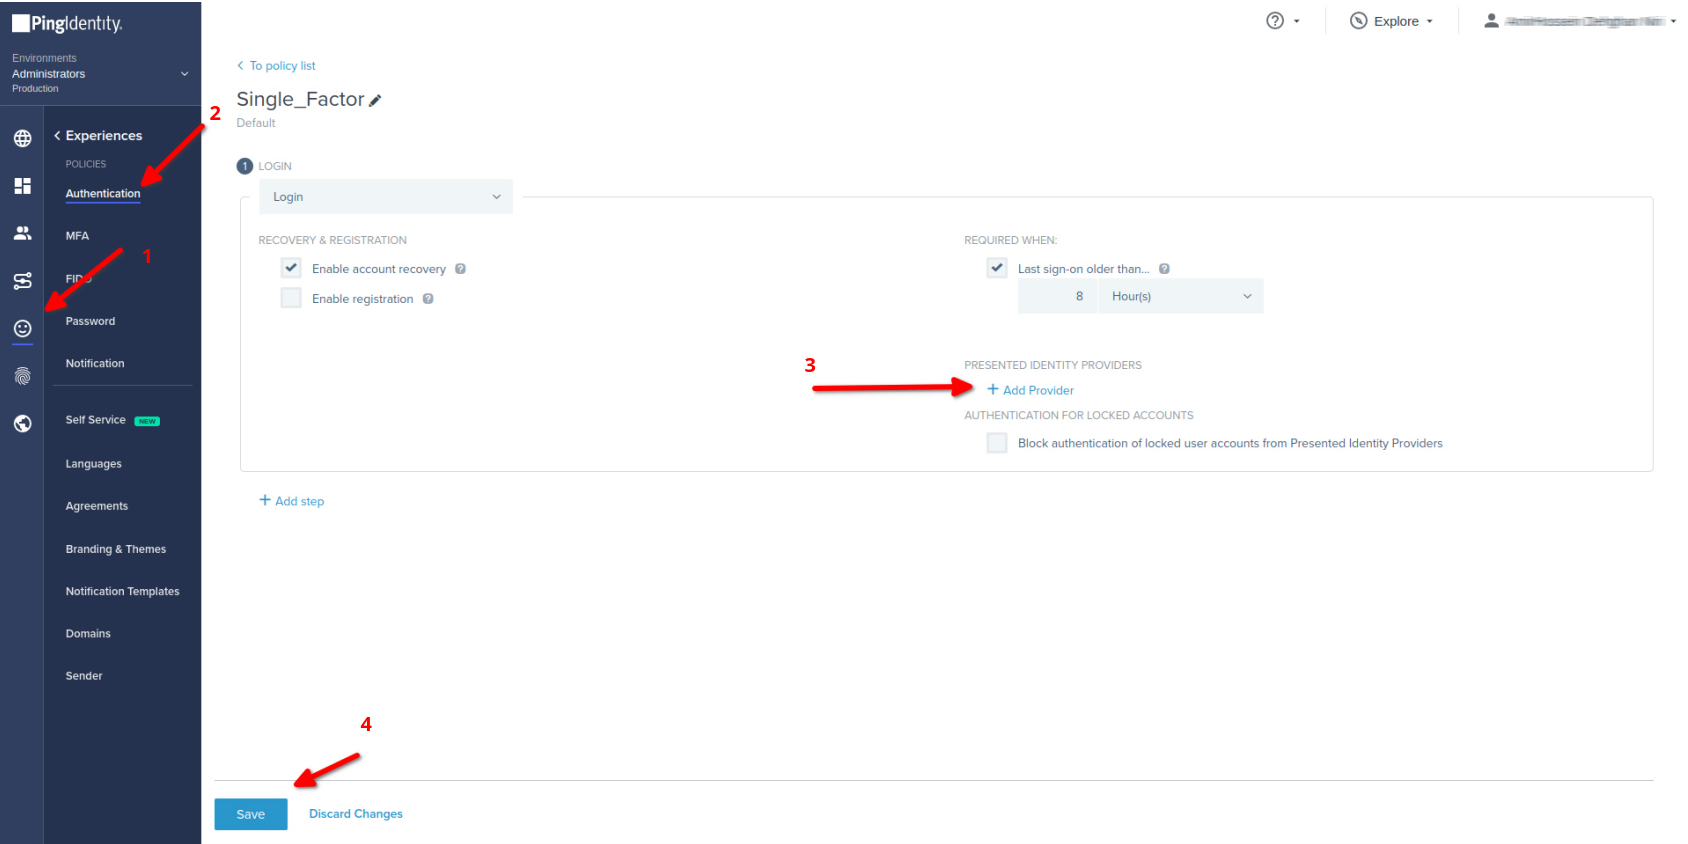
- Click on Experiences then Authentication Admin dashboard of Ping Identity
- Under Authentication Policies
- Choose or createyour custom Authentication
- example :
- Click on PRESENTED IDENTITY PROVIDERS
- Choose IDmelon as Identity Provider
- Save
API Token
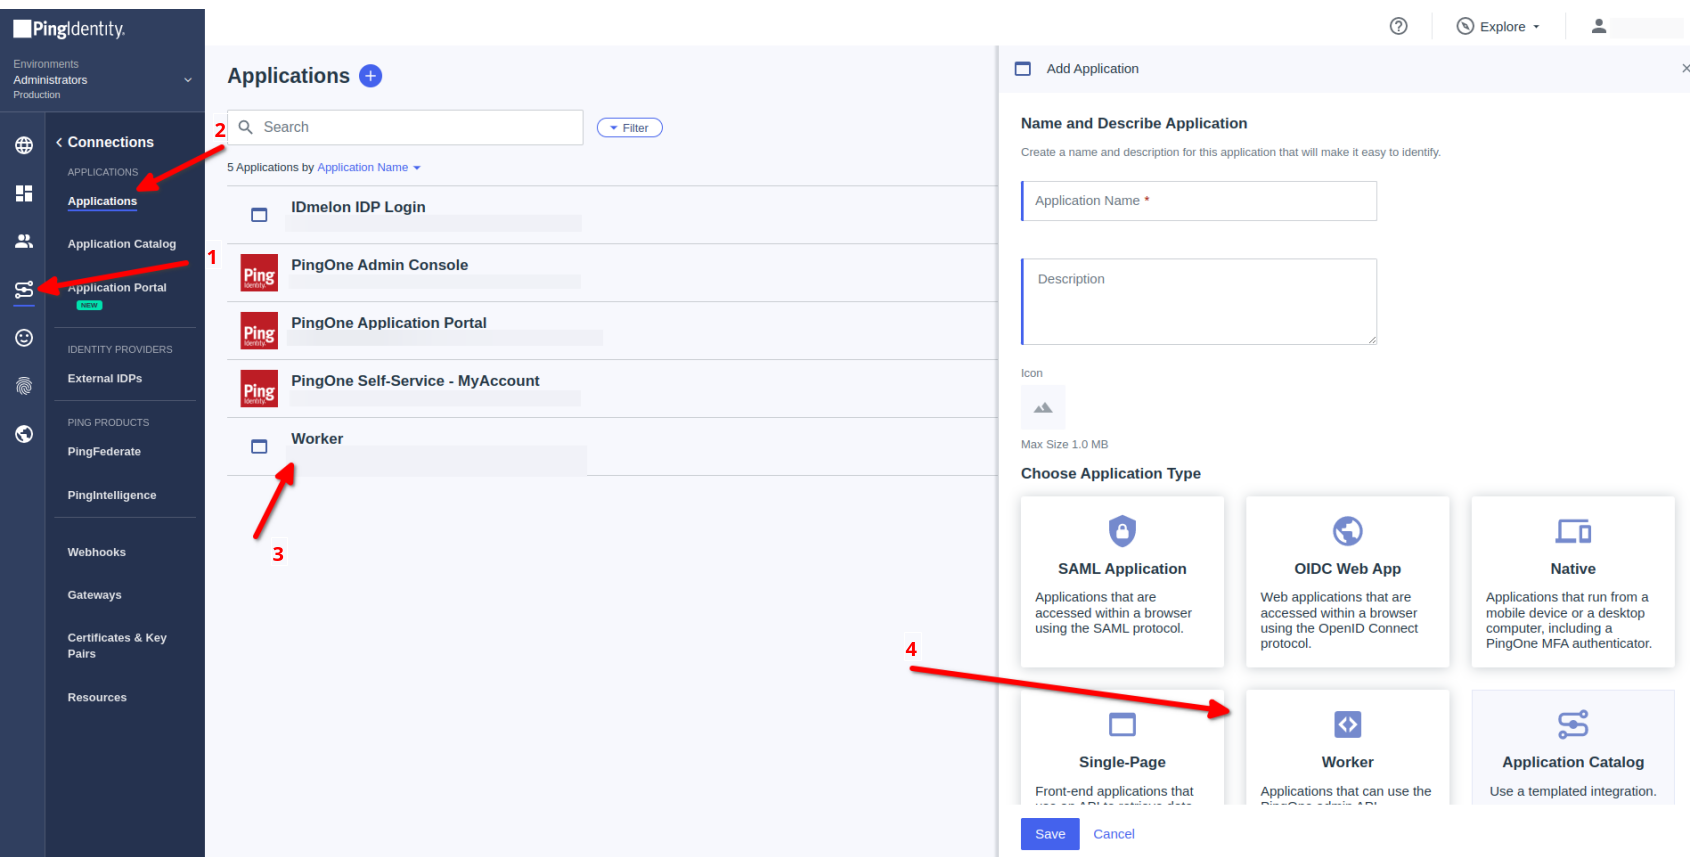
- Click on Connections then Applications
- Click on Add Applications then Choose Worker
- Choose Custom name
- Optional : Custom description
- Click on Save
- Click on Worker hen Click on Configuration
- Scroll down then Click on Get Access Token
- Copy Access Token click on Done
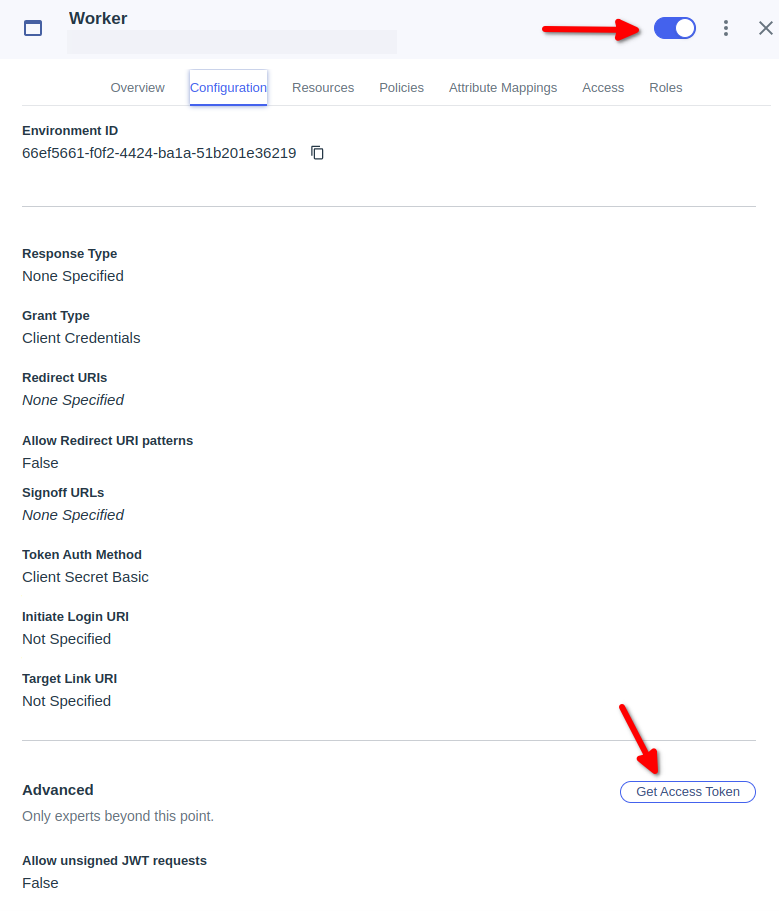
Note : Activate Worker Application
- Done