Ignition
This document describes how to set up IDmelon as an external Identity Provider (IdP) for Ignition.
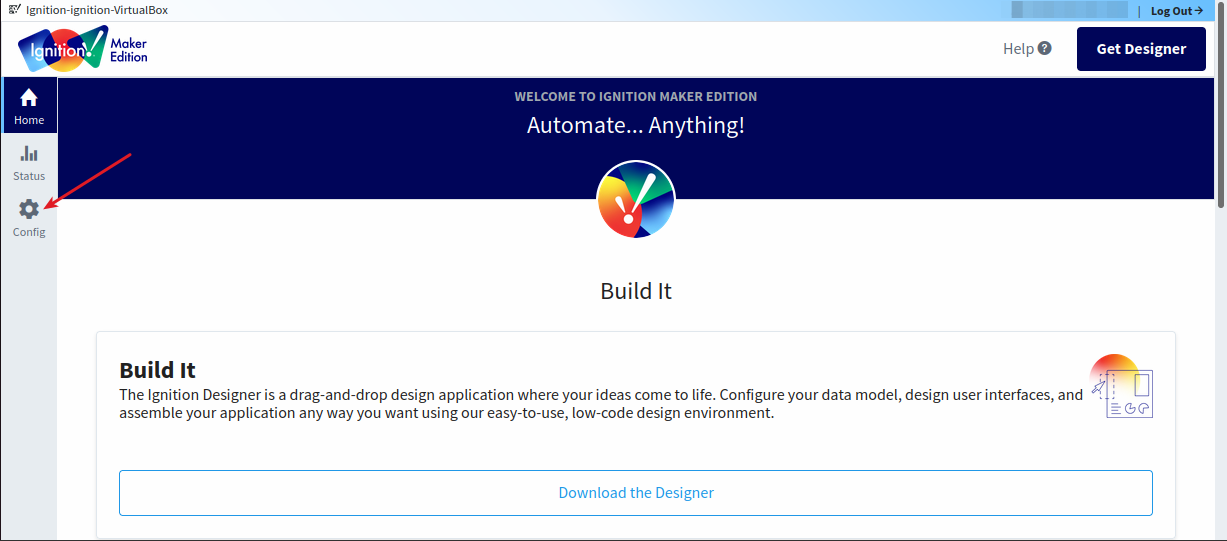
Accessing the Ignition Configuration Panel
To configure the connection, log in to your Ignition configuration panel. Click “Config” on the left side of the Ignition panel page.
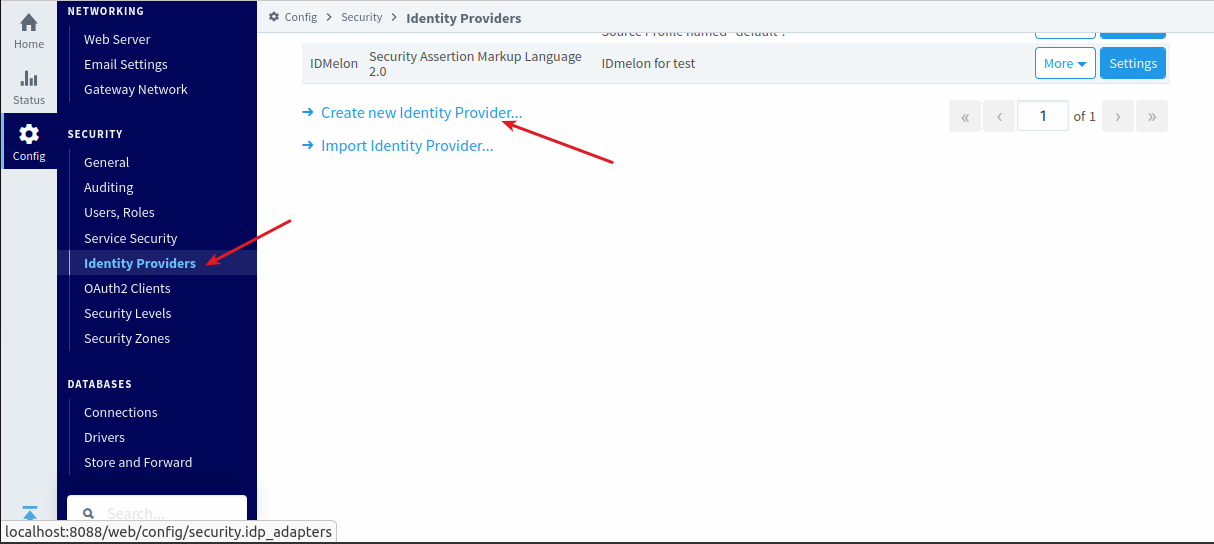
Configuring the Identity Provider in Ignition
Navigate to “Identity Provider” within the “Security” section. Click “Create new Identity Provider” to begin creating an IdP for Ignition.
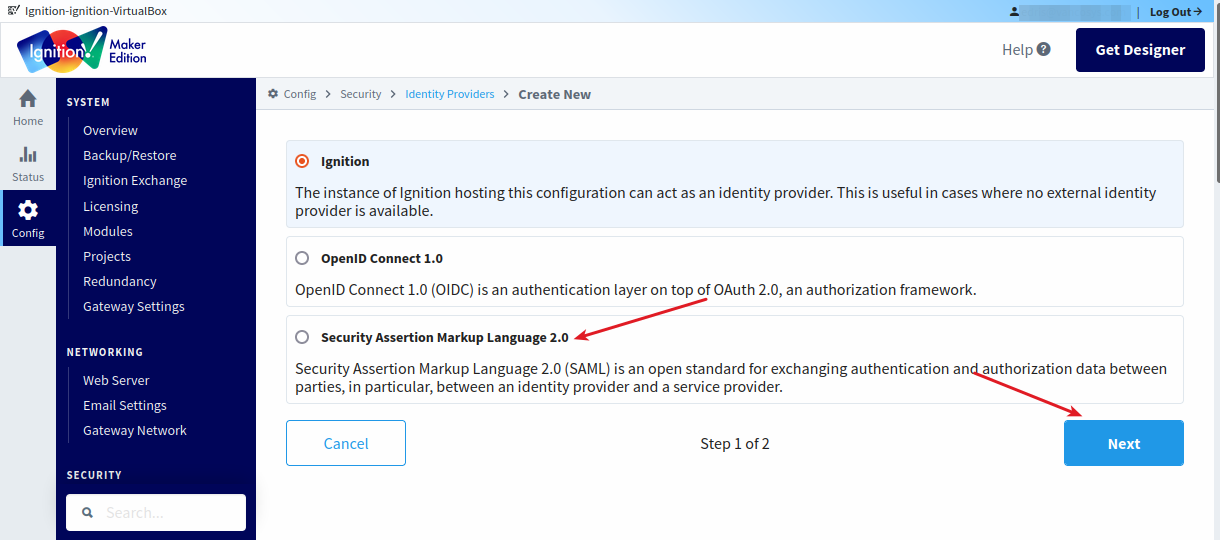
On the first page, select “Security Assertion Markup Language 2.0” to integrate IDmelon with Ignition as an Identity Provider.
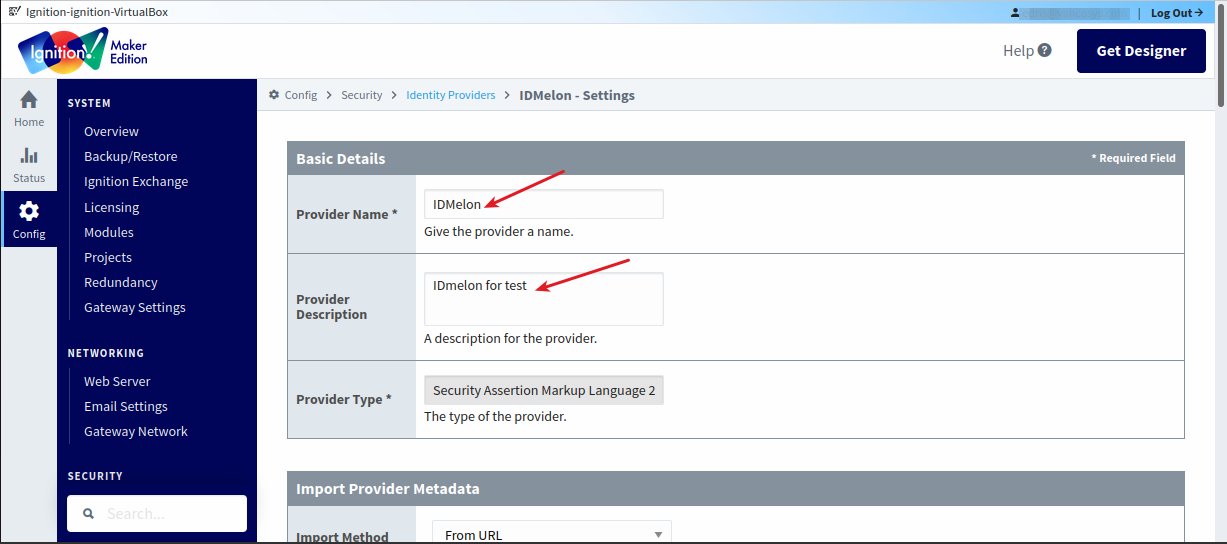
After selecting the IdP type, you’ll be on the main integration page. First, provide a name and description for your configuration.
Then, scroll down to view the Service Provider (SP) configurations.
Configuring the Service Provider in IDmelon
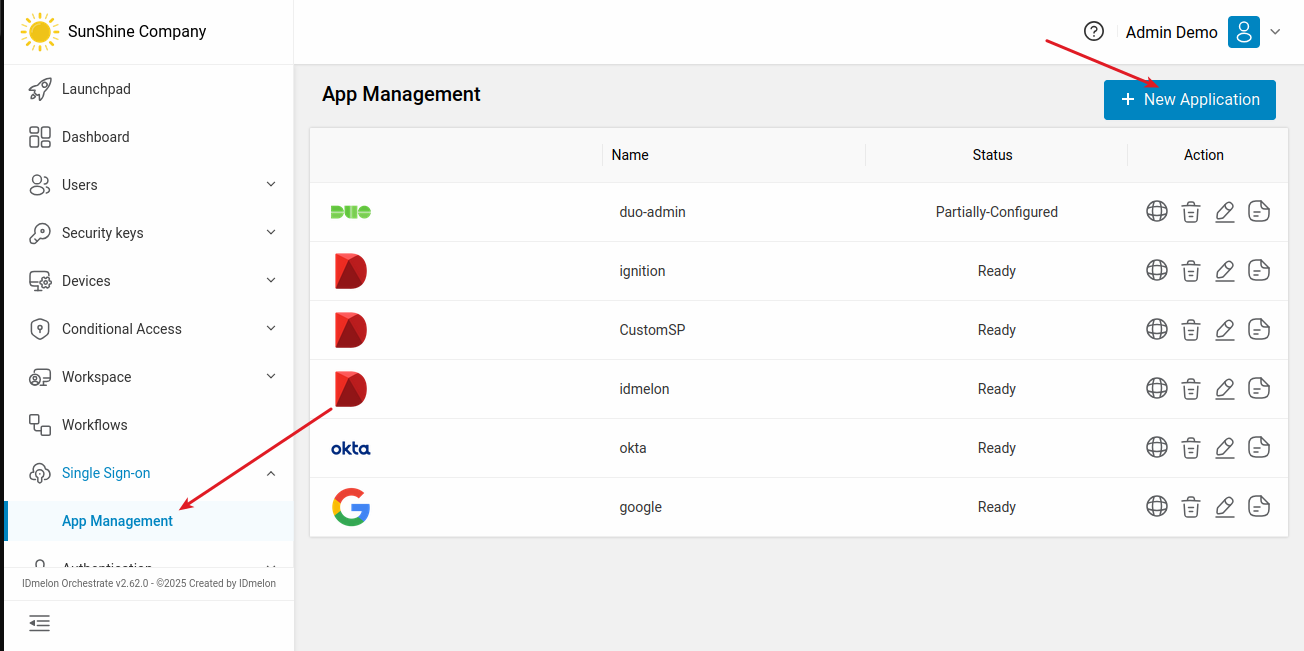
Now, access the IDmelon panel and create a new SP configuration for Ignition:
“Single Sign-on” → “App Management” → “New Application”
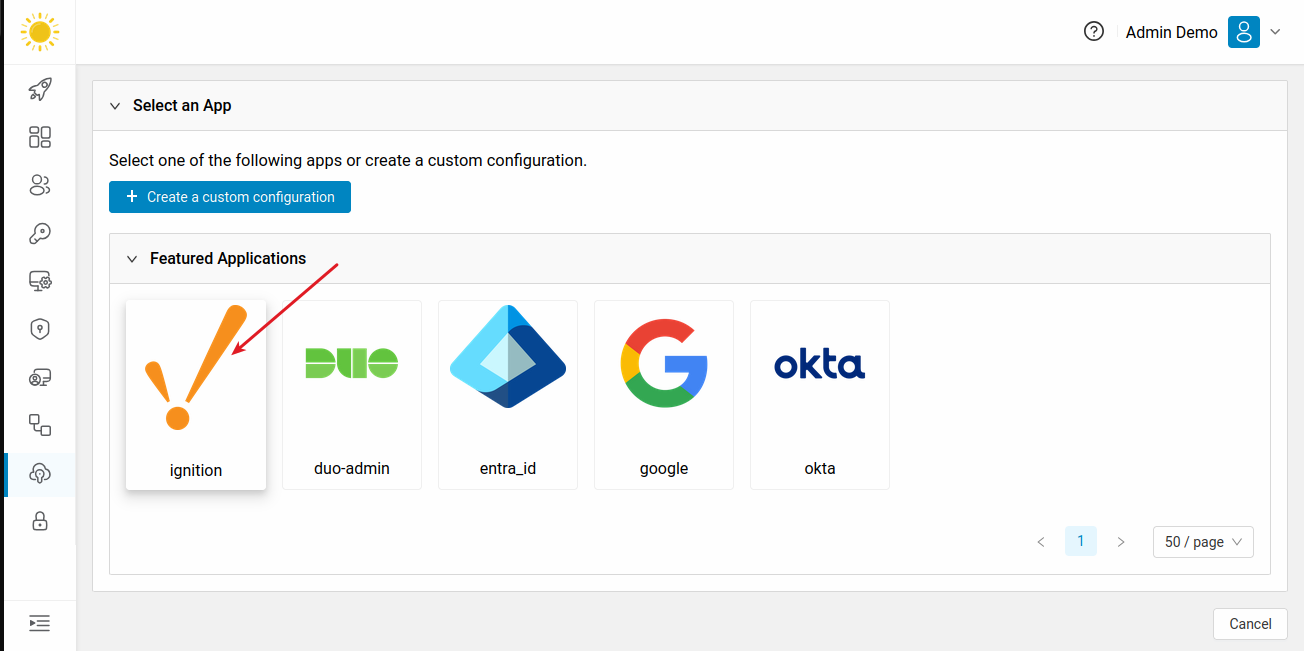
Select “Ignition” to create a new configuration based on the default Ignition configuration.
Connecting Ignition and IDmelon
You now have an IdP configuration in the IDmelon panel and an SP configuration in the Ignition panel.
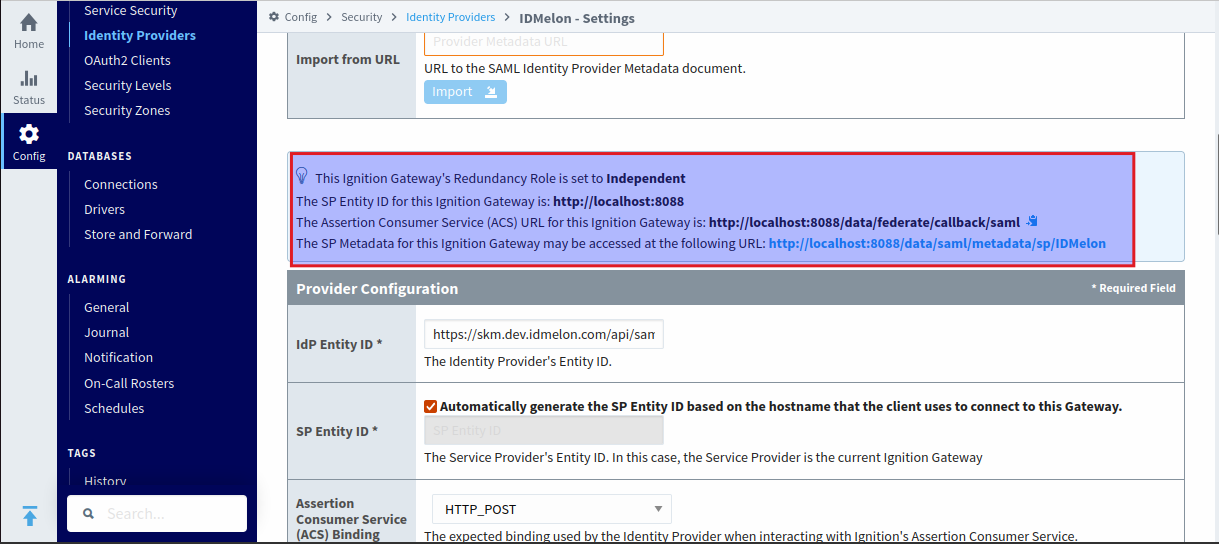
Copy the SP Entity ID and Assertion Consumer Service (ACS) URL from the
Ignitionpanel and paste them into the corresponding fields in theIDmelonform.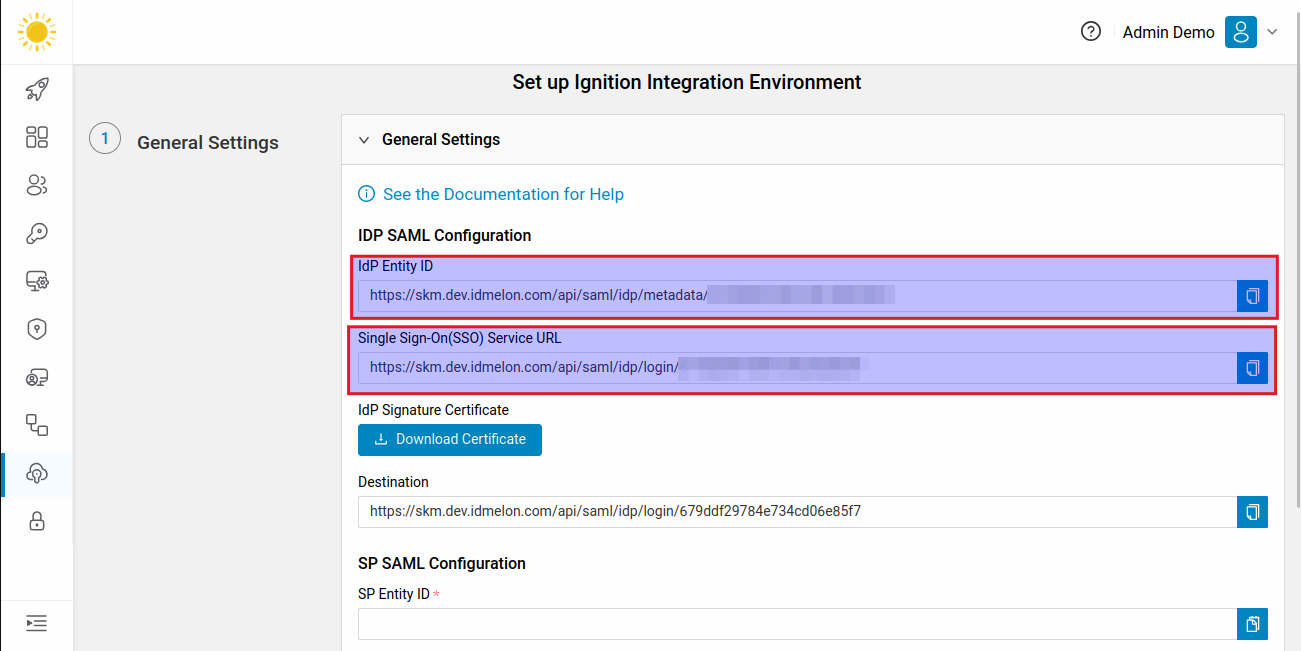
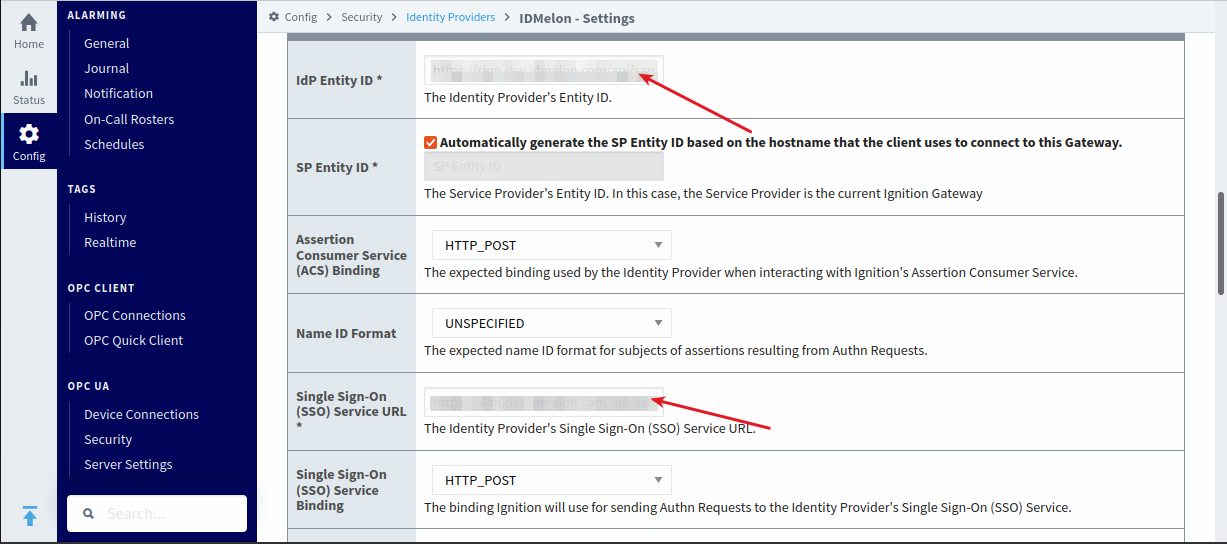
Scroll down to the “Provider Configuration” section in the IDmelon panel. Set the IdP Entity ID and Single Sign-On (SSO) Service URL using the links from the IDmelon panel.
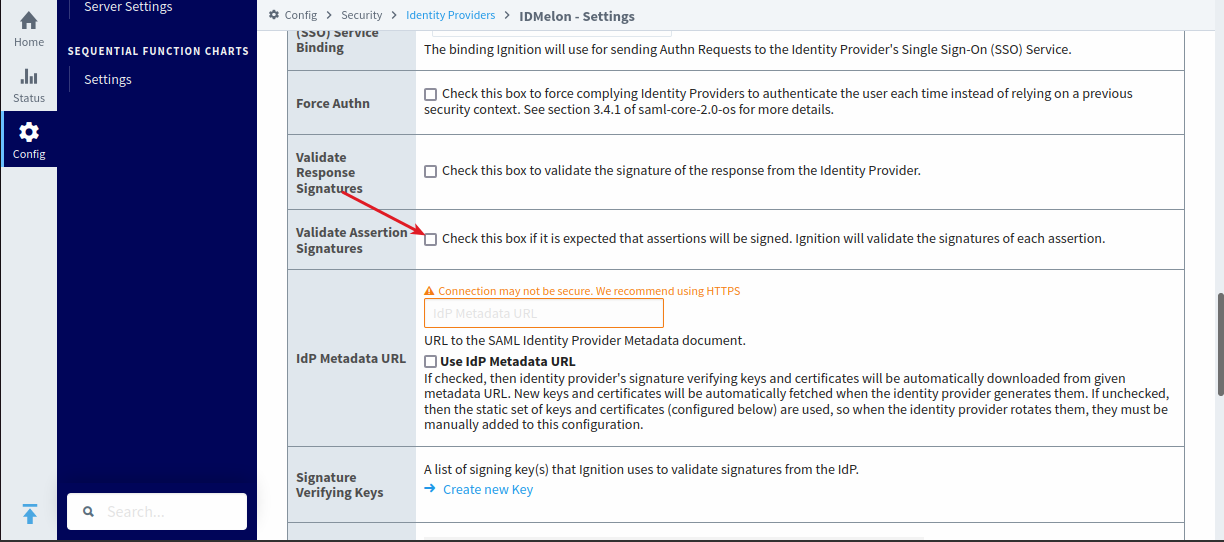
For the default IDmelon configuration, uncheck “Validate Response Signatures.”
Click “Confirm” in the
IDmelonpanel and “Save” in theIgnitionpanel.
Mapping User Attributes
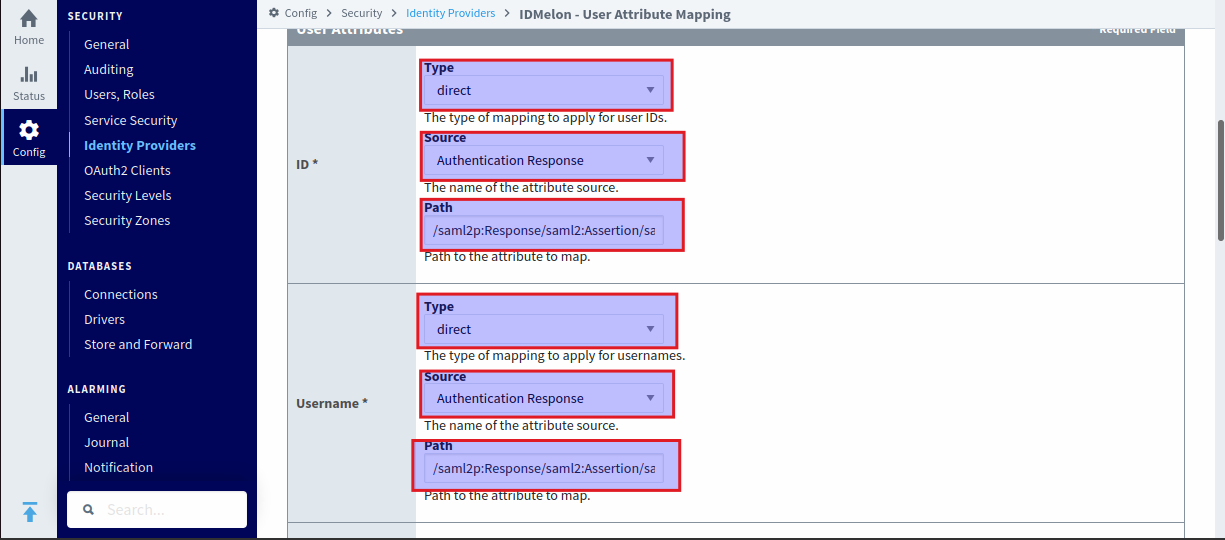
After saving in Ignition, go to “More” → “User Attribute Mapping” to map the login parameters with IDmelon.
 Configure the following mappings:
- ID:
- Type:
direct - Source:
Authentication Response - Path:
/saml2p:Response/saml2:Assertion/saml2:Subject/saml2:NameID/text()
- Type:
- Username:
- Type:
direct - Source:
Authentication Response - Path:
/saml2p:Response/saml2:Assertion/saml2:AttributeStatement/saml2:Attribute[@Name="username"]/saml2:AttributeValue/text()
- Type:
- First Name:
- Type:
direct - Source:
Authentication Response - Path:
/saml2p:Response/saml2:Assertion/saml2:AttributeStatement/saml2:Attribute[@Name="firstname"]/saml2:AttributeValue/text()
- Type:
- Last Name:
- Type:
direct - Source:
Authentication Response - Path:
/saml2p:Response/saml2:Assertion/saml2:AttributeStatement/saml2:Attribute[@Name="lastname"]/saml2:AttributeValue/text()
- Type:
- Email:
- Type:
direct - Source:
Authentication Response - Path:
/saml2p:Response/saml2:Assertion/saml2:AttributeStatement/saml2:Attribute[@Name="email"]/saml2:AttributeValue/text()
- Type:
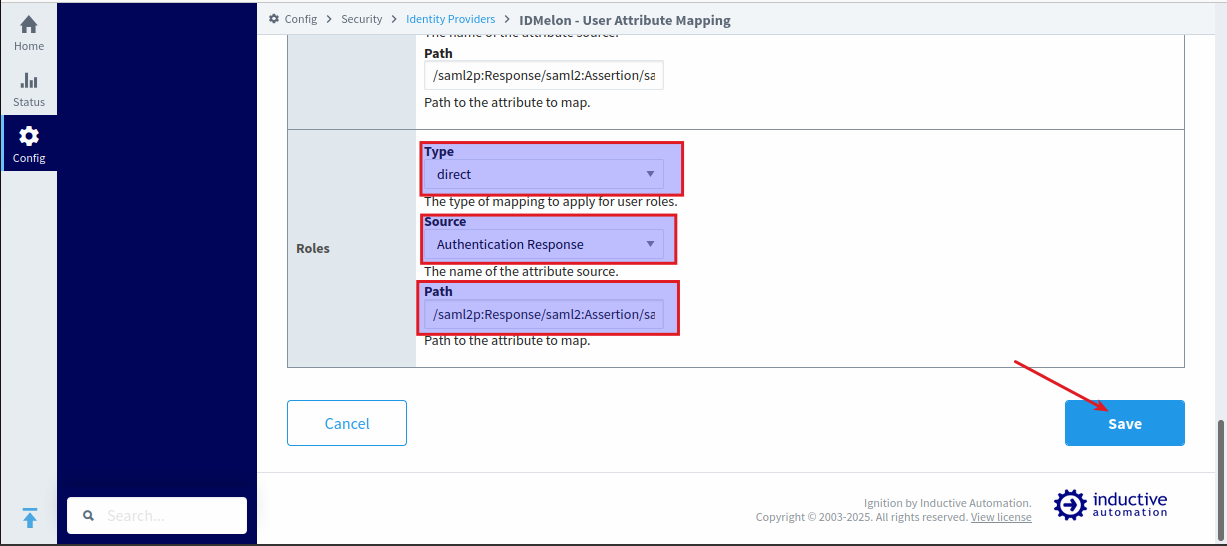
- Roles:
- Type:
direct - Source:
Authentication Response - Path:
/saml2p:Response/saml2:Assertion/saml2:AttributeStatement/saml2:Attribute[@Name="roles"]/saml2:AttributeValue/text()
- Type:
Finally, click “Save.”
Testing the Configuration
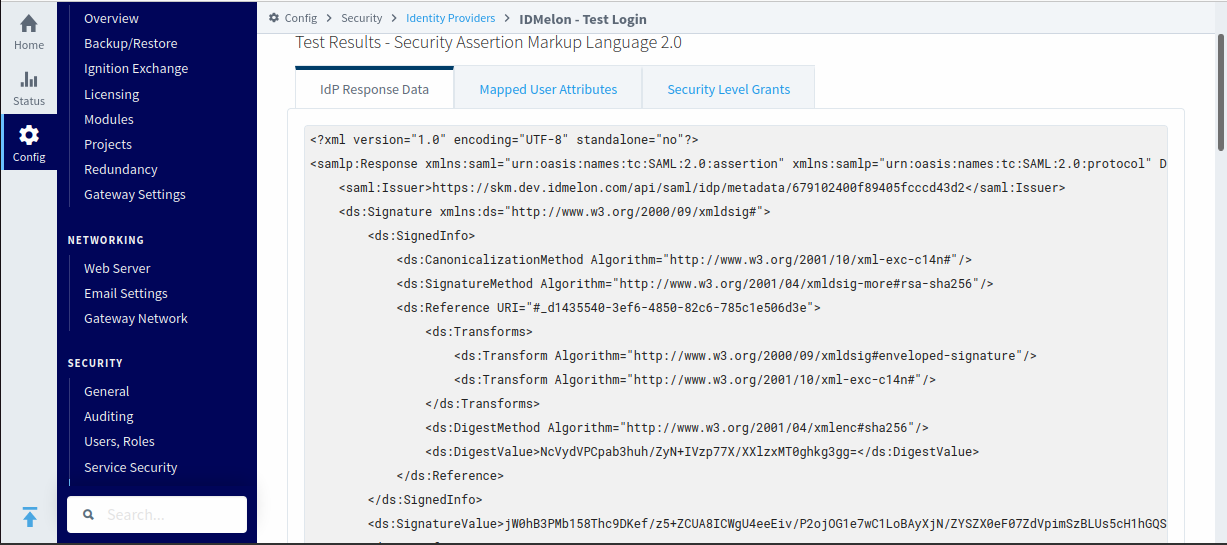
Test the configuration to ensure everything is working correctly. Go to “More” → “Test Login”.
You should be redirected to the IDmelon login page. Enter your account information. After successful authentication in IDmelon, you should see an XML data response. Review the other tabs to validate your configuration.
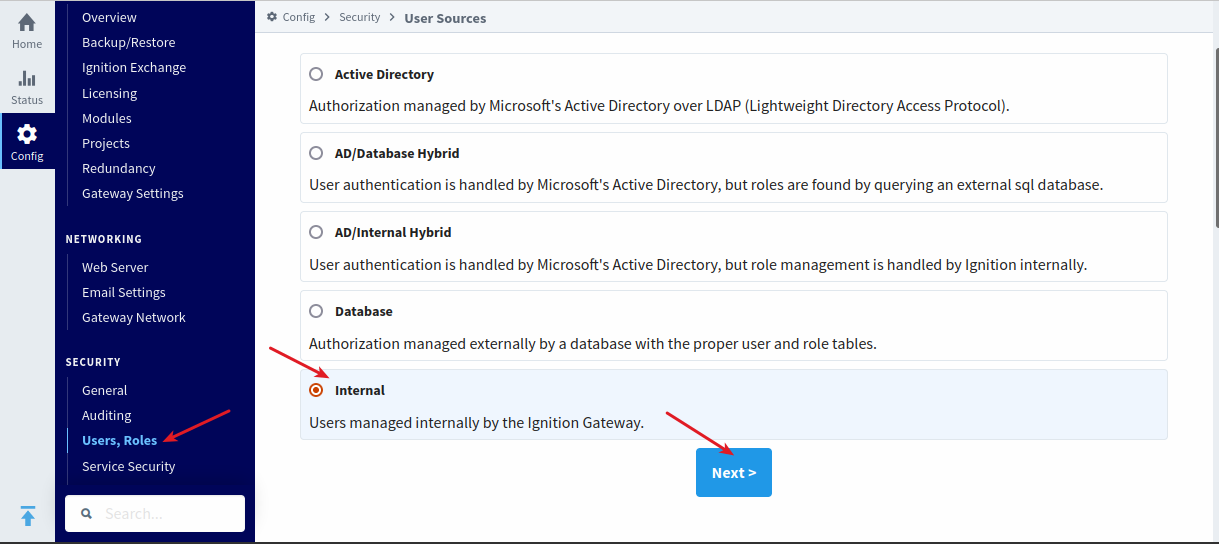
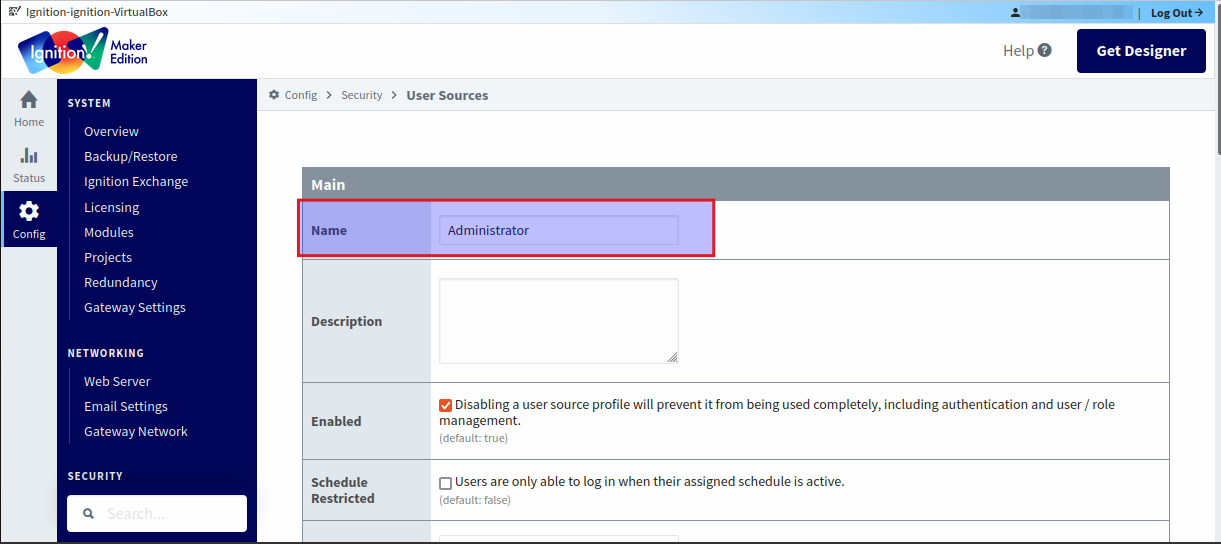
Managing User Access
If the data is correct, the integration is complete. Manage user access by creating internal rules within Ignition. The default administration rule is named “Administrator”. Users in the “Administrator” group in IDmelon will have administrator access in Ignition. Manage group names and access as needed.
Setting IDmelon as the Default Login
To change the default login to IDmelon, go to “General” configuration in the “Security” section and select your IDmelon configuration as the default login role.