Citrix
This guide explains how to set up IDmelon as an external IdP for Citrix.
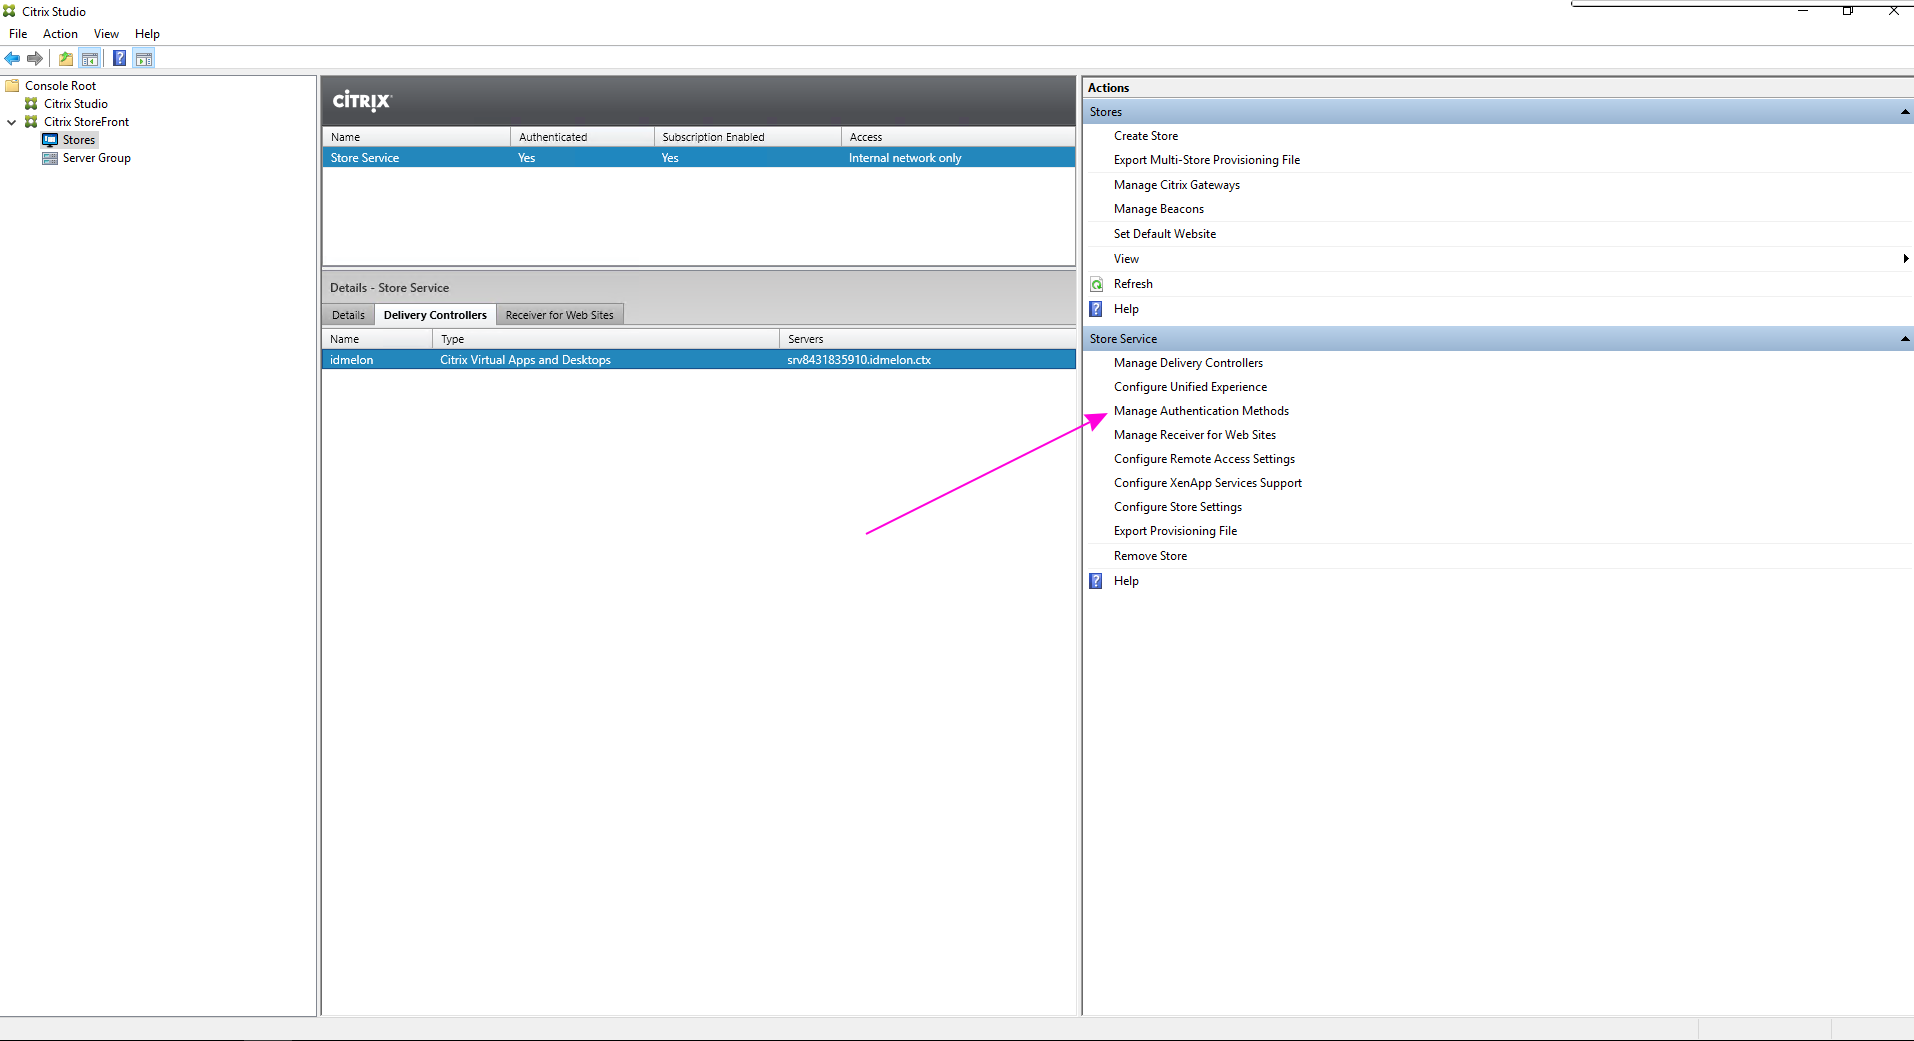
Login to the Citrix Administration Panel
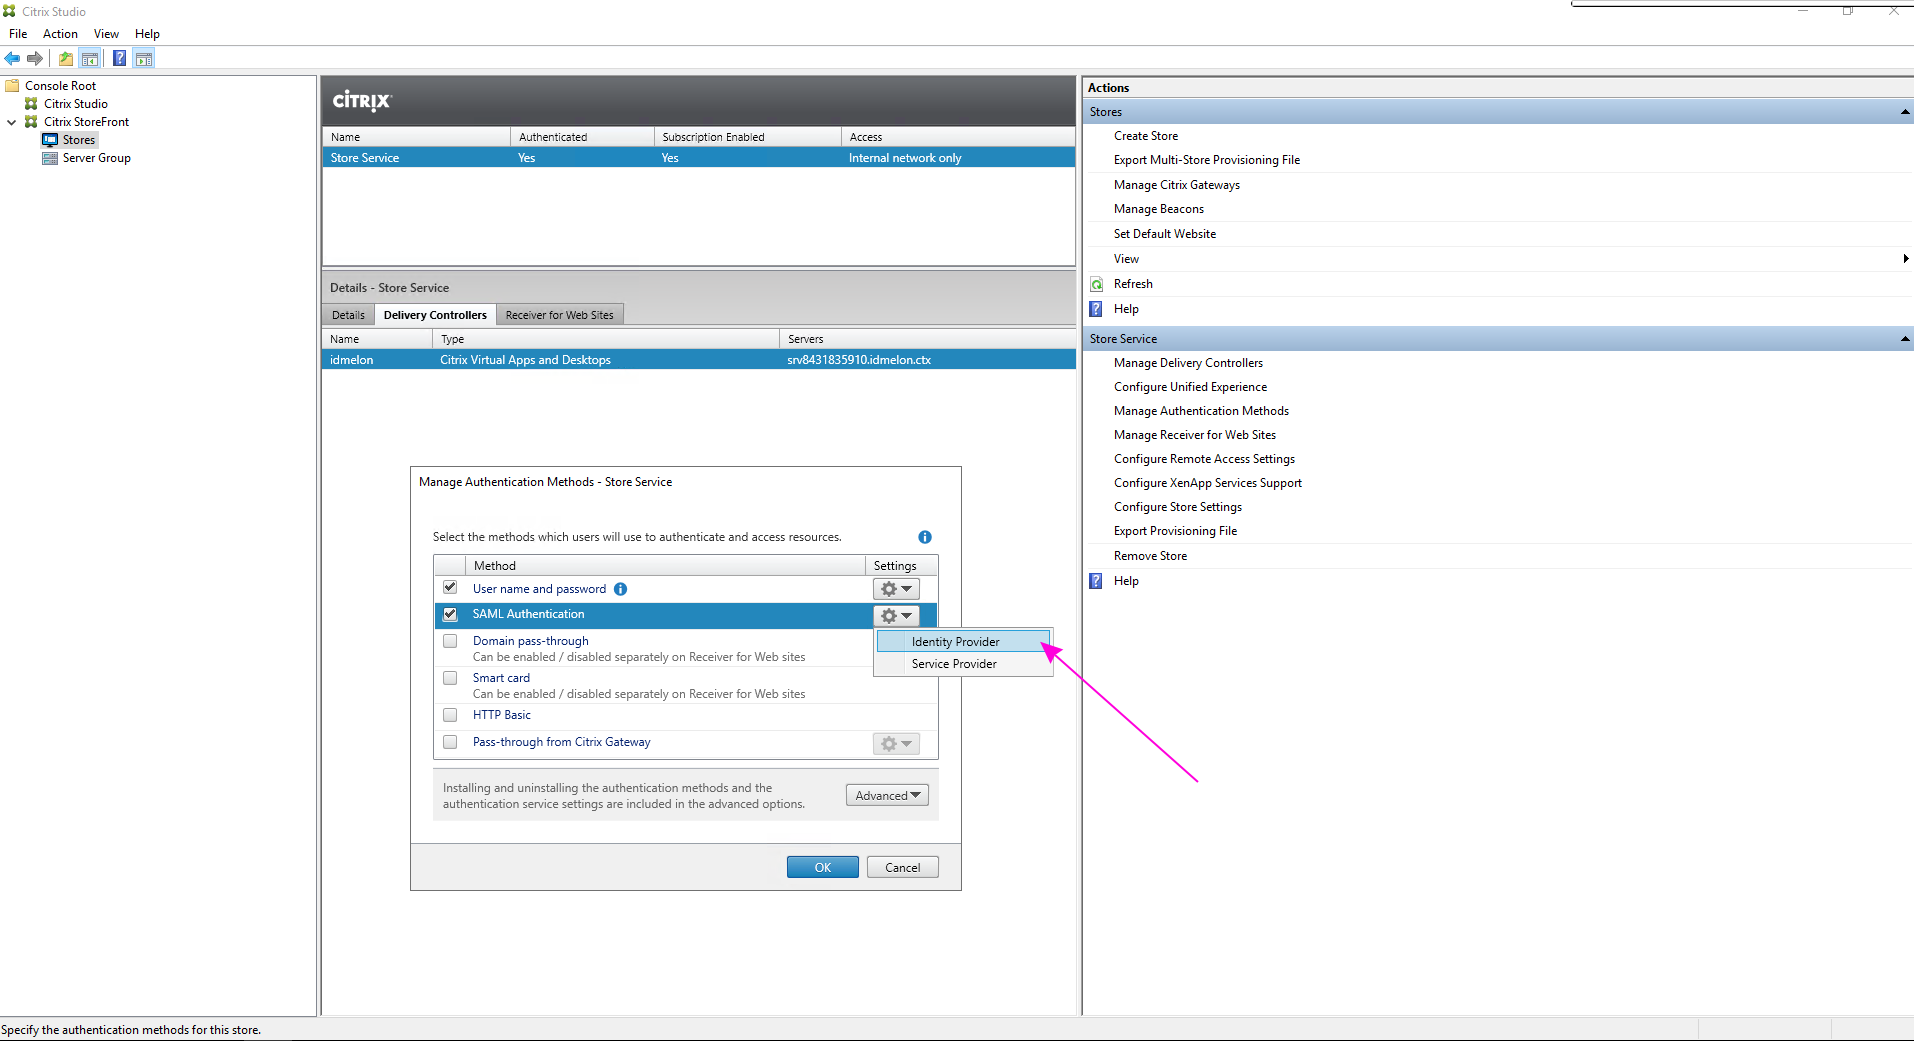
- Click on “Manage Authentication Methods”.
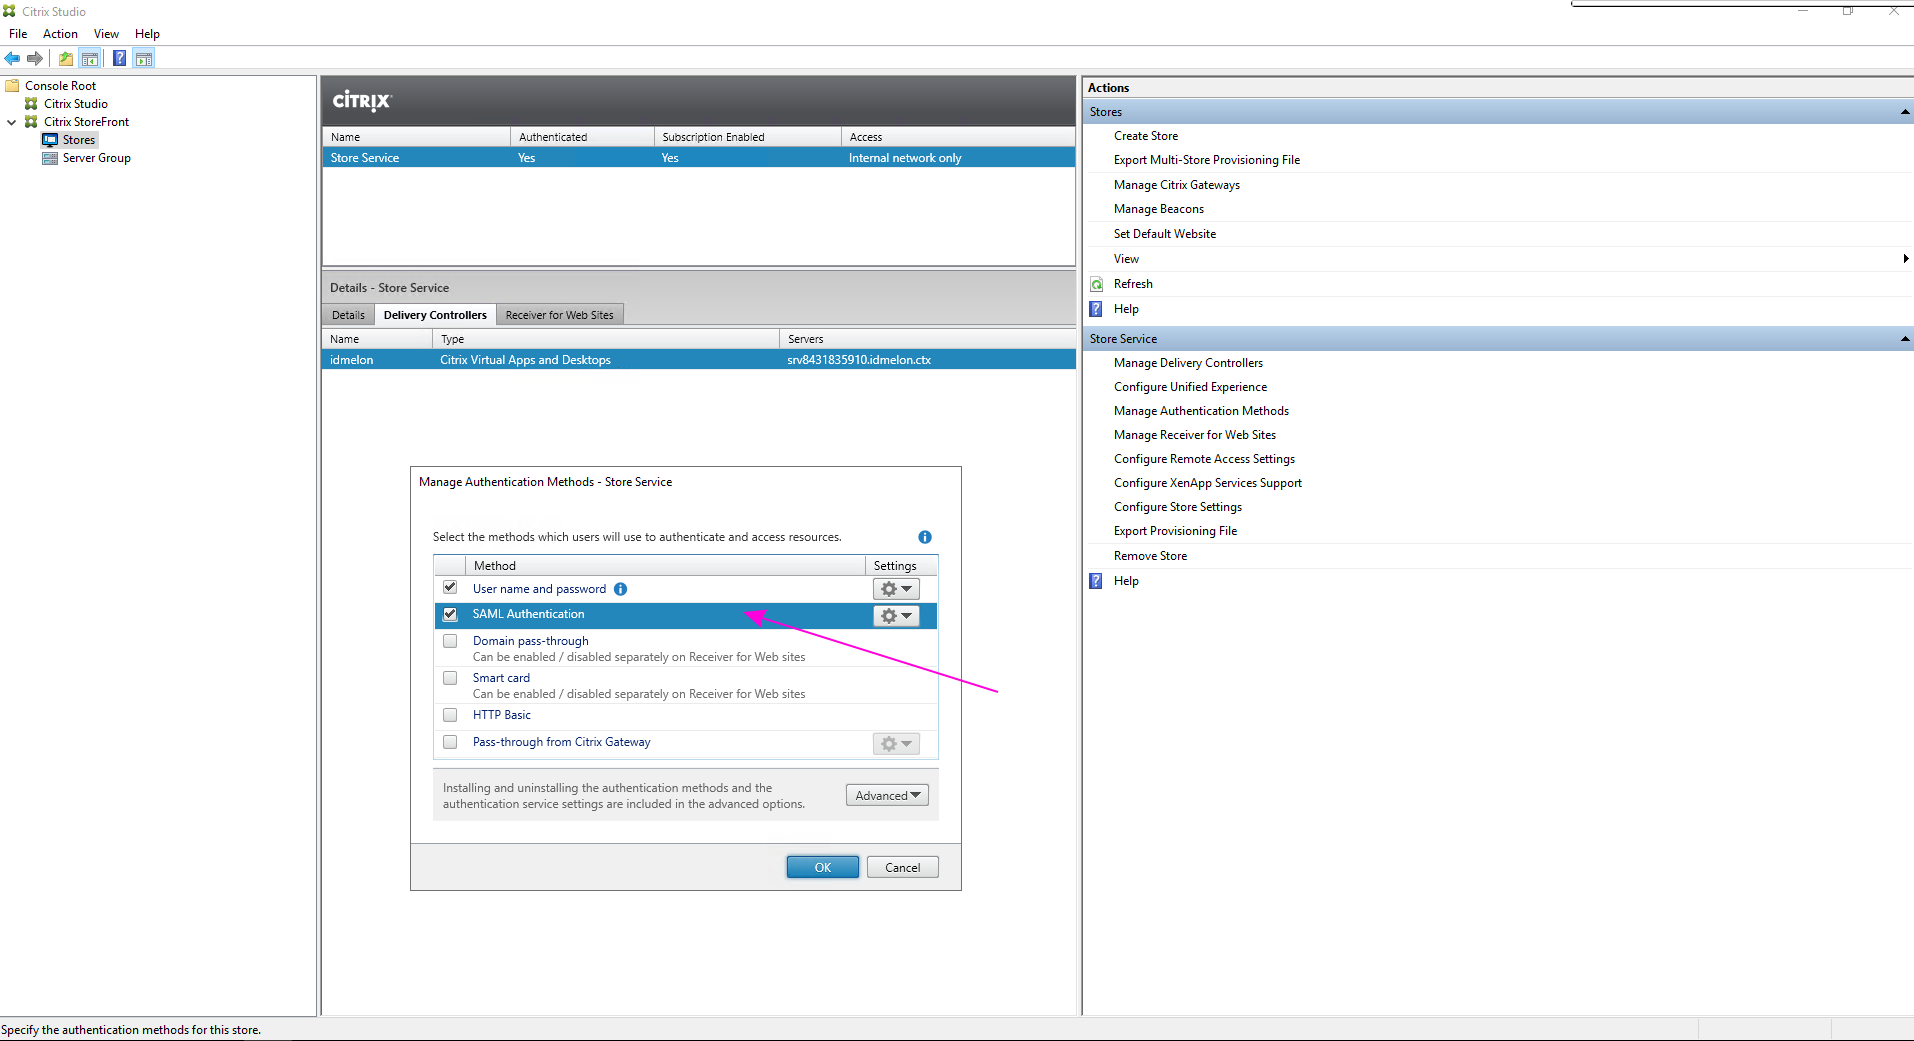
- Click on “SAML Authentication”.
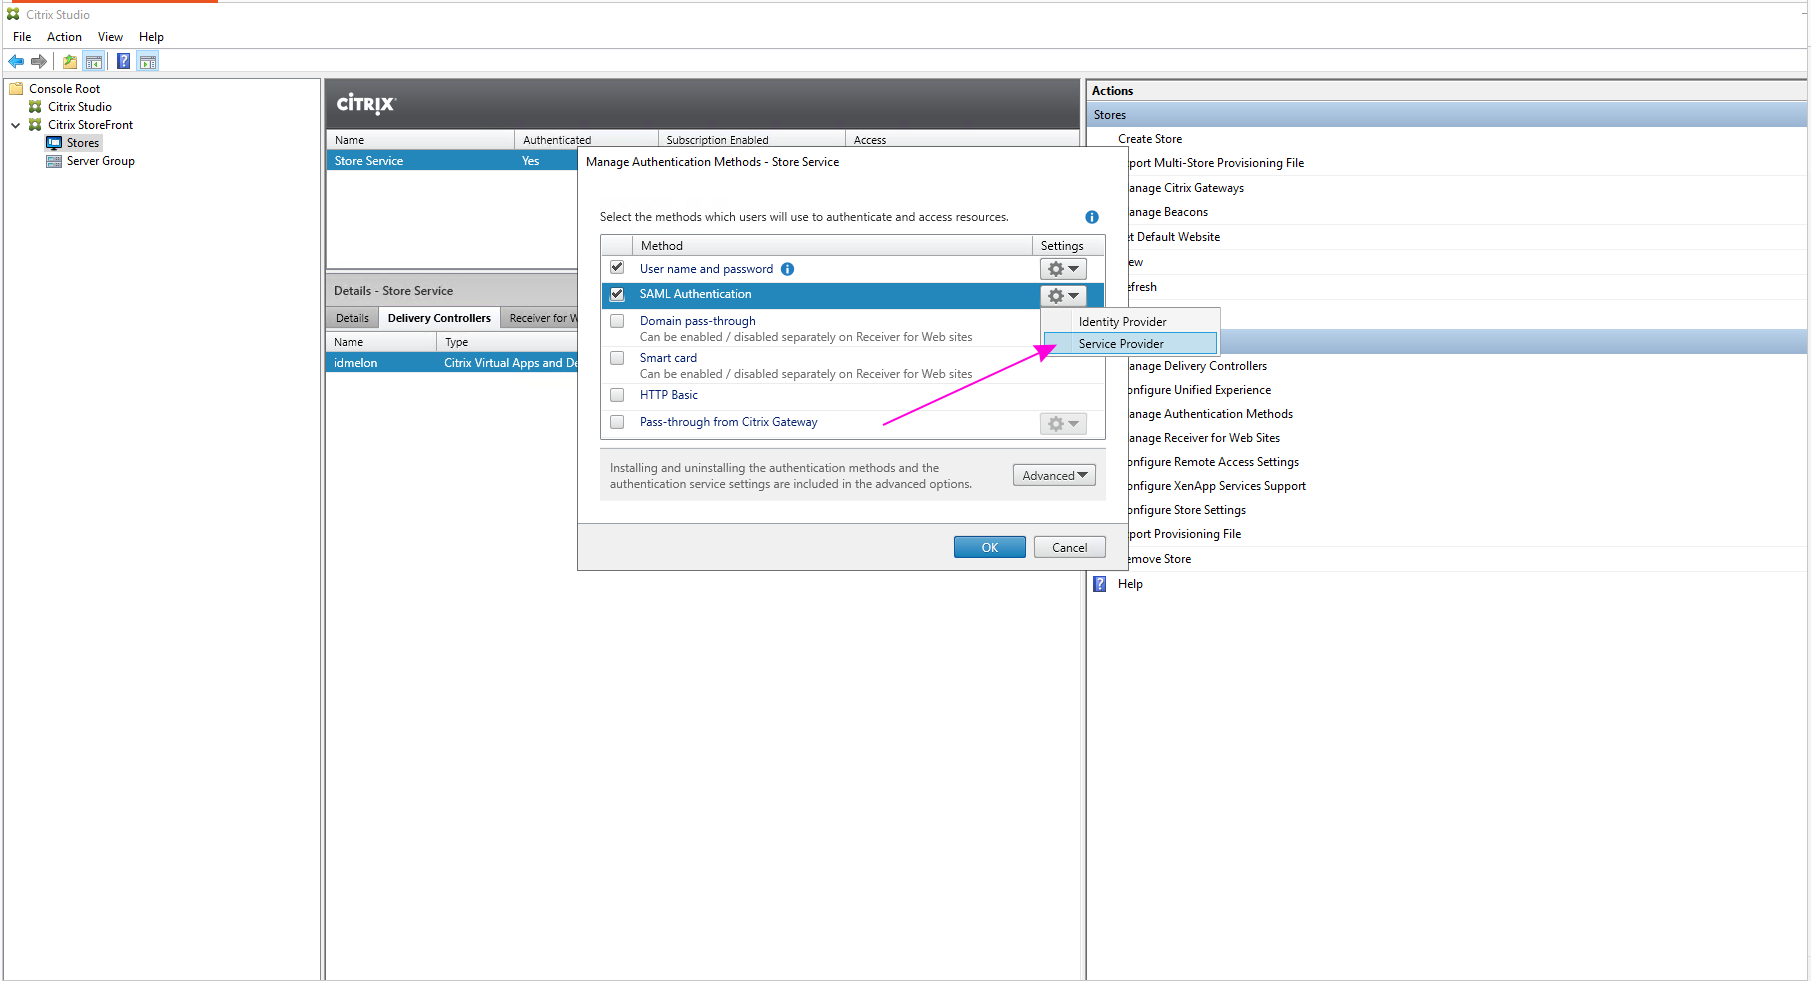
- Select the “SAML Authentication” option and choose “Service Provider”.
- Copy the value of the “Service Provider Identifier” field. You will use this as the “Entity ID” when adding the app in your IDmelon Administration panel.

- Click the “Browse” button next to “Export Encryption Certificate”:
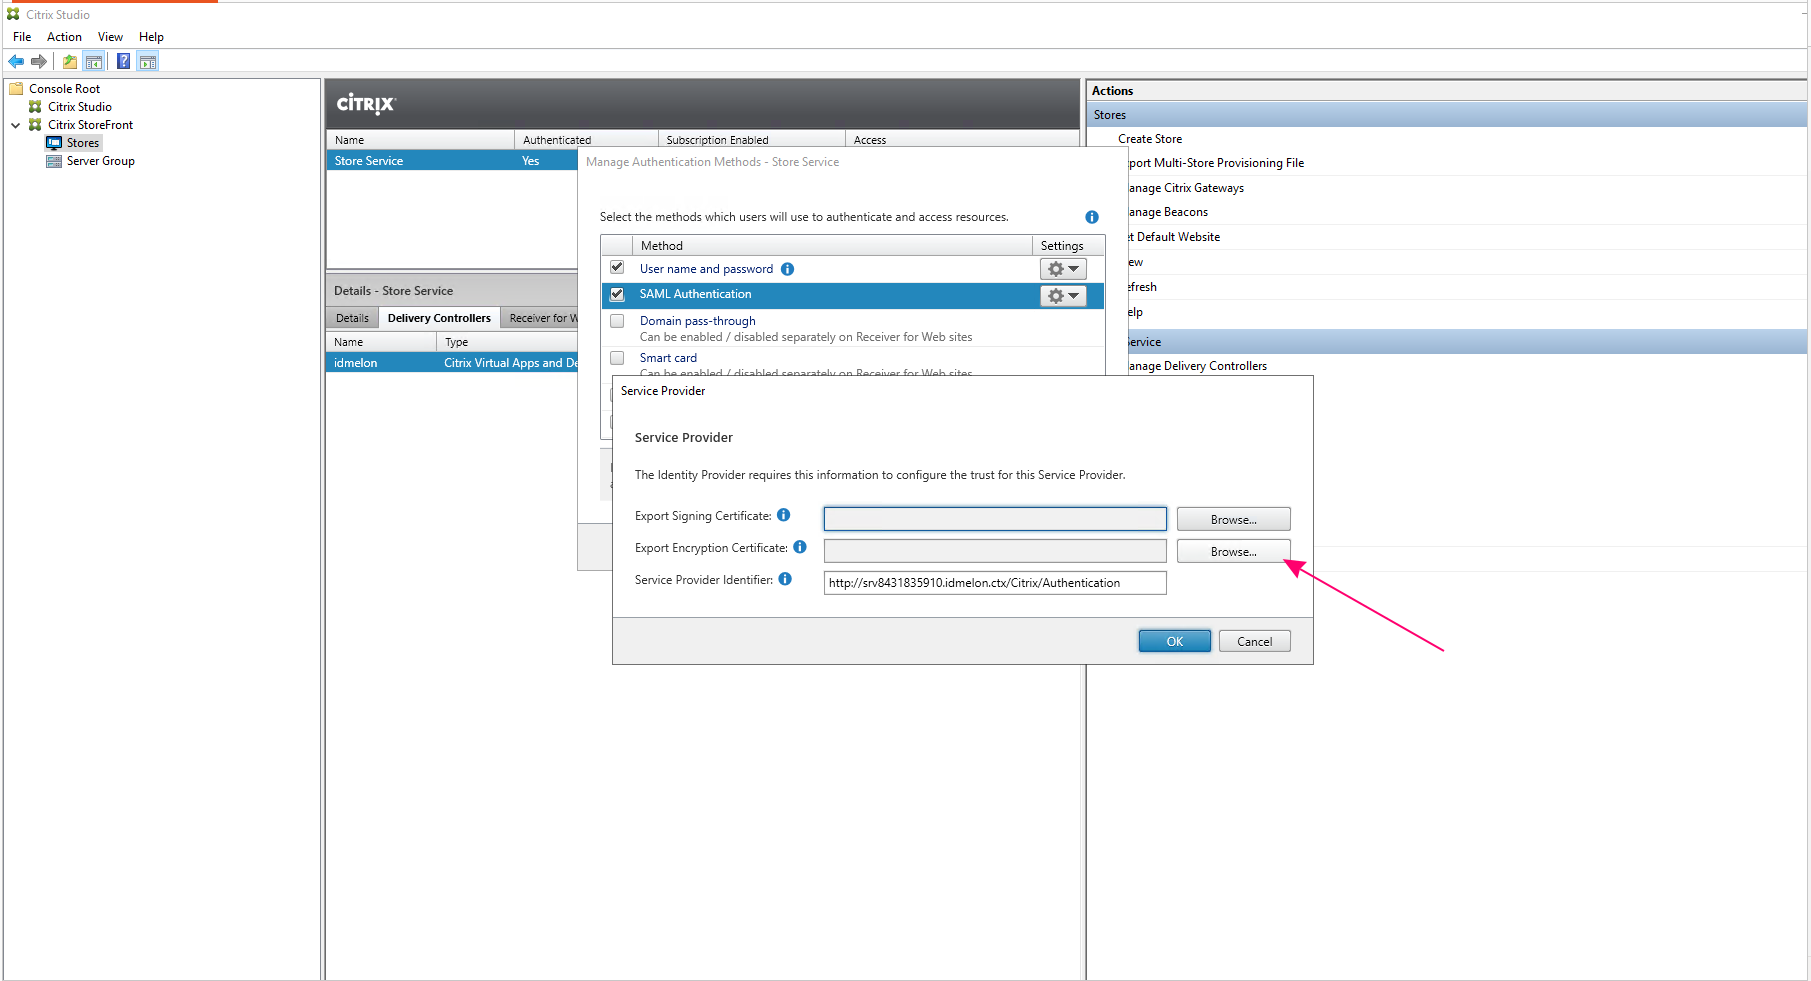 Save the certificate file with a custom name, such as
 sp_enc.cer.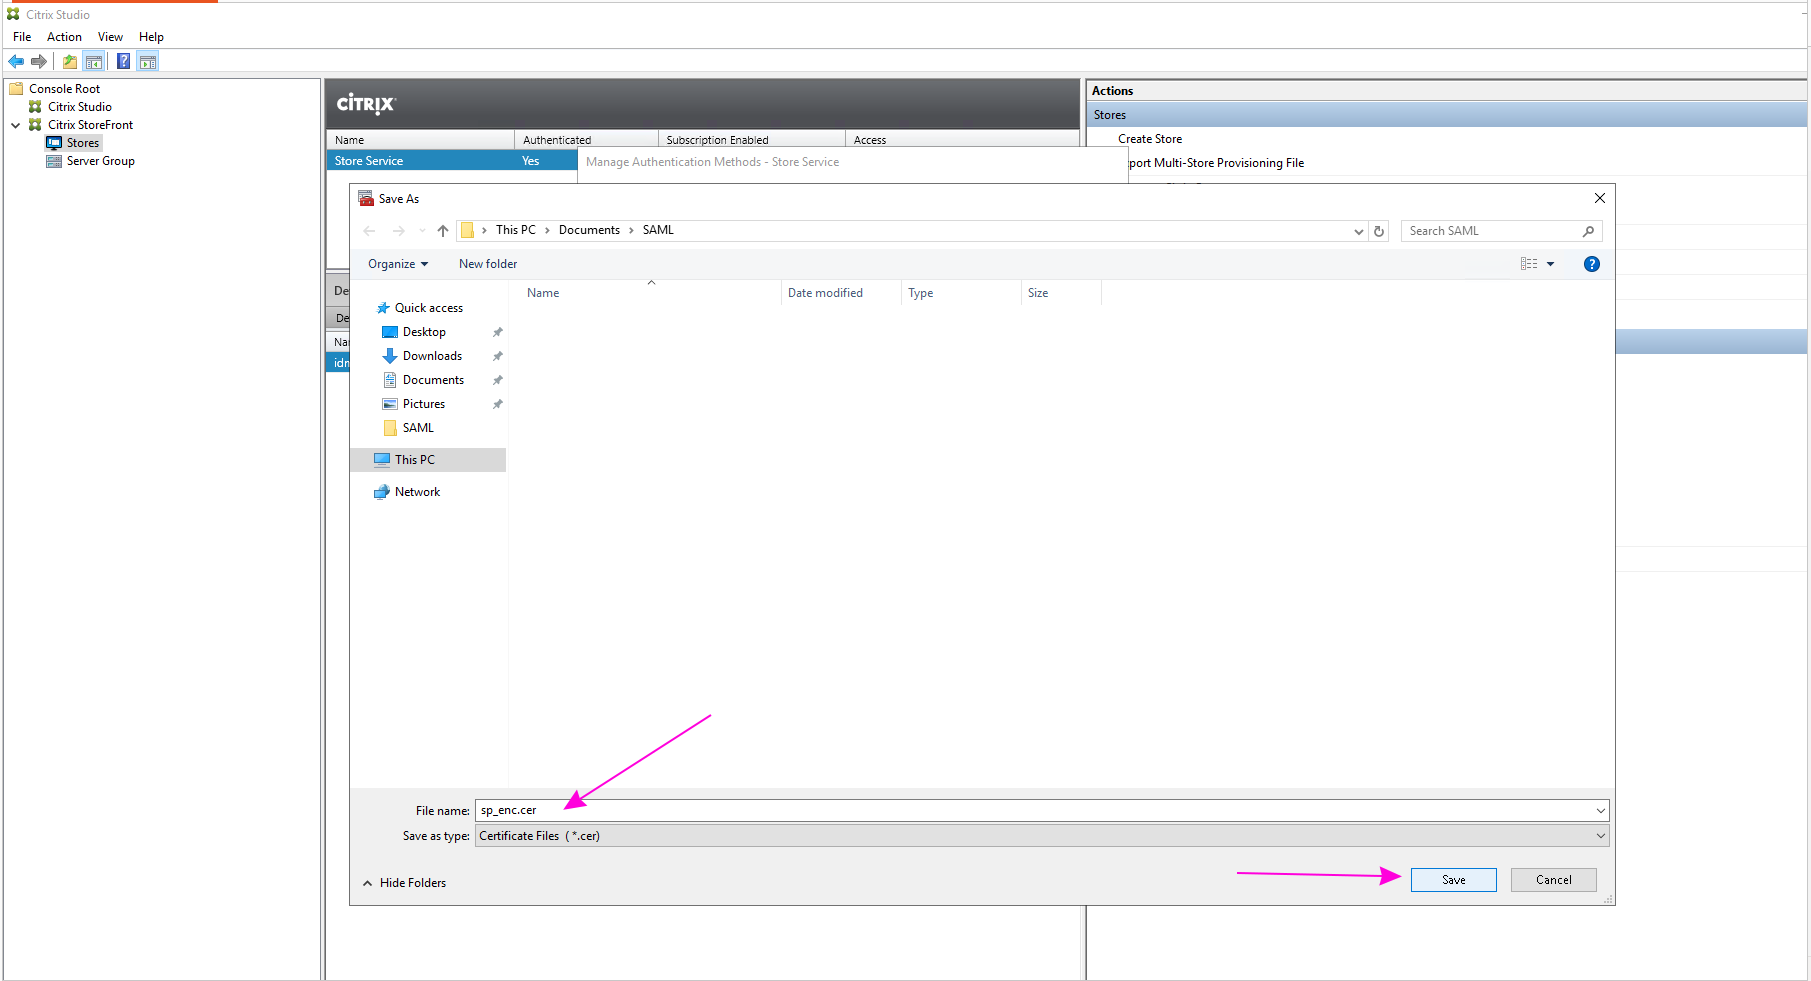
- Convert the exported certificate file from binary encoded
.cerformat to.pemformat:
openssl x509 -in sp_enc.cer -out sp_enc.pem -outform PEM
The output file will be sp_enc.pem. You will use this file in the IDmelon Administration Panel.
IDmelon SAML Configuration
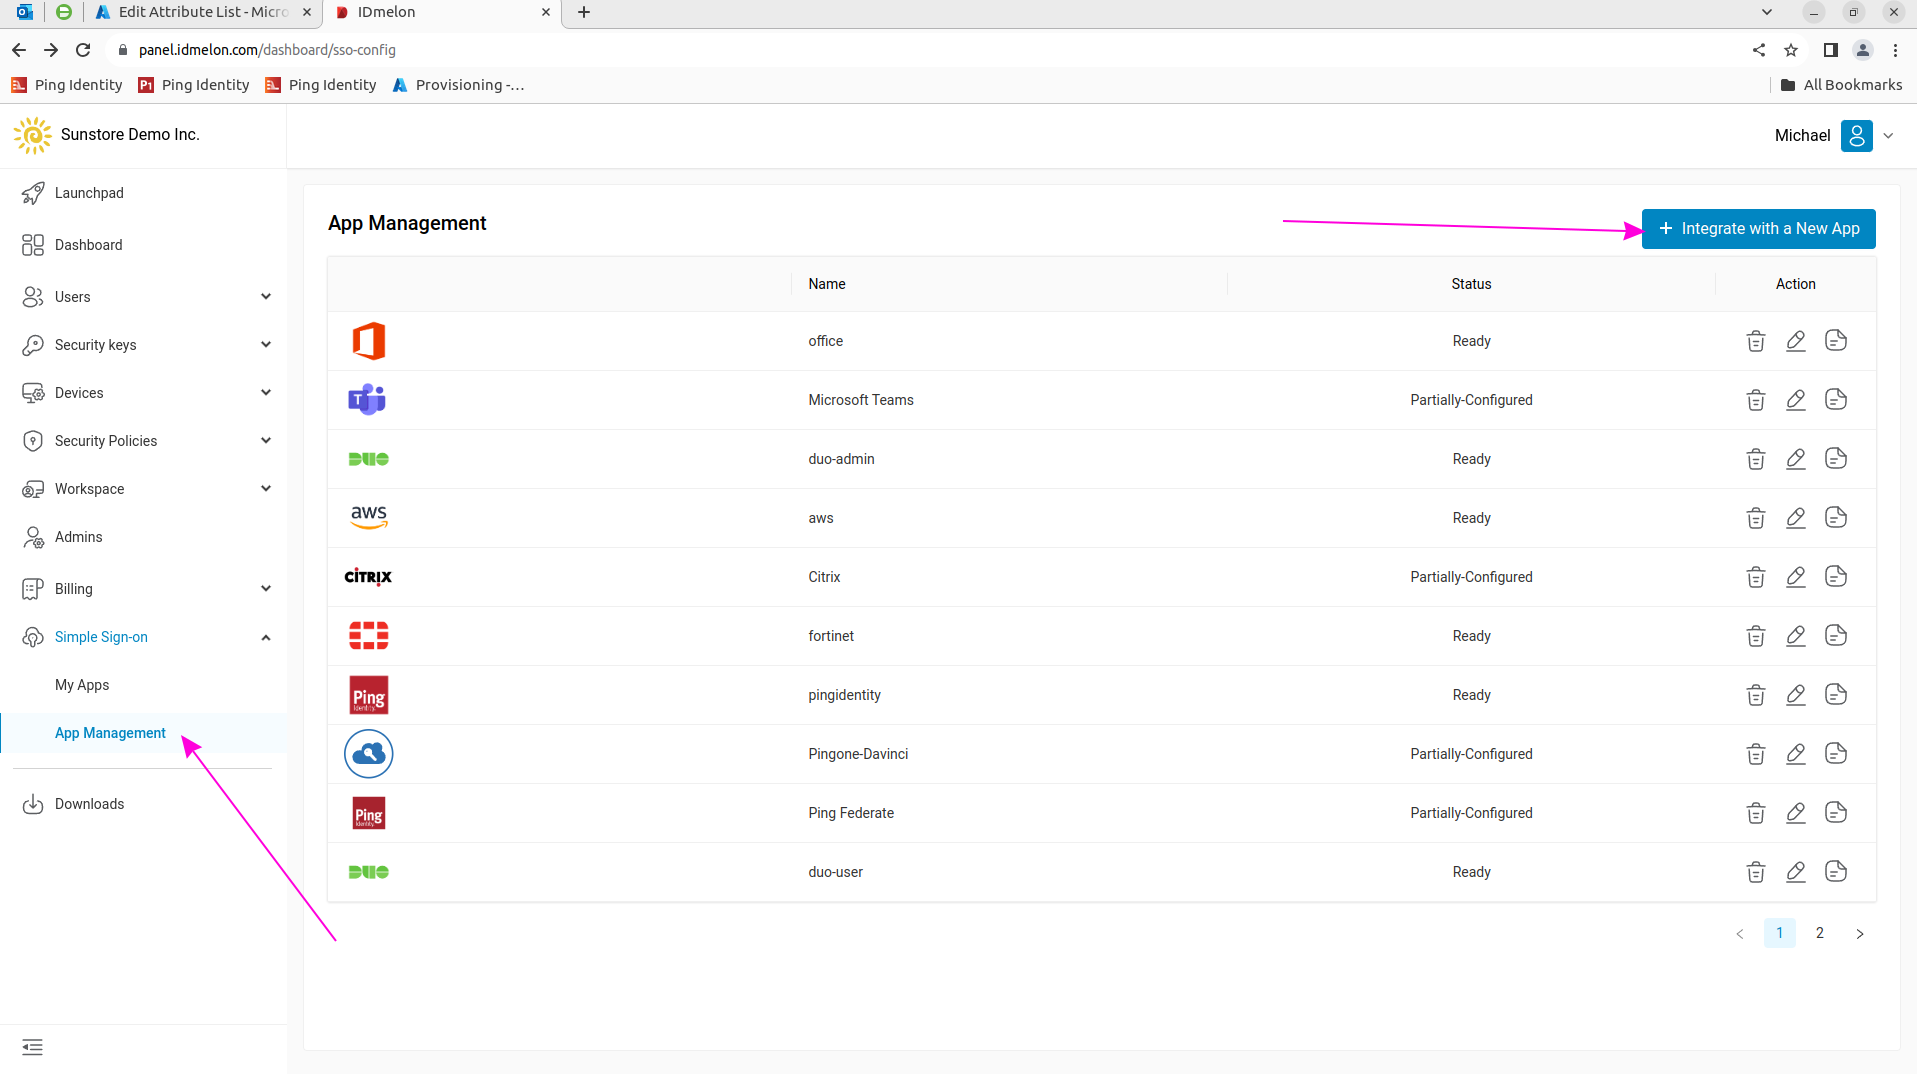
Log in to the IDmelon Administration Panel and navigate to “App Integrations” > “Single Sign-on”. Then click the “New Application” button:
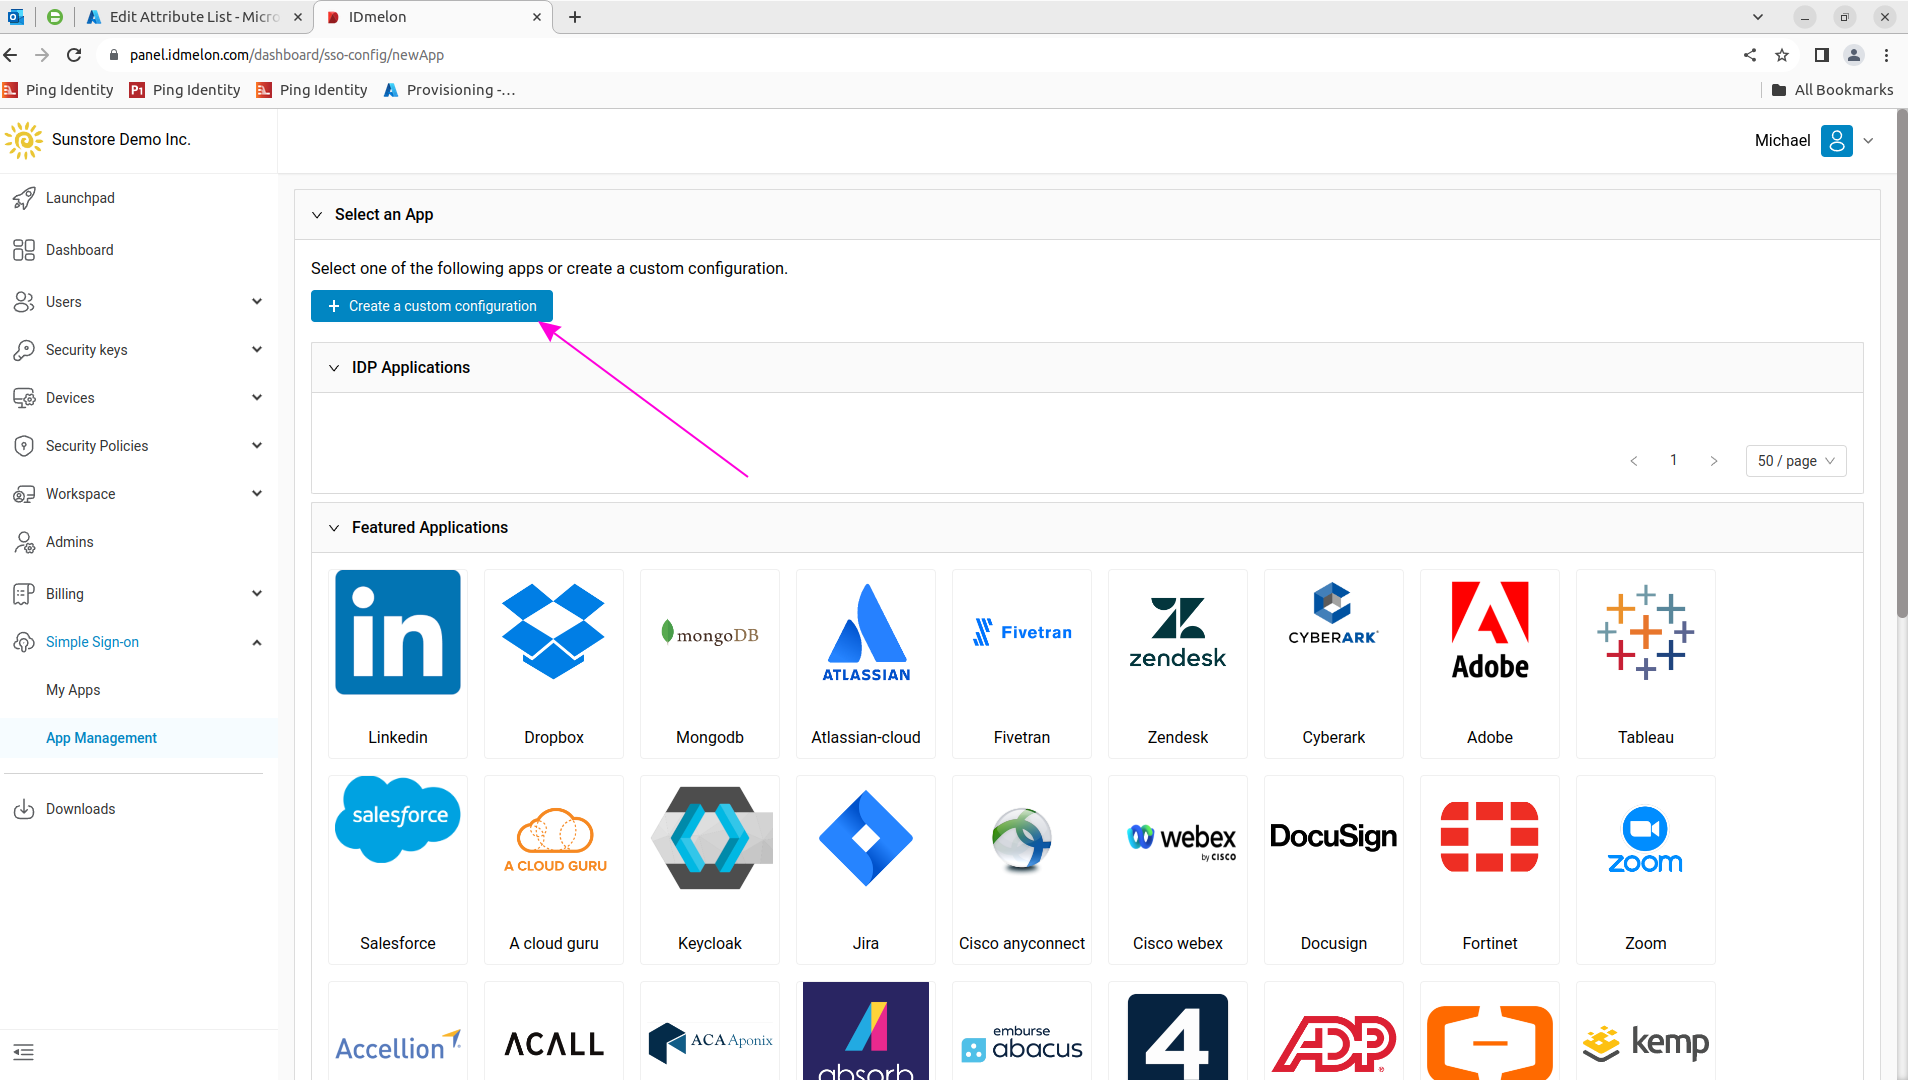
Click the “Citrix” feature icon:
On this page, you will need the “IdP Single Sign-on (Address)” and “Certificate” to configure the Identity Provider in Citrix in the next step.
 At the bottom of the page, click “Upload Encryption Certificate File” and select
 sp_enc.pemto upload the Service Provider encryption public key. Also, fill in “Entity ID” with the “Service Provider Identifier” from step 4. The “Assertion Consumer Service URL” will be generated in the following step.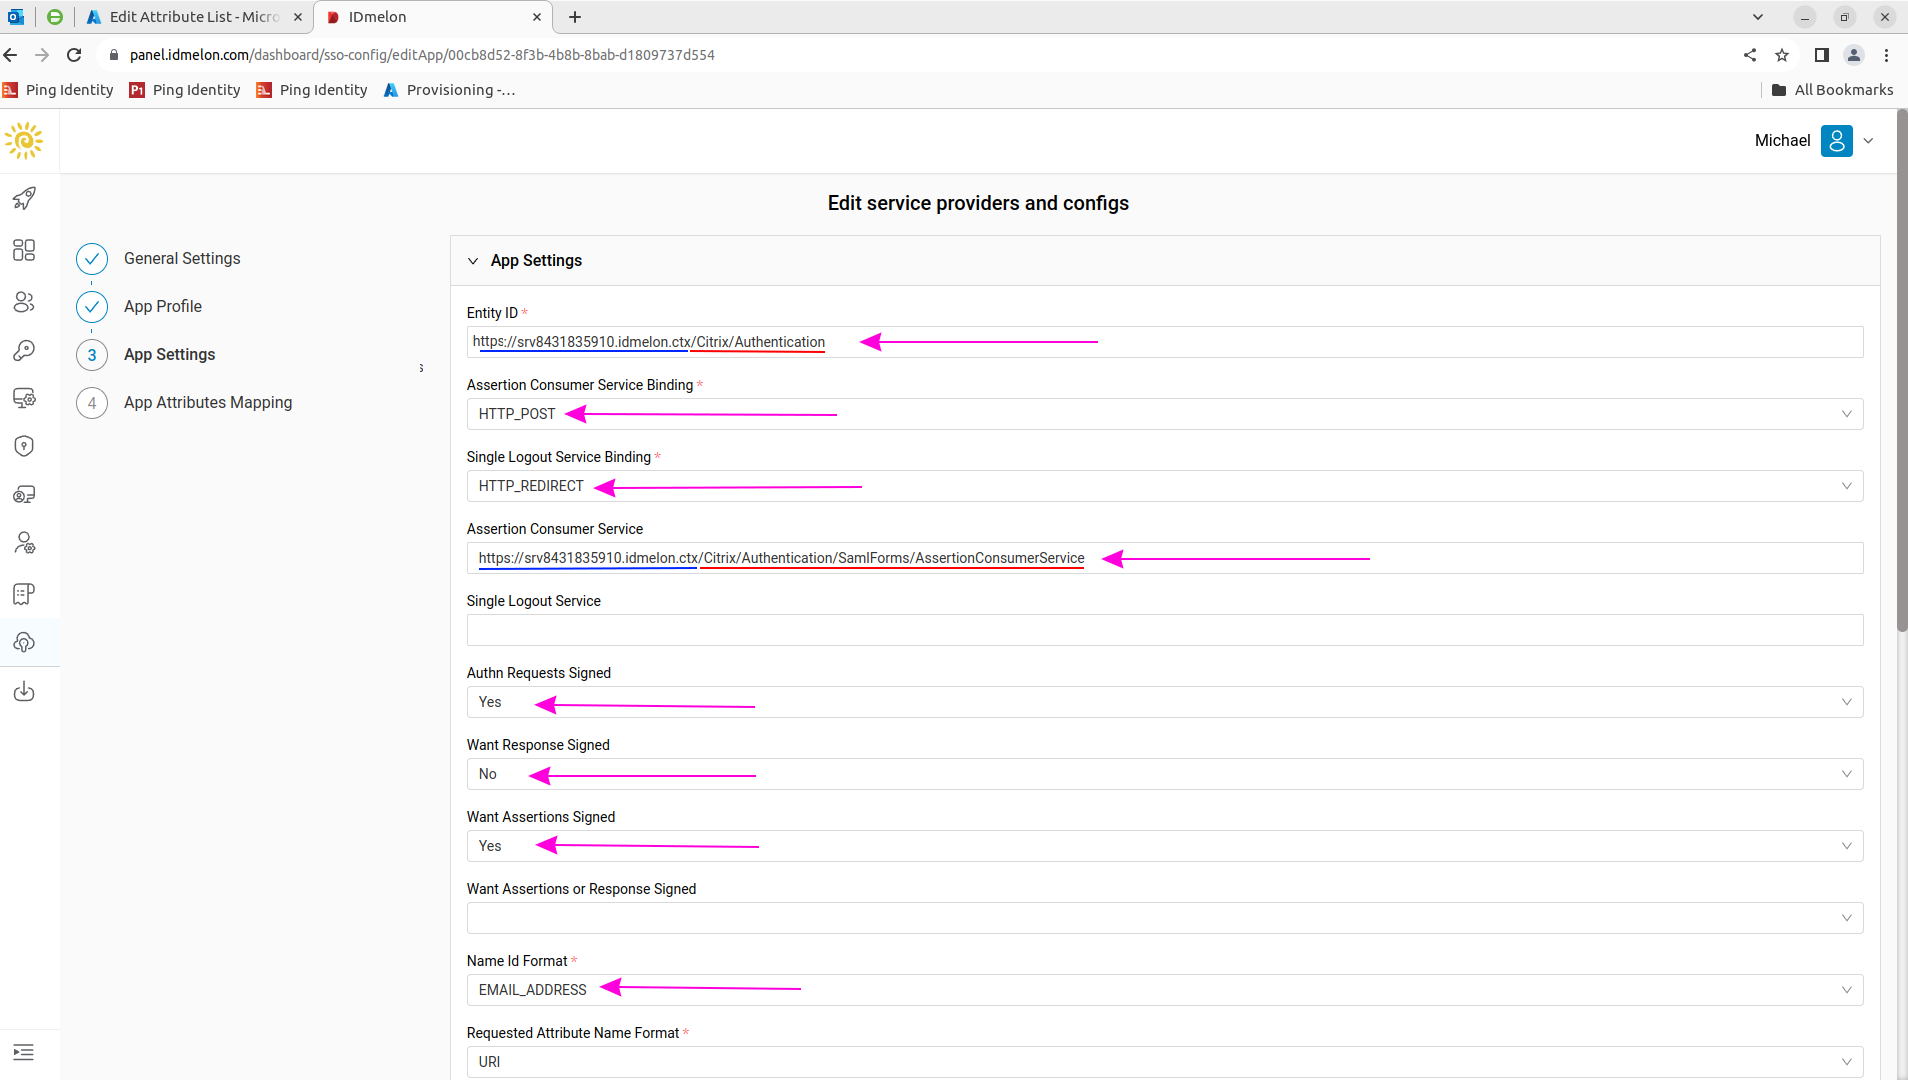 Sample Entity ID:
https://srv8431835910.idmelon.ctx/Citrix/idmelonAuthSample Assertion Consumer Service URL:
https://srv8431835910.idmelon.ctx/Citrix/idmelonAuth/SamlForms/AssertionConsumerServiceTo get the value for the “Assertion Consumer Service URL” field: In Windows
PowerShell ISE, run:Get-STFStoreService | Out-String -Stream | Select-String "VirtualPath"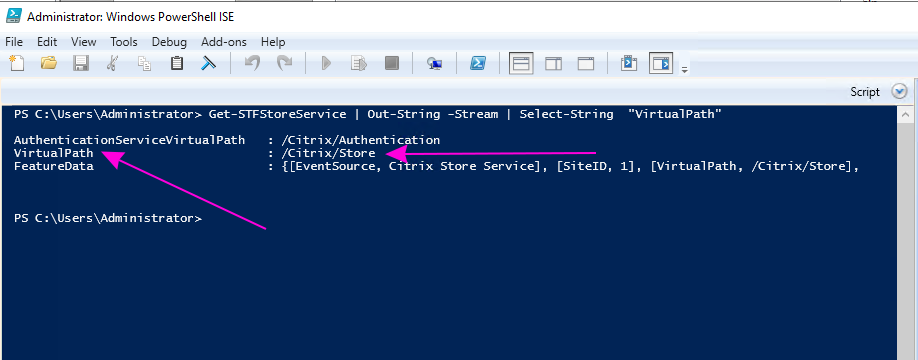
Then run the following commands, replacing
/Citrix/Storewith the value you obtained above:Get-STFStoreService | Out-String -Stream | Select-String "VirtualPath" $storeVirtualPath = "/Citrix/Store" $auth = Get-STFAuthenticationService -Store (Get-STFStoreService -VirtualPath $storeVirtualPath) $acs = New-Object System.Uri $auth.Routing.HostbaseUrl, ($auth.VirtualPath + "/SamlForms/AssertionConsumerService") echo $acs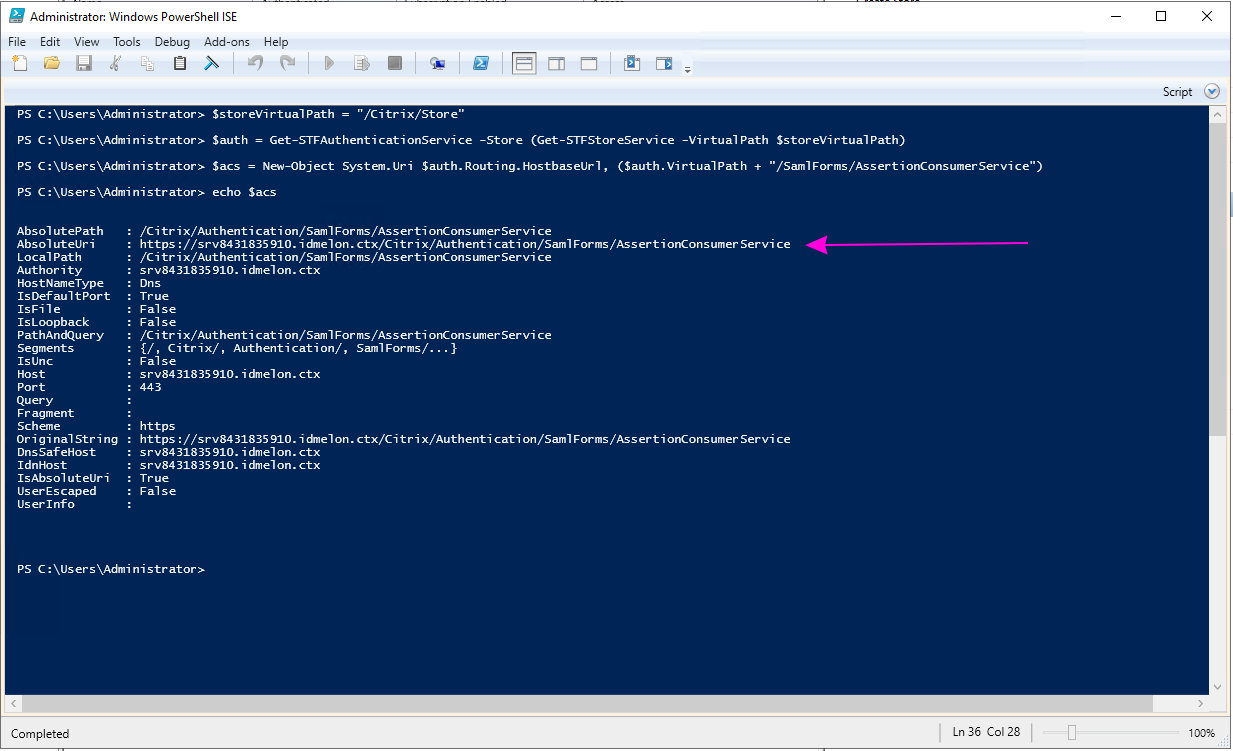
Use the
AbsoluteUrias the “Assertion Consumer Service URL” in the IDmelon configuration form.Convert the “Certificate” file you downloaded to
.cerformat:openssl x509 -inform PEM -in cert.pem -outform DER -out idp.cerThe output file will be
idp.cer, which you will use in the Citrix Panel.Return to “Manage Authentication Methods” in the Citrix Panel. Click on the “SAML Authentication” option and then on “Identity Provider”.
Set “SAML Binding” to “Post”. Set “Address” to the value copied from “IdP Single Sign-on URL (Address)” in step 3.
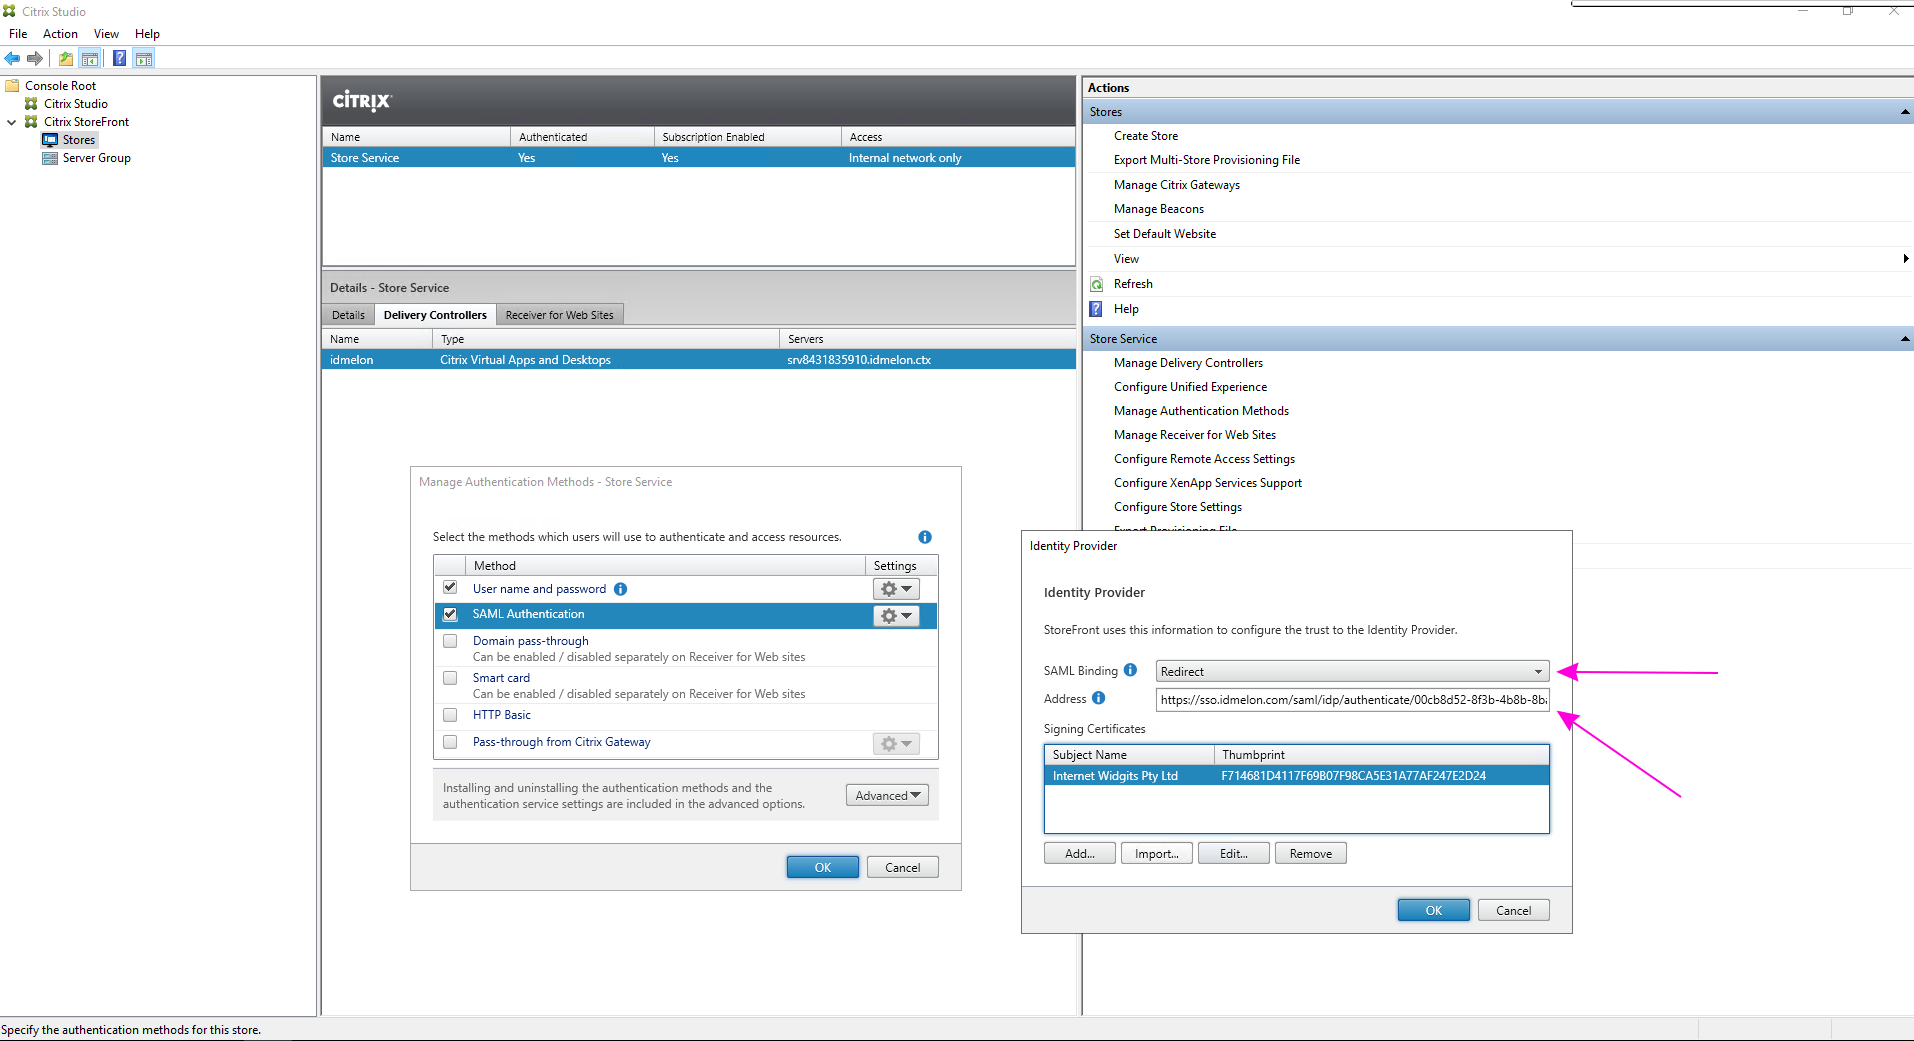
Click the “Import” button and select the
idp.cerfile you converted in step 5 for the “IdP Signature Certificate” section.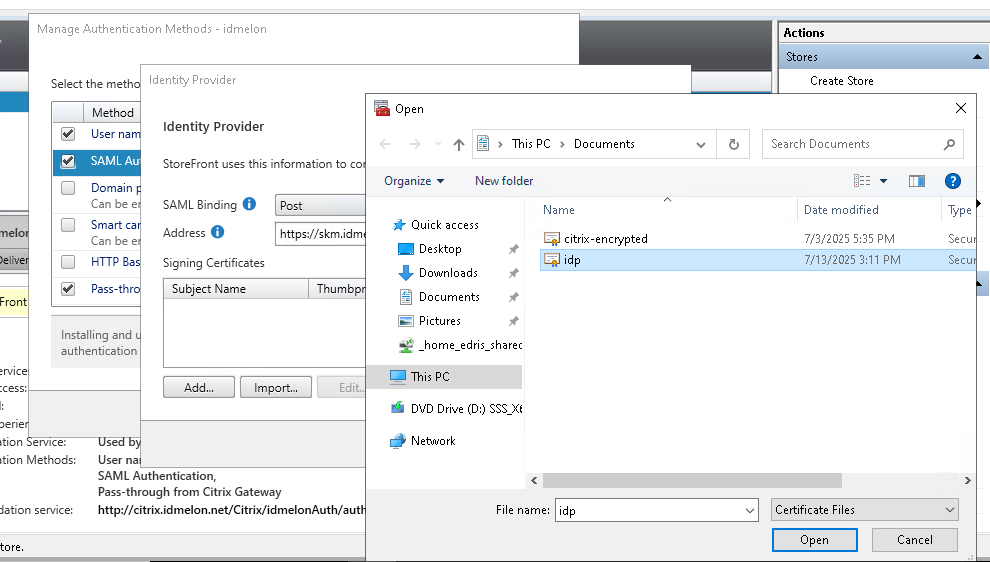
Citrix XML Trust Configuration
If, after integration, you receive a Cannot start desktop <Delivery Group Name> error, you need to enable TrustRequestsSentToTheXMLServicePort in your Citrix StoreFront. This allows StoreFront to perform actions on behalf of the user without password validation.
- Use the Citrix Virtual Apps and Desktops PowerShell SDK to verify and configure XML trust:
- Use
Get-BrokerSiteto checkTrustRequestsSentToTheXMLServicePort. - Use
Set-BrokerSite -TrustRequestsSentToTheXMLServicePort $trueto enable it. In this document, you are going to set upIDmelonas an external IdP to theCitrix.
- Use