Azure Application Integration
IDmelon makes it easy to integrate with your organization’s Microsoft Entra ID tenant using various features available in the IDmelon panel, such as importing users and devices. This document describes the integration process, details the necessary permissions, and explains how to grant admin consent for seamless operation.
Overview
IDmelon integrates with your Microsoft Entra ID tenant using app-only access, allowing it to function as a standalone application. This approach enables IDmelon to perform background tasks, such as importing users through workflows, without interruptions. Additionally, it eliminates the need for repeated permission approvals from privileged administrators.
For more details on access scenarios, refer to the official Microsoft documentation.
Required Permissions
Due to current Microsoft limitations, applications cannot request a subset of permissions for different actions. Consequently, IDmelon must request all permissions associated with its features. Learn more about this restriction in the Microsoft consent documentation.
The required permissions are as follows:
Device.Read.All: Allows IDmelon to import all devices from Microsoft Entra ID.Group.Read.All: Allows IDmelon to import all groups from Microsoft Entra ID.User.Read.All: Allows IDmelon to read all users from Microsoft Entra ID.UserAuthenticationMethod.ReadWrite.All: Allows IDmelon to add FIDO2 security keys for users.
Granting Consent
You can either grant permissions to the predefined IDmelon app registration with predefined permissions or create your own app registration manually and provide the required information to us.
Using Default App Registration
To approve these permissions, initiate any Microsoft Entra ID-related feature within IDmelon. This action will redirect you to the admin consent flow. According to Microsoft, you need to sign in as at least a Privileged Role Administrator to consent to application permissions to Microsoft Graph.
For more details, refer to the official Microsoft admin consent documentation.
Using Manual App Registration
If your organization restricts permission approvals from external applications or requires more control over app registration and permissions, you can create your own app registration and integrate it with IDmelon. To do so, follow the steps below:
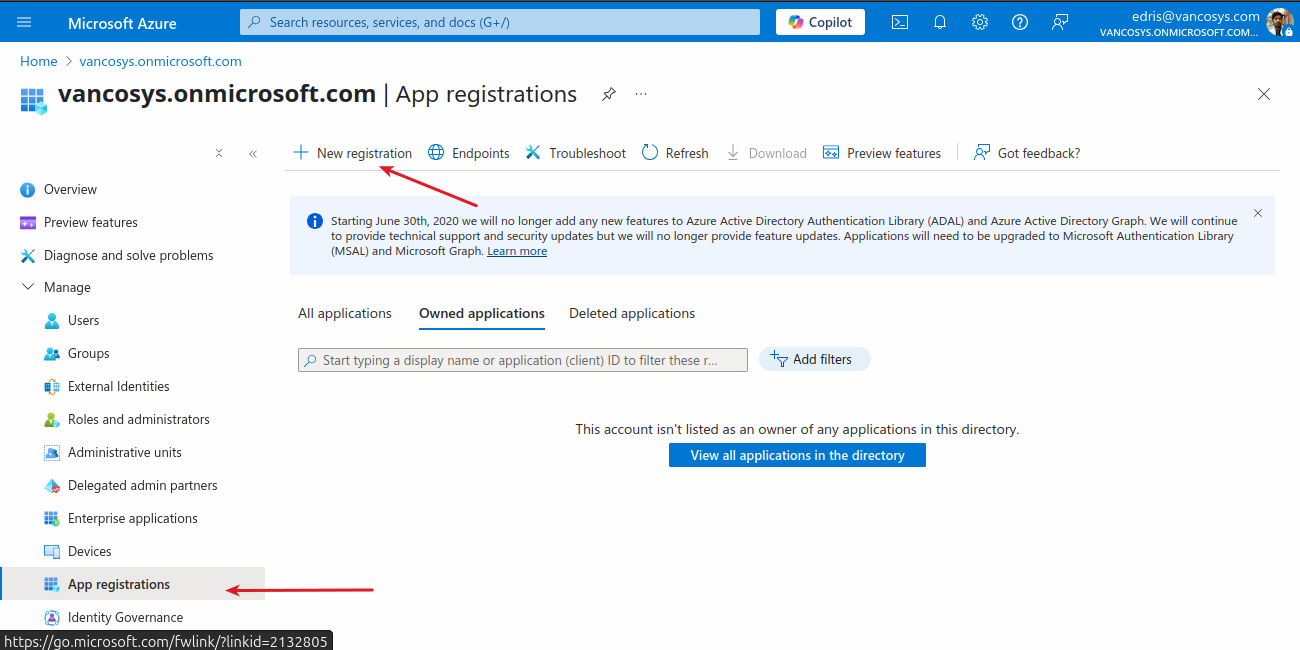
Navigate to the Azure Portal and click on Microsoft Entra ID.

From the App registrations blade, click on New registration.
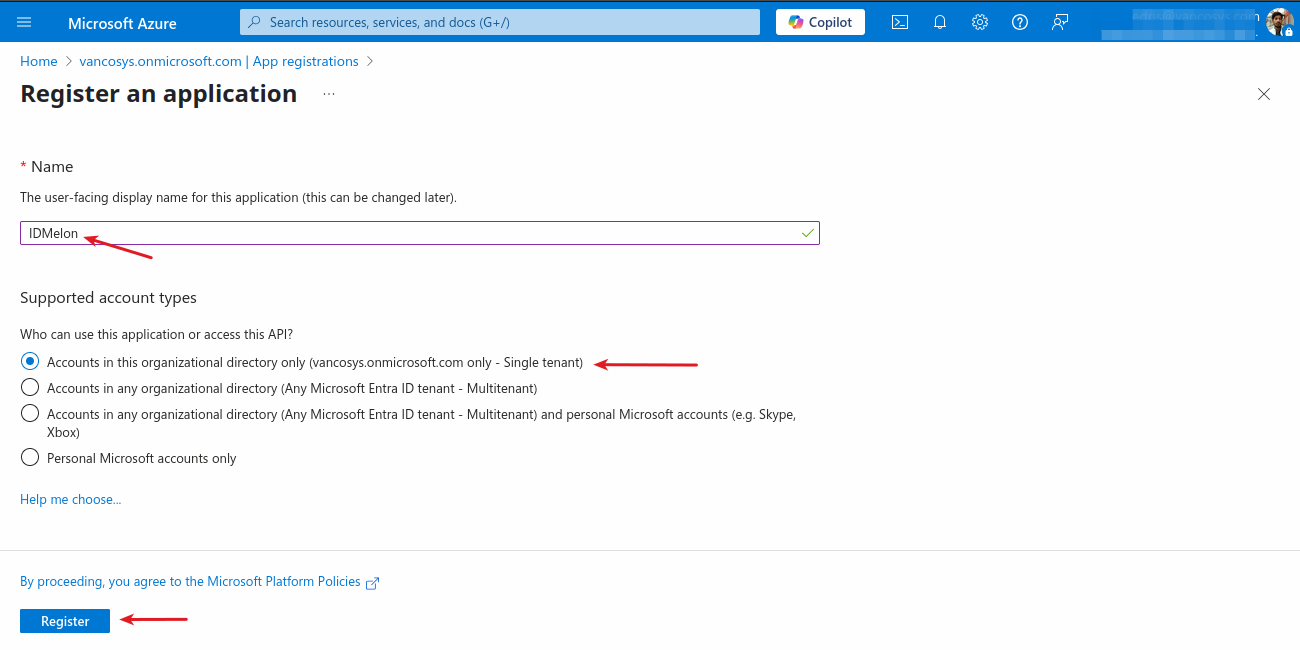
Fill in a Name for the app registration and choose Accounts in this organizational directory only. Click Register.
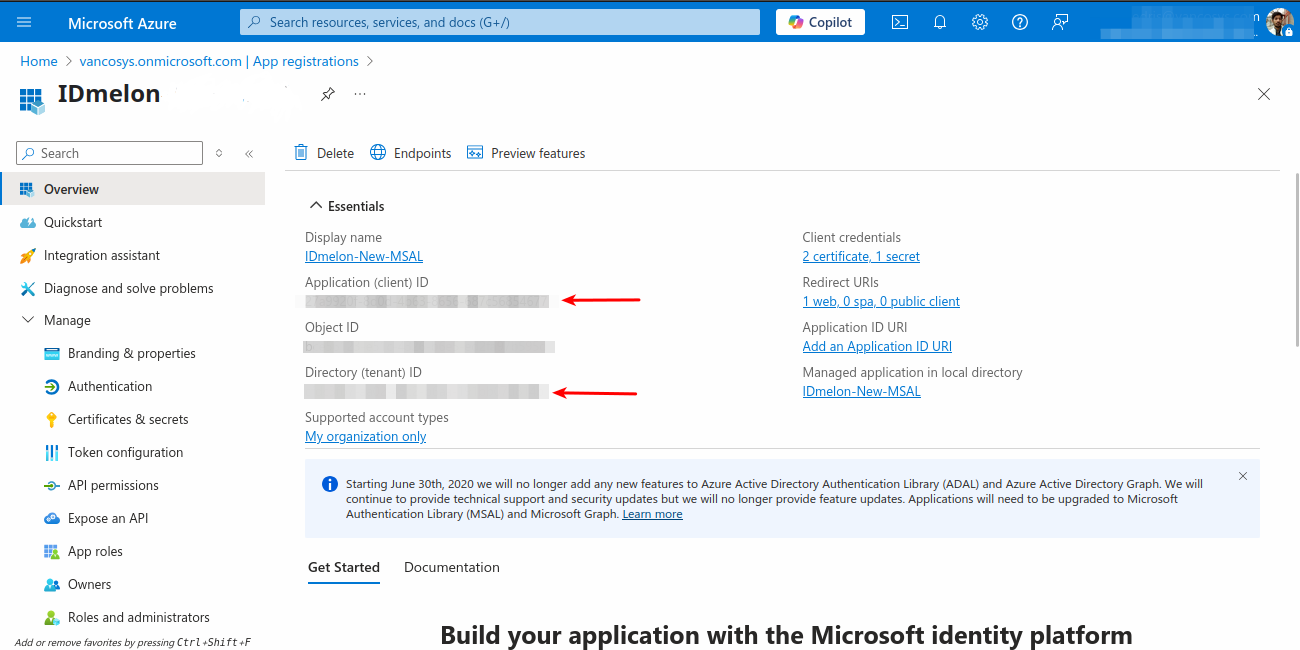
In the Overview blade, copy the Application (client) ID and Directory (tenant) ID.
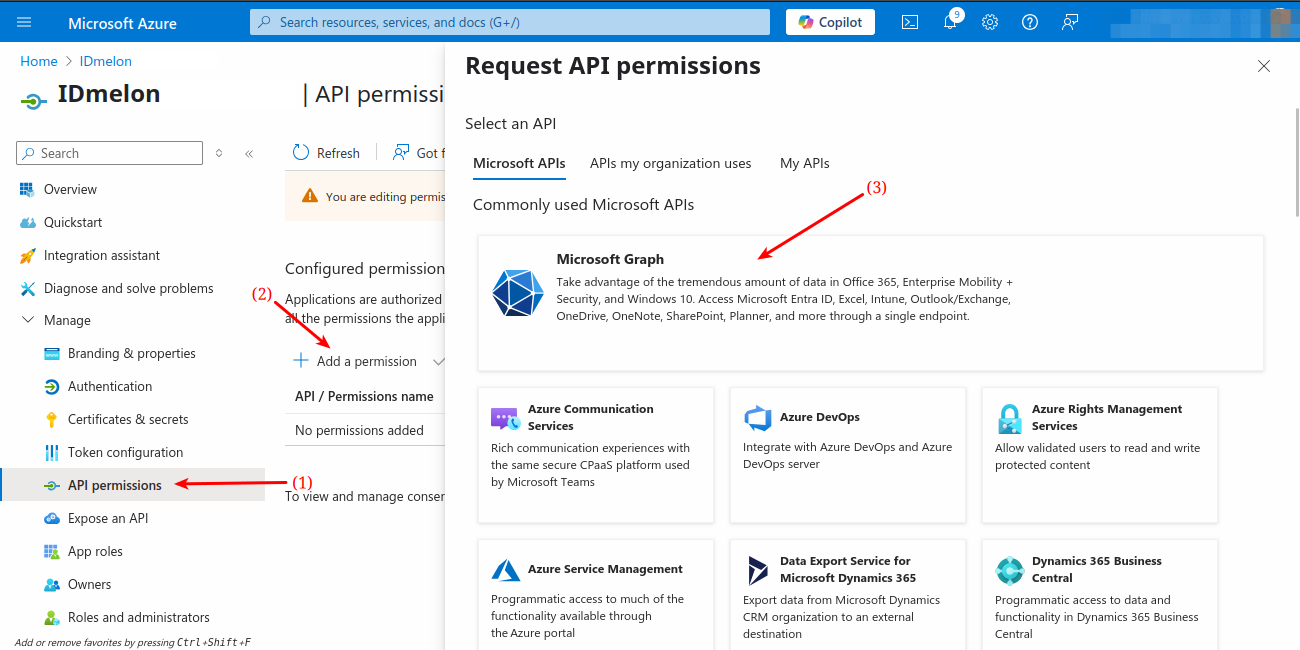
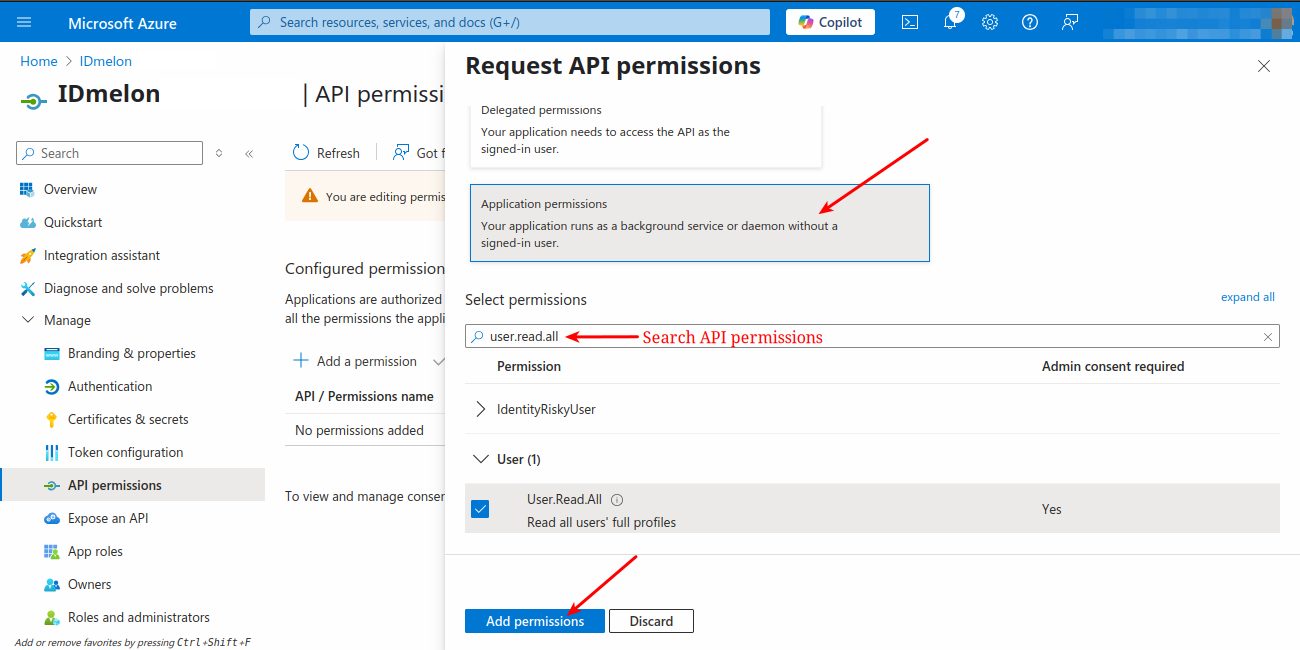
Navigate to the API permissions blade and click Add a permission. Select Microsoft Graph > Application permissions.
Select the following permissions:
Device.Read.AllGroup.Read.AllUser.Read.AllUserAuthenticationMethod.ReadWrite.All
You can also substitute all these permissions with the broader Directory.Read.All permission. If you want to restrict the
UserAuthenticationMethod.ReadWrite.Allpermission to a specific subset of users in your organization, you can skip adding this permission at this stage and follow the instructions below to configure it using Administrative Units.After adding all permissions, click Grant admin consent for
and accept the confirmation. 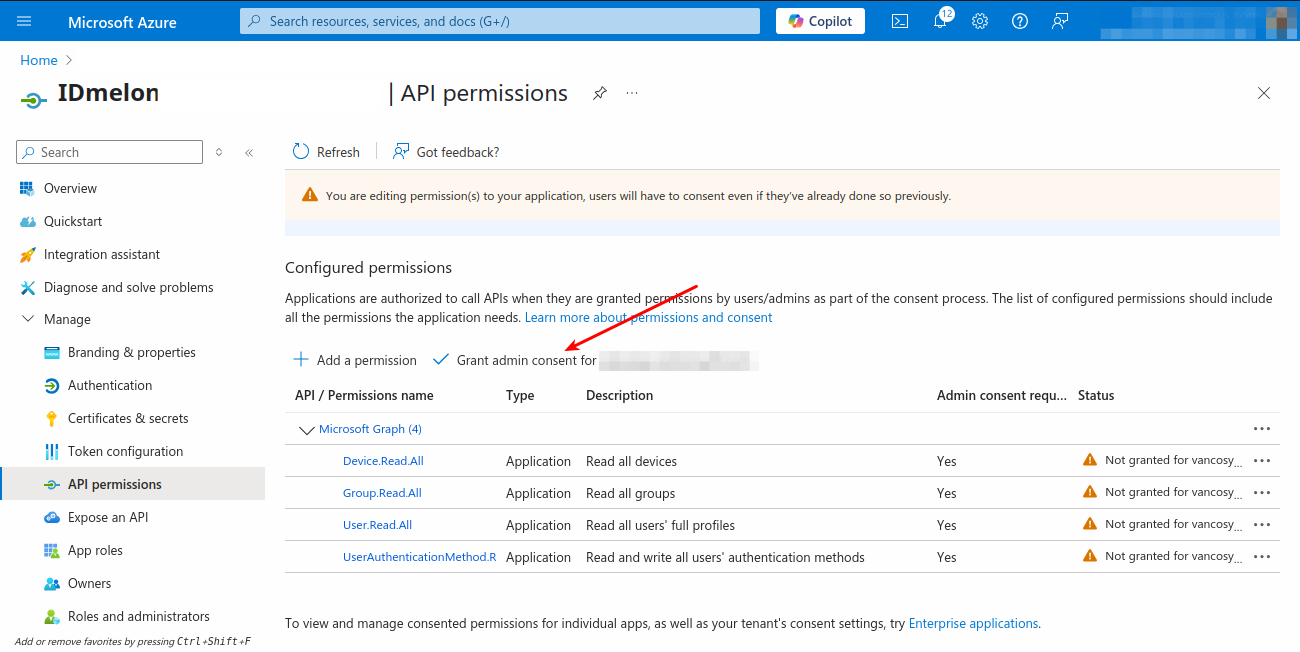
Finally, you should see the following state in your Azure Application:
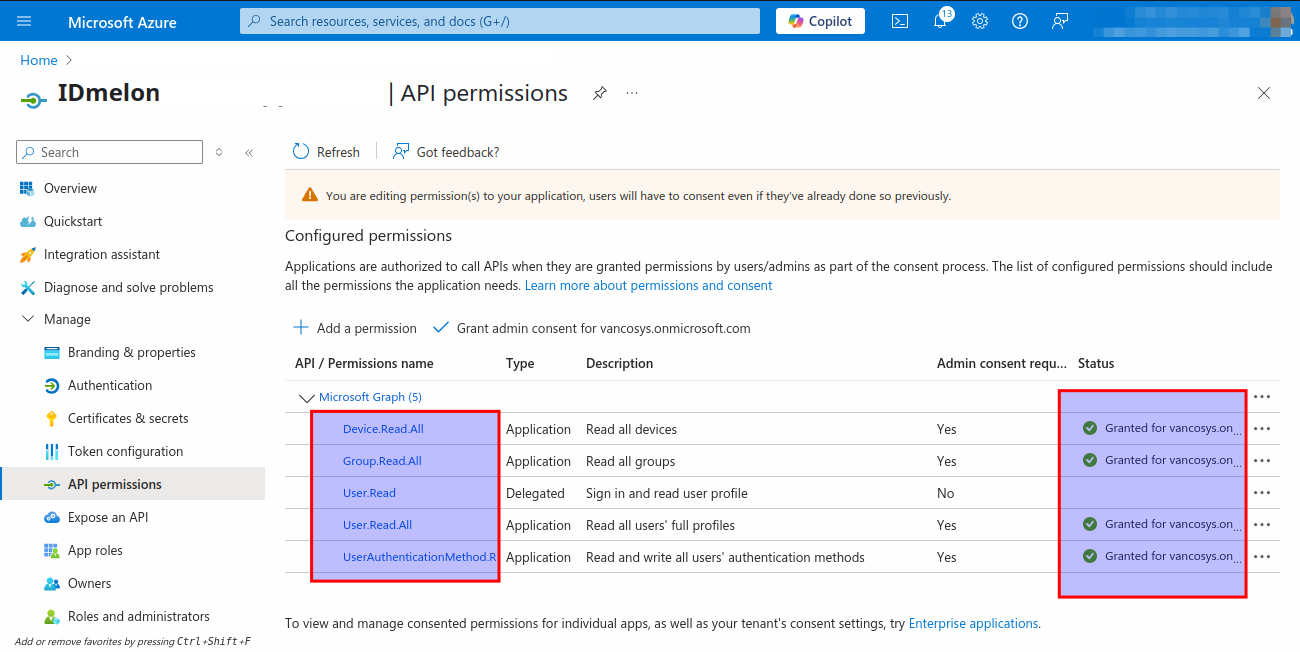
If your organization wants to limit the UserAuthenticationMethod.ReadWrite.All permission to specific user groups, you can use Administrative Units instead of granting this permission globally. This allows you to scope the permission more precisely, giving IDmelon access only to manage authentication methods for users within the defined units. To configure scoped permissions:
- Navigate to Azure Portal > Microsoft Entra ID.
- Go to Roles and administrators.
- Search for and select the Authentication Administrator role.
- Click Add assignments.
- In the assignment configuration:
- Set Scope type to
Administrative unit. - Select your administrative unit for the Selected scope.
- Under Selected member(s), choose the IDmelon application you created in Enterprise Applications.
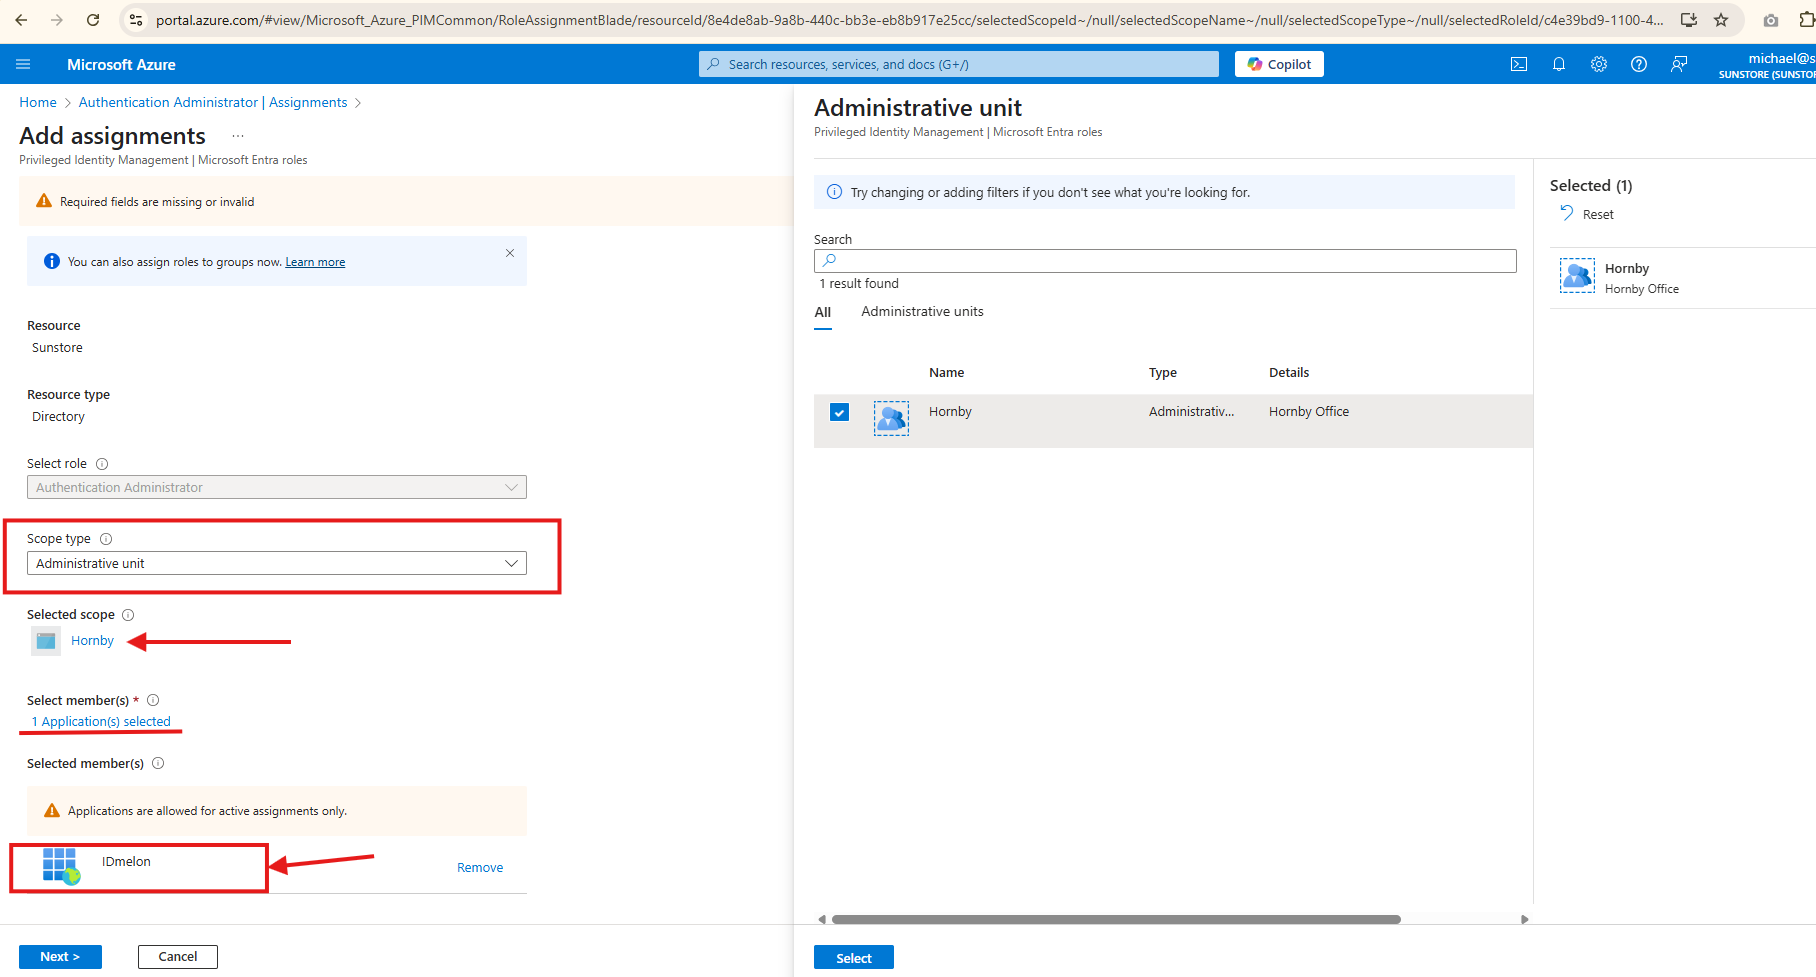
- Set Scope type to
- Click Next.
- Provide a detailed justification. For example:
Granting the permanent Authentication Administrator role to IDmelon to manage passkey rollout for targeted users and groups defined within the Administrative Units. - Complete the assignment.
This configuration allows IDmelon to manage MFA authentication methods only for users within the specified administrative unit, rather than all users in your organization.
For detailed instructions on creating and managing Administrative Units, refer to the Microsoft documentation.
For security configuration, IDmelon supports both certificate-based authentication and client secret-based authentication.
Client Secret
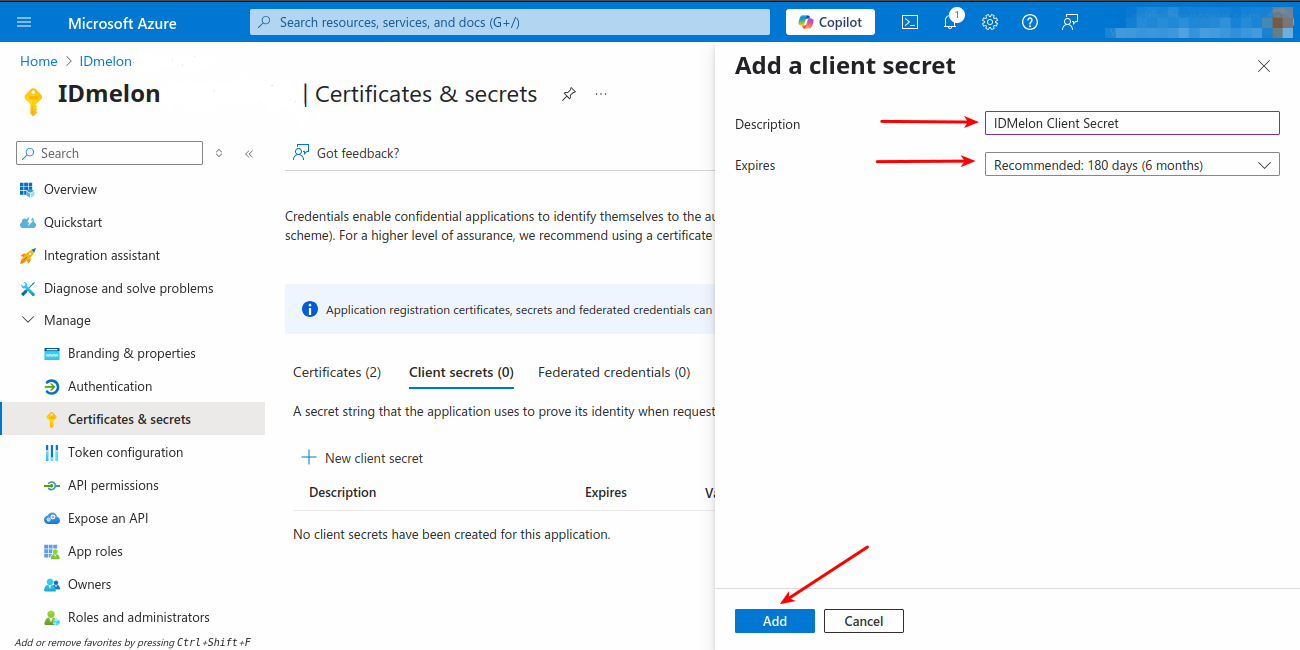
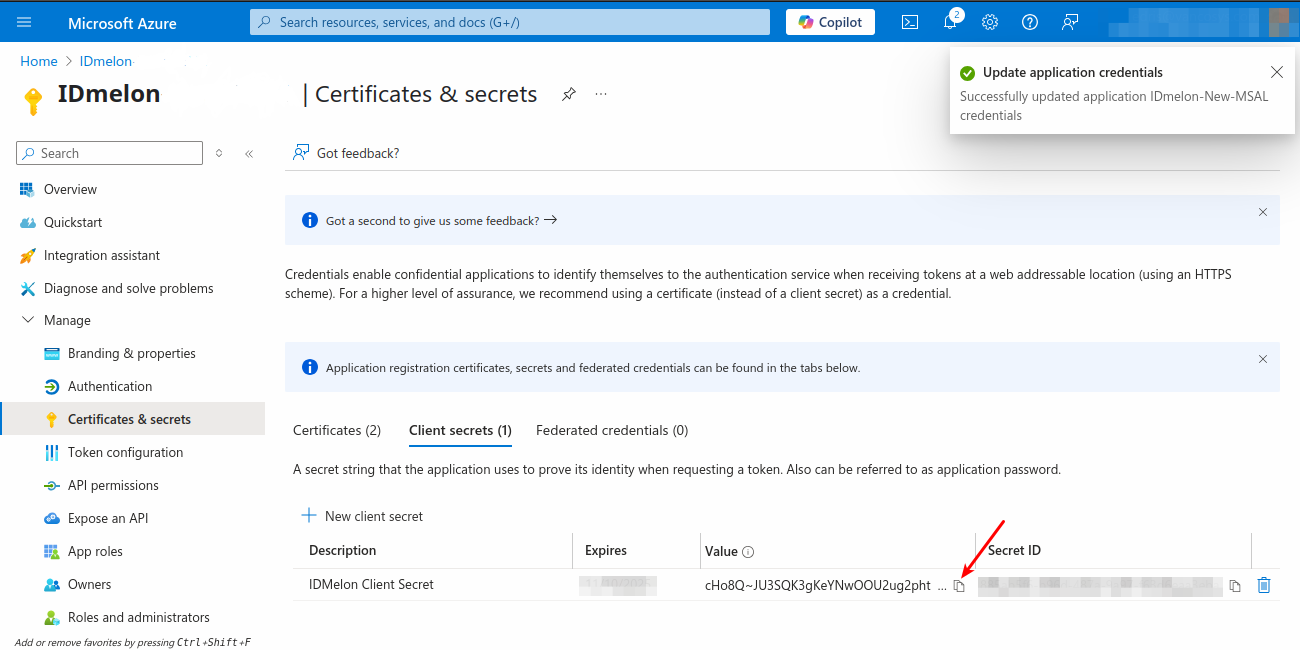
From the Certificates & secrets blade, click the Client secrets tab, then click on New client secret. Add a description (optional), select the expiration, click Add, and copy the Secret value.

Certificate
To integrate with IDmelon using certificate-based authentication, you need to generate a private key and a certificate, upload the certificate to the Azure portal, and upload the private key to the IDmelon Administration Panel.
Run the following PowerShell commands:
# Create a self-signed certificate with an exportable private key
$cert = New-SelfSignedCertificate -DnsName "localhost" `
    -CertStoreLocation "cert:\CurrentUser\My" `
    -KeyExportPolicy Exportable `
    -KeyLength 2048 `
    -KeySpec Signature `
    -NotAfter (Get-Date).AddYears(2)
Adjust the certificate expiration period by changing
AddYears(2)as needed.
# Export the certificate and private key as a PFX (PKCS#12) file
$pfxPath = "C:\Path\To\Output\File\mycert.pfx"
$securePwd = ConvertTo-SecureString -String "MyStrongPassword123!" -Force -AsPlainText
Export-PfxCertificate -Cert $cert -FilePath $pfxPath -Password $securePwd
Change
$pfxPathto the file path where you want to save the PFX file. Set a strong password in place ofMyStrongPassword123!to protect the PFX file.
Use OpenSSL to extract the private key and certificate files in PEM format:
# Extract the private key (PEM format)
openssl pkcs12 -in C:\Path\To\Output\File\mycert.pfx -nocerts -out C:\Path\To\Output\File\private.key -nodes -passin pass:MyStrongPassword123!

# Extract the certificate (PEM format)
openssl pkcs12 -in C:\Path\To\Output\File\mycert.pfx -clcerts -nokeys -out C:\Path\To\Output\File\certificate.crt -passin pass:MyStrongPassword123!
Update the input PFX path (
-in) to where your PFX file is saved. Specify the desired output paths (-out) for the private key and certificate files. Use the password you set when exporting the PFX in the-passinargument.
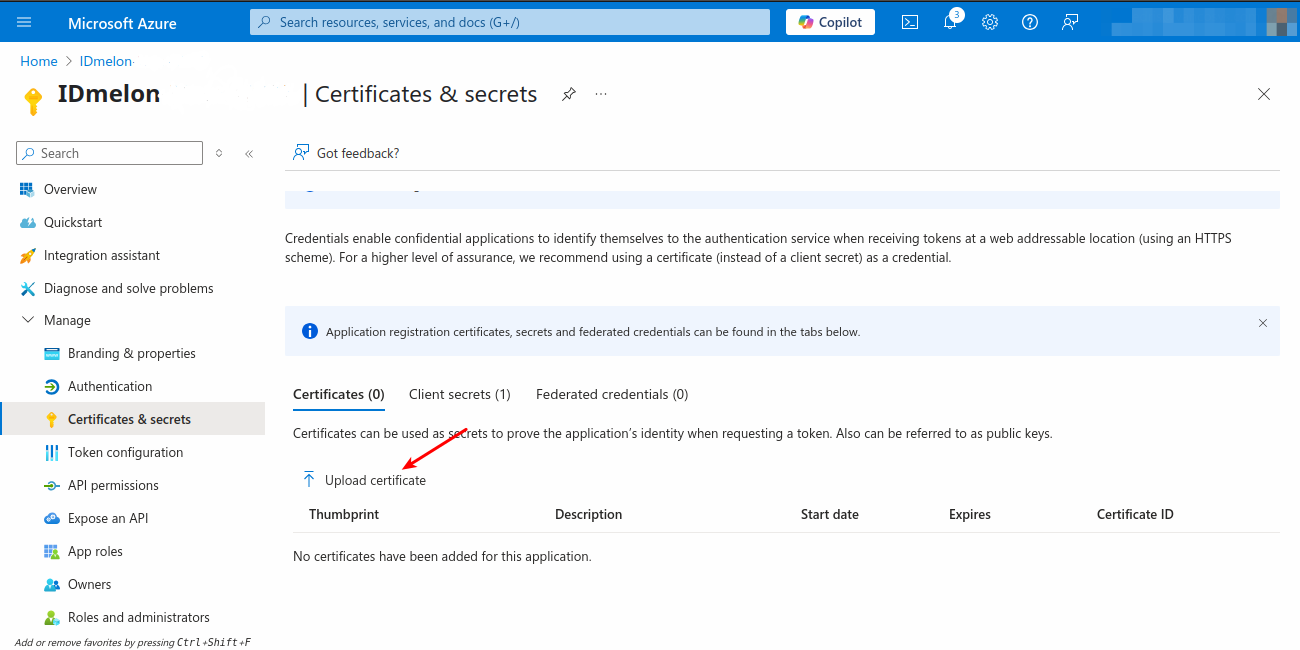
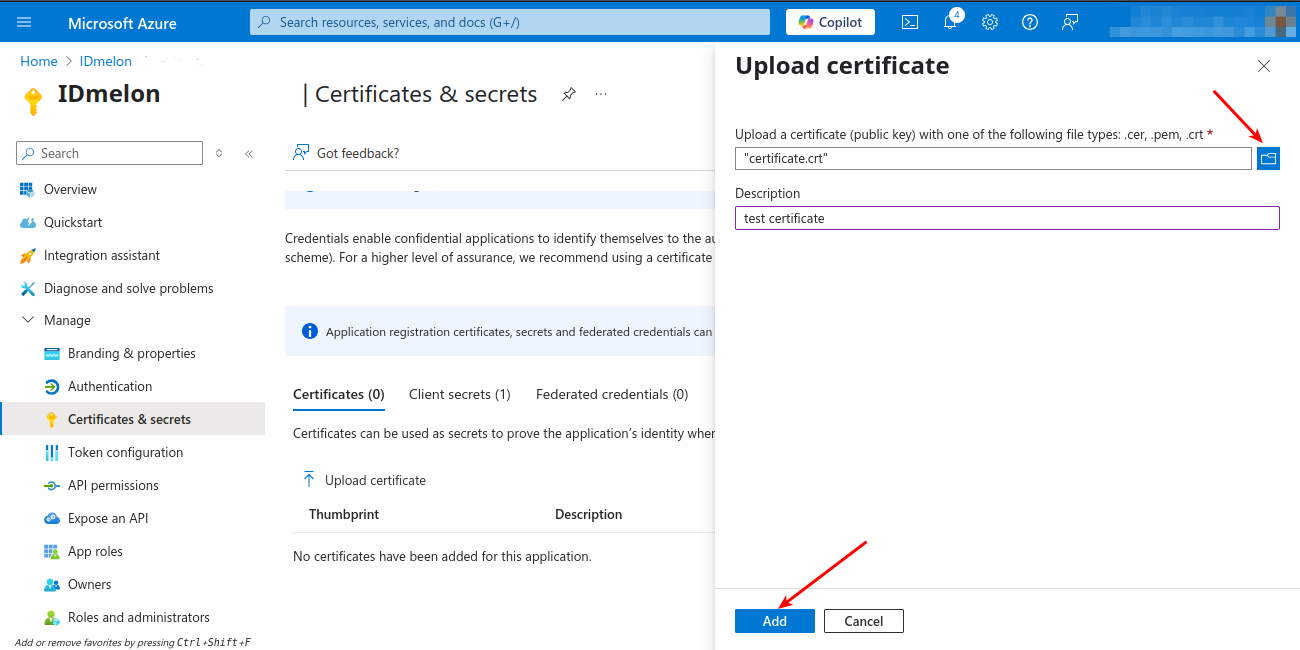
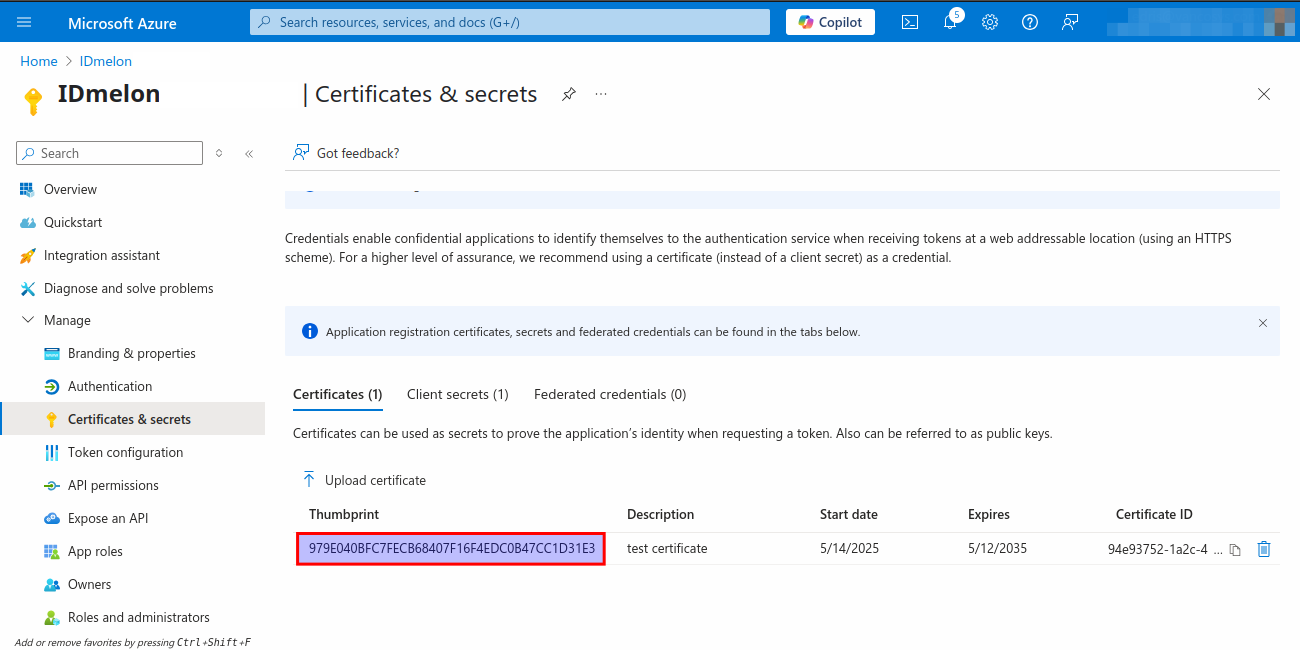
After creating the private key and certificate files, upload the certificate to the Azure portal. In the Certificates & secrets blade, select the Certificates tab, then click Upload certificate. Choose your certificate file, optionally add a description, click Add, and copy the Thumbprint (you may need to expand the column to see it fully).
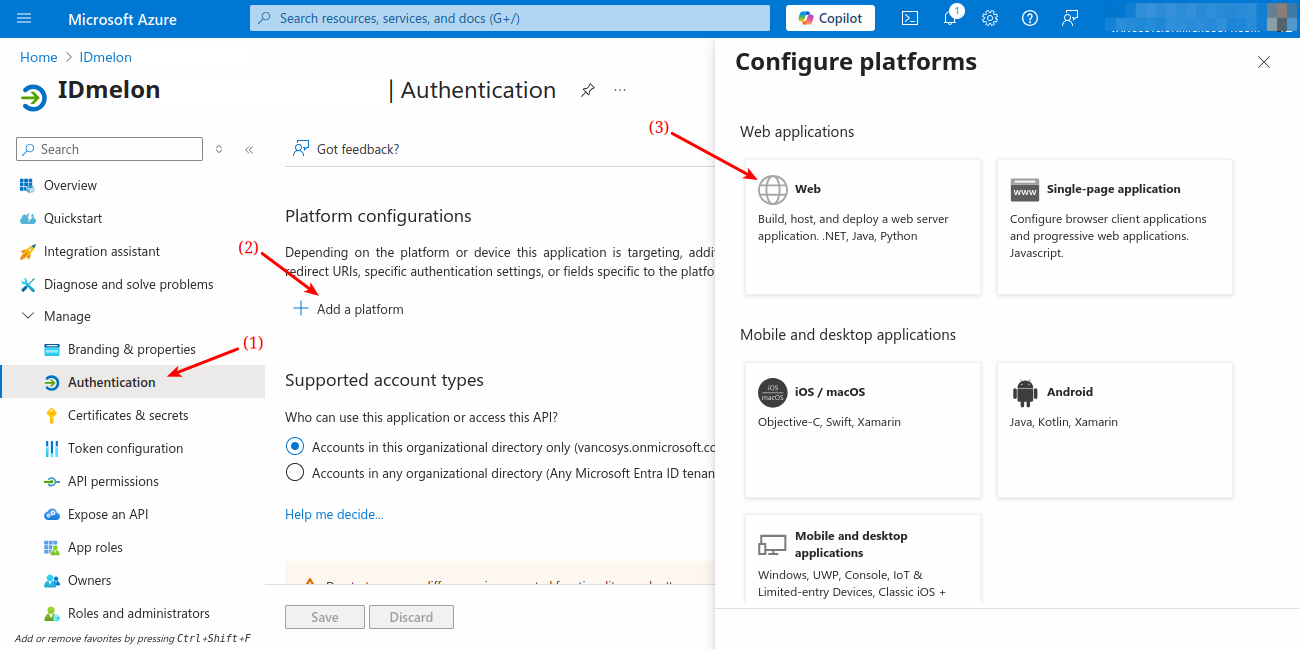
Configure Redirect URL
Go to the Authentication blade. Click Add a platform > Web. Enter https://skm.idmelon.com/aad/redirect-azure as the Redirect URI, then click Configure. Click Add URI, enter https://panel.idmelon.com and https://panel.idmelon.com/msal/result, and click Save.
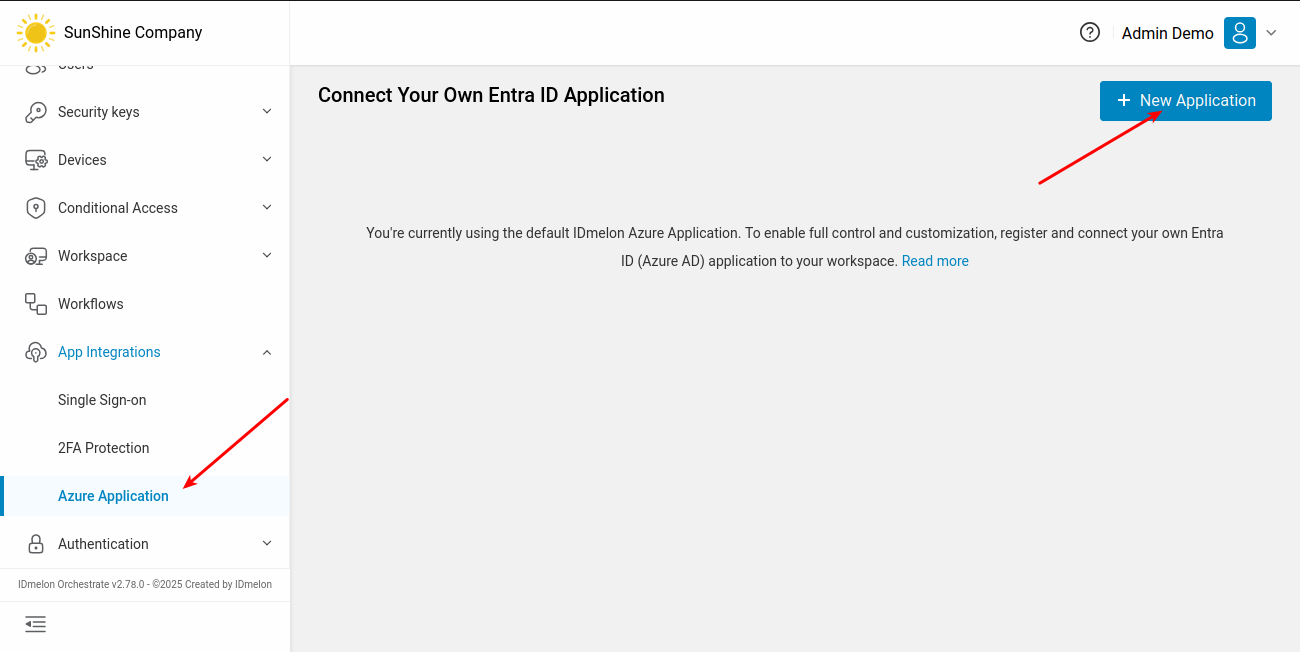
Adding the Application in IDmelon Admin Panel
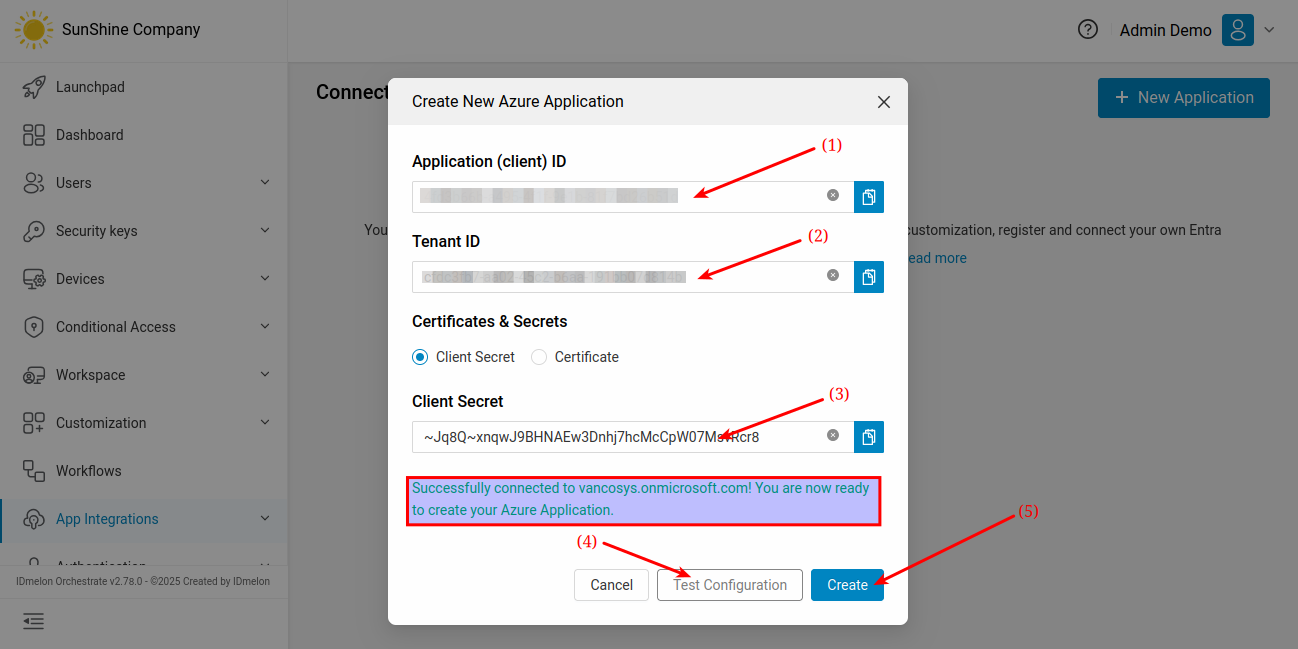
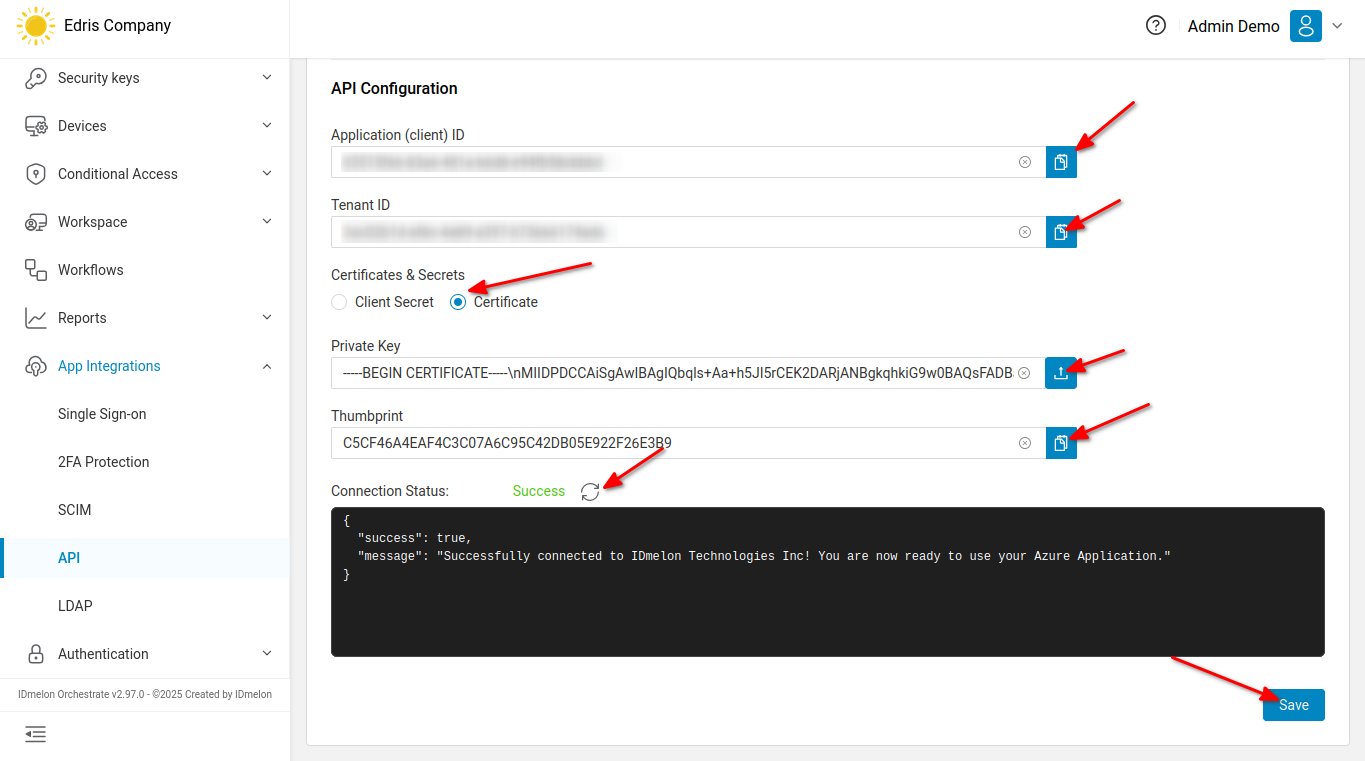
In the IDmelon Admin Panel, navigate to App Integrations > API and click on Microsoft Graph.
Fill in the fields using the information from your application. If you have a Client Secret, select this option in the Certificate & Secret option, and if you want to configure using a Certificate, select it in the options.
Then, click the Checking Configuration icon to verify the connection. If the check is successful, click Save.